stop start KIA K900 2015 1.G Repair Manual
[x] Cancel search | Manufacturer: KIA, Model Year: 2015, Model line: K900, Model: KIA K900 2015 1.GPages: 522, PDF Size: 7.92 MB
Page 225 of 522
Features of your vehicle
4-146
Fan speed control
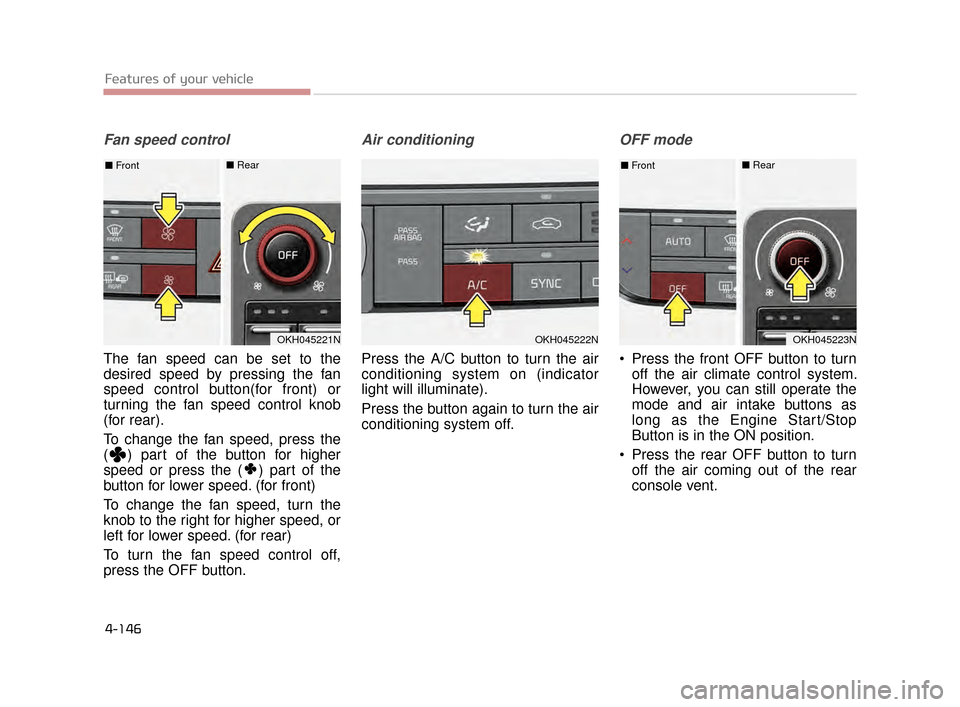
The fan speed can be set to the
desired speed by pressing the fan
speed control button(for front) or
turning the fan speed control knob
(for rear).
To change the fan speed, press the
( ) part of the button for higher
speed or press the ( ) part of the
button for lower speed. (for front)
To change the fan speed, turn the
knob to the right for higher speed, or
left for lower speed. (for rear)
To turn the fan speed control off,
press the OFF button.
Air conditioning
Press the A/C button to turn the air
conditioning system on (indicator
light will illuminate).
Press the button again to turn the air
conditioning system off.
OFF mode
Press the front OFF button to turnoff the air climate control system.
However, you can still operate the
mode and air intake buttons as
long as the Engine Start/Stop
Button is in the ON position.
Press the rear OFF button to turn off the air coming out of the rear
console vent.
OKH045222NOKH045221N
■ Front■ Rear
OKH045223N
■Front■ Rear
KH CAN (ENG) 4:2015 3/26/2015 10:46 AM Page 146
Page 232 of 522
Features of your vehicle
4
4-153
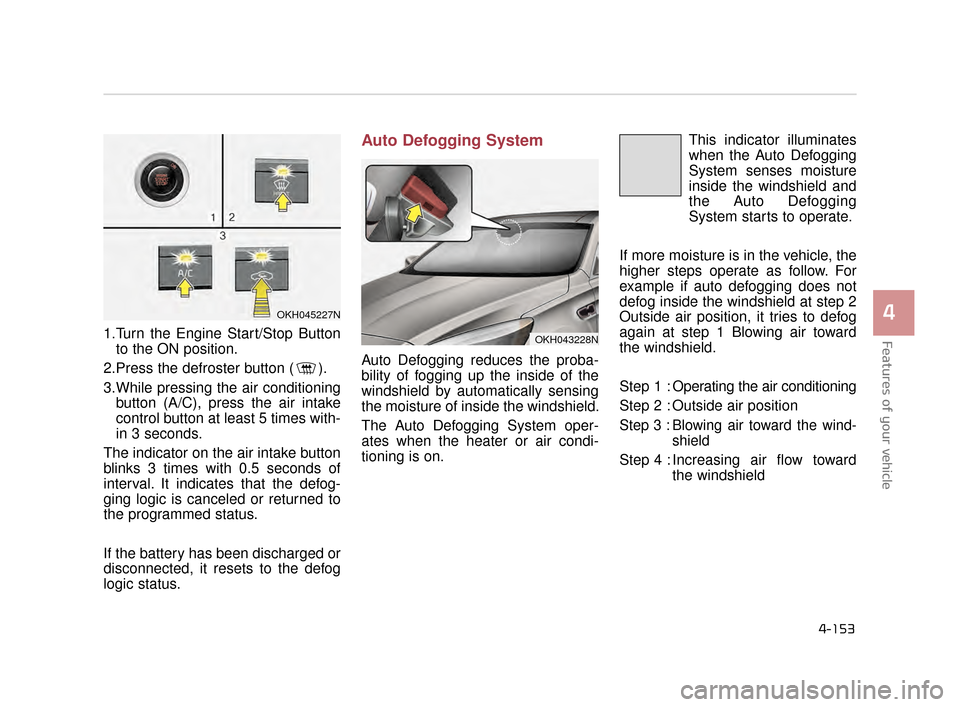
1.Turn the Engine Start/Stop Buttonto the ON position.
2.Press the defroster button ( ).
3.While pressing the air conditioning button (A/C), press the air intake
control button at least 5 times with-
in 3 seconds.
The indicator on the air intake button
blinks 3 times with 0.5 seconds of
interval. It indicates that the defog-
ging logic is canceled or returned to
the programmed status.
If the battery has been discharged or
disconnected, it resets to the defog
logic status.
Auto Defogging System
Auto Defogging reduces the proba-
bility of fogging up the inside of the
windshield by automatically sensing
the moisture of inside the windshield.
The Auto Defogging System oper-
ates when the heater or air condi-
tioning is on. This indicator illuminates
when the Auto Defogging
System senses moisture
inside the windshield and
the Auto Defogging
System starts to operate.
If more moisture is in the vehicle, the
higher steps operate as follow. For
example if auto defogging does not
defog inside the windshield at step 2
Outside air position, it tries to defog
again at step 1 Blowing air toward
the windshield.
Step 1 : Operating the air conditioning
Step 2 : Outside air position
Step 3 :Blowing air toward the wind-
shield
Step 4 : Increasing air flow toward the windshield
OKH043228N
OKH045227N
KH CAN (ENG) 4:2015 3/26/2015 10:46 AM Page 153
Page 233 of 522
Features of your vehicle
4-154
To cancel or reset the Auto Defogging
System
Press the front windshield defroster
button for 3 seconds when the
Engine Start/Stop button is in the ON
position. When the Auto Defogging
System is canceled, Front defroster
button will blink 6 times.
When the Auto Defogging System is
reset, Front defroster button will blink
3 times without a signal.✽NOTICE
If the A/C off or recirculated air
position is manually selected while
the auto defogging system is on, the
auto defogging indicator will blink 3
times to give notice that manual
operation is canceled.
Do not remove the sensor cover
located on the upper end of the
driver side windshield glass.
Damage to the system parts
could occur and may not be cov-
ered by your vehicle warranty.
CAUTION
KH CAN (ENG) 4:2015 3/26/2015 10:46 AM Page 154
Page 235 of 522
Features of your vehicle
4-156
Cluster ionizer
When the Engine Start/Stop button
is in the ON position, the clean air
function turns on automatically.
Also, the clean air function turns off
automatically, when the Engine
Start/Stop button is in the OFF posi-
tion.
Smart ventilation
When driving and the heater and air
conditioning system is off, the smart
ventilation system maintains pleas-
ant indoor aerial environment by
controlling the temperature, humidity
and CO2 of interior.
“SMART VENTILATION ON” mes-
sage is displayed on the AVN climate
monitor for 5 seconds when the
smart ventilation system operates.
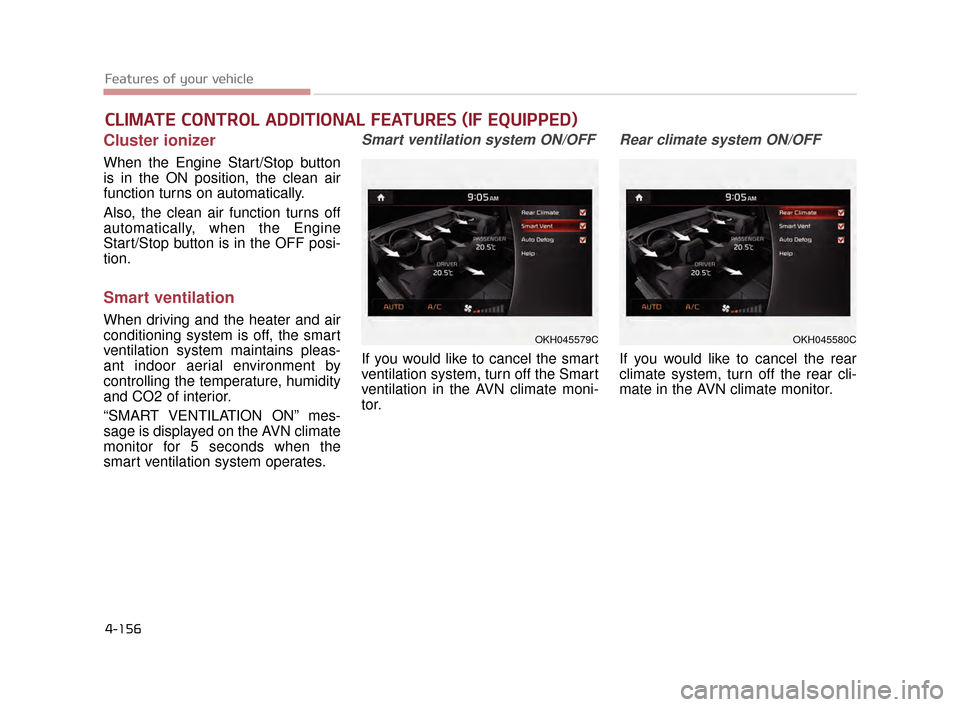
Smart ventilation system ON/OFF
If you would like to cancel the smart
ventilation system, turn off the Smart
ventilation in the AVN climate moni-
tor.
Rear climate system ON/OFF
If you would like to cancel the rear
climate system, turn off the rear cli-
mate in the AVN climate monitor.
CLIMATE CONTROL ADDITIONAL FEATURES (IF EQUIPPED)
OKH045579COKH045580C
KH CAN (ENG) 4:2015 3/26/2015 10:46 AM Page 156
Page 243 of 522
The seat warmer is provided to warm
the seats during cold weather. With
the engine start/stop button in the
ON position, push the switch to warm
the seat.
During mild weather or under condi-
tions where the operation of the seat
warmer is not needed, keep the
switches in the OFF position.
With the seat warmer switch in the
ON position, the heating system in
the seat turns off or on automatically
depending on the seat temperature.
Each time you push the button, thetemperature setting of the seat is
changed as follows :
When pressing the switch for more than 1.5 seconds with the seat
warmer operating, the seat warmer
will turn OFF.
The seat warmer defaults to the OFF position whenever the engine
start/stop button is turned on. You can activate or deactivate the
rear seat warmer button by using
the REAR LOCK button on the rear
armrest or “System Settings” in
AVN (Audio, Video, and Navigation).
Detailed information for “System
Settings” is described in a separate-
ly supplied manual. If the REAR
LOCK button activated (LED “ON”),
you can not activate the rear seat
warmer button.
After deactivating (LED “OFF”) the
REAR LOCK button, you can acti-
vate the rear seat warmer button.
If the REAR LOCK button has acti-
vated through AVN, you can deac-
tivate the REAR LOCK button only
through AVN.
Features of your vehicle
4-164
OFF→ HIGH( )→ MIDDLE( )→LOW( )
→
Seat damage
When cleaning the seats, do
not use an organic solvent
such as paint thinner, ben-
zene, alcohol and gasoline.
Doing so may damage the
surface of the heater or seats.
To prevent overheating the seat warmer, do not place any-
thing on the seats that insu-
lates against heat, such as
blankets, cushions or seat
covers on the seats while the
seat warmer is in operation.
Do not place heavy or sharp objects on the seat. Those
things may damage the seat
warmer system.
CAUTION
KH CAN (ENG) 4:2015 3/26/2015 10:47 AM Page 164
Page 244 of 522
Features of your vehicle
4
4-165
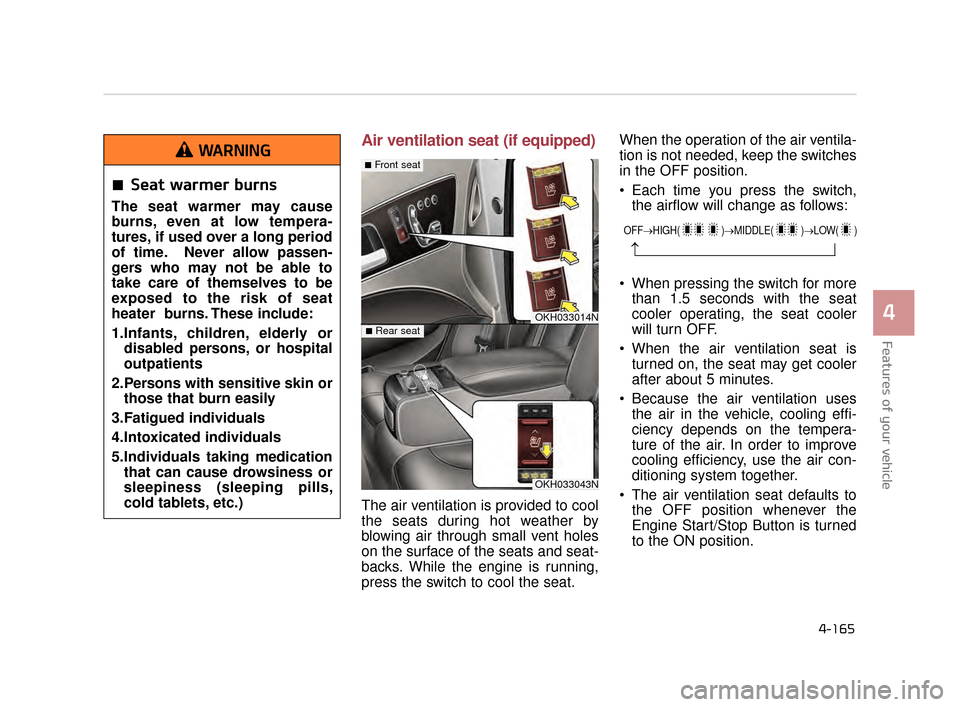
Air ventilation seat (if equipped)
The air ventilation is provided to cool
the seats during hot weather by
blowing air through small vent holes
on the surface of the seats and seat-
backs. While the engine is running,
press the switch to cool the seat. When the operation of the air ventila-
tion is not needed, keep the switches
in the OFF position.
Each time you press the switch,
the airflow will change as follows:
When pressing the switch for more than 1.5 seconds with the seat
cooler operating, the seat cooler
will turn OFF.
When the air ventilation seat is turned on, the seat may get cooler
after about 5 minutes.
Because the air ventilation uses the air in the vehicle, cooling effi-
ciency depends on the tempera-
ture of the air. In order to improve
cooling efficiency, use the air con-
ditioning system together.
The air ventilation seat defaults to the OFF position whenever the
Engine Start/Stop Button is turned
to the ON position.
Seat warmer burns
The seat warmer may cause
burns, even at low tempera-
tures, if used over a long period
of time. Never allow passen-
gers who may not be able to
take care of themselves to be
exposed to the risk of seat
heater burns. These include:
1.Infants, children, elderly ordisabled persons, or hospital
outpatients
2.Persons with sensitive skin or those that burn easily
3.Fatigued individuals
4.Intoxicated individuals
5.Individuals taking medication that can cause drowsiness or
sleepiness (sleeping pills,
cold tablets, etc.)
WARNING
OKH033014N
OKH033043N
■Front seat
■Rear seat
OFF→ HIGH( )→ MIDDLE( )→LOW( )
→
KH CAN (ENG) 4:2015 3/26/2015 10:47 AM Page 165
Page 251 of 522
Features of your vehicle
4-172
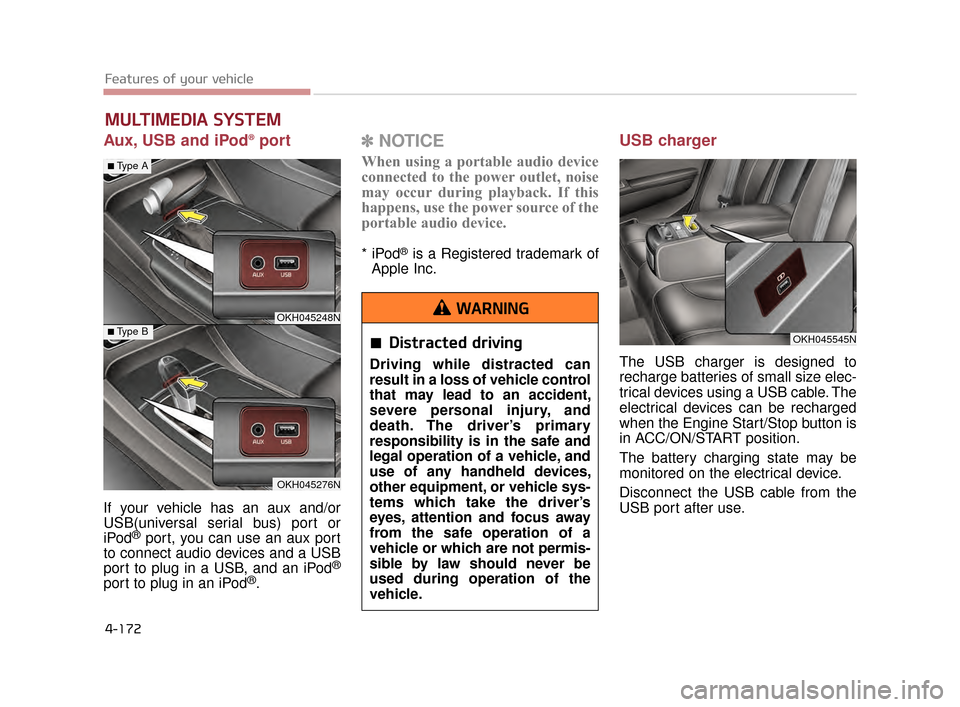
Aux, USB and iPod®port
If your vehicle has an aux and/or
USB(universal serial bus) port or
iPod
®port, you can use an aux port
to connect audio devices and a USB
port to plug in a USB, and an iPod
®
port to plug in an iPod®.
✽ NOTICE
When using a portable audio device
connected to the power outlet, noise
may occur during playback. If this
happens, use the power source of the
portable audio device.
* iPod®is a Registered trademark of
Apple Inc.
USB charger
The USB charger is designed to
recharge batteries of small size elec-
trical devices using a USB cable. The
electrical devices can be recharged
when the Engine Start/Stop button is
in ACC/ON/START position.
The battery charging state may be
monitored on the electrical device.
Disconnect the USB cable from the
USB port after use.
MULTIMEDIA SYSTEM
OKH045545N
OKH045248N
OKH045276N
■Type A
■Type BDistracted driving
Driving while distracted can
result in a loss of vehicle control
that may lead to an accident,
severe personal injury, and
death. The driver’s primary
responsibility is in the safe and
legal operation of a vehicle, and
use of any handheld devices,
other equipment, or vehicle sys-
tems which take the driver’s
eyes, attention and focus away
from the safe operation of a
vehicle or which are not permis-
sible by law should never be
used during operation of the
vehicle.
WARNING
KH CAN (ENG) 4:2015 3/26/2015 10:48 AM Page 172
Page 256 of 522
Driving your vehicle
5
Driving your vehicle
5
Driving your vehicle
Before driving......................................................5-4
..........................................5-4
.........................................................5-4
Engine START/STOP button...............................5-6
..............5-6
...................5-6
Starting the engine .............................................5-9
......................5-9
Automatic transmission (shift by cable) ...................5-11
.........................5-11
..........................................5-15
Automatic transmission (shift by wire) ..............5-16
.........................5-16
..........................................5-26
Brake system ....................................................5-27
......................................................5-28
.................................5-31
...............................5-41
................................5-47
.........................................5-47
Automous emergency Braking(AEB) ..................5-49
..........................................................5-49
....................................................5-51 .....................................5-52
Drive mode integrated control system ..............5-54
.................................5-54
..............................................5-55
...............5-55
............................5-58
Cruise control system .......................................5-62
.............................................5-63
...................................5-63
....................5-64
............................5-64
the cruise control on ...........................................5-64
........................................5-65
approximately 30 km/h (20 mph) ........................5-65
.........................................5-66
Advanced Smart Cruise Control System ..........5-67
...........................................5-68
...........5-72
.........................5-76
......................................5-76
Lane Departure Warning System (LDWS)........5-82
.................................................5-84
.......................5-84
5
KH CAN (ENG) 5:2015 3/25/2015 10:49 AM Page 1
Page 259 of 522
5-4
Driving your vehicle
Before entering vehicle
Be sure that all windows, outsidemirror(s), and outside lights are
clean.
Check the condition of the tires.
Check under the vehicle for any sign of leaks.
Be sure there are no obstacles behind you if you intend to back up.
Necessary inspections
Fluid levels, such as engine oil,
engine coolant, brake fluid, and
washer fluid should be checked on a
regular basis, with the exact interval
depending on the fluid. Further
details are provided in Section 7,
“Maintenance”.
Before starting
Close and lock all doors.
Position the seat so that all con-trols are easily reached.
Buckle your seat belt.
Adjust the inside and outside rearview mirrors.
Be sure that all lights work.
Check all gauges.
Check the operation of warning lights when the Engine Start/Stop
button is turned to the ON position.
Release the parking brake and make sure the brake warning light
goes off.
For safe operation, be sure you are
familiar with your vehicle and its
equipment.
BEFORE DRIVING
Distracted driving
Focus on the road while driving.
The driver's primary responsi-
bility is in the safe and legal
operation of the vehicle. Use of
any hand held devices, other
equipment or vehicle systems
that distract the driver should
not be used during vehicle
operation.
WARNING
KH CAN (ENG) 5:2015 3/25/2015 10:50 AM Page 4
Page 261 of 522
5-6
Driving your vehicle
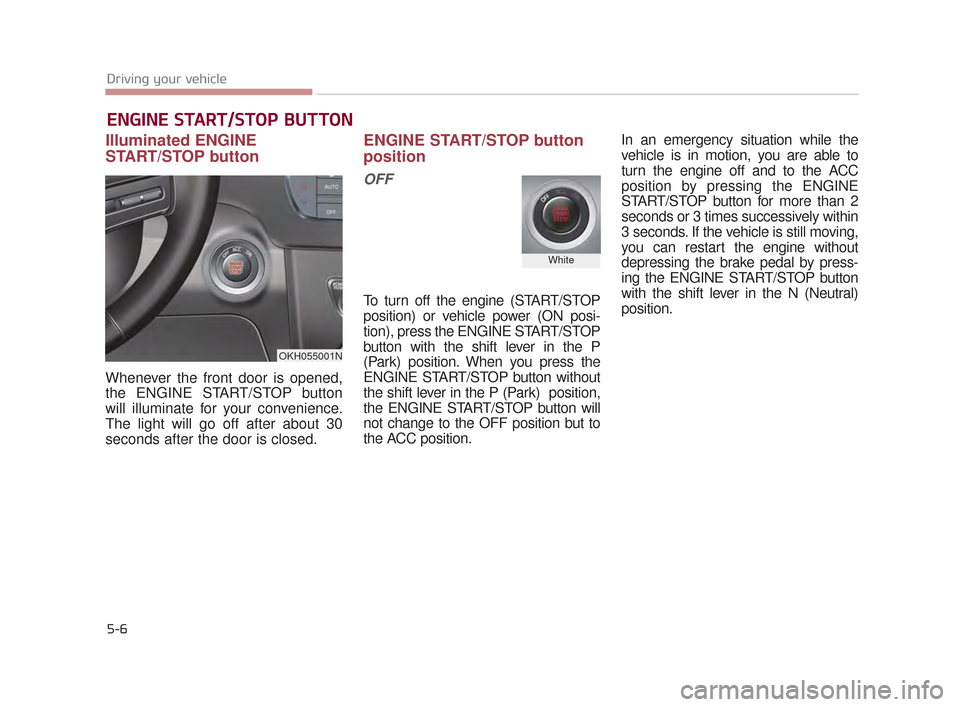
Illuminated ENGINE
START/STOP button
Whenever the front door is opened,
the ENGINE START/STOP button
will illuminate for your convenience.
The light will go off after about 30
seconds after the door is closed.
ENGINE START/STOP button
position
OFF
To turn off the engine (START/STOP
position) or vehicle power (ON posi-
tion), press the ENGINE START/STOP
button with the shift lever in the P
(Park) position. When you press the
ENGINE START/STOP button without
the shift lever in the P (Park) position,
the ENGINE START/STOP button will
not change to the OFF position but to
the ACC position.In an emergency situation while the
vehicle is in motion, you are able to
turn the engine off and to the ACC
position by pressing the ENGINE
START/STOP button for more than 2
seconds or 3 times successively within
3 seconds. If the vehicle is still moving,
you can restart the engine without
depressing the brake pedal by press-
ing the ENGINE START/STOP button
with the shift lever in the N (Neutral)
position.
ENGINE START/STOP BUTTON
OKH055001N
White
KH CAN (ENG) 5:2015 3/25/2015 10:50 AM Page 6