oil pressure KIA K900 2019 Owners Manual
[x] Cancel search | Manufacturer: KIA, Model Year: 2019, Model line: K900, Model: KIA K900 2019Pages: 580, PDF Size: 15.11 MB
Page 188 of 580
495
Features of your vehicle
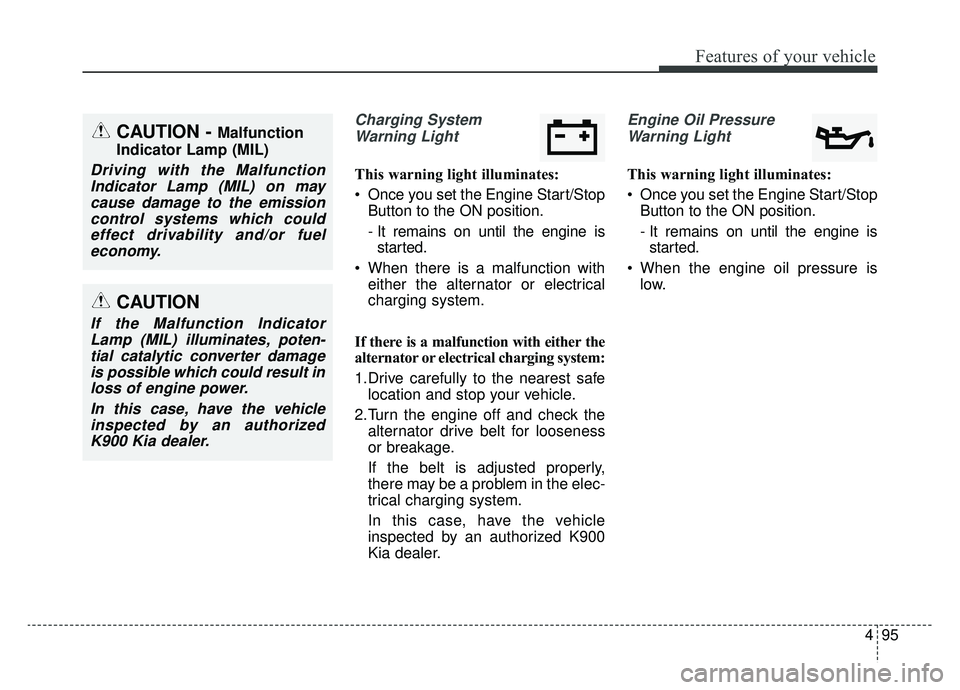
Charging SystemWarning Light
This warning light illuminates:
Once you set the Engine Start/Stop Button to the ON position.
- It remains on until the engine isstarted.
When there is a malfunction with either the alternator or electrical
charging system.
If there is a malfunction with either the
alternator or electrical charging system:
1.Drive carefully to the nearest safe location and stop your vehicle.
2.Turn the engine off and check the alternator drive belt for looseness
or breakage.
If the belt is adjusted properly,
there may be a problem in the elec-
trical charging system.
In this case, have the vehicle
inspected by an authorized K900
Kia dealer.
Engine Oil Pressure
Warning Light
This warning light illuminates:
Once you set the Engine Start/Stop Button to the ON position.
- It remains on until the engine isstarted.
When the engine oil pressure is low.
CAUTION
If the Malfunction IndicatorLamp (MIL) illuminates, poten-tial catalytic converter damageis possible which could result inloss of engine power.
In this case, have the vehicleinspected by an authorizedK900 Kia dealer.
CAUTION - Malfunction
Indicator Lamp (MIL)
Driving with the Malfunction Indicator Lamp (MIL) on maycause damage to the emissioncontrol systems which couldeffect drivability and/or fueleconomy.
Page 189 of 580
Features of your vehicle
96
4
If the engine oil pressure is low:
1.Drive carefully to the nearest safe
location and stop your vehicle.
2.Turn the engine off and check the engine oil level (For more details,
refer to “Engine Oil” in chapter 7). If
the level is low, add oil as required.
If the warning light remains on after
adding oil or if oil is not available,
have the vehicle inspected by an
authorized K900 Kia dealer.Low Fuel Level Warning
Light
This warning light illuminates:
When the fuel tank is nearly empty.
If the fuel tank is nearly empty:
Add fuel as soon as possible.
CAUTION - Engine
Overheating
Do not continue driving with theengine overheated. Otherwisethe engine may be damaged.
CAUTION - Engine
damage
If the engine is not stoppedimmediately after the engine oilpressure warning light is illumi-nated and stays on while theengine is running, seriousengine damage may result.CAUTION - Low Fuel
Level
Driving with the Low Fuel Levelwarning light on or with the fuellevel below “E” can cause theengine to misfire and damagethe catalytic converter (ifequipped).
Page 416 of 580
5151
Driving your vehicle
Driving in flooded areas
Avoid driving through flooded areas
unless you are sure the water is no
higher than the bottom of the wheel
hub. Drive through any water slowly.
Allow adequate stopping distance
because brake performance may be
affected.
After driving through water, dry the
brakes by gently applying them sev-
eral times while the vehicle is moving
slowly.
Driving off-road
Drive carefully off-road because your
vehicle may be damaged by rocks or
roots of trees. Become familiar with
the off-road conditions where you
are going to drive before you begin
driving.
Highway driving
Tires
Adjust the tire inflation pressures to
specification. Low tire inflation pres-
sures will result in overheating and
possible failure of the tires.
Avoid using worn or damaged tires
which may result in reduced traction
or tire failure.
Never exceed the maximum tire
inflation pressure shown on the tires.
Fuel, engine coolant and engine oil
High speed travel consumes more
fuel than urban motoring. Do not for-
get to check both the engine coolant
and engine oil.
Drive belt
A loose or damaged drive belt may
result in overheating of the engine.
WARNING- Under/overinflated tires
Always check the tires for proper
inflation before driving.
Underinflated or overinflated
tires can cause poor handling,
loss of vehicle control, and sud-
den tire failure leading to acci-
dents, injuries, and even death.
For proper tire pressures, refer to
“Tires and wheels” in chapter 8.
WARNING- Tire tread
Always check the tire tread
before driving your vehicle.
Worn-out tires can result in loss
of vehicle control. Worn-out tires
should be replaced as soon as
possible. For further information
and tread limits, refer to "Tires
and wheels" in chapter 7.
Page 462 of 580
Maintenance
87
OWNER MAINTENANCE
The following lists are vehicle checks
and inspections that should be per-
formed by the owner or an author-
ized K900 Kia dealer at the frequen-
cies indicated to help ensure safe,
dependable operation of your vehi-
cle.
Any adverse conditions should be
brought to the attention of your deal-
er as soon as possible.
These Owner Maintenance Checks
are generally not covered by war-
ranties and you may be charged for
labor, parts and lubricants used.Owner maintenance schedule
When you stop for fuel:
Check the engine oil level.
Check the coolant level in coolantreservoir.
Check the windshield washer fluid level.
Look for low or under-inflated tires.
While operating your vehicle:
Note any changes in the sound of the exhaust or any smell of
exhaust fumes in the vehicle.
Check for vibrations in the steering wheel. Notice any increased steer-
ing effort or looseness in the steer-
ing wheel, or change in its straight-
ahead position.
Notice if your vehicle constantly turns slightly or “pulls” to one side
when traveling on smooth, level
road.
When stopping, listen and check for unusual sounds, pulling to one
side, increased brake pedal travel
or “hard-to-push” brake pedal.
If any slipping or changes in the operation of your transmission
occurs, check the transmission
fluid level.
Check the automatic transmission P (Park) function.
Check the parking brake.
Check for fluid leaks under your vehicle (water dripping from the air
conditioning system during or after
use is normal).
WARNING- Hot coolant
Be careful when checking your
engine coolant level when the
engine is hot. Scalding hot
coolant and steam may blow
out under pressure.
Page 501 of 580
747
Maintenance
Temperature -A, B & C
The temperature grades are A (the
highest), B and C representing the
tire’s resistance to the generation of
heat and its ability to dissipate heat
when tested under controlled condi-
tions on a specified indoor laboratory
test wheel.
Sustained high temperature can
cause the material of the tire to
degenerate and reduce tire life, and
excessive temperature can lead to
sudden tire failure. The grade C cor-
responds to a level of performance
which all passenger car tires must
meet under the Federal Motor
Vehicle Safety Standard No. 109.
Grades B and A represent higher
levels of performance on the labora-
tory test wheel than the minimum
required by law.Tire terminology and definitions
Air Pressure:
The amount of air
inside the tire pressing outward on
the tire. Air pressure is expressed in
kilopascal (kPa) or pounds per
square inch (psi).
Accessory Weight: This means the
combined weight of optional acces-
sories. Some examples of optional
accessories are, automatic transmis-
sion, power seats, and air condition-
ing.
Aspect Ratio: The relationship of a
tire's height to its width.
Belt: A rubber coated layer of cords
that is located between the plies and
the tread. Cords may be made from
steel or other reinforcing materials.
Bead: The tire bead contains steel
wires wrapped by steel cords that
hold the tire onto the rim.
Bias Ply Tire: A pneumatic tire in
which the plies are laid at alternate
angles less than 90 degrees to the
centerline of the tread. Cold Tire Pressure:
The amount of
air pressure in a tire, measured in
kilopascals (kPa) or pounds per
square inch (psi) before a tire has
built up heat from driving.
Curb Weight: This means the weight
of a motor vehicle with standard and
optional equipment including the
maximum capacity of fuel, oil and
coolant, but without passengers and
cargo.
DOT Markings: A code molded into
the sidewall of a tire signifying that
the tire is in compliance with the U.S.
Department of Transportation motor
vehicle safety standards. The DOT
code includes the Tire Identification
Number (TIN), an alphanumeric des-
ignator which can also identify the
tire manufacturer, production plant,
brand and date of production.
Page 524 of 580
Maintenance
70
7
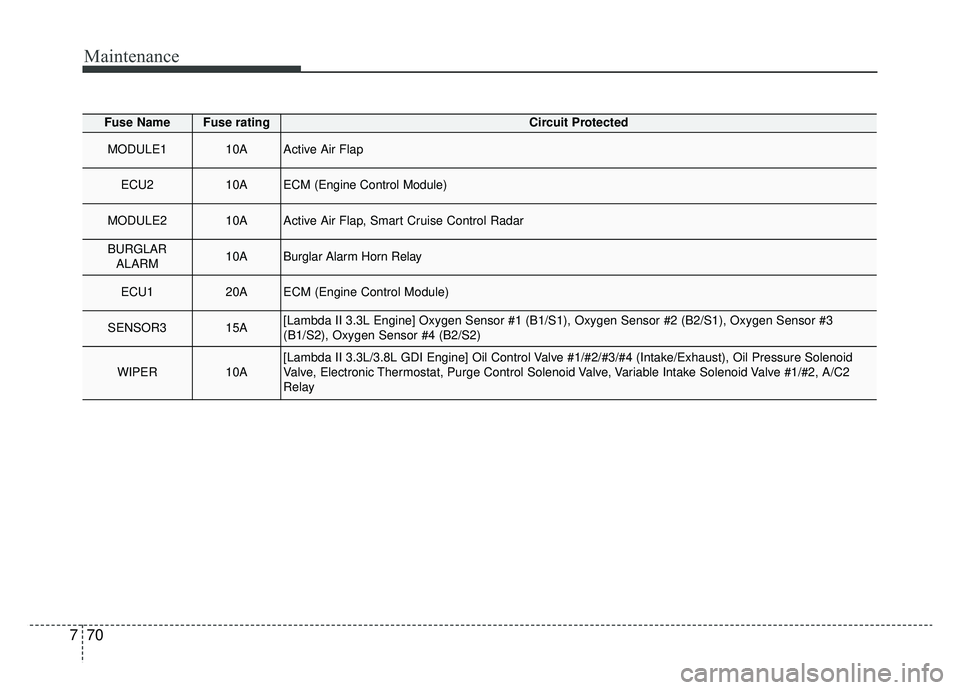
Fuse NameFuse ratingCircuit Protected
MODULE110AActive Air Flap
ECU210AECM (Engine Control Module)
MODULE210AActive Air Flap, Smart Cruise Control Radar
BURGLAR
ALARM10ABurglar Alarm Horn Relay
ECU120AECM (Engine Control Module)
SENSOR315A[Lambda II 3.3L Engine] Oxygen Sensor #1 (B1/S1), Oxygen Sensor #2 (B\
2/S1), Oxygen Sensor #3
(B1/S2), Oxygen Sensor #4 (B2/S2)
WIPER10A[Lambda II 3.3L/3.8L GDI Engine] Oil Control Valve #1/#2/#3/#4 (Intake/Exhaust), Oil Pressure Solenoid
Valve, Electronic Thermostat, Purge Control Solenoid Valve, Variable Intake Solenoid Valve #1/#2, A/C2
Relay
Page 539 of 580
785
Maintenance
Waxing
Wax the vehicle when water will no
longer bead on the paint.
Always wash and dry the vehicle
before waxing. Use a good quality
liquid or paste wax, and follow the
manufacturer’s instructions. Wax all
metal trim to protect it and to main-
tain its luster.
Removing oil, tar, and similar materi-
als with a spot remover will usually
strip the wax from the finish. Be sure
to re-wax these areas even if the rest
of the vehicle does not yet need wax-
ing.
Do not apply wax on embossed
unpainted unit, as it may tarnish the
unit.
ORJ078045
CAUTION - Wet engine
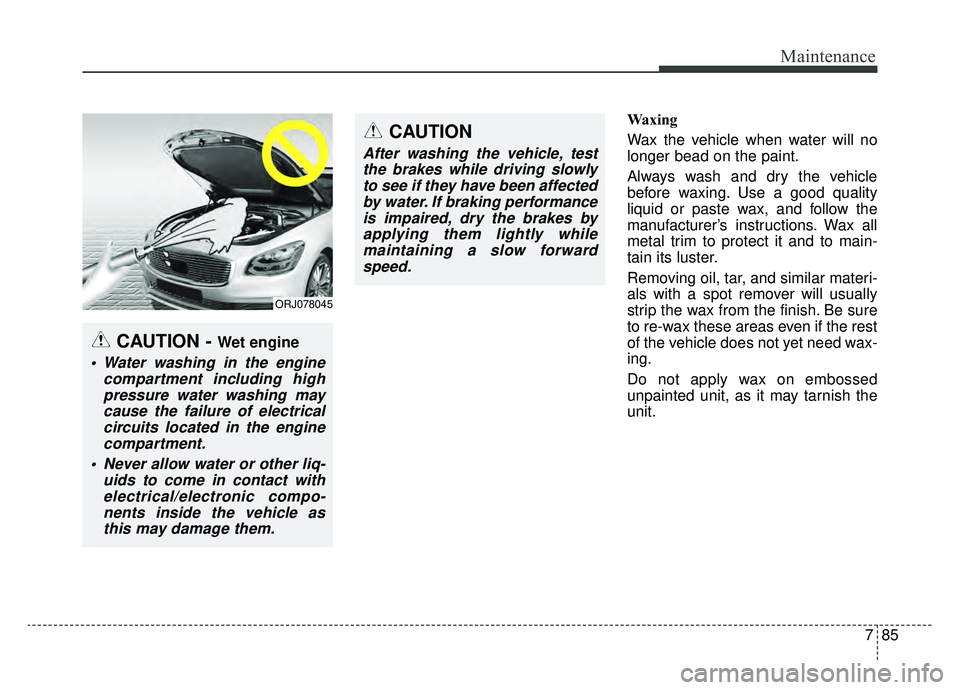
Water washing in the enginecompartment including highpressure water washing maycause the failure of electricalcircuits located in the enginecompartment.
Never allow water or other liq- uids to come in contact withelectrical/electronic compo-nents inside the vehicle asthis may damage them.
CAUTION
After washing the vehicle, testthe brakes while driving slowlyto see if they have been affectedby water. If braking performanceis impaired, dry the brakes byapplying them lightly whilemaintaining a slow forwardspeed.
Page 545 of 580
791
Maintenance
Taking care of leather seats (if equipped)
Vacuum the seat periodically to remove dust and sand on the seat.
It will prevent abrasion or damage of
the leather and maintain its quality.
Wipe the natural leather seat cover often with dry or soft cloth.
Sufficient use of a leather protec- tive may prevent abrasion of the
cover and helps maintain the color.
Be sure to read the instructions
and consult a specialist when
using leather coating or protective
agents.
Leather with bright colors(beige, cream beige) is easily contaminat-
ed and clear in appearance. Clean
the seats frequently.
Avoid wiping with wet cloth. It may cause the surface to crack.
Cleaning the leather seats
(if equipped)
Remove all contaminations instant- ly. Refer to instructions below for
removal of each contaminant.
Cosmetic products(sunscreen, foundation, etc.)
- Apply cleansing cream on a clothand wipe the contaminated point.
Wipe off the cream with a wet
cloth and remove water with a dry
cloth.
Beverages(coffee, soft drink, etc.) - Apply a small amount of neutraldetergent and wipe until contami-
nations do not smear.
Oil - Remove oil instantly withabsorbable cloth and wipe with
stain remover for natural leather
only.
Chewing gum - Harden the gum with ice andremove gradually.
Fabric seat cover using precau-
tions (if equipped)
Please clean the fabric seats regu-
larly with a vacuum cleaner in con-
sideration of fabric material charac-
teristics. If they are heavily soiled
with beverage stains, etc., use a suit-
able interior cleaner. To prevent dam-
age to seat covers, wipe off the seat
covers down to the seams with a
large wiping motion and moderate
pressure using a soft sponge or
microfiber cloth.
Velcro closures on clothing or sharp
objects may cause snagging or
scratches on the surface of the
seats. Make sure not to rub such
objects against the surface.
Page 568 of 580
I3
Index
Battery replacement. . . . . . . . . . . . . . . . . . . . . . . 4-10, 7-34
Battery saver function . . . . . . . . . . . . . . . . . . . . . . . . . 4-114
Battery. . . . . . . . . . . . . . . . . . . . . . . . . . . . . . . . . . . . \
. . 7-34Battery replacement . . . . . . . . . . . . . . . . . . . . . . . . . 7-34
Recharging the battery . . . . . . . . . . . . . . . . . . . . . . . 7-36
Reset items . . . . . . . . . . . . . . . . . . . . . . . . . . . . . . . . 7-37
Before driving . . . . . . . . . . . . . . . . . . . . . . . . . . . . . . . . . 5-5
Blade inspection . . . . . . . . . . . . . . . . . . . . . . . . . . . . . . 7-31
Blade replacement . . . . . . . . . . . . . . . . . . . . . . . . . . . . 7-31
Blind-Spot Collision Warning/ Blind-Spot Collision-Avoidance Assist system . . . . . . . . . . . . 5-116
System description . . . . . . . . . . . . . . . . . . . . . . . . . 5-116
System setting and activation . . . . . . . . . . . . . . . . . 5-117
Warning message and system control . . . . . . . . . . 5-119
Limitations of the system . . . . . . . . . . . . . . . . . . . . 5-125
Blind-spot view monitor system . . . . . . . . . . . . . . . . . 4-113
Bonnet see the hood . . . . . . . . . . . . . . . . . . . . . . . . . . . 4-42
Brake discs, pads, calipers and rotors. . . . . . . . . . . . . . 7-20
Brake fluid . . . . . . . . . . . . . . . . . . . . . . . . . . . . . . 7-19, 7-26 Checking the brake fluid level . . . . . . . . . . . . . . . . . 7-26
Brake hoses and lines . . . . . . . . . . . . . . . . . . . . . . . . . . 7-19
Brake system. . . . . . . . . . . . . . . . . . . . . . . . . . . . . . . . . 5-31 Power brakes . . . . . . . . . . . . . . . . . . . . . . . . . . . . . . 5-31
Electronic Parking Brake (EPB) . . . . . . . . . . . . . . . 5-33
Auto hold . . . . . . . . . . . . . . . . . . . . . . . . . . . . . . . . . 5-39
Anti-lock Brake System (ABS) . . . . . . . . . . . . . . . . 5-43 Electronic Stability Control (ESC) . . . . . . . . . . . . . 5-45
Vehicle Stability Management (VSM) . . . . . . . . . . . 5-49
Hill-start Assist Control (HAC) . . . . . . . . . . . . . . . . 5-51
Button start/stop, see engine start/stop button . . . . . . . . 5-7
California perchlorate notice . . . . . . . . . . . . . . . . . . . . 7-95
Camera (rear view) . . . . . . . . . . . . . . . . . . . . . . . . . . . 4-111
Care Care of seat belts . . . . . . . . . . . . . . . . . . . . . . . . . . . 3-38
SRS Care . . . . . . . . . . . . . . . . . . . . . . . . . . . . . . . . . 3-75
Care of seat belts . . . . . . . . . . . . . . . . . . . . . . . . . . . . . 3-38
Center console storage . . . . . . . . . . . . . . . . . . . . . . . . 4-151
Central door lock switch. . . . . . . . . . . . . . . . . . . . . . . . 4-19
Chains - Tire . . . . . . . . . . . . . . . . . . . . . . . . . . . . . . . . 5-153
Changing the coolant . . . . . . . . . . . . . . . . . . . . . . . . . . 7-25
Changing the engine oil and filter . . . . . . . . . . . . . . . . 7-22
Checking fluid levels . . . . . . . . . . . . . . . . . . . . . . . . . . 7-20
Checking the brake fluid level . . . . . . . . . . . . . . . . . . . 7-26
Checking the coolant level . . . . . . . . . . . . . . . . . . . . . . 7-23
Checking the engine oil level . . . . . . . . . . . . . . . . . . . . 7-21
Checking the washer fluid level . . . . . . . . . . . . . . . . . . 7-27
Checking tire inflation pressure . . . . . . . . . . . . . . . . . . 7-39
C
B