engine oil KIA Magnetis 2010 3.G Owner's Guide
[x] Cancel search | Manufacturer: KIA, Model Year: 2010, Model line: Magnetis, Model: KIA Magnetis 2010 3.GPages: 336, PDF Size: 6.46 MB
Page 284 of 336
719
Maintenance
BRAKE FLUID
G080100AMG
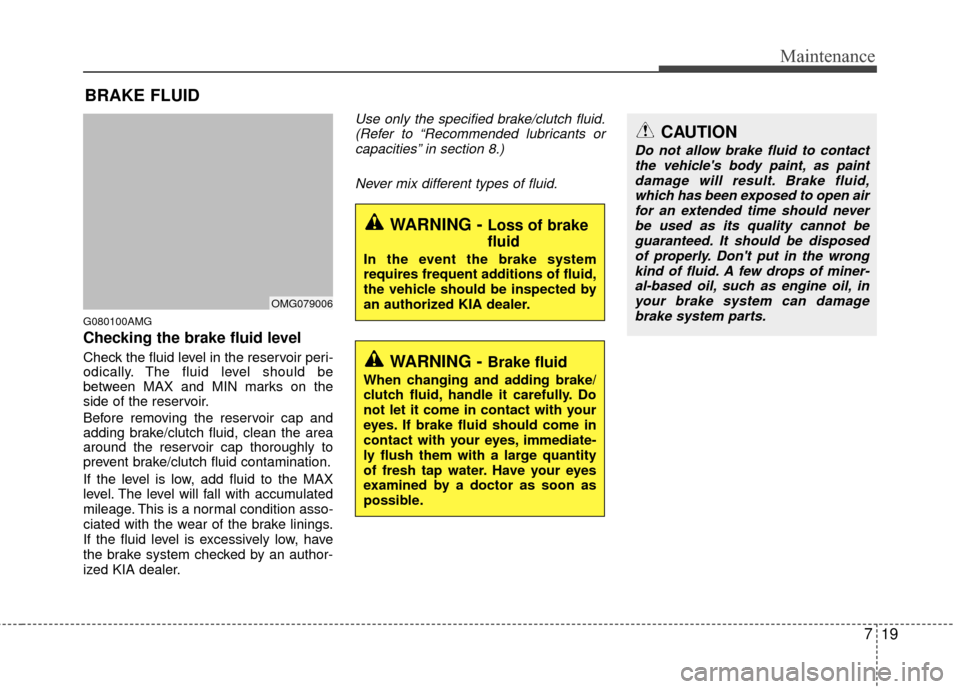
Checking the brake fluid level
Check the fluid level in the reservoir peri-
odically. The fluid level should be
between MAX and MIN marks on the
side of the reservoir.
Before removing the reservoir cap and
adding brake/clutch fluid, clean the area
around the reservoir cap thoroughly to
prevent brake/clutch fluid contamination.
If the level is low, add fluid to the MAX
level. The level will fall with accumulated
mileage. This is a normal condition asso-
ciated with the wear of the brake linings.
If the fluid level is excessively low, have
the brake system checked by an author-
ized KIA dealer.
Use only the specified brake/clutch fluid.(Refer to “Recommended lubricants orcapacities” in section 8.)
Never mix different types of fluid.
WARNING - Brake fluid
When changing and adding brake/
clutch fluid, handle it carefully. Do
not let it come in contact with your
eyes. If brake fluid should come in
contact with your eyes, immediate-
ly flush them with a large quantity
of fresh tap water. Have your eyes
examined by a doctor as soon as
possible.
WARNING - Loss of brake
fluid
In the event the brake system
requires frequent additions of fluid,
the vehicle should be inspected by
an authorized KIA dealer.
CAUTION
Do not allow brake fluid to contactthe vehicle's body paint, as paintdamage will result. Brake fluid, which has been exposed to open airfor an extended time should neverbe used as its quality cannot be guaranteed. It should be disposedof properly. Don't put in the wrong kind of fluid. A few drops of miner-al-based oil, such as engine oil, in your brake system can damagebrake system parts.
OMG079006
Page 285 of 336

Maintenance
20
7
POWER STEERING FLUID (IF EQUIPPED)
G090100AMG
Checking the power steering fluid
level
With the vehicle on level ground, check
the fluid level in the power steering reser-
voir periodically. The fluid should be
between MAX and MIN marks on the
side of the reservoir at the normal tem-
perature.
Before adding power steering fluid, thor-
oughly clean the area around the reser-
voir cap to prevent power steering fluid
contamination.
If the level is low, add fluid to the MAX
level.
✽ ✽
NOTICE - (if equipped)
Check that the fluid level is in the
"HOT" range on the reservoir. If the
fluid is cold, check that it is in the
"COLD" range (if equipped).
In the event the power steering system
requires frequent addition of fluid, the
vehicle should be inspected by an
authorized KIA dealer.
Use only the specified power steering
fluid. (Refer to "Recommended lubricantsor capacities" in section 8.)
G090200AEN
Checking the power steering
hose
Check the connections for oil leaks, dam-
age and twists in the power steering
hose before driving.
CAUTION
To avoid damage to the power steering pump, do not operate thevehicle for prolonged periods with a low power steering fluidlevel.
Never start the engine when the reservoir tank is empty.
When adding fluid, be careful that dirt does not get into the tank.
Too little fluid can result in increased steering effort and/ornoise from the power steering system.
The use of the non-specified fluid could reduce the effectiveness ofthe power steering system andcause damage to it.
OMG079007
Page 287 of 336

Maintenance
22
7
✽
✽
NOTICE
“C” (COLD) range is for reference only
and should NOT be used to determine
transaxle fluid level.
✽ ✽NOTICE
New automatic transaxle fluid should be
red. The red dye is added so the assem-
bly plant can identify it as automatic
transaxle fluid and distinguish it from
engine oil or antifreeze. The red dye,
which is not an indicator of fluid quali-
ty, is not permanent. As the vehicle is
driven, the automatic transaxle fluid
will begin to look darker. The color may
eventually appear light brown.
Therefore, have an authorized KIA
dealer change the automatic transaxle
fluid according to the Scheduled
Maintenance at the beginning of this
section.
Use only the specified automatic
transaxle fluid. (Refer to “Recommended
lubricants and capacities” in section 8.)
G100200AUN
Changing the automatic transaxle
fluid
Have automatic transaxle fluid changed
by an authorized KIA dealer according to
the Maintenance Schedule at the begin-
ning of this section.
WARNING - Transaxle fluid
The transaxle fluid level should be
checked when the engine is at nor-
mal operating temperature. This
means that the engine, radiator,
radiator hose and exhaust system
etc., are very hot. Exercise great
care not to burn yourself during
this procedure.
WARNING- Parking brake
To avoid sudden movement of the
vehicle, apply parking brake and
depress the brake pedal before
moving the shift lever.
CAUTION
Low fluid level causes transaxle
slippage. Overfilling can causefoaming, loss of fluid and transaxlemalfunction.
The use of a non-specified fluid could result in transaxle malfunc-tion and failure.
Page 293 of 336
Maintenance
28
7
G190200AUN
Battery recharging
Your vehicle has a maintenance-free,
calcium-based battery.
If the battery becomes discharged in a
short time (because, for example, the
headlights or interior lights were left on
while the vehicle was not in use),
recharge it by slow charging (trickle)
for 10 hours.
If the battery gradually discharges because of high electric load while the
vehicle is being used, recharge it at 20-
30A for two hours.
(Continued)
When lifting a plastic-cased bat-tery, excessive pressure on the
case may cause battery acid to
leak, resulting in personal injury.
Lift with a battery carrier or with
your hands on opposite corners.
Never attempt to recharge the battery when the battery cables
are connected.
The electrical ignition system works with high voltage. Never
touch these components with the
engine running or the ignition
switched on.
Failure to follow the above warn-
ings can result in serious bodily
injury or death.
CAUTION
When you don’t use the vehicle for a long time in the low temper-ature area, separate the batteryand keep it indoors.
Always charge the battery fully to prevent the battery case dam-aged in low temperature area.
WARNING- Recharging battery
When recharging the battery,
observe the following precautions:
The battery must be removed
from the vehicle and placed in an
area with good ventilation.
Do not allow cigarettes, sparks, or flame near the battery.
Watch the battery during charg- ing, and stop or reduce the charg-
ing rate if the battery cells begin
gassing (boiling) violently or if
the temperature of the electrolyte
of any cell exceeds 49°C (120°F).
Wear eye protection when check- ing the battery during charging.
(Continued)
Page 315 of 336

Maintenance
50
7
Engine compartment
Description Fuse rating Protected component
ALT150A(2.7L)
FUSIBLE LINK, FUSE
125A(2.4L)
IGN1 30A
FUSE (A/BAG, TURN, CLUSTER, TELTAIL, A/BAG IND., 21, PCU, MODULE-1, SPARE)
IGN2 30A FUSE (MODULE-2, H/LP, A/CON, WIPER, SPARE, SATRT), BUTTON RELAY
TAIL 20A TAIL_LP_LH, TAIL_LP_RH
FUSIBLE RR HTD 40A MIRR HTD, RR_HTD_RELAY
LINK BLOWER 40A BLOWER MTR, FUSE (A/CON SW)
I/P B+1 30A FUSE (HAZARD, STOP LP, TPMS, T/LID, PEDAL ADJ, DR_LOCK)
I/P B+2 50AP/WINDOW RELAY, FUSE (RR FOG, P/SEAT_LH, P/SEAT_RH, W/DEICER,
POWER CONNECTOR, PDM_1, PDM_2)
ECU RLY 30A PCU, IGN COIL, INJECTOR, SENSOR
1 RAD FAN 40A(2.7L)
RAD FAN MTR
30A(2.4L)
2 ABS1 40A ABS/ESC UNIT
3 ABS2 40A ABS/ESC UNIT
4 A/CON 10A A/CON COMPRESSOR
5 S/WARMER 25A S/WARMER_LH, S/WARMER_RH
FUSE 6 P/AMP 20A P/AMP, AV-AMP
7 S/ROOF 20A S/ROOF MTR
8 P/OUTLET 25A P/OUTLET
9 FRT FOG 15A FRT FOG LAMP
10 HEAD LP HI 15A HEAD LP HI
11 HEAD LP LOW 15A HEAD LP LOW
12 HORN 15A HORN, B/ALARM HORN, HORN SW
Page 318 of 336
753
Maintenance
Waxing
Wax the vehicle when water will no
longer bead on the paint.
Always wash and dry the vehicle before
waxing. Use a good quality liquid or
paste wax, and follow the manufacturer’s
instructions. Wax all metal trim to protect
it and to maintain its luster.
Removing oil, tar, and similar materials
with a spot remover will usually strip the
wax from the finish. Be sure to re-wax
these areas even if the rest of the vehicle
does not yet need waxing.G230103AUN
Finish damage repair
Deep scratches or stone chips in the
painted surface must be repaired
promptly. Exposed metal will quickly rust
and may develop into a major repair
expense.
✽ ✽NOTICE
If your vehicle is damaged and requires
any metal repair or replacement, be sure
the body shop applies anti-corrosion
materials to the parts repaired or
replaced.
G230104AUN
Bright-metal maintenance
To remove road tar and insects, use a
tar remover, not a scraper or other
sharp object.
To protect the surfaces of bright-metal parts from corrosion, apply a coating of
wax or chrome preservative and rub to
a high luster.
During winter weather or in coastal areas, cover the bright metal parts with
a heavier coating of wax or preserva-
tive. If necessary, coat the parts with
non-corrosive petroleum jelly or other
protective compound.
CAUTION
Wiping dust or dirt off the body with a dry cloth will scratch thefinish.
Do not use steel wool, abrasive cleaners, or strong detergentscontaining highly alkaline orcaustic agents on chrome-platedor anodized aluminum parts. Thismay result in damage to the pro-tective coating and cause discol-oration or paint deterioration.
CAUTION
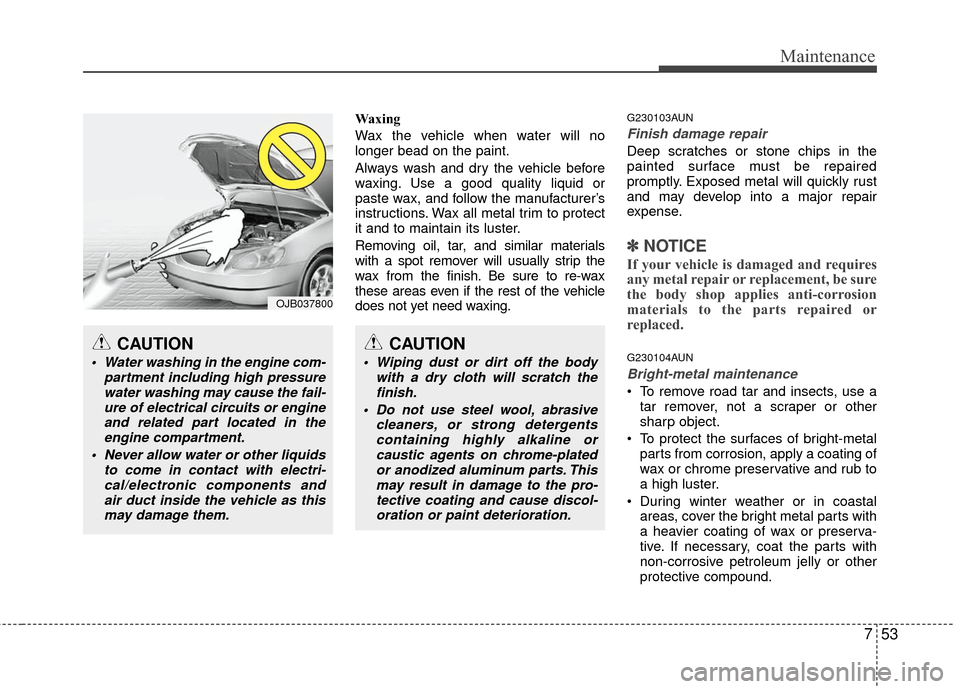
Water washing in the engine com- partment including high pressurewater washing may cause the fail-ure of electrical circuits or engineand related part located in theengine compartment.
Never allow water or other liquids to come in contact with electri-cal/electronic components andair duct inside the vehicle as thismay damage them.
OJB037800
Page 329 of 336
Specifications, Consumer information
48
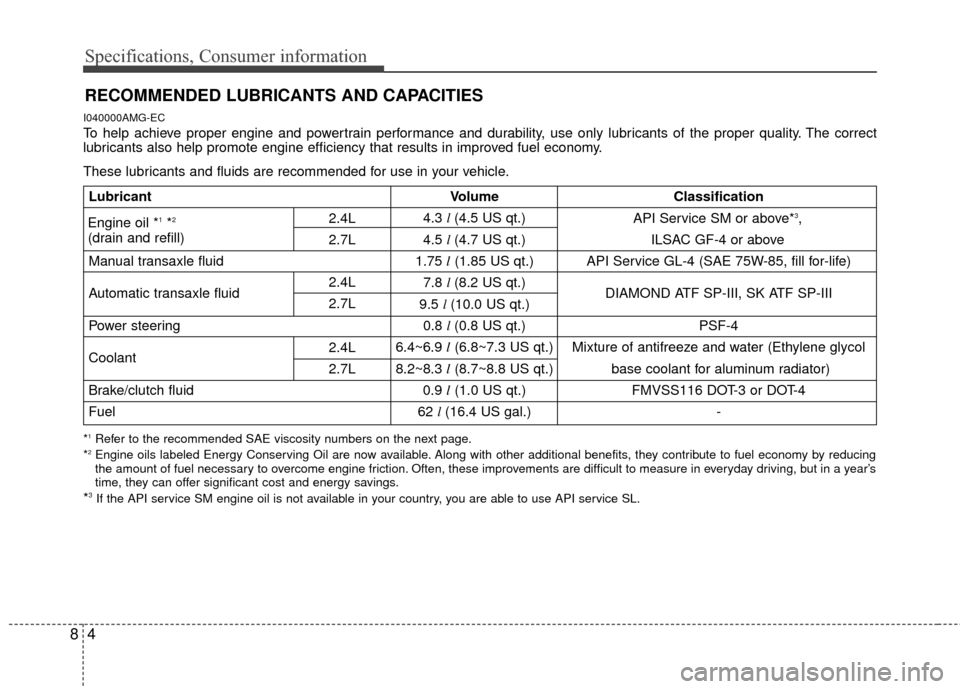
RECOMMENDED LUBRICANTS AND CAPACITIES
I040000AMG-EC
To help achieve proper engine and powertrain performance and durability, use only lubricants of the proper quality. The correct
lubricants also help promote engine efficiency that results in improved fuel economy.
These lubricants and fluids are recommended for use in your vehicle.
*1Refer to the recommended SAE viscosity numbers on the next page.
*2Engine oils labeled Energy Conserving Oil are now available. Along with other additional benefits, they contribute to fuel econo my by reducing
the amount of fuel necessary to overcome engine friction. Often, these improvements are difficult to measure in everyday driving, but in a year’s
time, they can offer significant cost and energy savings.
*3If the API service SM engine oil is not available in your country, you are able to use API service SL.
Lubricant Volume Classification
4.3 l (4.5 US qt.)
4.5 l (4.7 US qt.)
Manual transaxle fluid 1.75 l(1.85 US qt.) API Service GL-4 (SAE 75W-85, fill for-life)
Automatic transaxle fluid 7.8
l (8.2 US qt.)
DIAMOND ATF SP-III, SK ATF SP-III
9.5 l (10.0 US qt.)
Power steering 0.8 l (0.8 US qt.) PSF-4
6.4~6.9 l(6.8~7.3 US qt.) Mixture of antifreeze and water (Ethylene glycol
Coolant 8.2~8.3 l(8.7~8.8 US qt.) base coolant for aluminum radiator)
Brake/clutch fluid 0.9 l(1.0 US qt.) FMVSS116 DOT-3 or DOT-4
Fuel 62 l (16.4 US gal.) -
Engine oil *1*2
(drain and refill) API Service SM or above*
3,
ILSAC GF-4 or above
2.4L
2.7L 2.4L
2.7L
2.4L
2.7L
Page 330 of 336
85
Specifications, Consumer information
I040100AUN-EU
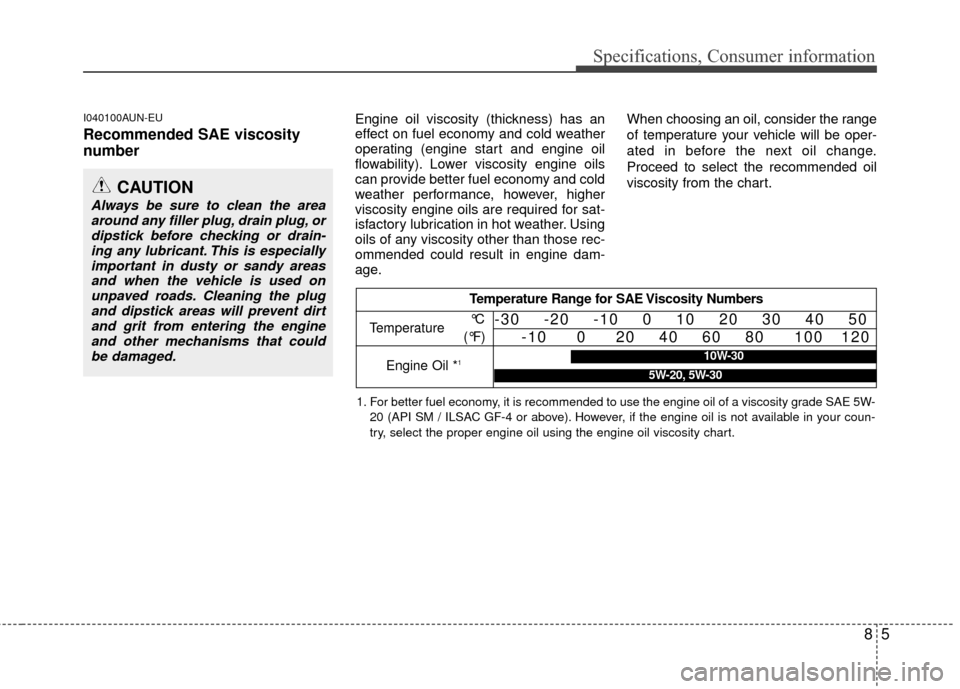
Recommended SAE viscosity
number
Engine oil viscosity (thickness) has an
effect on fuel economy and cold weather
operating (engine start and engine oil
flowability). Lower viscosity engine oils
can provide better fuel economy and cold
weather performance, however, higher
viscosity engine oils are required for sat-
isfactory lubrication in hot weather. Using
oils of any viscosity other than those rec-
ommended could result in engine dam-
age.When choosing an oil, consider the range
of temperature your vehicle will be oper-
ated in before the next oil change.
Proceed to select the recommended oil
viscosity from the chart.
CAUTION
Always be sure to clean the area
around any filler plug, drain plug, ordipstick before checking or drain-ing any lubricant. This is especiallyimportant in dusty or sandy areasand when the vehicle is used onunpaved roads. Cleaning the plugand dipstick areas will prevent dirt and grit from entering the engineand other mechanisms that couldbe damaged.
Temperature Range for SAE Viscosity Numbers
Temperature
Engine Oil *
1
°C
(°F)-30 -20 -10 0 10 20 30 40 50 -10 0 20 40 60 80 100 120
1. For better fuel economy, it is recommended to use the engine oil of a viscosity grade SAE 5W-
20 (API SM / ILSAC GF-4 or above). However, if the engine oil is not available in your coun-
try, select the proper engine oil using the engine oil viscosity chart.
10W-30
5W-20, 5W-30
Page 334 of 336

Index
2I
Air bag - supplemental restraint system ··················\
······3-34
Air cleaner ··················\
··················\
··················\
···············7-24
Appearance care··················\
··················\
··················\
·······7-52
Audio system ··················\
··················\
··················\
···········4-99
Automatic climate control system ··················\
···············4-82
Automatic transaxle ··················\
··················\
··················\
·5-14
Automatic transaxle fluid ··················\
··················\
··········7-21
Battery··················\
··················\
··················\
··················\
····7-27
Before driving ··················\
··················\
··················\
············5-3
Brake fluid ··················\
··················\
··················\
···············7-19
Brake system··················\
··················\
··················\
············5-20
Bulb wattage ··················\
··················\
··················\
··············8-2
Child restraint system ··················\
··················\
················3-26
Climate control air filter ··················\
··················\
············7-24
Cruise control system ··················\
··················\
················5-30
Defroster ··················\
··················\
··················\
··················\
4-71Dimensions ··················\
··················\
··················\
················8-2
Door locks··················\
··················\
··················\
················4-16
Economical operation ··················\
··················\
················5-34
Emergency starting ··················\
··················\
··················\
····6-4
Emission control system ··················\
··················\
············7-58
Engine compartment ··················\
··················\
············2-4, 7-2
Engine coolant ··················\
··················\
··················\
·········7-16
Engine number ··················\
··················\
··················\
···········8-7
Engine oil ··················\
··················\
··················\
·················7-15\
Engine START/STOP button ··················\
··················\
·······5-7
Explanation of scheduled maintenance items ···············7-12
Fuel filler lid ··················\
··················\
··················\
············4-28
Fuel requirements ··················\
··················\
··················\
······1-3
Fuses ··················\
··················\
··················\
··················\
······7-43
Hazard warning flasher ··················\
··················\
··············4-61
Hood··················\
··················\
··················\
··················\
·······4-27
How to use this manual ··················\
··················\
···············1-2
A
E
F
H
B
C
D