Break KIA MOHAVE 2014 Owners Manual
[x] Cancel search | Manufacturer: KIA, Model Year: 2014, Model line: MOHAVE, Model: KIA MOHAVE 2014Pages: 417, PDF Size: 38.72 MB
Page 7 of 417
1
How to use this manual / 1-2
Fuel requirements / 1-2
Vehicle handling instructions / 1-5
Vehicle break-in process / 1-5Indicator symbols on the instrument cluster / 1-6
Introduction
Page 11 of 417
15
Introduction
Biodiesel (for New Zealand)
Commercially supplied Diesel blends of no more than 7% biodiesel, commonly
known as "B7 Diesel" may be used in
your vehicle if Biodiesel meets EN 14214
or equivalent specifications. (EN stands
for "European Norm"). The use of biofu-
els exceeding 7%, made from rapeseed
methyl ester (RME), vegetable oil methyl
ester (VME) etc. or mixing diesel exceed-ing 7% with biodiesel will cause
increased wear or damage to the engine
and fuel system. Repair or replacement
of worn or damaged components due to
the use of non approved fuels will not be
covered by the manufactures warranty.A090000AEN
As with other vehicles of this type, failure
to operate this vehicle correctly mayresult in loss of control, an accident or
vehicle rollover.
Specific design characteristics (higher
ground clearance, track, etc.) give this
vehicle a higher center of gravity than
other types of vehicles. In other words
they are not designed for cornering at the
same speeds as conventional 2-wheel
drive vehicles. Avoid sharp turns or
abrupt maneuvers. Again, failure to oper-
ate this vehicle correctly may result in
loss of control, an accident or vehicle
rollover.
Be sure to read the “Reducing
the risk of a rollover” driving guide-
lines, in section 5 of this manual. A030000AUN
No special break-in period is needed. By
following a few simple precautions for the
first 1,000 km (600 miles) you may add to
the performance, economy and life of
your vehicle.
Do not race the engine.
While driving, keep your engine speed
(rpm, or revolutions per minute)
between 2,000 rpm and 4,000 rpm.
Do not maintain a single speed for long
periods of time, either fast or slow.
Varying engine speed is needed to
properly break-in the engine.
Avoid hard stops, except in emergen- cies, to allow the brakes to seat prop-
erly.
Don't let the engine idle longer than 3 minutes at one time.
Don't tow a trailer during the first 2,000
km (1,200 miles) of operation.
CAUTION
Never use any fuel, whether
diesel, B7 biodiesel or otherwise,
that fails to meet the latest petro-leum industry specification.
Never use any fuel additives or treatments that are not recom-mended or approved by the vehi-
cle manufacturer.
VEHICLE HANDLING
INSTRUCTIONS VEHICLE BREAK-IN PROCESS
Page 39 of 417

Safety features of your vehicle
22
3
C020101AEN-EE
Seat belt warning
As a reminder to the driver, the seat belt
warning light will blink for approximately
6 seconds each time you turn the ignition
switch ON regardless of belt fastening.
If the driver’s seat belt is unfastened after
the ignition switch is ON, the seat belt
warning light blinks again for approxi-
mately 6 seconds.
If the driver's seat belt is not fastened
when the ignition switch is turned ON or
if it is unfastened after the ignition switch
is ON, the seat belt warning chime will
sound for approximately 6 seconds. At
this time, if the seat belt is fastened, the
chime will stop at once. C020102BHM
Lap/shoulder belt
To fasten your seat belt:
To fasten your seat belt, pull it out of the
retractor and insert the metal tab (1) into
the buckle (2). There will be an audible
"click" when the tab locks into the buckle. The seat belt automatically adjusts to the proper length only after the lap belt por-
tion is adjusted manually so that it fits
snugly around your hips. If you lean for-
ward in a slow, easy motion, the belt will
extend and let you move around. If there
is a sudden stop or impact, however, the
belt will lock into position. It will also lock
if you try to lean forward too quickly.
1GQA2083B180A01NF-1
WARNING
No modifications or additions should be made by the user
which will either prevent the seat
belt adjusting devices from oper-
ating to remove slack, or prevent
the seat belt assembly from being
adjusted to remove slack.
When you fasten the seat belt, be careful not to latch the seat belt in
buckles of other seat. It's very dan-
gerous and you may not be pro-
tected by the seat belt properly.
Do not unfasten the seat belt and do not fasten and unfasten the
seat belt repeatedly while driving.This could result in loss of con-
trol, and an accident causing
death, serious injury, or property
damage.
When fastening the seat belt, make sure that the seat belt does
not pass over objects that are
hard or can break easily.
Make sure there is nothing in the buckle. The seat belt may not be
fastened securely.
Page 55 of 417
Safety features of your vehicle
38
3
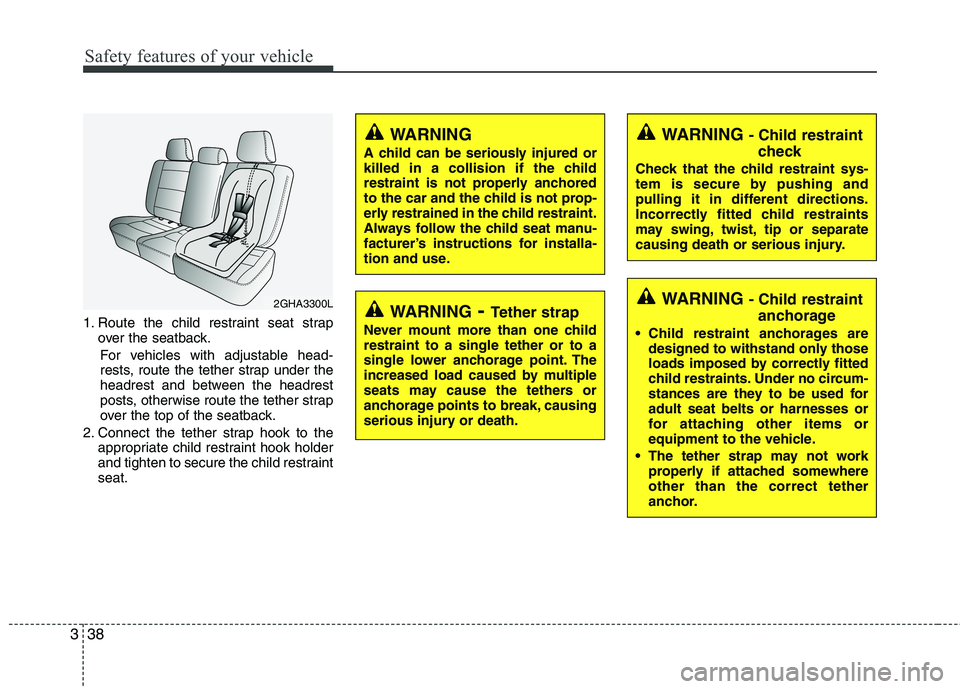
1. Route the child restraint seat strap
over the seatback.
For vehicles with adjustable head-
rests, route the tether strap under the
headrest and between the headrest
posts, otherwise route the tether strap
over the top of the seatback.
2. Connect the tether strap hook to the appropriate child restraint hook holder
and tighten to secure the child restraintseat.
2GHA3300LWARNING - Tether strap
Never mount more than one child restraint to a single tether or to a
single lower anchorage point. The
increased load caused by multiple
seats may cause the tethers or
anchorage points to break, causing
serious injury or death.
WARNING
A child can be seriously injured or
killed in a collision if the child
restraint is not properly anchored
to the car and the child is not prop-
erly restrained in the child restraint.
Always follow the child seat manu-
facturer’s instructions for installa-
tion and use.WARNING - Child restraint
check
Check that the child restraint sys-
tem is secure by pushing and
pulling it in different directions.
Incorrectly fitted child restraints
may swing, twist, tip or separate
causing death or serious injury.
WARNING - Child restraint
anchorage
Child restraint anchorages are designed to withstand only those
loads imposed by correctly fitted
child restraints. Under no circum-
stances are they to be used foradult seat belts or harnesses or
for attaching other items or
equipment to the vehicle.
The tether strap may not work properly if attached somewhereother than the correct tether
anchor.
Page 57 of 417
Safety features of your vehicle
40
3
To secure the child restraint seat
1. To engage the child restraint seat to
the ISOFIX anchor, insert the child
restraint seat latch into the ISOFIX
anchor. Listen for the audible “click”sound.
2. Connect the tether strap hook to the child restraint hook holder and tighten
to secure the seat. (Refer to the previ-
ous page.)
WARNING
When using the vehicle's "ISOFIX" system to install a child restraint system in the rear seat,
all unused vehicle rear seat belt
metal latch plates or tabs must be
latched securely in their seat belt
buckles and the seat belt web-
bing must be retracted behind
the child restraint to prevent the
child from reaching and takinghold of unretracted seat belts.
Unlatched metal latch plates or
tabs may allow the child to reach
the unretracted seat belts which
may result in strangulation and a
serious injury or death to the
child in the child restraint.
Do not place anything around the lower anchors. Also make surethat the seat belt is not caught in
the lower anchors.
WARNING
Install the child restraint seat fully
rearward against the seatback with
the seatback reclined two positions
from the most upright latched posi-tion.
WARNING
Do not install a child restraint seat at the center of the rear seat
using the vehicle's ISOFIX
anchors. The ISOFIX anchors are
only provided for the left and
right outboard rear seating posi-
tions. Do not misuse the ISOFIX
anchors by attempting to attach a
child restraint seat in the middleof the rear seat to the ISOFIX
anchors.
(Continued)
(Continued)In a crash, the child restraint seat
ISOFIX attachments may not be
strong enough to secure the child
restraint seat properly in the cen-
ter of the rear seat and may
break, causing serious injury ordeath.
Do not mount more than one child restraint to a child restraint
lower anchorage point. The
improper increased load may
cause the anchorage points or
tether anchor to break, causing
serious injury or death.
Attach the ISOFIX or ISOFIX-com- patible child restraint seat only to
the appropriate locations shownin the illustration.
Always follow the installation and use instructions provided by the
manufacturer of the childrestraint.
CAUTION
Do not allow the rear seat belt web-
bing to get scratched or pinched by
the ISOFIX-seat latch and ISOFIXanchor during installation.
Page 103 of 417

Features of your vehicle
26
4
D100100AHM Opening the fuel filler lid
The fuel filler lid must be opened from
inside the vehicle by pulling out the fuel
filler lid opener located on the driver’s
door.
✽✽
NOTICE
If the fuel filler lid does not open
because ice has formed around it, tap
lightly or push on the lid to break the ice
and release the lid. Do not pry on the lid.
If necessary, spray around the lid with
an approved de-icer fluid (do not use
radiator anti-freeze) or move the vehicle
to a warm place and allow the ice to
melt.
1. Stop the engine.
2. To open the fuel filler lid, pull the fuel filler lid opener up.
3. Pull open the fuel filler lid (1).
4. To remove the cap, turn the fuel filler cap (2) counterclockwise.
5. Refuel as needed. D100200AUN Closing the fuel filler lid
1. To install the cap, turn it clockwise until
it “clicks”. This indicates that the cap is securely tightened.
2. Close the fuel filler lid and push it light- ly and make sure that it is securelyclosed.
D100300BHM
FUEL FILLER LID
OHM048021NOHM048022WARNING
- Refueling
If pressurized fuel sprays out, it can cover your clothes or skin
and subject you to the risk of fire
and burns. Always remove the
fuel cap carefully and slowly. If
the cap is venting fuel or if you
hear a hissing sound, wait until
the condition stops before com-
pletely removing the cap.
Do not "top off" after the nozzle automatically shuts off whenrefueling.
Always check that the fuel cap is installed securely to prevent fuel
spillage in the event of an acci-dent.
Page 105 of 417

Features of your vehicle
28
4
D100500AHM
Emergency fuel filler lid release If the fuel filler lid does not open using
the remote fuel filler lid release, you can
open it manually. Remove the panel in
the luggage compartment area. Pull the
handle out slightly.
(Continued)
If a fire breaks out during refuel-
ing, leave the vicinity of the vehi-
cle, and immediately contact the
manager of the gas station and
then contact the local fire depart-
ment. Follow any safety instruc-
tions they provide.
CAUTION
Make sure to refuel your vehicle
according to the “Fuel
requirments” suggested in sec- tion 1.
If the fuel filler cap requires replacement, use only a genuineKia cap or the equivalent speci-
fied for your vehicle. An incorrectfuel filler cap can result in a seri- ous malfunction of the fuel sys-tem or emission control system.
Do not spill fuel on the exterior surfaces of the vehicle. Any typeof fuel spilled on painted surfacesmay damage the paint.
After refueling, make sure the fuel cap is installed securely to pre-
vent fuel spillage in the event of an accident.
CAUTION
Do not pull the handle excessively, otherwise the luggage compart-
ment area trim or release handle may be damaged.
OHM048023
OHM048023N
■ Type A
■ Type B
Page 114 of 417

437
Features of your vehicle
D130100AHM
Power steering
Power steering uses energy from the
engine to assist you in steering the vehi-
cle. If the engine is off or if the power
steering system becomes inoperative,
the vehicle may still be steered, but it will
require increased steering effort.
Should you notice any change in the
effort required to steer during normal
vehicle operation, have the power steer-
ing checked by an authorized Kia dealer.✽✽NOTICE
If the power steering drive belt breaks
or if the power steering pump malfunc-
tions, the steering effort will greatly
increase.
✽
✽ NOTICE
If the vehicle is parked for extended
periods outside in cold weather (below
-10°C(14°F)), the power steering may
require increased effort when the engine
is first started. This is caused by
increased fluid viscosity due to the cold
weather and does not indicate a mal-
function.
When this happens, increase the engine
RPM by depressing the accelerator until
the RPM reaches 1,500 rpm then release
or let the engine idle for two or three
minutes to warm up the fluid.
D130300AEN Tilt steering
Tilt steering allows you to adjust the
steering wheel before you drive. You can
also raise it to give your legs more room
when you exit and enter the vehicle.
The steering wheel should be positioned
so that it is comfortable for you to drive,
while permitting you to see the instru-
ment panel warning lights and gauges.
STEERING WHEEL
CAUTION
Never hold the steering wheel to the
extreme right or left for more than 5
seconds with the engine running.Holding the steering wheel for morethan 5 seconds in either positionmay cause damage to the power
steering pump.
WARNING
Never adjust the angle of the steering wheel while driving. You
may lose steering control and
cause severe personal injury,death or accidents.
After adjusting, push the steering wheel both up and down to be
certain it is locked in position.
Page 136 of 417
459
Features of your vehicle
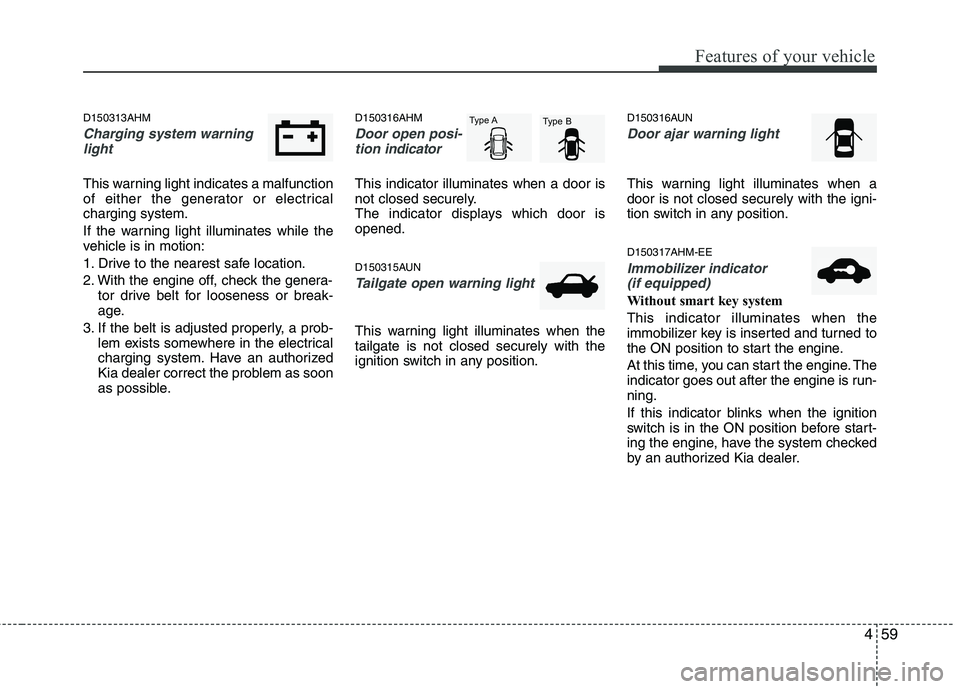
D150313AHM
Charging system warninglight
This warning light indicates a malfunction
of either the generator or electricalcharging system.
If the warning light illuminates while the
vehicle is in motion:
1. Drive to the nearest safe location.
2. With the engine off, check the genera- tor drive belt for looseness or break-
age.
3. If the belt is adjusted properly, a prob- lem exists somewhere in the electrical
charging system. Have an authorized
Kia dealer correct the problem as soon
as possible. D150316AHM
Door open posi-
tion indicator
This indicator illuminates when a door is
not closed securely.
The indicator displays which door isopened.
D150315AUN
Tailgate open warning light
This warning light illuminates when the tailgate is not closed securely with the
ignition switch in any position. D150316AUN
Door ajar warning light
This warning light illuminates when a door is not closed securely with the igni-
tion switch in any position. D150317AHM-EE
Immobilizer indicator
(if equipped)
Without smart key system This indicator illuminates when the
immobilizer key is inserted and turned to
the ON position to start the engine.
At this time, you can start the engine. The
indicator goes out after the engine is run-ning.
If this indicator blinks when the ignition
switch is in the ON position before start-
ing the engine, have the system checked
by an authorized Kia dealer.
Type A Type B
Page 192 of 417
4115
Features of your vehicle
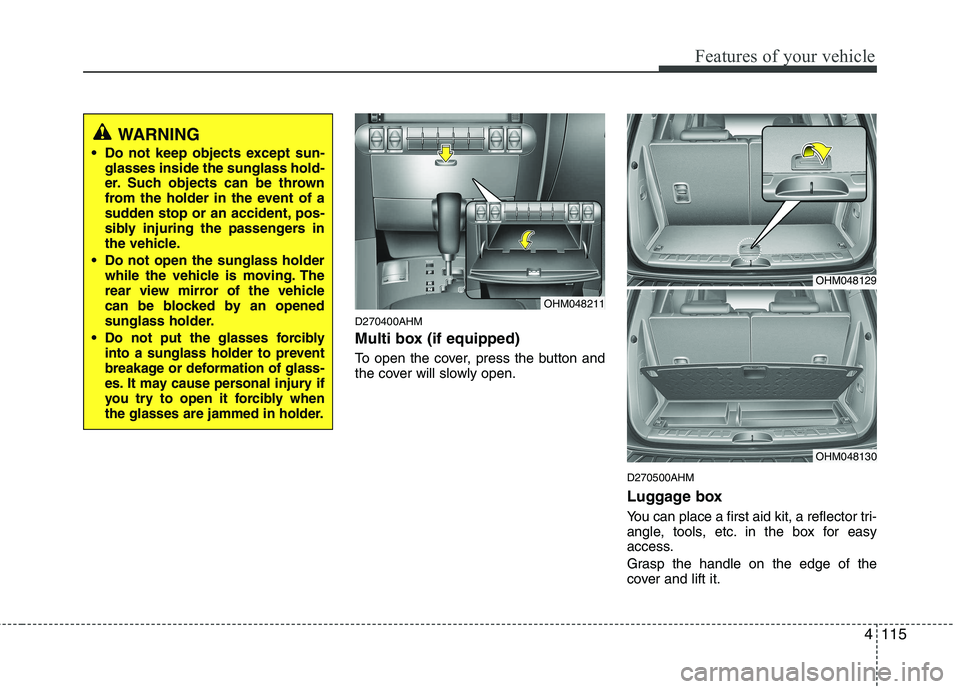
D270400AHM
Multi box (if equipped)
To open the cover, press the button and
the cover will slowly open.D270500AHM
Luggage box
You can place a first aid kit, a reflector tri-
angle, tools, etc. in the box for easy
access.
Grasp the handle on the edge of the
cover and lift it.
OHM048129
OHM048130
WARNING
Do not keep objects except sun- glasses inside the sunglass hold-
er. Such objects can be thrown
from the holder in the event of a
sudden stop or an accident, pos-
sibly injuring the passengers in
the vehicle.
Do not open the sunglass holder while the vehicle is moving. The
rear view mirror of the vehicle
can be blocked by an opened
sunglass holder.
Do not put the glasses forcibly
into a sunglass holder to prevent
breakage or deformation of glass-
es. It may cause personal injury if
you try to open it forcibly when
the glasses are jammed in holder.
OHM048211