fuel KIA NIRO 2017 Owner's Guide
[x] Cancel search | Manufacturer: KIA, Model Year: 2017, Model line: NIRO, Model: KIA NIRO 2017Pages: 552, PDF Size: 14.92 MB
Page 372 of 552
Driving your vehicle
84
6
Highway driving
Tires
Adjust the tire inflation pressures to
specification. Low tire inflation pres-
sures will result in overheating and
possible failure of the tires.
Avoid using worn or damaged tires
which may result in reduced traction
or tire failure.
Never exceed the maximum tire
inflation pressure shown on the tires.
Fuel, engine coolant and engine oil
High speed travel consumes more
fuel than urban motoring. Do not for-
get to check both the engine coolant
and engine oil.
Drive belt
A loose or damaged drive belt may
result in overheating of the engine.
WARNING- Under/over
inflated tires
Always check the tires for proper
inflation before driving.
Underinflated or overinflated
tires can cause poor handling,
loss of vehicle control, and sud-
den tire failure leading to acci-
dents, injuries, and even death.
For proper tire pressures, refer to
“Tires and wheels” in chapter 9.
WARNING- Tire tread
Always check the tire tread
before driving your vehicle.
Worn-out tires can result in loss
of vehicle control. Worn-out tires
should be replaced as soon as
possible. For further information
and tread limits, refer to "Tires
and wheels" in chapter 8.
Page 380 of 552
Driving your vehicle
92
6
Certification label
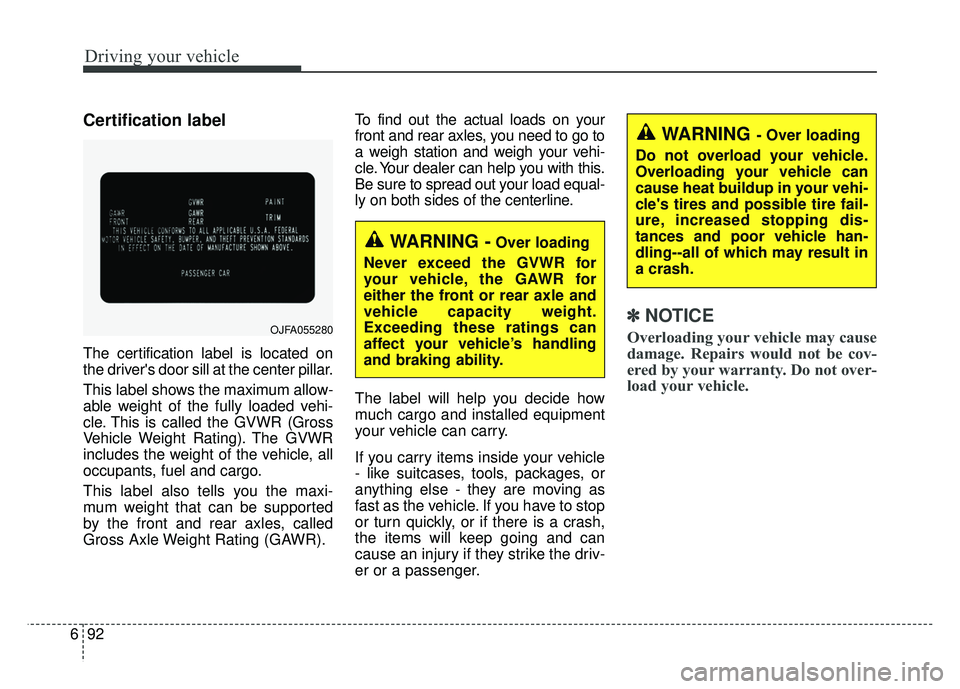
The certification label is located on
the driver's door sill at the center pillar.
This label shows the maximum allow-
able weight of the fully loaded vehi-
cle. This is called the GVWR (Gross
Vehicle Weight Rating). The GVWR
includes the weight of the vehicle, all
occupants, fuel and cargo.
This label also tells you the maxi-
mum weight that can be supported
by the front and rear axles, called
Gross Axle Weight Rating (GAWR). To find out the actual loads on your
front and rear axles, you need to go to
a weigh station and weigh your vehi-
cle. Your dealer can help you with this.
Be sure to spread out your load equal-
ly on both sides of the centerline.
The label will help you decide how
much cargo and installed equipment
your vehicle can carry.
If you carry items inside your vehicle
- like suitcases, tools, packages, or
anything else - they are moving as
fast as the vehicle. If you have to stop
or turn quickly, or if there is a crash,
the items will keep going and can
cause an injury if they strike the driv-
er or a passenger.
✽ ✽
NOTICE
Overloading your vehicle may cause
damage. Repairs would not be cov-
ered by your warranty. Do not over-
load your vehicle.OJFA055280
WARNING -Over loading
Never exceed the GVWR for
your vehicle, the GAWR for
either the front or rear axle and
vehicle capacity weight.
Exceeding these ratings can
affect your vehicle’s handling
and braking ability.
WARNING - Over loading
Do not overload your vehicle.
Overloading your vehicle can
cause heat buildup in your vehi-
cle's tires and possible tire fail-
ure, increased stopping dis-
tances and poor vehicle han-
dling--all of which may result in
a crash.
Page 381 of 552
693
Driving your vehicle
VEHICLE WEIGHT
This chapter will guide you in the
proper loading of your vehicle and/or
trailer, to keep your loaded vehicle
weight within its design rating capa-
bility, with or without a trailer. Properly
loading your vehicle will provide max-
imum return of the vehicle design
performance. Before loading your
vehicle, familiarize yourself with the
following terms for determining your
vehicle's weight ratings, with or with-
out a trailer, from the vehicle's speci-
fications and the compliance label:Base curb weight
This is the weight of the vehicle
including a full tank of fuel and all
standard equipment. It does not
include passengers, cargo, or option-
al equipment.
Vehicle curb weight
This is the weight of your new vehicle
when you picked it up from your deal-
er plus any aftermarket equipment.
Cargo weight
This figure includes all weight added
to the Base Curb Weight, including
cargo and optional equipment.
GAW (Gross axle weight)
This is the total weight placed on
each axle (front and rear) - including
vehicle curb weight and all payload.
GAWR
(Gross axle weight rating)
This is the maximum allowable
weight that can be carried by a single
axle (front or rear). These numbers
are shown on the compliance label.
The total load on each axle must
never exceed its GAWR.
GVW (Gross vehicle weight)
This is the Base Curb Weight plus
actual Cargo Weight plus passen-
gers.
GVWR
(Gross vehicle weight rating)
This is the maximum allowable
weight of the fully loaded vehicle
(including all options, equipment,
passengers and cargo). The GVWR
is shown on the certification label
located on the driver’s door sill.
Page 385 of 552
What to do in an emergency
47
IF THE ENGINE WILL NOT START
If engine doesn't turn over or
turns over slowly
1. Be sure the shift lever is in N(Neutral) or P (Park) and the
emergency brake is set.
2. Check the battery connections to be sure they are clean and tight.
3. Turn on the interior light. If the light dims or goes out when you oper-
ate the starter, the battery is dis-
charged.
4. Check the starter connections to be sure they are securely tight-
ened.
5. Do not push or pull the vehicle to start it. See instructions for "Jump
starting".
If engine turns over normally
but does not start
1. Check the fuel level.
2. With the ignition switch in theLOCK position, check all connec-
tors at the ignition coils and spark
plugs. Reconnect any that may be
disconnected or loose.
3. Check the fuel line in the engine compartment.
4. If the engine still does not start, call an authorized Kia dealer or
seek other qualified assistance.
WARNING - Push/
pull start
Do not push or pull the vehicle
to start it. Push or pull starting
may cause the catalytic con-
verter to overload and create a
fire hazard.
Page 394 of 552
713
What to do in an emergency
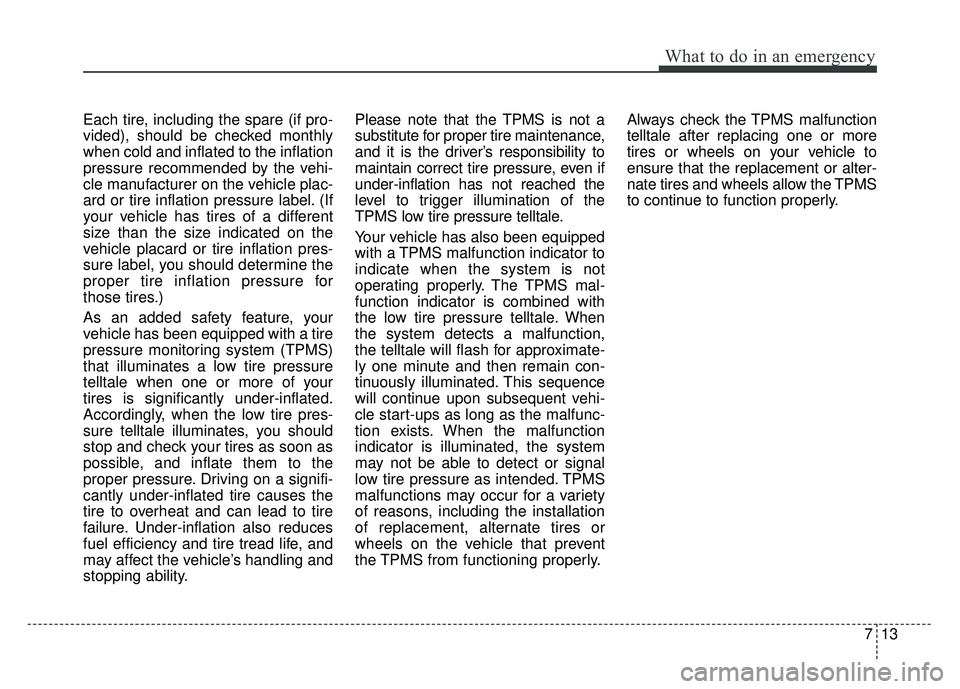
Each tire, including the spare (if pro-
vided), should be checked monthly
when cold and inflated to the inflation
pressure recommended by the vehi-
cle manufacturer on the vehicle plac-
ard or tire inflation pressure label. (If
your vehicle has tires of a different
size than the size indicated on the
vehicle placard or tire inflation pres-
sure label, you should determine the
proper tire inflation pressure for
those tires.)
As an added safety feature, your
vehicle has been equipped with a tire
pressure monitoring system (TPMS)
that illuminates a low tire pressure
telltale when one or more of your
tires is significantly under-inflated.
Accordingly, when the low tire pres-
sure telltale illuminates, you should
stop and check your tires as soon as
possible, and inflate them to the
proper pressure. Driving on a signifi-
cantly under-inflated tire causes the
tire to overheat and can lead to tire
failure. Under-inflation also reduces
fuel efficiency and tire tread life, and
may affect the vehicle’s handling and
stopping ability.Please note that the TPMS is not a
substitute for proper tire maintenance,
and it is the driver’s responsibility to
maintain correct tire pressure, even if
under-inflation has not reached the
level to trigger illumination of the
TPMS low tire pressure telltale.
Your vehicle has also been equipped
with a TPMS malfunction indicator to
indicate when the system is not
operating properly. The TPMS mal-
function indicator is combined with
the low tire pressure telltale. When
the system detects a malfunction,
the telltale will flash for approximate-
ly one minute and then remain con-
tinuously illuminated. This sequence
will continue upon subsequent vehi-
cle start-ups as long as the malfunc-
tion exists. When the malfunction
indicator is illuminated, the system
may not be able to detect or signal
low tire pressure as intended. TPMS
malfunctions may occur for a variety
of reasons, including the installation
of replacement, alternate tires or
wheels on the vehicle that prevent
the TPMS from functioning properly.
Always check the TPMS malfunction
telltale after replacing one or more
tires or wheels on your vehicle to
ensure that the replacement or alter-
nate tires and wheels allow the TPMS
to continue to function properly.
Page 425 of 552

• Radial-ply tires . . . . . . . . . . . . . . . . . . . . . . . . . . . . . . 8-56
• Low aspect ratio tire . . . . . . . . . . . . . . . . . . . . . . . . . . 8-56
Fuses . . . . . . . . . . . . . . . . . . . . . . . . . . . . . . . . . . . . \
8-58
• Inner panel fuse replacement . . . . . . . . . . . . . . . . . . . 8-59
• Engine compartment fuse replacement. . . . . . . . . . . 8-61
• Fuse/relay panel description. . . . . . . . . . . . . . . . . . . . 8-63
Light bulbs . . . . . . . . . . . . . . . . . . . . . . . . . . . . . . . 8-75
• Bulb replacement precaution . . . . . . . . . . . . . . . . . . 8-75
• Light bulb position (Front). . . . . . . . . . . . . . . . . . . . . 8-76
• Light bulb position (Rear) . . . . . . . . . . . . . . . . . . . . . 8-76
• Light bulb position (Side) . . . . . . . . . . . . . . . . . . . . . . 8-77
• Headlamp (HID type) bulb replacement . . . . . . . . . 8-77
• Headlamp (High/Low beam) bulb replacement . . . . 8-78
• Front turn signal lamp bulb replacement. . . . . . . . . 8-80
• Fog lamp/DRL bulb replacement . . . . . . . . . . . . . . . 8-80
• Stop and tail lamp bulb replacement . . . . . . . . . . . . 8-81
• Tail lamp (inside) bulb replacement . . . . . . . . . . . . . 8-82
• Stop and tail lamp (LED type) bulb replacement . . 8-83
• Back-up lamp bulb replacement . . . . . . . . . . . . . . . . 8-83
• High mounted stop lamp bulb replacement . . . . . . . 8-84
• License plate lamp bulb replacement . . . . . . . . . . . . 8-84
• Side repeater lamp (LED type) bulb replacement . . 8-85
• Map lamp bulb replacement . . . . . . . . . . . . . . . . . . . 8-85
• Vanity mirror lamp bulb replacement . . . . . . . . . . . 8-85
• Room lamp bulb replacement . . . . . . . . . . . . . . . . . . 8-86
• Tailgate room lamp bulb replacement . . . . . . . . . . . 8-87
Appearance care . . . . . . . . . . . . . . . . . . . . . . . . . . . 8-88
• Exterior care . . . . . . . . . . . . . . . . . . . . . . . . . . . . . . . . 8-88
• Interior care . . . . . . . . . . . . . . . . . . . . . . . . . . . . . . . . . 8-93
Emission control system . . . . . . . . . . . . . . . . . . . . 8-96
• Crankcase emission control system . . . . . . . . . . . . . . 8-96
• Evaporative emission control (including ORVR:Onboard Refueling Vapor Recovery) system . . . . . 8-96
• Exhaust emission control system . . . . . . . . . . . . . . . . 8-97
California perchlorate notice . . . . . . . . . . . . . . . . 8-99
8
Page 429 of 552
Maintenance
68
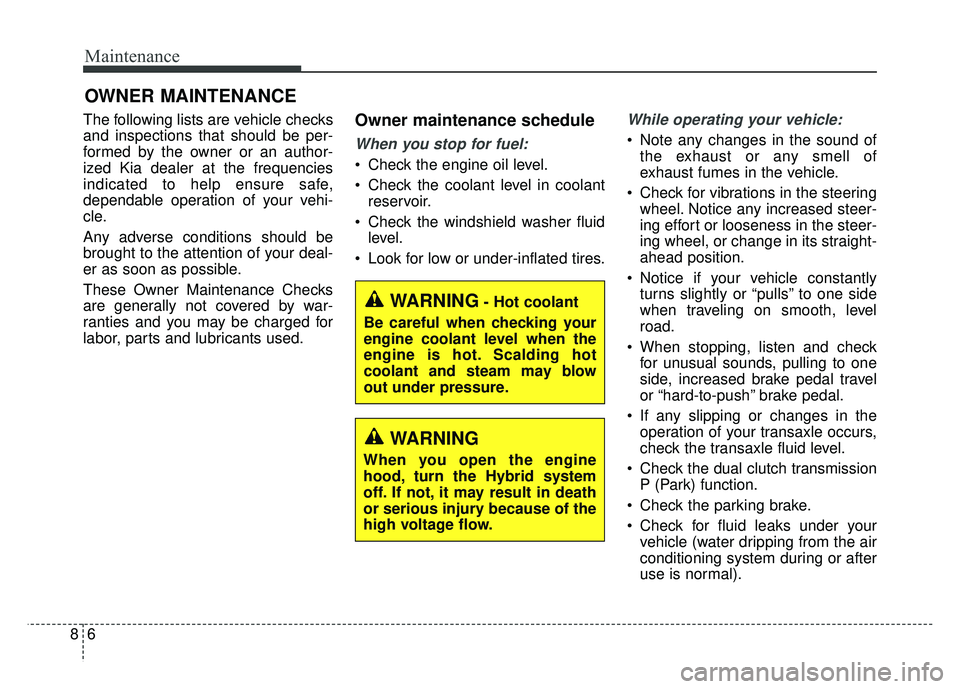
OWNER MAINTENANCE
The following lists are vehicle checks
and inspections that should be per-
formed by the owner or an author-
ized Kia dealer at the frequencies
indicated to help ensure safe,
dependable operation of your vehi-
cle.
Any adverse conditions should be
brought to the attention of your deal-
er as soon as possible.
These Owner Maintenance Checks
are generally not covered by war-
ranties and you may be charged for
labor, parts and lubricants used.Owner maintenance schedule
When you stop for fuel:
Check the engine oil level.
Check the coolant level in coolantreservoir.
Check the windshield washer fluid level.
Look for low or under-inflated tires.
While operating your vehicle:
Note any changes in the sound of the exhaust or any smell of
exhaust fumes in the vehicle.
Check for vibrations in the steering wheel. Notice any increased steer-
ing effort or looseness in the steer-
ing wheel, or change in its straight-
ahead position.
Notice if your vehicle constantly turns slightly or “pulls” to one side
when traveling on smooth, level
road.
When stopping, listen and check for unusual sounds, pulling to one
side, increased brake pedal travel
or “hard-to-push” brake pedal.
If any slipping or changes in the operation of your transaxle occurs,
check the transaxle fluid level.
Check the dual clutch transmission P (Park) function.
Check the parking brake.
Check for fluid leaks under your vehicle (water dripping from the air
conditioning system during or after
use is normal).
WARNING- Hot coolant
Be careful when checking your
engine coolant level when the
engine is hot. Scalding hot
coolant and steam may blow
out under pressure.
WARNING
When you open the engine
hood, turn the Hybrid system
off. If not, it may result in death
or serious injury because of the
high voltage flow.
Page 432 of 552
89
Maintenance
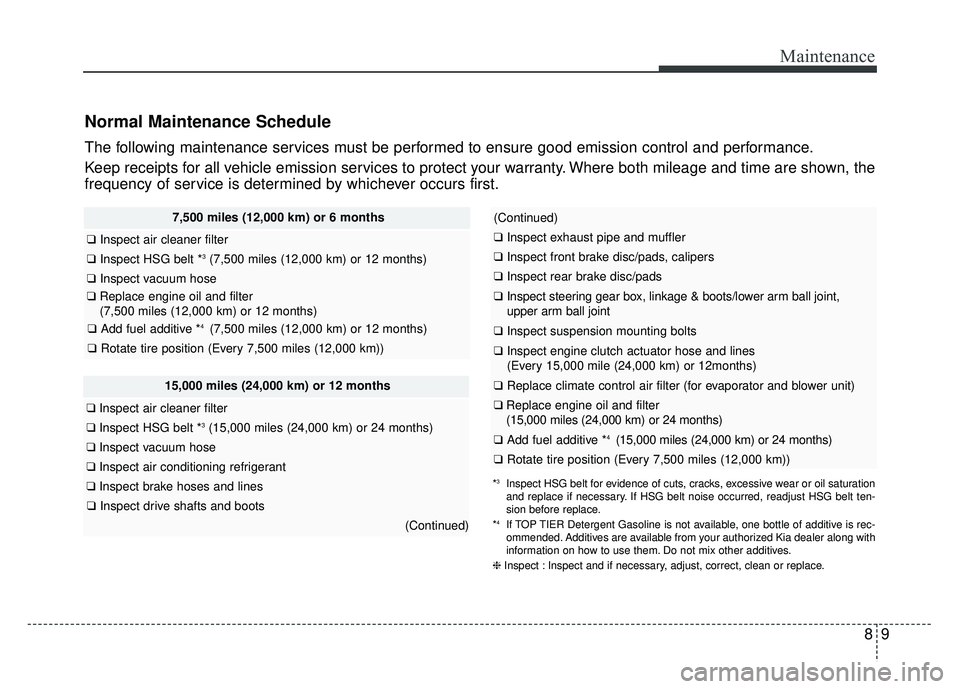
Normal Maintenance Schedule
The following maintenance services must be performed to ensure good emission control and performance.
Keep receipts for all vehicle emission services to protect your warranty. Where both mileage and time are shown, the
frequency of service is determined by whichever occurs first.
7,500 miles (12,000 km) or 6 months
❑Inspect air cleaner filter
❑Inspect HSG belt *3(7,500 miles (12,000 km) or 12 months)
❑Inspect vacuum hose
❑Replace engine oil and filter
(7,500 miles (12,000 km) or 12 months)
❑ Add fuel additive *4 (7,500 miles (12,000 km) or 12 months)
❑Rotate tire position (Every 7,500 miles (12,000 km))
15,000 miles (24,000 km) or 12 months
❑Inspect air cleaner filter
❑Inspect HSG belt *3(15,000 miles (24,000 km) or 24 months)
❑Inspect vacuum hose
❑Inspect air conditioning refrigerant
❑Inspect brake hoses and lines
❑Inspect drive shafts and boots
(Continued)
(Continued)
❑Inspect exhaust pipe and muffler
❑Inspect front brake disc/pads, calipers
❑Inspect rear brake disc/pads
❑Inspect steering gear box, linkage & boots/lower arm ball joint,
upper arm ball joint
❑ Inspect suspension mounting bolts
❑Inspect engine clutch actuator hose and lines
(Every 15,000 mile (24,000 km) or 12months)
❑ Replace climate control air filter (for evaporator and blower unit)
❑Replace engine oil and filter
(15,000 miles (24,000 km) or 24 months)
❑ Add fuel additive *4 (15,000 miles (24,000 km) or 24 months)
❑Rotate tire position (Every 7,500 miles (12,000 km))
*3Inspect HSG belt for evidence of cuts, cracks, excessive wear or oil saturation
and replace if necessary. If HSG belt noise occurred, readjust HSG belt ten-
sion before replace.
*
4If TOP TIER Detergent Gasoline is not available, one bottle of additive is rec-
ommended. Additives are available from your authorized Kia dealer along with
information on how to use them. Do not mix other additives.
❈ Inspect : Inspect and if necessary, adjust, correct, clean or replace.
Page 433 of 552
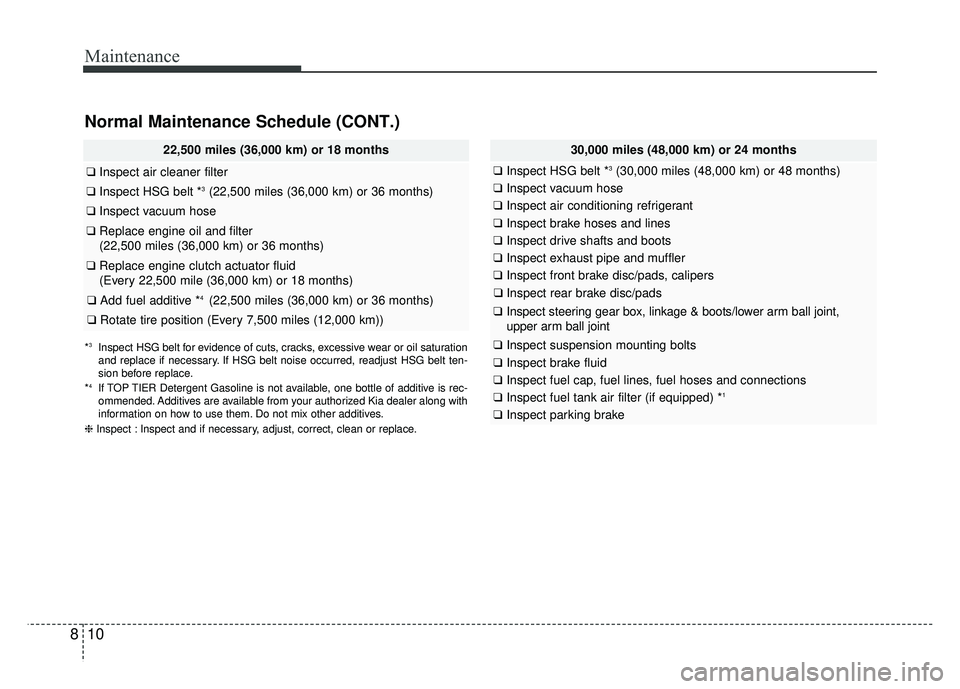
30,000 miles (48,000 km) or 24 months
❑Inspect HSG belt *3(30,000 miles (48,000 km) or 48 months)
❑Inspect vacuum hose
❑Inspect air conditioning refrigerant
❑Inspect brake hoses and lines
❑Inspect drive shafts and boots
❑Inspect exhaust pipe and muffler
❑Inspect front brake disc/pads, calipers
❑Inspect rear brake disc/pads
❑Inspect steering gear box, linkage & boots/lower arm ball joint,
upper arm ball joint
❑Inspect suspension mounting bolts
❑Inspect brake fluid
❑Inspect fuel cap, fuel lines, fuel hoses and connections
❑Inspect fuel tank air filter (if equipped) *1
❑Inspect parking brake
Maintenance
10
8
22,500 miles (36,000 km) or 18 months
❑ Inspect air cleaner filter
❑Inspect HSG belt *3(22,500 miles (36,000 km) or 36 months)
❑Inspect vacuum hose
❑Replace engine oil and filter
(22,500 miles (36,000 km) or 36 months)
❑Replace engine clutch actuator fluid
(Every 22,500 mile (36,000 km) or 18 months)
❑ Add fuel additive *4 (22,500 miles (36,000 km) or 36 months)
❑Rotate tire position (Every 7,500 miles (12,000 km))
*3Inspect HSG belt for evidence of cuts, cracks, excessive wear or oil saturation
and replace if necessary. If HSG belt noise occurred, readjust HSG belt ten-
sion before replace.
*
4If TOP TIER Detergent Gasoline is not available, one bottle of additive is rec-
ommended. Additives are available from your authorized Kia dealer along with
information on how to use them. Do not mix other additives.
❈ Inspect : Inspect and if necessary, adjust, correct, clean or replace.
Normal Maintenance Schedule (CONT.)
Page 434 of 552
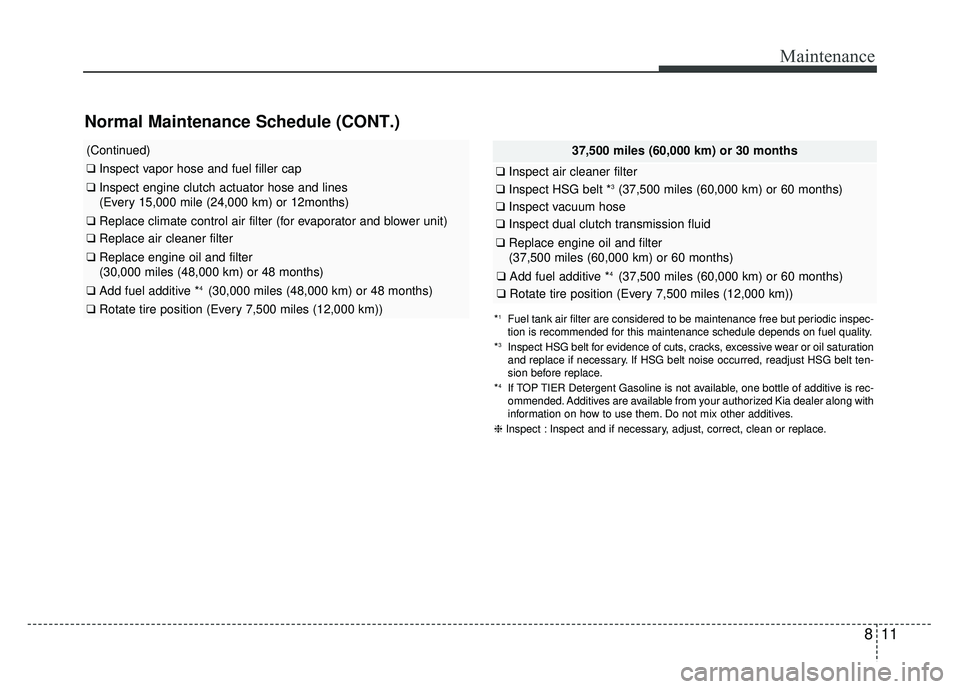
811
Maintenance
Normal Maintenance Schedule (CONT.)
37,500 miles (60,000 km) or 30 months
❑Inspect air cleaner filter
❑Inspect HSG belt *3(37,500 miles (60,000 km) or 60 months)
❑Inspect vacuum hose
❑Inspect dual clutch transmission fluid
❑Replace engine oil and filter
(37,500 miles (60,000 km) or 60 months)
❑ Add fuel additive *4 (37,500 miles (60,000 km) or 60 months)
❑Rotate tire position (Every 7,500 miles (12,000 km))
*1Fuel tank air filter are considered to be maintenance free but periodic inspec-
tion is recommended for this maintenance schedule depends on fuel quality.
*
3Inspect HSG belt for evidence of cuts, cracks, excessive wear or oil saturation
and replace if necessary. If HSG belt noise occurred, readjust HSG belt ten-
sion before replace.
*
4If TOP TIER Detergent Gasoline is not available, one bottle of additive is rec-
ommended. Additives are available from your authorized Kia dealer along with
information on how to use them. Do not mix other additives.
❈ Inspect : Inspect and if necessary, adjust, correct, clean or replace.
(Continued)
❑Inspect vapor hose and fuel filler cap
❑Inspect engine clutch actuator hose and lines
(Every 15,000 mile (24,000 km) or 12months)
❑ Replace climate control air filter (for evaporator and blower unit)
❑Replace air cleaner filter
❑Replace engine oil and filter
(30,000 miles (48,000 km) or 48 months)
❑ Add fuel additive *4 (30,000 miles (48,000 km) or 48 months)
❑Rotate tire position (Every 7,500 miles (12,000 km))