stop start KIA NIRO PLUG-IN HYBRID 2018 Owner's Guide
[x] Cancel search | Manufacturer: KIA, Model Year: 2018, Model line: NIRO PLUG-IN HYBRID, Model: KIA NIRO PLUG-IN HYBRID 2018Pages: 616, PDF Size: 18.98 MB
Page 169 of 616
Features of your vehicle
36
4
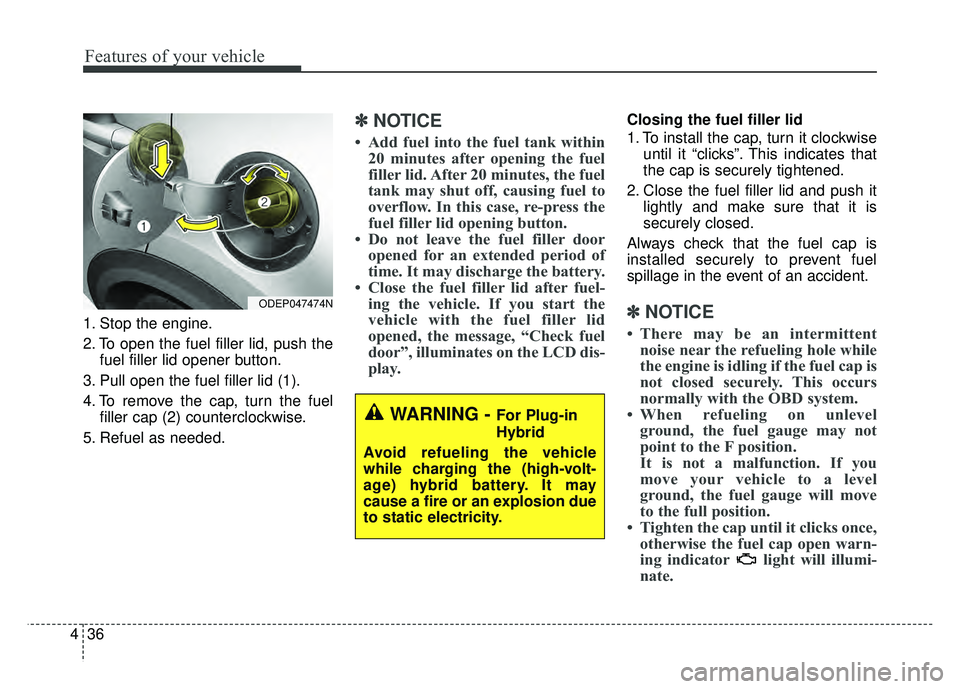
1. Stop the engine.
2. To open the fuel filler lid, push the
fuel filler lid opener button.
3. Pull open the fuel filler lid (1).
4. To remove the cap, turn the fuel filler cap (2) counterclockwise.
5. Refuel as needed.
✽ ✽ NOTICE
• Add fuel into the fuel tank within
20 minutes after opening the fuel
filler lid. After 20 minutes, the fuel
tank may shut off, causing fuel to
overflow. In this case, re-press the
fuel filler lid opening button.
• Do not leave the fuel filler door opened for an extended period of
time. It may discharge the battery.
• Close the fuel filler lid after fuel- ing the vehicle. If you start the
vehicle with the fuel filler lid
opened, the message, “Check fuel
door”, illuminates on the LCD dis-
play.
Closing the fuel filler lid
1. To install the cap, turn it clockwise
until it “clicks”. This indicates that
the cap is securely tightened.
2. Close the fuel filler lid and push it lightly and make sure that it is
securely closed.
Always check that the fuel cap is
installed securely to prevent fuel
spillage in the event of an accident.
✽ ✽ NOTICE
• There may be an intermittent
noise near the refueling hole while
the engine is idling if the fuel cap is
not closed securely. This occurs
normally with the OBD system.
• When refueling on unlevel ground, the fuel gauge may not
point to the F position.
It is not a malfunction. If you
move your vehicle to a level
ground, the fuel gauge will move
to the full position.
• Tighten the cap until it clicks once, otherwise the fuel cap open warn-
ing indicator light will illumi-
nate.
WARNING - For Plug-in
Hybrid
Avoid refueling the vehicle
while charging the (high-volt-
age) hybrid battery. It may
cause a fire or an explosion due
to static electricity.
ODEP047474N
Page 177 of 616
Features of your vehicle
44
4
Electronic power steering
(EPS)
The power steering uses a motor to
assist you in steering the vehicle. If
the engine is off or if the power steer-
ing system becomes inoperative, the
vehicle may still be steered, but it will
require increased steering effort.
The EPS is controlled by a power
steering control unit which senses
the steering wheel torque and vehi-
cle speed to command the motor.
The steering becomes heavier as the
vehicle’s speed increases and
becomes lighter as the vehicle’s
speed decreases for optimum steer-
ing control.
Should you notice any change in the
effort required to steer during normal
vehicle operation, have the power
steering checked by an authorized
Kia dealer. If the Electronic Power Steering
System does not operate normally,
the warning light will illuminate on
the instrument cluster. The steering
wheel may require increased
steering effort. Take your vehicle to
an authorized Kia dealer and have
the vehicle checked as soon as
possible.
When you operate the steering wheel in low temperature, noise
may occur. If temperature rises, the
noise will likely disappear. This is a
normal condition.
When the vehicle is stationary, and the steering wheel is turned all the
way to the left or right continuous-
ly, the steering wheel becomes
harder to turn. The power assist is
limited to protect the motor from
overheating.
As time passes, the steering wheel
will return to its normal condition.
✽ ✽ NOTICE
The following symptoms may occur
during normal vehicle operation:
• The EPS warning light does not
illuminate.
• The steering gets heavy immedi- ately after turning the Engine
Start/Stop button is ON position.
This happens as the system per-
forms the EPS system diagnostics.
When the diagnostics are complet-
ed, the steering wheel will return
to its normal condition.
• A click noise may be heard from the EPS relay after turning the
Engine Start/Stop button is ON or
OFF position.
• A motor noise may be heard when the vehicle is at a stop or at a low
driving speed.
• If the Electronic Power Steering System does not operate normally,
the warning light will illuminate on
the instrument cluster. The steer-
ing wheel may become difficult to
control or operate abnormally.
Take your vehicle to an authorized
Kia dealer and have the vehicle
checked as soon as possible. (Continued)
STEERING WHEEL
Page 179 of 616
Features of your vehicle
46
4
Heated steering wheel
(if equipped)
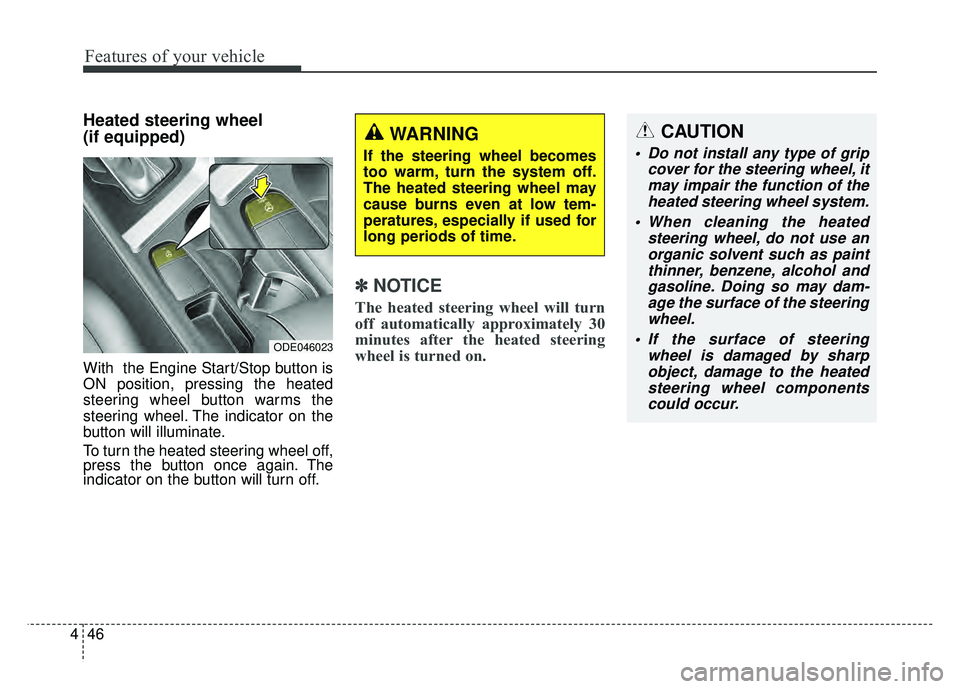
With the Engine Start/Stop button is
ON position, pressing the heated
steering wheel button warms the
steering wheel. The indicator on the
button will illuminate.
To turn the heated steering wheel off,
press the button once again. The
indicator on the button will turn off.
✽ ✽
NOTICE
The heated steering wheel will turn
off automatically approximately 30
minutes after the heated steering
wheel is turned on.
CAUTION
Do not install any type of grip
cover for the steering wheel, itmay impair the function of theheated steering wheel system.
When cleaning the heated steering wheel, do not use anorganic solvent such as paintthinner, benzene, alcohol andgasoline. Doing so may dam-age the surface of the steeringwheel.
If the surface of steering wheel is damaged by sharpobject, damage to the heatedsteering wheel componentscould occur.
ODE046023
WARNING
If the steering wheel becomes
too warm, turn the system off.
The heated steering wheel may
cause burns even at low tem-
peratures, especially if used for
long periods of time.
Page 185 of 616
Features of your vehicle
52
4
Folding the outside rearview mirror
(if equipped)
Electric type
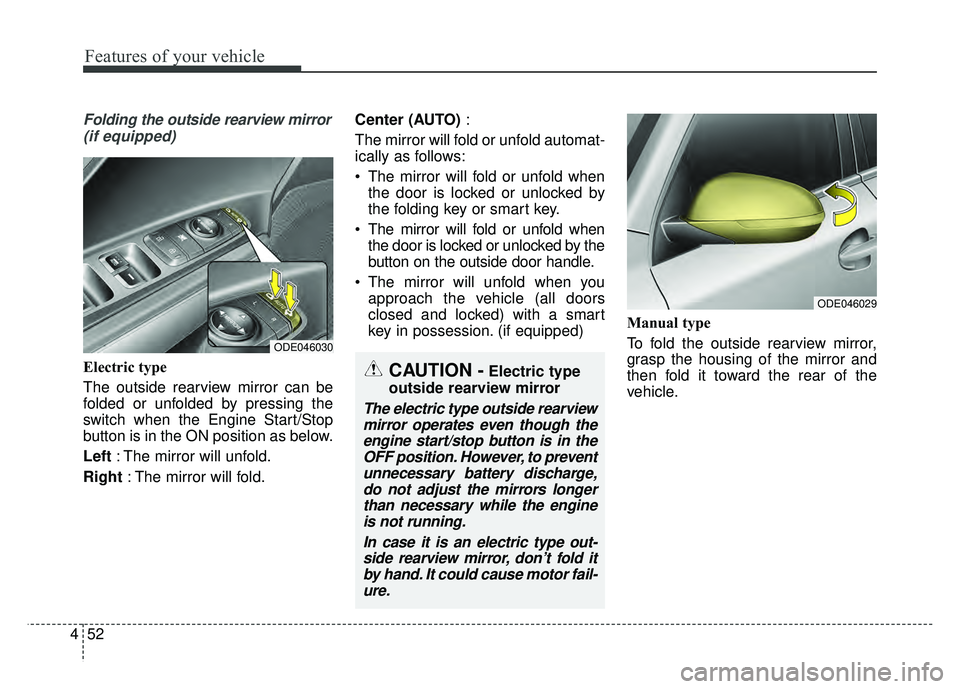
The outside rearview mirror can be
folded or unfolded by pressing the
switch when the Engine Start/Stop
button is in the ON position as below.
Left : The mirror will unfold.
Right : The mirror will fold. Center (AUTO)
:
The mirror will fold or unfold automat-
ically as follows:
The mirror will fold or unfold when the door is locked or unlocked by
the folding key or smart key.
The mirror will fold or unfold when the door is locked or unlocked by the
button on the outside door handle.
The mirror will unfold when you approach the vehicle (all doors
closed and locked) with a smart
key in possession. (if equipped) Manual type
To fold the outside rearview mirror,
grasp the housing of the mirror and
then fold it toward the rear of the
vehicle.
ODE046029
CAUTION -Electric type
outside rearview mirror
The electric type outside rearview mirror operates even though theengine start/stop button is in theOFF position. However, to preventunnecessary battery discharge,do not adjust the mirrors longerthan necessary while the engineis not running.
In case it is an electric type out-side rearview mirror, don’t fold itby hand. It could cause motor fail-ure.
ODE046030
Page 189 of 616
Features of your vehicle
56
4
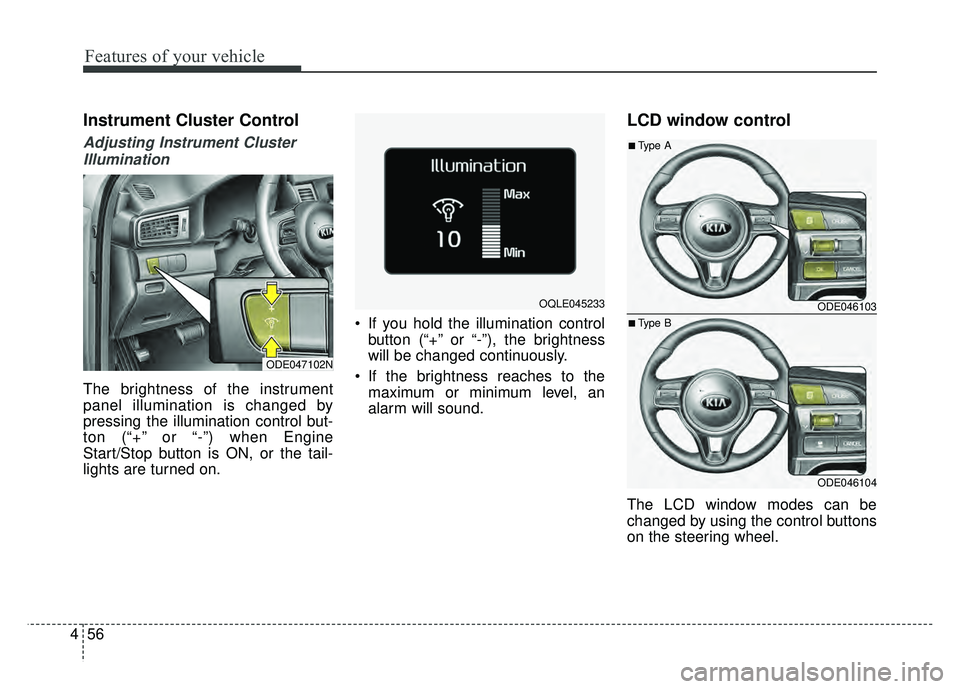
Instrument Cluster Control
Adjusting Instrument Cluster
Illumination
The brightness of the instrument
panel illumination is changed by
pressing the illumination control but-
ton (“+” or “-”) when Engine
Start/Stop button is ON, or the tail-
lights are turned on. If you hold the illumination control
button (“+” or “-”), the brightness
will be changed continuously.
If the brightness reaches to the maximum or minimum level, an
alarm will sound.
LCD window control
The LCD window modes can be
changed by using the control buttons
on the steering wheel.
ODE047102N
OQLE045233 ODE046103
ODE046104
■Type A
■Type B
Page 198 of 616
465
Features of your vehicle
Fuel Economy
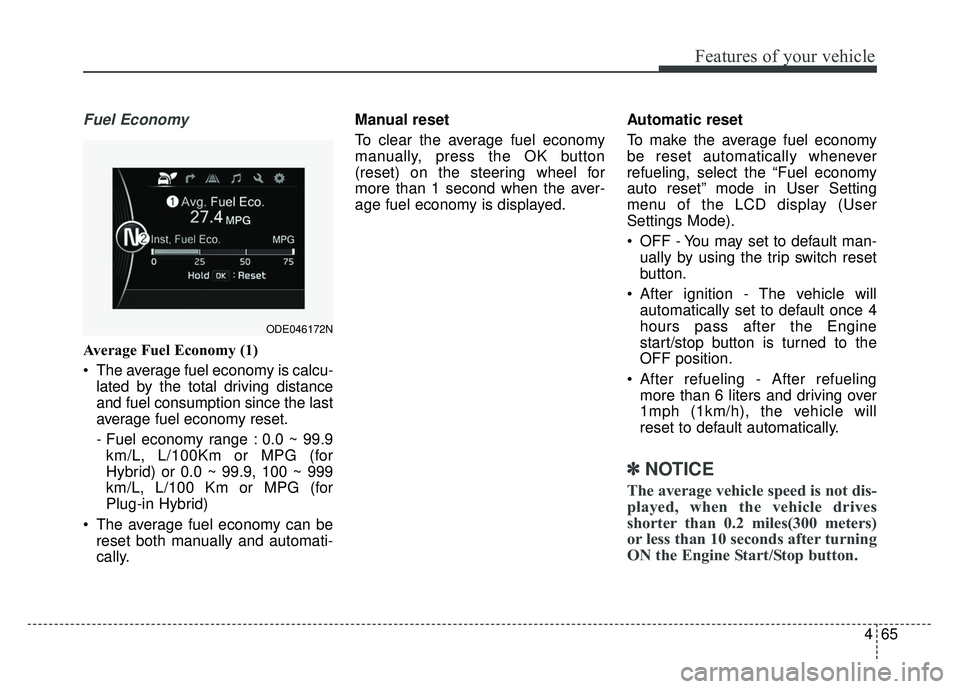
Average Fuel Economy (1)
The average fuel economy is calcu-lated by the total driving distance
and fuel consumption since the last
average fuel economy reset.
- Fuel economy range : 0.0 ~ 99.9km/L, L/100Km or MPG (for
Hybrid) or 0.0 ~ 99.9, 100 ~ 999
km/L, L/100 Km or MPG (for
Plug-in Hybrid)
The average fuel economy can be reset both manually and automati-
cally. Manual reset
To clear the average fuel economy
manually, press the OK button
(reset) on the steering wheel for
more than 1 second when the aver-
age fuel economy is displayed.
Automatic reset
To make the average fuel economy
be reset automatically whenever
refueling, select the “Fuel economy
auto reset” mode in User Setting
menu of the LCD display (User
Settings Mode).
OFF - You may set to default man-
ually by using the trip switch reset
button.
After ignition - The vehicle will automatically set to default once 4
hours pass after the Engine
start/stop button is turned to the
OFF position.
After refueling - After refueling more than 6 liters and driving over
1mph (1km/h), the vehicle will
reset to default automatically.
✽ ✽ NOTICE
The average vehicle speed is not dis-
played, when the vehicle drives
shorter than 0.2 miles(300 meters)
or less than 10 seconds after turning
ON the Engine Start/Stop button.
ODE046172N
Page 200 of 616
467
Features of your vehicle
✽
✽NOTICE
• The average vehicle speed is not
displayed if the driving distance
has been less than 0.03 miles(500
meters) or the driving time has
been less than 10 seconds since the
ignition switch or Engine
Start/Stop button was turned to
ON.
• Even if the vehicle is not in motion, the average vehicle speed
keeps going while the engine is
running.
Elapsed Time (3)
The elapsed time is the total driv-
ing time since the last elapsed time
reset.
- Time range (hh:mm): 00:00 ~99:59
To reset the elapsed time, press the OK button (reset) on the steer-
ing wheel for more than 1 second
when the elapsed time is dis-
played.
✽ ✽ NOTICE
Even if the vehicle is not in motion,
the elapsed time keeps going while
the engine is running.
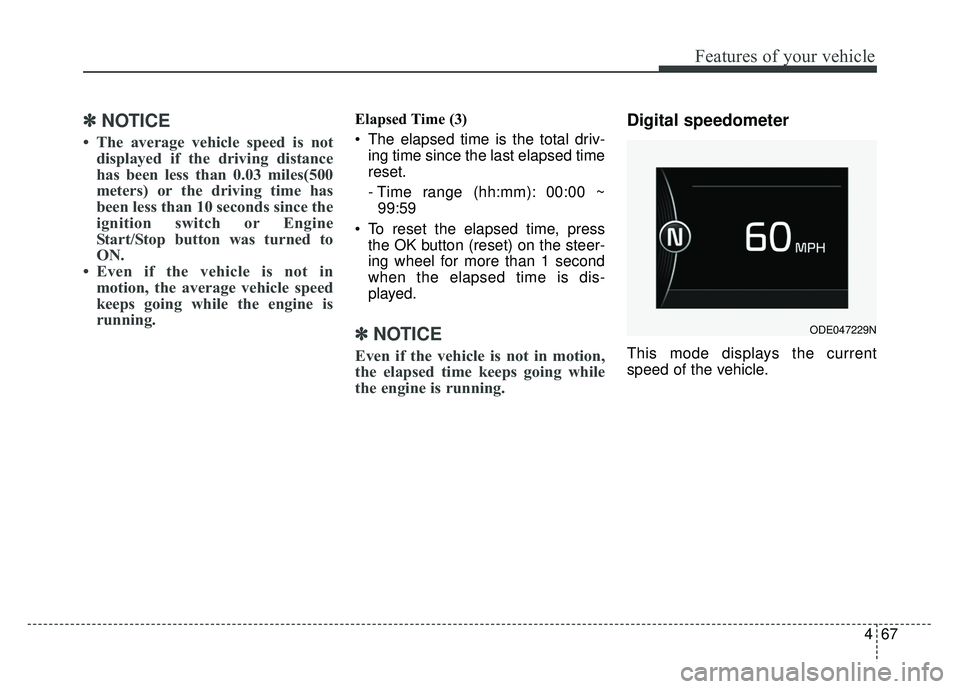
Digital speedometer
This mode displays the current
speed of the vehicle.
ODE047229N
Page 205 of 616
Features of your vehicle
72
4
Manual reset
To clear the average fuel economy
manually, press the OK button
(reset) on the steering wheel for
more than 1 second when the aver-
age fuel economy is displayed. Automatic reset
To make the average fuel economy
be reset automatically whenever
refueling, select the “Fuel economy
auto reset” mode in User Setting
menu of the LCD display (Refer to
“LCD window”).
OFF - You may set to default man-
ually by using the trip switch reset
button.
After ignition - The vehicle will automatically set to default once 4
hours pass after the Engine
start/stop button is turned to the
OFF position.
After refueling - After refueling more than 1.5 gallons (6 liters) and
driving over 1 mph (1 km/h), the
vehicle will reset to default auto-
matically.
✽ ✽ NOTICE
The average vehicle speed is not dis-
played, when the vehicle drives
shorter than 0.19 miles (300 meters)
or less than 10 seconds after turning
ON the Engine Start/Stop button.
Instant Fuel Economy (2)
This mode displays the instant fuel
economy during the last few sec-
onds when the vehicle speed is
more than 6.2 MPH (10 km/h).
- Fuel economy range : 0.0 ~ 50.0MPG or 0.0 ~ 30L/100km
Page 213 of 616
Features of your vehicle
80
4
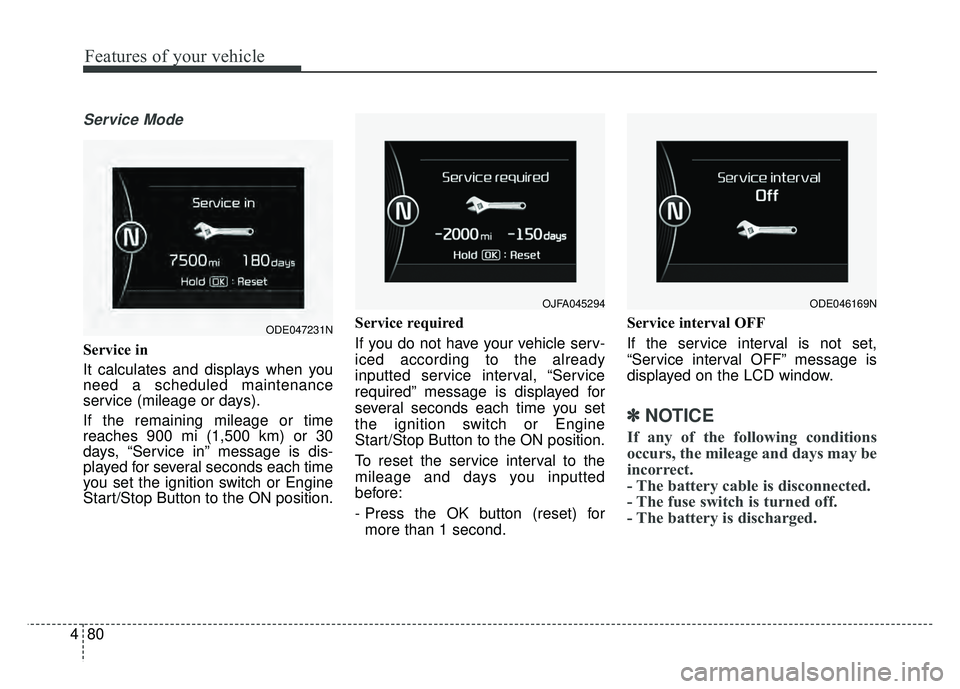
Service Mode
Service in
It calculates and displays when you
need a scheduled maintenance
service (mileage or days).
If the remaining mileage or time
reaches 900 mi (1,500 km) or 30
days, “Service in” message is dis-
played for several seconds each time
you set the ignition switch or Engine
Start/Stop Button to the ON position. Service required
If you do not have your vehicle serv-
iced according to the already
inputted service interval, “Service
required” message is displayed for
several seconds each time you set
the ignition switch or Engine
Start/Stop Button to the ON position.
To reset the service interval to the
mileage and days you inputted
before:
- Press the OK button (reset) for
more than 1 second. Service interval OFF
If the service interval is not set,
“Service interval OFF” message is
displayed on the LCD window.
✽ ✽
NOTICE
If any of the following conditions
occurs, the mileage and days may be
incorrect.
- The battery cable is disconnected.
- The fuse switch is turned off.
- The battery is discharged.
OJFA045294
ODE047231N
ODE046169N
Page 215 of 616
Features of your vehicle
82
4
Smart Cruise Control Response (if
equipped) : Choose the sensitivi-
ty(Slow/Normal/Fast) of the smart
cruise control.
❈ For more details, refer to “Smart
Cruise Control System” in chapter
6.
Autonomous Emergency Braking (if equipped) : If this item is
checked, the AEB function will be
activated.
❈ For more details, refer to
“Autonomous Emergency Braking
(AEB)” in chapter 6.
Forward Collision Warning (if equipped) : Choose the sensitivity
of the forward collision warning.
- Late/Normal/Early
❈ For more details, refer to
“Autonomous Emergency Braking
(AEB)” in chapter 6. BSD (Blind Spot Detection) Sound
(if equipped) : If this item checked,
the blind spot detection sound will
be activated.
❈ For more details, refer to “Blind Spot
Detection System” in chapter 6.
Rear Cross Traffic Alert (if equipped) : If this item is checked,
the rear cross traffic alert function
will be activate
❈ For more details, refer to “Blind Spot
Detection System” in chapter 6.
Coasting Guide (if equipped) : To activate or deactivate the Coasting
Guide system and sound.
❈ For more information, refer to
“Coasting Guide” in this chapter.
Start Coasting (if equipped) : To adjust the
sensitivity(Late/Normal/Early) of
the Coasting Guide.
❈ For more information, refer to
“Coasting Guide” in this chapter. Door
Automatic Lock
- Enable on Speed : All doors willbe automatically locked when the
vehicle speed exceeds 9.3 mph
(15 km/h).
- Enable on Shift: All doors will be automatically locked if the trans-
mission shift lever is shifted from
the P (Park) position to the R
(Reverse), N (Neutral), or D
(Drive) position.
Automatic Unlock - Disable : The auto door unlockoperation will be canceled.
- Vehicle Off : All doors will be auto- matically unlocked when the
Engine Star/Stop button is set to
the OFF position.
- On Shift to P : All doors will be auto- matically unlocked if the shift lever
is shifted to the P (Park) position.
Two Press Unlock : If this item is checked, the two press unlock will
be activated.