radio KIA Optima Hybrid 2011 3.G Owner's Manual
[x] Cancel search | Manufacturer: KIA, Model Year: 2011, Model line: Optima Hybrid, Model: KIA Optima Hybrid 2011 3.GPages: 394, PDF Size: 8.63 MB
Page 76 of 394
45
Features of your vehicle
Start-up
You can start the engine without inserting
the key. For detailed information refer to
“Starting the engine with a smart key” in
section 5.
Smart key precautions
If you lose your smart key, you will notbe able to start the hybrid system. Tow
the vehicle, if necessary, and contact
an authorized Kia dealer.
A maximum of 2 smart keys can be registered to a single vehicle. If you
lose a smart key, you should immedi-
ately take the vehicle and key to your
authorized Kia dealer to protect it from
potential theft.
The smart key will not work if any of fol- lowing occurs:
- The smart key is close to a radiotransmitter such as a radio station or
an airport which can interfere with
normal operation of the smart key.
- The smart key near a mobile two-way radio system or a cellular phone.
- Another vehicle’s smart key is being operated close to your vehicle.
When the smart key does not work cor-
rectly, open and close the door with the
mechanical key. If you have a problem
with the smart key, contact an author-
ized Kia dealer. If the smart key is in close proximity to
your cell phone or smart phone, the
signal from the smart key could be
blocked by normal operation of your
cell phone or smart phone. This is
especially important when the phone is
active such as making call, receiving
calls, text messaging, and/or send-
ing/receiving emails. Avoid placing the
smart key and your cell phone or smart
phone in the same pants or jacket
pocket and maintain adequate dis-
tance between the two devices. This device complies with industry
Canada standards RSS-210.
Operation is subject to the following two
conditions:
1. This device may not cause harmful
interference, and
2. This device must accept any interfer- ence received, including interference
that may cause undesired operation.
✽ ✽NOTICE
Changes or modifications not expressly
approved by the party responsible for
compliance could void the user’s
authority to operate the equipment. If
the keyless entry system is inoperative
due to changes or modifications not
expressly approved by the party respon-
sible for compliance, it will not be cov-
ered by your manufacturer’s vehicle
warranty.
CAUTION - Transmitter
Keep the smart key away from
water or any liquid as it canbecome damaged and not function properly.
Page 78 of 394
47
Features of your vehicle
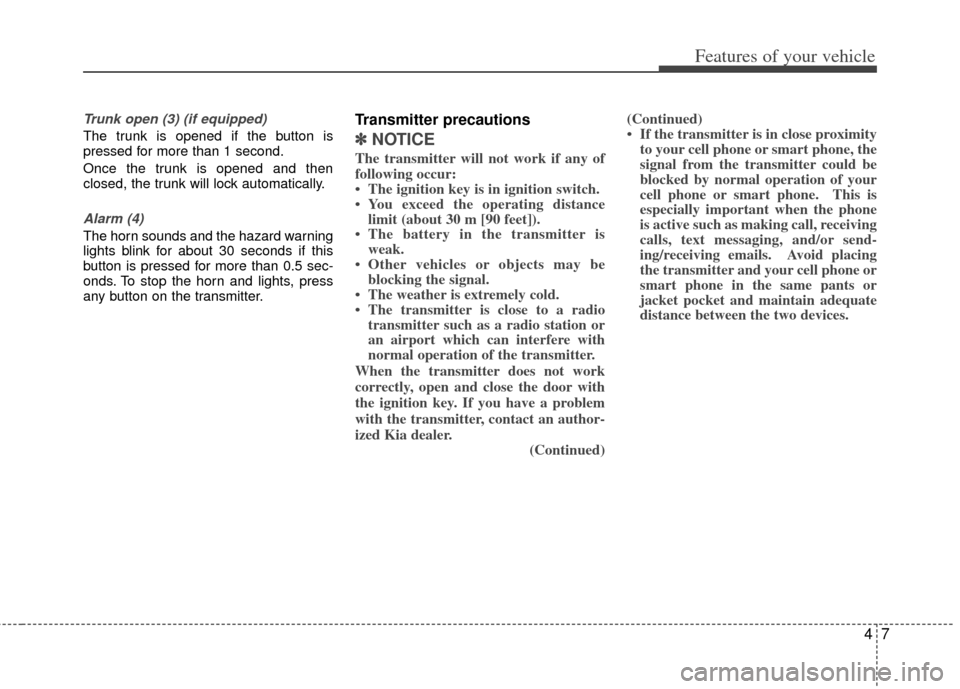
Trunk open (3) (if equipped)
The trunk is opened if the button is
pressed for more than 1 second.
Once the trunk is opened and then
closed, the trunk will lock automatically.
Alarm (4)
The horn sounds and the hazard warning
lights blink for about 30 seconds if this
button is pressed for more than 0.5 sec-
onds. To stop the horn and lights, press
any button on the transmitter.
Transmitter precautions
✽ ✽NOTICE
The transmitter will not work if any of
following occur:
• The ignition key is in ignition switch.
• You exceed the operating distance
limit (about 30 m [90 feet]).
• The battery in the transmitter is weak.
• Other vehicles or objects may be blocking the signal.
• The weather is extremely cold.
• The transmitter is close to a radio transmitter such as a radio station or
an airport which can interfere with
normal operation of the transmitter.
When the transmitter does not work
correctly, open and close the door with
the ignition key. If you have a problem
with the transmitter, contact an author-
ized Kia dealer. (Continued)(Continued)
• If the transmitter is in close proximity
to your cell phone or smart phone, the
signal from the transmitter could be
blocked by normal operation of your
cell phone or smart phone. This is
especially important when the phone
is active such as making call, receiving
calls, text messaging, and/or send-
ing/receiving emails. Avoid placing
the transmitter and your cell phone or
smart phone in the same pants or
jacket pocket and maintain adequate
distance between the two devices.
Page 111 of 394
Features of your vehicle
40
4
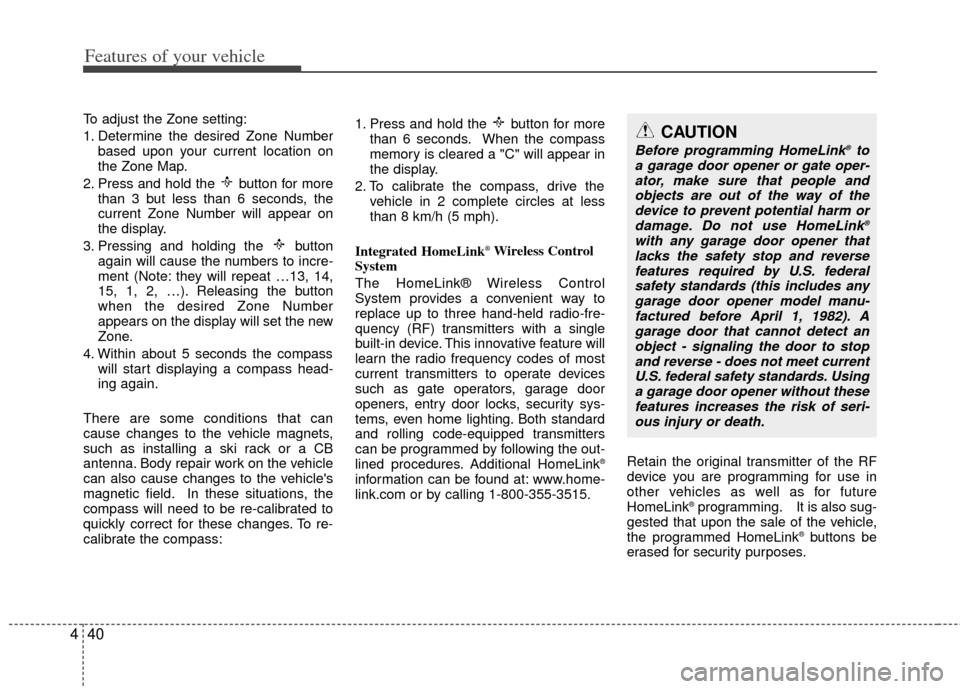
To adjust the Zone setting:
1. Determine the desired Zone Number
based upon your current location on
the Zone Map.
2. Press and hold the button for more than 3 but less than 6 seconds, the
current Zone Number will appear on
the display.
3. Pressing and holding the button again will cause the numbers to incre-
ment (Note: they will repeat …13, 14,
15, 1, 2, …). Releasing the button
when the desired Zone Number
appears on the display will set the new
Zone.
4. Within about 5 seconds the compass will start displaying a compass head-
ing again.
There are some conditions that can
cause changes to the vehicle magnets,
such as installing a ski rack or a CB
antenna. Body repair work on the vehicle
can also cause changes to the vehicle's
magnetic field. In these situations, the
compass will need to be re-calibrated to
quickly correct for these changes. To re-
calibrate the compass: 1. Press and hold the button for more
than 6 seconds. When the compass
memory is cleared a "C" will appear in
the display.
2. To calibrate the compass, drive the vehicle in 2 complete circles at less
than 8 km/h (5 mph).
Integrated HomeLink
®Wireless Control
System
The HomeLink® Wireless Control
System provides a convenient way to
replace up to three hand-held radio-fre-
quency (RF) transmitters with a single
built-in device. This innovative feature will
learn the radio frequency codes of most
current transmitters to operate devices
such as gate operators, garage door
openers, entry door locks, security sys-
tems, even home lighting. Both standard
and rolling code-equipped transmitters
can be programmed by following the out-
lined procedures. Additional HomeLink
®
information can be found at: www.home-
link.com or by calling 1-800-355-3515. Retain the original transmitter of the RF
device you are programming for use in
other vehicles as well as for future
HomeLink
®programming. It is also sug-
gested that upon the sale of the vehicle,
the programmed HomeLink
®buttons be
erased for security purposes.
CAUTION
Before programming HomeLink®to
a garage door opener or gate oper- ator, make sure that people and objects are out of the way of thedevice to prevent potential harm ordamage. Do not use HomeLink
®
with any garage door opener thatlacks the safety stop and reverse features required by U.S. federalsafety standards (this includes any garage door opener model manu-factured before April 1, 1982). Agarage door that cannot detect anobject - signaling the door to stop and reverse - does not meet currentU.S. federal safety standards. Using a garage door opener without thesefeatures increases the risk of seri- ous injury or death.
Page 112 of 394
441
Features of your vehicle
Programming HomeLink®
✽
✽NOTICE
• When programming a garage door
opener, it is advised to park the vehi-
cle outside of the garage.
• It is recommended that a new battery be placed in the hand-held transmit-
ter of the device being programmed to
HomeLink
®for quicker training and
accurate transaxle of the radio-fre-
quency signal.
• Some vehicles may require the igni- tion switch to be turned to the second
(or "accessories") position for pro-
gramming and/or operation of
HomeLink.
• In the event that there are still pro- gramming difficulties or questions
after following the programming steps
listed below, contact HomeLink
®at:
www.homelink.com or 1-800-355-
3515.
Standard programming
To train most devices, follow these
instructions:
1. For first-time programming, press and
hold the two outside buttons,
HomeLink
®Channel 1 and Channel 3
Buttons, until the indicator light begins
to flash (after 20 seconds). Release
both buttons. Do not hold the buttons
for longer than 30 seconds.
2. Position the end of your hand-held transmitter 2-8 cm (1-3 inches) away
from the HomeLink
®buttons while
keeping the indicator light in view.
3. Simultaneously press and hold both the HomeLink
®and hand-held trans-
mitter button. DO NOT release the but-
tons until step 4 has been completed.
4. While continuing to hold the buttons the red Indicator Status LED will flash
slowly and then rapidly after
HomeLink
®successfully trains to the
frequency signal from the hand-held
transmitter. Release both buttons. 5. Press and hold the just-trained
HomeLink
®button and observe the red
Status Indicator LED. If the indicator
light stays on constantly, programming
is complete and your device should
activate when the HomeLink
®button is
pressed and released.
6. To program the remaining two HomeLink
®buttons, follow steps 2
through 5.
Rolling code programming
Rolling code devices which are "code-
protected" and manufactured after 1996
may be determined by the following:
Reference the device owner's manual for verification.
The handheld transmitter appears to program the HomeLink
®Universal
Transceiver but does not activate the
device.
Press and hold the trained HomeLink button. The device has the rolling code
feature if the indicator light flashes rap-
idly and then turns solid after 2 sec-
onds.
Page 188 of 394
4117
Features of your vehicle
✽
✽NOTICE
If you install an after market HID head
lamp, your vehicle’s audio and electron-
ic device may malfunction.
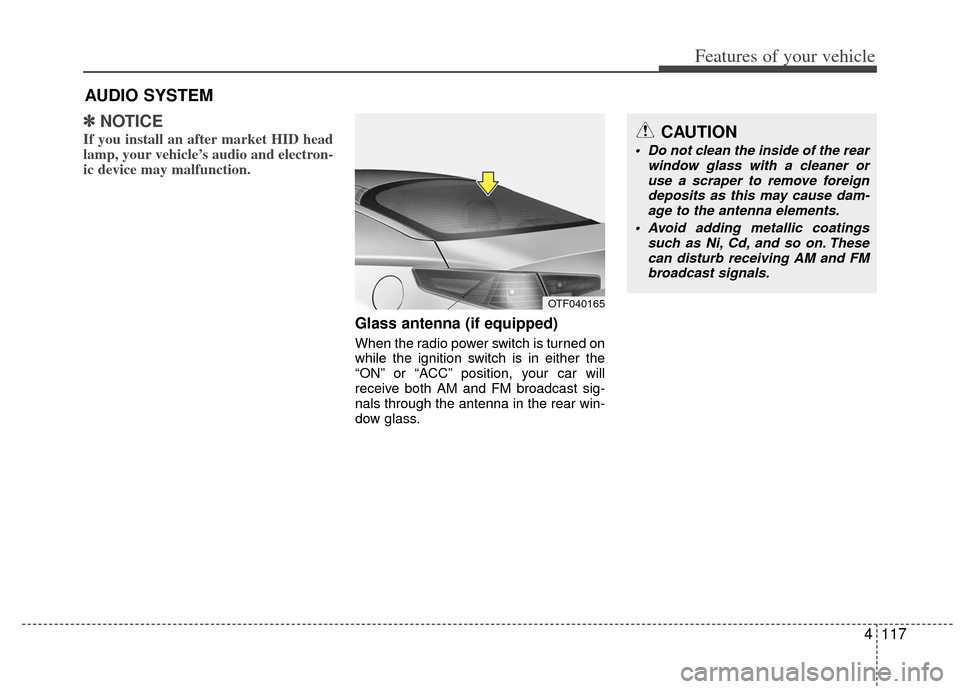
Glass antenna (if equipped)
When the radio power switch is turned on
while the ignition switch is in either the
“ON” or “ACC” position, your car will
receive both AM and FM broadcast sig-
nals through the antenna in the rear win-
dow glass.
AUDIO SYSTEM
OTF040165
CAUTION
• Do not clean the inside of the rear
window glass with a cleaner oruse a scraper to remove foreign deposits as this may cause dam-age to the antenna elements.
Avoid adding metallic coatings such as Ni, Cd, and so on. Thesecan disturb receiving AM and FMbroadcast signals.
Page 189 of 394
Features of your vehicle
118
4
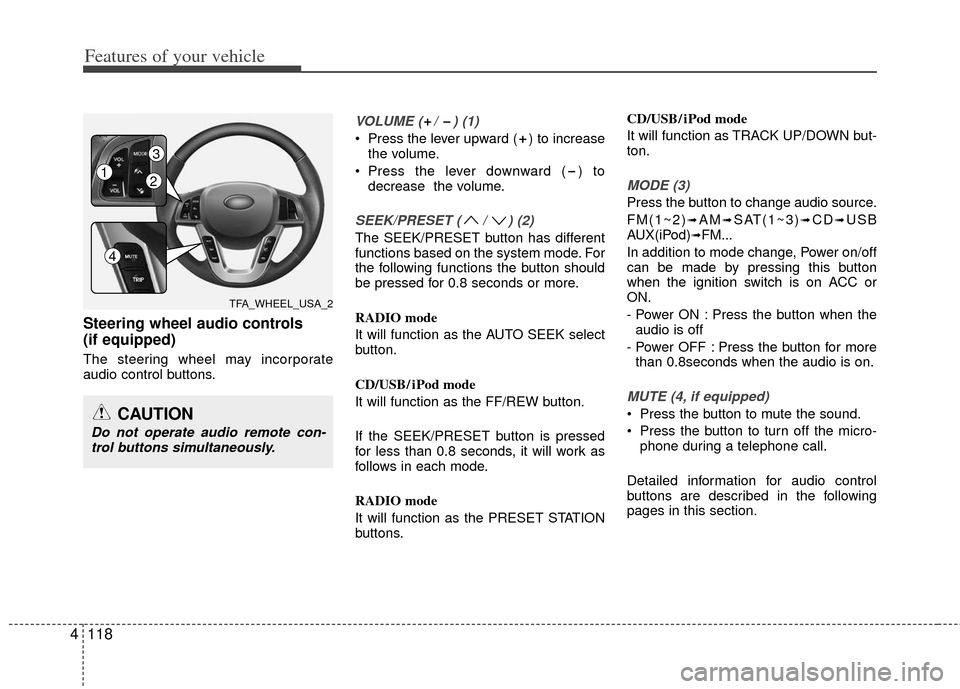
Steering wheel audio controls
(if equipped)
The steering wheel may incorporate
audio control buttons.
VOLUME ( / ) (1)
Press the lever upward ( ) to increase
the volume.
Press the lever downward ( ) to decrease the volume.
SEEK/PRESET ( / ) (2)
The SEEK/PRESET button has different
functions based on the system mode. For
the following functions the button should
be pressed for 0.8 seconds or more.
RADIO mode
It will function as the AUTO SEEK select
button.
CD/USB/ iPod mode
It will function as the FF/REW button.
If the SEEK/PRESET button is pressed
for less than 0.8 seconds, it will work as
follows in each mode.
RADIO mode
It will function as the PRESET STATION
buttons. CD/USB/ iPod mode
It will function as TRACK UP/DOWN but-
ton.
MODE (3)
Press the button to change audio source.
FM(1~2)
➟AM➟SAT(1~3)➟CD➟USB
AUX(iPod)➟FM...
In addition to mode change, Power on/off
can be made by pressing this button
when the ignition switch is on ACC or
ON.
- Power ON : Press the button when the audio is off
- Power OFF : Press the button for more than 0.8seconds when the audio is on.
MUTE (4, if equipped)
Press the button to mute the sound.
Press the button to turn off the micro- phone during a telephone call.
Detailed information for audio control
buttons are described in the following
pages in this section.CAUTION
Do not operate audio remote con- trol buttons simultaneously.
TFA_WHEEL_USA_2
12
3
4
Page 190 of 394
4119
Features of your vehicle
Aux, USB and iPod®* port
If your vehicle has an aux and/or
USB(universal serial bus) port or iPod
port, you can use an aux port to connect
audio devices and an USB port to plug in
an USB and also an iPod port to plug in
an iPod.
✽ ✽NOTICE
When using a portable audio device
connected to the power outlet, noise may
occur during playback. If this happens,
use the power source of the portable
audio device.
*iPod®is a trademark of Apple Inc.
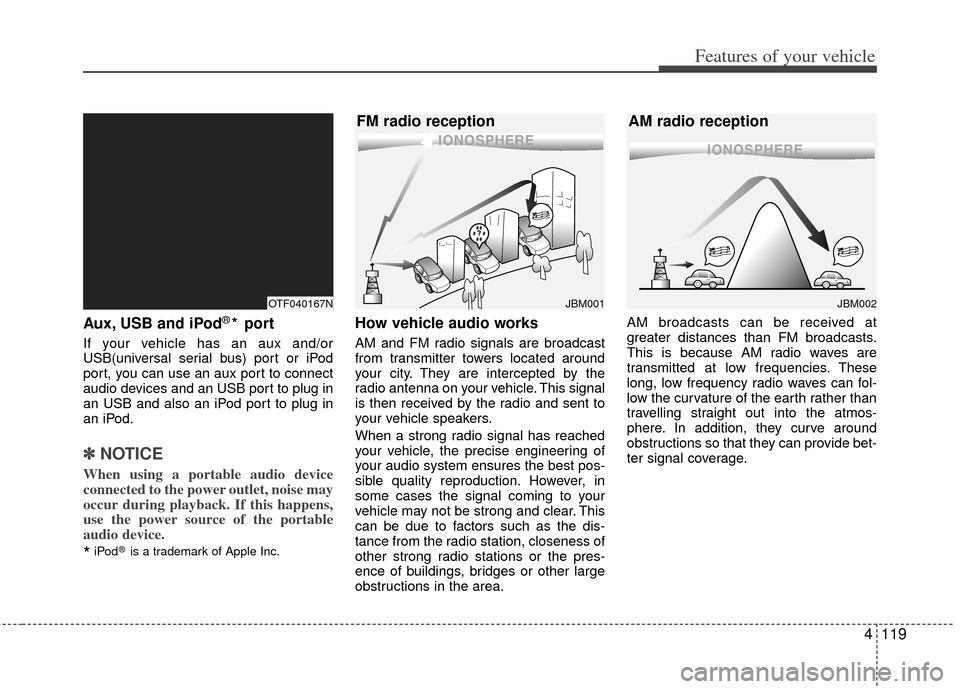
How vehicle audio works
AM and FM radio signals are broadcast
from transmitter towers located around
your city. They are intercepted by the
radio antenna on your vehicle. This signal
is then received by the radio and sent to
your vehicle speakers.
When a strong radio signal has reached
your vehicle, the precise engineering of
your audio system ensures the best pos-
sible quality reproduction. However, in
some cases the signal coming to your
vehicle may not be strong and clear. This
can be due to factors such as the dis-
tance from the radio station, closeness of
other strong radio stations or the pres-
ence of buildings, bridges or other large
obstructions in the area. AM broadcasts can be received at
greater distances than FM broadcasts.
This is because AM radio waves are
transmitted at low frequencies. These
long, low frequency radio waves can fol-
low the curvature of the earth rather than
travelling straight out into the atmos-
phere. In addition, they curve around
obstructions so that they can provide bet-
ter signal coverage.
OTF040167NJBM001
FM radio reception
JBM002
AM radio reception
Page 191 of 394
Features of your vehicle
120
4
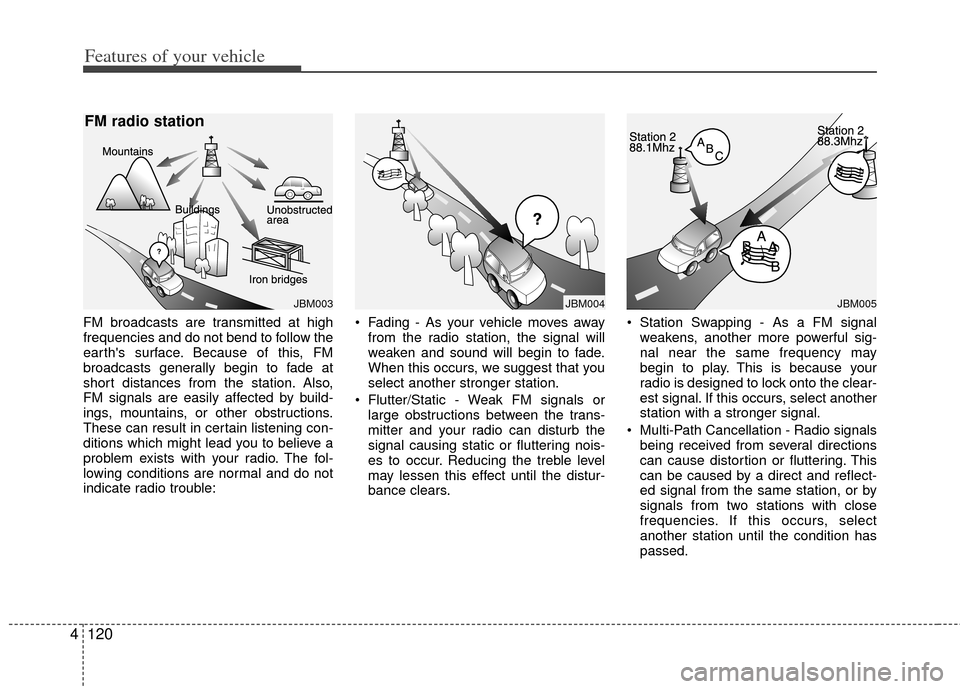
FM broadcasts are transmitted at high
frequencies and do not bend to follow the
earth's surface. Because of this, FM
broadcasts generally begin to fade at
short distances from the station. Also,
FM signals are easily affected by build-
ings, mountains, or other obstructions.
These can result in certain listening con-
ditions which might lead you to believe a
problem exists with your radio. The fol-
lowing conditions are normal and do not
indicate radio trouble: Fading - As your vehicle moves away
from the radio station, the signal will
weaken and sound will begin to fade.
When this occurs, we suggest that you
select another stronger station.
Flutter/Static - Weak FM signals or large obstructions between the trans-
mitter and your radio can disturb the
signal causing static or fluttering nois-
es to occur. Reducing the treble level
may lessen this effect until the distur-
bance clears. Station Swapping - As a FM signal
weakens, another more powerful sig-
nal near the same frequency may
begin to play. This is because your
radio is designed to lock onto the clear-
est signal. If this occurs, select another
station with a stronger signal.
Multi-Path Cancellation - Radio signals being received from several directions
can cause distortion or fluttering. This
can be caused by a direct and reflect-
ed signal from the same station, or by
signals from two stations with close
frequencies. If this occurs, select
another station until the condition has
passed.
JBM004JBM005JBM003
FM radio station
Page 192 of 394
4121
Features of your vehicle
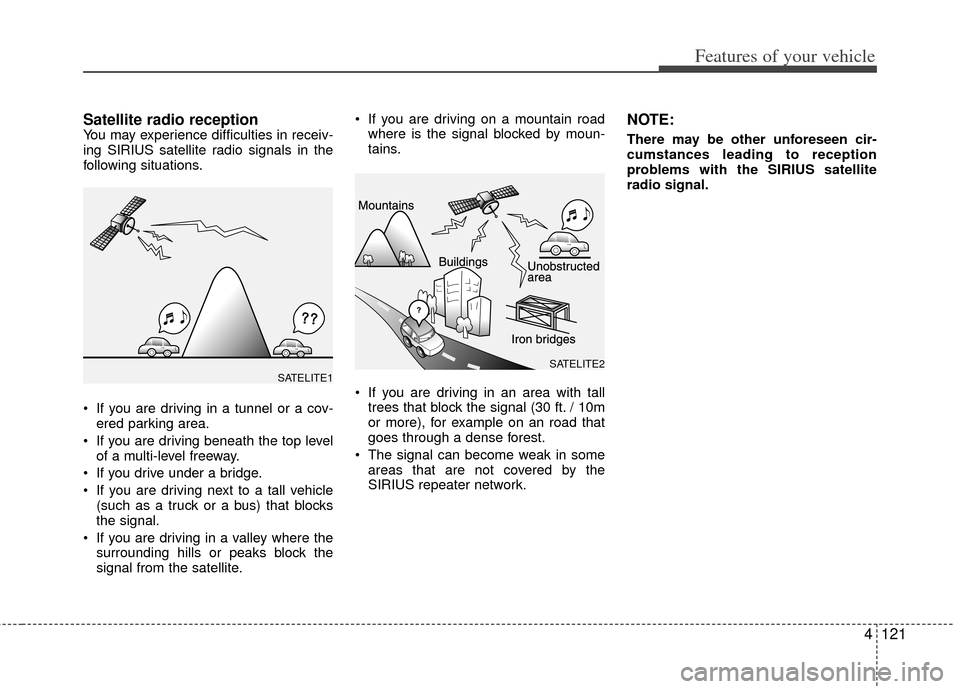
Satellite radio receptionYou may experience difficulties in receiv-
ing SIRIUS satellite radio signals in the
following situations.
If you are driving in a tunnel or a cov-ered parking area.
If you are driving beneath the top level of a multi-level freeway.
If you drive under a bridge.
If you are driving next to a tall vehicle (such as a truck or a bus) that blocks
the signal.
If you are driving in a valley where the surrounding hills or peaks block the
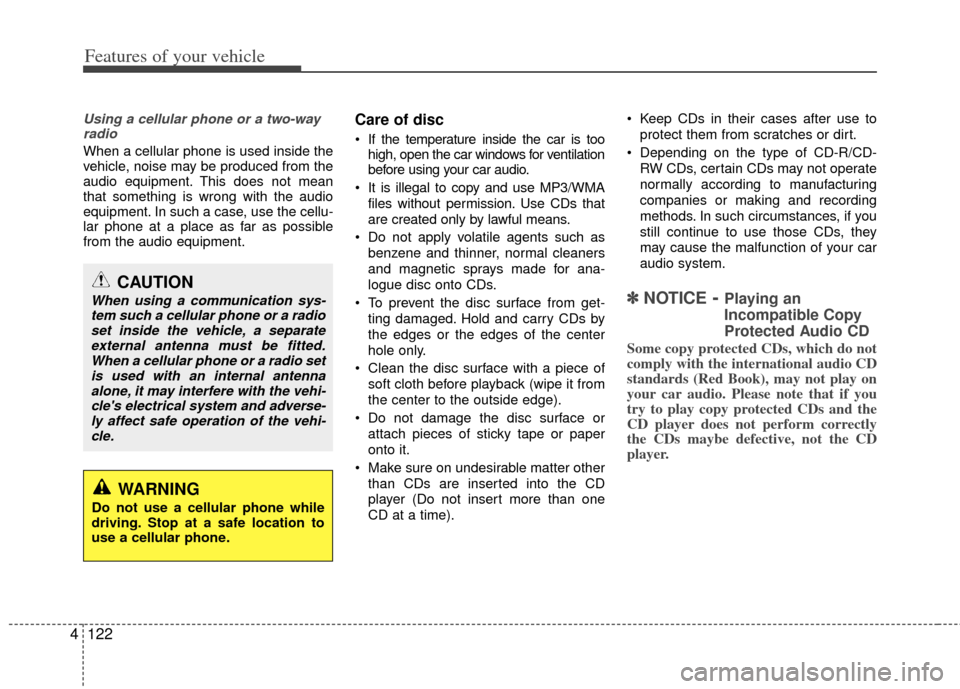
signal from the satellite. If you are driving on a mountain road
where is the signal blocked by moun-
tains.
If you are driving in an area with tall trees that block the signal (30 ft. / 10m
or more), for example on an road that
goes through a dense forest.
The signal can become weak in some areas that are not covered by the
SIRIUS repeater network.NOTE:
There may be other unforeseen cir-
cumstances leading to reception
problems with the SIRIUS satellite
radio signal.
SATELITE2SATELITE1
Page 193 of 394
Features of your vehicle
122
4
Using a cellular phone or a two-way
radio
When a cellular phone is used inside the
vehicle, noise may be produced from the
audio equipment. This does not mean
that something is wrong with the audio
equipment. In such a case, use the cellu-
lar phone at a place as far as possible
from the audio equipment.
Care of disc
If the temperature inside the car is too high, open the car windows for ventilation
before using your car audio.
It is illegal to copy and use MP3/WMA files without permission. Use CDs that
are created only by lawful means.
Do not apply volatile agents such as benzene and thinner, normal cleaners
and magnetic sprays made for ana-
logue disc onto CDs.
To prevent the disc surface from get- ting damaged. Hold and carry CDs by
the edges or the edges of the center
hole only.
Clean the disc surface with a piece of soft cloth before playback (wipe it from
the center to the outside edge).
Do not damage the disc surface or attach pieces of sticky tape or paper
onto it.
Make sure on undesirable matter other than CDs are inserted into the CD
player (Do not insert more than one
CD at a time). Keep CDs in their cases after use to
protect them from scratches or dirt.
Depending on the type of CD-R/CD- RW CDs, certain CDs may not operate
normally according to manufacturing
companies or making and recording
methods. In such circumstances, if you
still continue to use those CDs, they
may cause the malfunction of your car
audio system.
✽ ✽ NOTICE- Playing an
Incompatible Copy
Protected Audio CD
Some copy protected CDs, which do not
comply with the international audio CD
standards (Red Book), may not play on
your car audio. Please note that if you
try to play copy protected CDs and the
CD player does not perform correctly
the CDs maybe defective, not the CD
player.
CAUTION
When using a communication sys-
tem such a cellular phone or a radioset inside the vehicle, a separateexternal antenna must be fitted.When a cellular phone or a radio setis used with an internal antennaalone, it may interfere with the vehi- cle's electrical system and adverse-ly affect safe operation of the vehi-cle.
WARNING
Do not use a cellular phone while
driving. Stop at a safe location to
use a cellular phone.