run flat KIA OPTIMA HYBRID 2015 Owners Manual
[x] Cancel search | Manufacturer: KIA, Model Year: 2015, Model line: OPTIMA HYBRID, Model: KIA OPTIMA HYBRID 2015Pages: 495, PDF Size: 13.38 MB
Page 6 of 495
1
2
3
4
5
6
7
8I
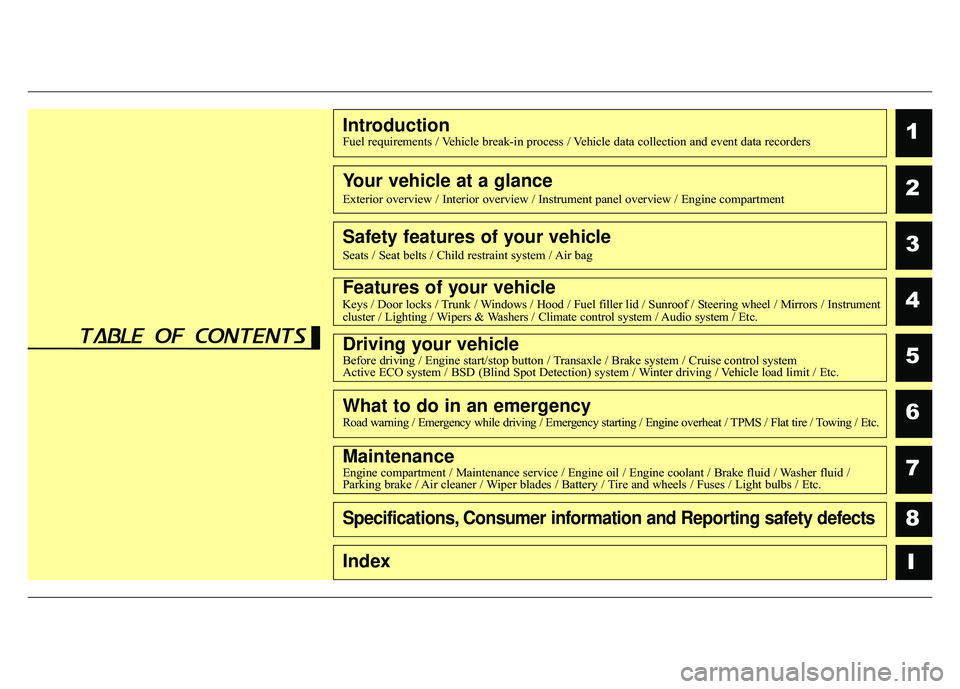
IntroductionFuel requirements / Vehicle break-in process / Vehicle data collection and event data recorders
Your vehicle at a glance
Exterior overview / Interior overview / Instrument panel overview / Engi\
ne compartment
Safety features of your vehicle
Seats / Seat belts / Child restraint system / Air bag
Features of your vehicleKeys / Door locks / Trunk / Windows / Hood / Fuel filler lid / Sunroof / Steering wheel / Mirrors / Instrumentcluster / Lighting / Wipers & Washers / Climate control system / Audio system / Etc.
Driving your vehicleBefore driving / Engine start/stop button / Transaxle / Brake system / Cruise control system
Active ECO system / BSD (Blind Spot Detection) system / Winter driving / Vehicle load limit / Etc.
What to do in an emergencyRoad warning / Emergency while driving / Emergency starting / Engine overheat / TPMS / Flat tire / Towing / Etc.
MaintenanceEngine compartment / Maintenance service / Engine oil / Engine coolant /\
Brake fluid / Washer fluid /
Parking brake / Air cleaner / Wiper blades / Battery / Tire and wheels / Fuses / Light bulbs / Etc.
Specifications, Consumer information and Reporting safety defects
Index
table of contents
Page 296 of 495
Driving your vehicle
22
5
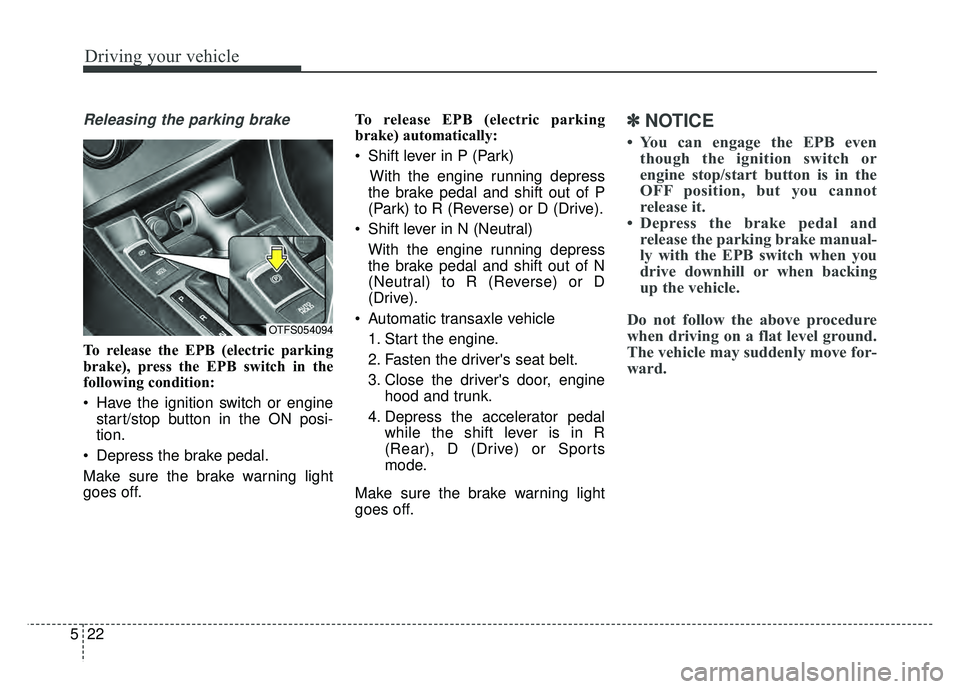
Releasing the parking brake
To release the EPB (electric parking
brake), press the EPB switch in the
following condition:
Have the ignition switch or engine
start/stop button in the ON posi-
tion.
Depress the brake pedal.
Make sure the brake warning light
goes off. To release EPB (electric parking
brake) automatically:
Shift lever in P (Park)
With the engine running depress
the brake pedal and shift out of P
(Park) to R (Reverse) or D (Drive).
Shift lever in N (Neutral) With the engine running depress
the brake pedal and shift out of N
(Neutral) to R (Reverse) or D
(Drive).
Automatic transaxle vehicle 1. Start the engine.
2. Fasten the driver's seat belt.
3. Close the driver's door, engine hood and trunk.
4. Depress the accelerator pedal while the shift lever is in R
(Rear), D (Drive) or Sports
mode.
Make sure the brake warning light
goes off.
✽ ✽ NOTICE
• You can engage the EPB even
though the ignition switch or
engine stop/start button is in the
OFF position, but you cannot
release it.
• Depress the brake pedal and release the parking brake manual-
ly with the EPB switch when you
drive downhill or when backing
up the vehicle.
Do not follow the above procedure
when driving on a flat level ground.
The vehicle may suddenly move for-
ward.
OTFS054094
Page 301 of 495
527
Driving your vehicle
If you notice a continuous noise or
burning smell when the EPB is used
for emergency braking, have your
vehicle checked by an authorized Kia
dealer.
When the EPB (electric parkingbrake) is not released
If the EPB does not release normal-
ly, take your vehicle to an authorized
Kia dealer by loading the vehicle on
a flatbed tow truck and have the sys-
tem checked.
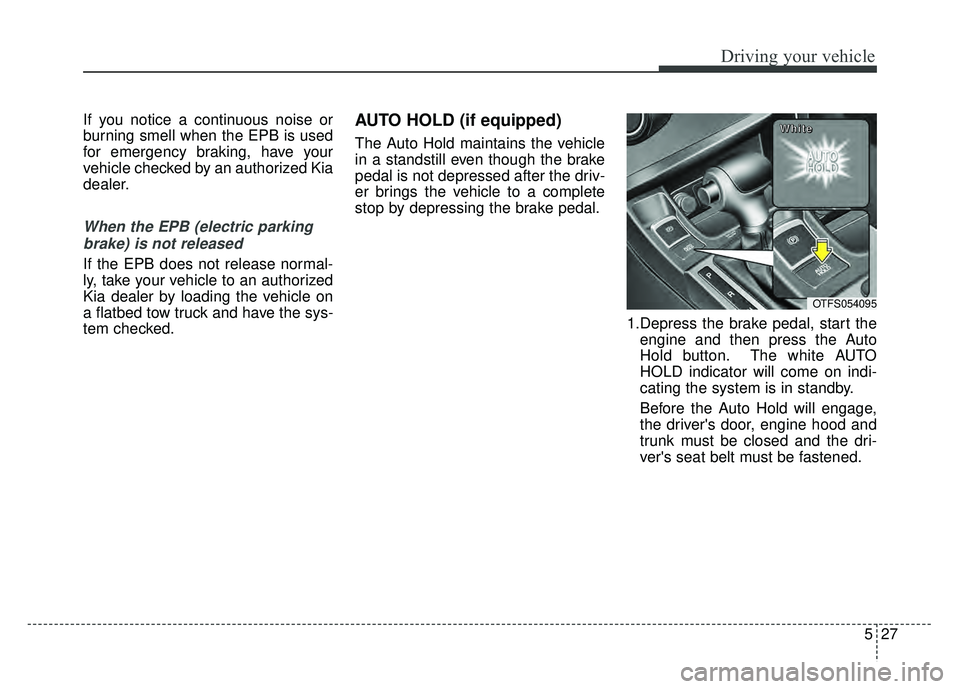
AUTO HOLD (if equipped)
The Auto Hold maintains the vehicle
in a standstill even though the brake
pedal is not depressed after the driv-
er brings the vehicle to a complete
stop by depressing the brake pedal.
1.Depress the brake pedal, start theengine and then press the Auto
Hold button. The white AUTO
HOLD indicator will come on indi-
cating the system is in standby.
Before the Auto Hold will engage,
the driver's door, engine hood and
trunk must be closed and the dri-
ver's seat belt must be fastened.
OTFS054095
W
W
W
W
h
h
h
h
i
i
i
i
t
t
t
t
e
e
e
e
Page 323 of 495
549
Driving your vehicle
❈If your vehicle's left or right side
bumper is blinded by barrier or
vehicles, the system sensing abili-
ty may be deteriorated.Non-operating condition
Driver's Attention
The driver must be cautious in the
below situations for the system may
not assist the driver and may not
work properly.
- Curved roads, tollgates, etc.
- The surrounding of the sensor is
polluted with rain, snow, mud, etc
- The rear bumper near the sensor is covered or hidden with a foreign
matter such as a sticker, bumper
guard, bicycle stand etc.
- The rear bumper is damaged or the sensor is out of place.
- The height of the vehicle shows much change such as when the
trunk is loaded with heavy objects,
abnormal tire pressure etc.
- Due to bad weather such as heavy rain or snow. - A fixed object is near such as a
guardrail, etc.
- A lot of amount of metal sub- stances are near the vehicles such
as a construction area.
- A big vehicle is near such as a bus or truck.
- A motorcycle or bicycle is near.
- A flat trailer like vehicle is near.
- If the vehicle has started at the same time as the vehicle next to it
and has accelerated.
- When the other vehicle passes by very fast.
- When changing lanes.
- When going down or up a steep road where the height of the lane is
different.
- When the other vehicle drives at the rear very nearby or drives very
close.
- When a trailer or carrier is installed.
CAUTION
The system may not work properly if the bumper hasbeen replaced or if a repairwork has been done near thesensor.
The detection area differs according to the roads width.If the road is narrow the sys-tem may detect other vehiclesin the next lane.
On the contrary, if the road is very wide the system may notdetect other vehicles.
The system may turn off due to strong electromagneticwaves.
Page 349 of 495
69
What to do in an emergency
Always check the TPMS malfunction
telltale after replacing one or more
tires or wheels on your vehicle to
ensure that the replacement or alter-
nate tires and wheels allow the
TPMS to continue to function proper-
ly.
✽ ✽NOTICE
If any of the below happens, have
the system be checked by an author-
ized Kia dealer.
1.The low tire pressure telltale/
TPMS malfunction indicator do
not illuminate for 3 seconds when
the ignition switch is turned to the
ON or engine is running.
2. The TPMS malfunction indicator remains illuminated after blinking
for approximately 1 minute.
3. The Low tire pressure position telltale remains illuminated.
Low tire pressure
telltale
Low tire pressure position tell-
tale
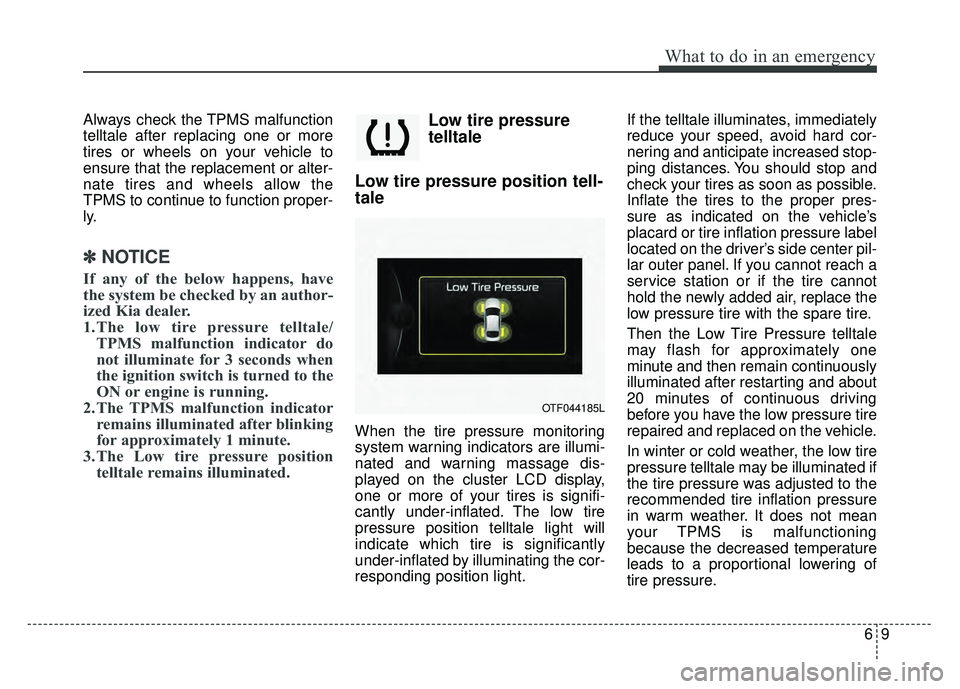
When the tire pressure monitoring
system warning indicators are illumi-
nated and warning massage dis-
played on the cluster LCD display,
one or more of your tires is signifi-
cantly under-inflated. The low tire
pressure position telltale light will
indicate which tire is significantly
under-inflated by illuminating the cor-
responding position light. If the telltale illuminates, immediately
reduce your speed, avoid hard cor-
nering and anticipate increased stop-
ping distances. You should stop and
check your tires as soon as possible.
Inflate the tires to the proper pres-
sure as indicated on the vehicle’s
placard or tire inflation pressure label
located on the driver’s side center pil-
lar outer panel. If you cannot reach a
service station or if the tire cannot
hold the newly added air, replace the
low pressure tire with the spare tire.
Then the Low Tire Pressure telltale
may flash for approximately one
minute and then remain continuously
illuminated after restarting and about
20 minutes of continuous driving
before you have the low pressure tire
repaired and replaced on the vehicle.
In winter or cold weather, the low tire
pressure telltale may be illuminated if
the tire pressure was adjusted to the
recommended tire inflation pressure
in warm weather. It does not mean
your TPMS is malfunctioning
because the decreased temperature
leads to a proportional lowering of
tire pressure.
OTF044185L
Page 363 of 495
623
What to do in an emergency
It is possible that some tires, espe-
cially with larger punctures or dam-
age to the sidewall, cannot be sealed
completely.
Air pressure loss in the tire may
adversely affect tire performance.
For this reason, you should avoid
abrupt steering or other driving
maneuvers, especially if the vehicle
is heavily loaded or if a trailer is in
use.
The Tire Mobility Kit is not designed
or intended as a permanent tire
repair method and is to be used for
one tire only.
This instruction shows you step by
step procedure to temporarily seal
the puncture.
Read the section "Notes on the safe
use of the Tire Mobility Kit".Notes on the safe use of the
Tire Mobility Kit
Park your car at the side of theroad so that you can work with the
Tire Mobility Kit away from moving
traffic.
To be sure your vehicle will not move, even when you're on fairly
level ground, always set your park-
ing brake.
Only use the Tire Mobility Kit for sealing/inflation passenger car
tires. Only punctured areas located
within the tread region of the tire
can be sealed using the tire mobil-
ity kit.
Do not use on motorcycles, bicy- cles or any other type of tires.
When the tire and wheel are dam- aged, do not use Tire Mobility Kit
for your safety.
Use of the Tire Mobility Kit may not be effective for tire damage larger
than approximately 0.24 in (6 mm).
Please contact the nearest Kia
dealership if the tire cannot be
made roadworthy with the Tire
Mobility Kit. Do not use the Tire Mobility Kit if a
tire is severely damaged by driving
run flat or with insufficient air pres-
sure.
Do not remove any foreign objects such as nails or screws that have
penetrated the tire.
Provided the car is outdoors, leave the engine running. Otherwise
operating the compressor may
eventually drain the car battery.
Never leave the Tire Mobility Kit unattended while it is being used.
Do not leave the compressor run- ning for more than 10 min. at a time
or it may overheat.
Do not use the Tire Mobility Kit if the ambient temperature is below -
22°F (-30°C).
Page 365 of 495
625
What to do in an emergency
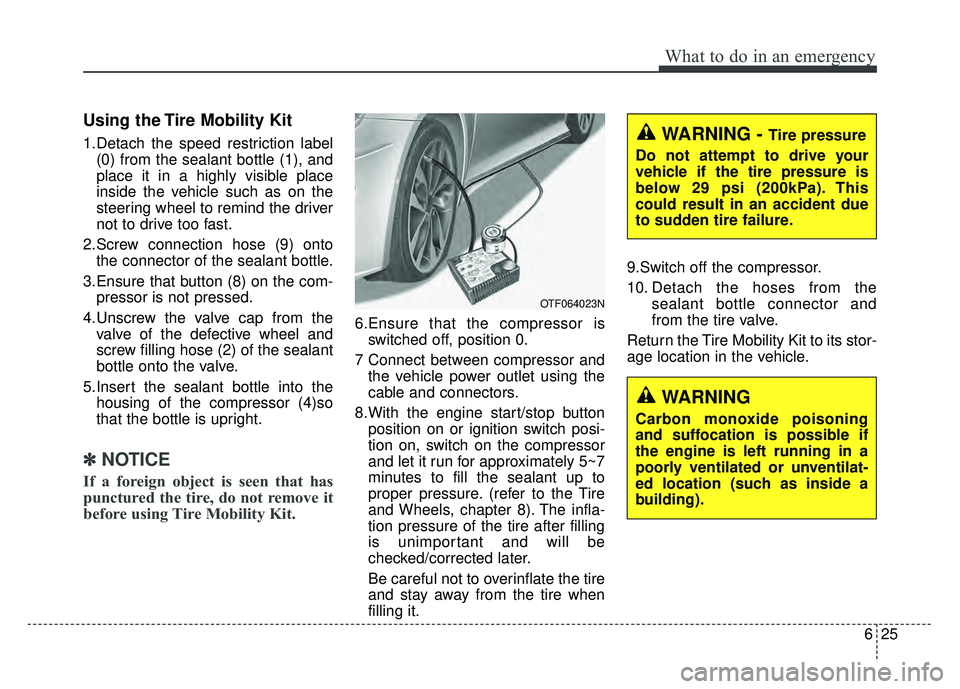
Using the Tire Mobility Kit
1.Detach the speed restriction label(0) from the sealant bottle (1), and
place it in a highly visible place
inside the vehicle such as on the
steering wheel to remind the driver
not to drive too fast.
2.Screw connection hose (9) onto the connector of the sealant bottle.
3.Ensure that button (8) on the com- pressor is not pressed.
4.Unscrew the valve cap from the valve of the defective wheel and
screw filling hose (2) of the sealant
bottle onto the valve.
5.Insert the sealant bottle into the housing of the compressor (4)so
that the bottle is upright.
✽ ✽ NOTICE
If a foreign object is seen that has
punctured the tire, do not remove it
before using Tire Mobility Kit.
6.Ensure that the compressor is
switched off, position 0.
7 Connect between compressor and the vehicle power outlet using the
cable and connectors.
8.With the engine start/stop button position on or ignition switch posi-
tion on, switch on the compressor
and let it run for approximately 5~7
minutes to fill the sealant up to
proper pressure. (refer to the Tire
and Wheels, chapter 8). The infla-
tion pressure of the tire after filling
is unimportant and will be
checked/corrected later.
Be careful not to overinflate the tire
and stay away from the tire when
filling it. 9.Switch off the compressor.
10. Detach the hoses from the
sealant bottle connector and
from the tire valve.
Return the Tire Mobility Kit to its stor-
age location in the vehicle.
WARNING
Carbon monoxide poisoning
and suffocation is possible if
the engine is left running in a
poorly ventilated or unventilat-
ed location (such as inside a
building).
WARNING - Tire pressure
Do not attempt to drive your
vehicle if the tire pressure is
below 29 psi (200kPa). This
could result in an accident due
to sudden tire failure.
OTF064023N
Page 366 of 495
What to do in an emergency
26
6
Distributing the sealant
11. Immediately drive approximately
4~6miles (7~10km or, about
10min) to evenly distribute the
sealant in the tire.
Do not exceed a speed of 50 mph
(80 km/h). If possible, do not fall
below a speed of 12 mph (20 km/h).
While driving, if you experience any
unusual vibration, ride disturbance or
noise, reduce your speed and drive
with caution until you can safely pull
off of the side of the road.
Call for road side service or towing.
When you use the Tire Mobility Kit,
the tire pressure sensor valve stem
and wheel may be stained by
sealant. After use wipe off sealant
residue and inspect. Consult you Kia
dealership if necessary.
Checking the tire inflation
pressure
1.After driving approximately 4 ~ 6 miles (7 ~ 10 km or about 10 min),
stop at a safe location.
2.Connect connection hose (9) of the compressor directly to the tire
valve.
3.Plug the compressor power cord into the vehicle power outlet.
4.Adjust the tire inflation pressure to the recomended tire inflation.
With the ignition switch on, pro-
ceed as follows.
- To increase the inflation pres-sure : Switch on the compressor,
position I. To check the current
inflation pressure setting, briefly
switch off the compressor.
✽ ✽ NOTICE
The pressure gauge may show high-
er than actual reading when the
compressor is running. To get an
accurate tire reading, the compres-
sor needs to be turned off.
- To reduce the inflation pres-
sure: Press the button 8 on the
compressor.
CAUTION - Tire pressure
sensor
When you use the Tire MobilityKit including sealant notapproved by Kia, the tire pres-sure sensors may be damagedby sealant. The sealant on thetire pressure sensor and wheelshould be removed when youreplace the tire with a new oneand inspect the tire pressuresensors at an authorized dealer.
Page 369 of 495
629
What to do in an emergency
Removable towing hook
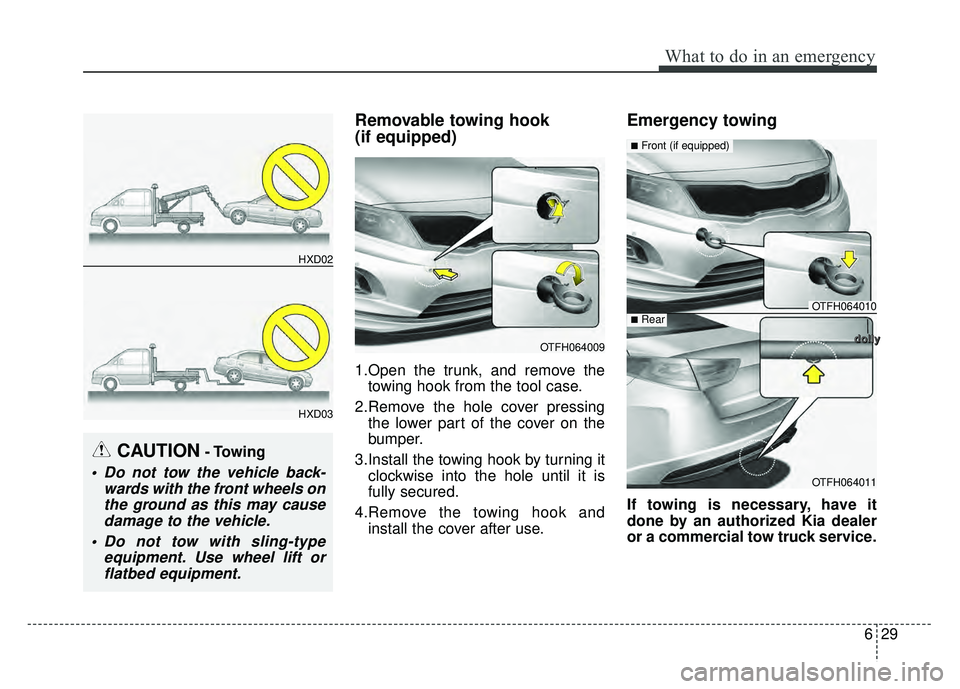
(if equipped)
1.Open the trunk, and remove thetowing hook from the tool case.
2.Remove the hole cover pressing the lower part of the cover on the
bumper.
3.Install the towing hook by turning it clockwise into the hole until it is
fully secured.
4.Remove the towing hook and install the cover after use.
Emergency towing
If towing is necessary, have it
done by an authorized Kia dealer
or a commercial tow truck service.
OTFH064009
OTFH064010
OTFH064011
■Front (if equipped)
■Rear
CAUTION- Towing
Do not tow the vehicle back- wards with the front wheels onthe ground as this may causedamage to the vehicle.
Do not tow with sling-type equipment. Use wheel lift orflatbed equipment.
HXD02
HXD03
d
d
d
d
o
o
o
o
l
l
l
l
l
l
l
l
y
y
y
y
Page 479 of 495
Specifications, Consumer information, Reporting safety defects
10
8
Roadside Assistance is provided on all new current
model year Kia Vehicles from the date the vehicle is deliv-
ered to the first retail buyer or otherwise put into use (in-
service date), whichever is earlier, for a period of 60
months or 60,000 miles, whichever is earlier, subject to
the terms, conditions and exclusions set forth in the Kia
Warranty and Consumer Information Manual applicable
to your model year vehicle.
KMA reserves the right to limit or deny services or other
benefits to any owner or driver when, in KMA's judgment,
the claims and/or service requests are excessive in fre-
quency or type of occurrence.
Toll free consumer assistance
Kia's toll-free Consumer Assistance hot line is staffed
from 5:00 AM to 6:00 PM PST, Monday through Friday
and is accessible by dialing 1-800-333-4Kia (4542).
For more information regarding assistance available,
please refer to your Kia Warranty & Consumer
Information Manual.
Emergency roadside assistance
Kia's toll free Roadside Assistance hot line is staffed 24
hours a day, 365 days a year and is accessible by dialing
1-800-333-4Kia (4542).
Please note that you must provide your Vehicle
Identification Number (VIN) to verify coverage at the time
of your call. The VIN can be found on the dash of your vehicle on the
driver’s side, on the door jamb of the driver’s door, your
vehicle’s registration or proof of insurance card.
Kia utilizes a network of over 30,000 roadside assistance
providers. Should you accidentally run out of fuel, require
a battery jump, or need help changing a tire, a Kia
Roadside Assistance Representative will dispatch some-
one to deliver a small quantity of gas, change a flat tire
with your inflated spare, or arrange a battery jump to
allow you to proceed to your destination. We have access
to a network of over 10,000 locksmiths to help you should
you become locked out of your Kia.
In the event that mechanical difficulty renders your vehi-
cle undriveable due to a warranty-related concern, Kia’s
Roadside Assistance Representative will arrange to
transport your vehicle to the nearest Kia dealer or to an
authorized Kia alternative service location.
Your vehicle must be accessible to our dispatch transport
vehicle, as determined by our driver, to receive this serv-
ice.
✽ ✽
NOTICE
Roadside Assistance benefits are not available for any
Kia vehicle that has ever been or should be issued a “sal-
vage” title or similar “branded” title under any state’s
law or has been declared a “total loss” or equivalent by
a financial institution or insurance company.
CONSUMER ASSISTANCE (U.S. ONLY)