warning light KIA Optima Hybrid 2016 4.G User Guide
[x] Cancel search | Manufacturer: KIA, Model Year: 2016, Model line: Optima Hybrid, Model: KIA Optima Hybrid 2016 4.GPages: 466, PDF Size: 14.92 MB
Page 74 of 466
Safety features of your vehicle
56
3
SRS Care
The SRS is virtually maintenance-free
and there are no parts you can safely
service by yourself. If the SRS air bag
warning light does not illuminate, or
continuously remains on, have your
vehicle immediately inspected by an
authorized Kia dealer.
Any work on the SRS system, such
as removing, installing, repairing, or
any work on the steering wheel must
be performed by an authorized Kia
dealer. Improper handling of the SRS
system may result in serious person-
al injury.
For cleaning the air bag pad covers,
use only a soft, dry cloth or one
which has been moistened with plain
water. Solvents or cleaners could
adversely affect the air bag covers
and proper deployment of the sys-
tem. If components of the air bag system
must be discarded, or if the vehicle
must be scrapped, certain safety
precautions must be observed. An
authorized Kia dealer knows these
precautions and can give you the
necessary information. Failure to fol-
low these precautions and proce-
dures could increase the risk of per-
sonal injury.
Adding equipment to or modi-
fying your air bag-equipped
vehicle
If you modify your vehicle by chang-
ing your vehicle's frame, bumper sys-
tem, front end or side sheet metal or
ride height, this may affect the opera-
tion of your vehicle's air bag system.
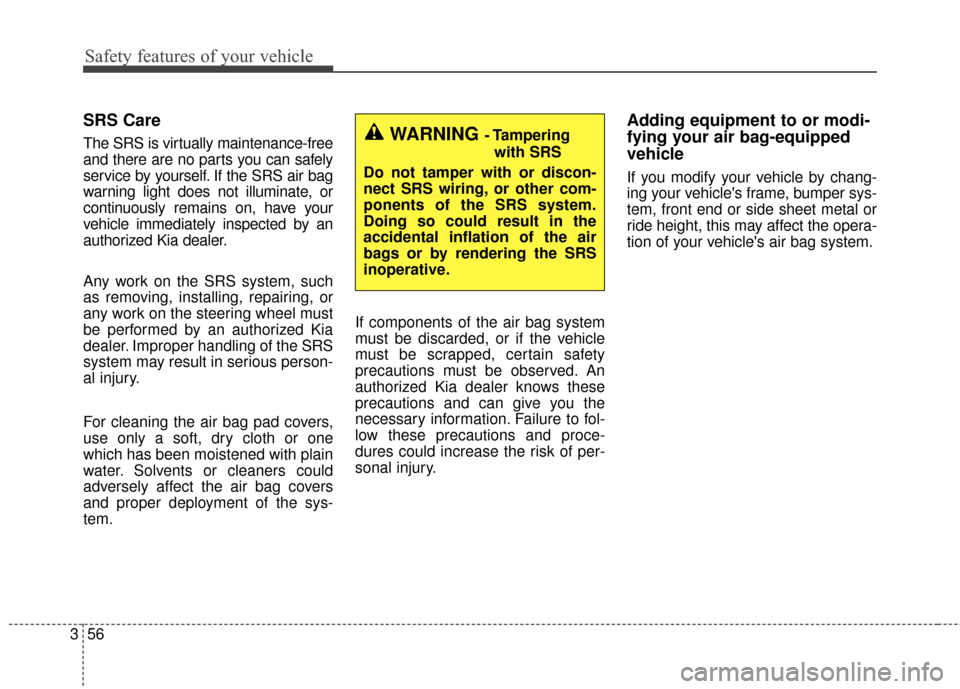
WARNING - Tampering
with SRS
Do not tamper with or discon-
nect SRS wiring, or other com-
ponents of the SRS system.
Doing so could result in the
accidental inflation of the air
bags or by rendering the SRS
inoperative.
Page 77 of 466
Instrument cluster . . . . . . . . . . . . . . . . . . . . . . . . . 4-45
. . . . . . . . . . . . . . . . . . . . 4-46
. . . . . . . . . . . . . . . . . . . . . . . . . 4-46
. . . . . . . . . . . . . . . . . . . . . . . . . . . . . . . . . . . . \
. 4-47
. . . . . . . . . . . . . . . . . . . . . . 4-50
LCD Display . . . . . . . . . . . . . . . . . . . . . . . . . . . . . . 4-51
. . . . . . . . . . . . . . . . . . . . . . . . . . . . . . . . . 4-51
. . . . . . . . . . . . . . . . . . . . . 4-52
. . . . . . . . . . . . . . . . . . . . . . . . . . . . . . . . 4-55
. . . . . . . . . . . . . . . . . . . . . . . . . . . 4-56
. . . . . . . . . . . . . . . . . . . . . . . . . . . . 4-59
Trip computer . . . . . . . . . . . . . . . . . . . . . . . . . . . . . 4-67
. . . . . . . . . . . . . . . . . . . . . . . . . . . . . . . 4-67
. . . . . . . . . . . . . . . . . . . . . . . . . . . . . . . . . . . . \
4-69
. . . . . . . . . . . . . 4-70
Warning and indicator lights . . . . . . . . . . . . . . . . 4-71
. . . . . . . . . . . . . . . . . . . . . . . . . . . . . . . 4-71
. . . . . . . . . . . . . . . . . . . . . . . . . . . . . . 4-77
Back-Up Warning System . . . . . . . . . . . . . . . . . . . 4-81
. . . . . . . 4-81
System. . . . . . . . . . . . . . . . . . . . . . . . . . . . . . . . . . . . \
. 4-82
. . . . . . . . . . . 4-82
. . . . . . . . . . . . . . . . . . . . . . . . . . . . . . . . 4-83
Rear Camera Display. . . . . . . . . . . . . . . . . . . . . . . 4-84
Welcome system . . . . . . . . . . . . . . . . . . . . . . . . . . . 4-85
positon light). . . . . . . . . 4-85
. . . . . . . . . . . . . . . . . . 4-85
. . . . . . . . . . . . . . . . . . . . . . . . . . . . . . . . 4-85
Lighting . . . . . . . . . . . . . . . . . . . . . . . . . . . . . . . . . . 4-86\
. . . . . . . . . . . . . . . . . . . . . . 4-86
. . . . . . . . . . . . . . . . . . . . . . . . . 4-87
. . . . . . . . . . . . . . . . . . . . . . . . . . . . . . 4-87
. . . . . . . . . . . . 4-90
. . . . . . . . . . . . . . . . . . . . . . . . . . . . . . . 4-91
Wipers and washers . . . . . . . . . . . . . . . . . . . . . . . . 4-92
. . . . . . . . . . . . . . . . . . . . . . . . . . . . 4-92
Interior light . . . . . . . . . . . . . . . . . . . . . . . . . . . . . . 4-95
. . . . . . . . . . . . . . . . . . . . 4-95
. . . . . . . . . . . . . . . . . . . . . . . . . . . . . . . . . . . 4-\
95
. . . . . . . . . . . . . . . . . . . . . . . . . . . . . . . . . . 4-96\
. . . . . . . . . . . . . . . . . . . . . . . . . . . . 4-97
. . . . . . . . . . . . . . . . . . . . . . . . . . . . . . 4-98
. . . . . . . . . . . . . . . . . . . . . . . . . . . 4-98
4
Page 80 of 466
45
Features of your vehicle
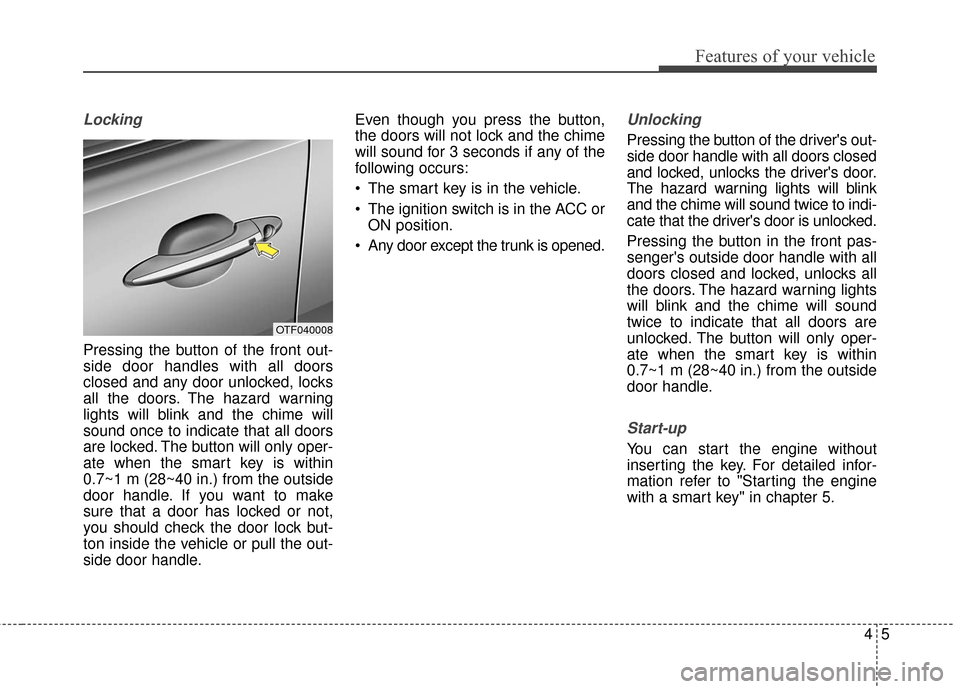
Locking
Pressing the button of the front out-
side door handles with all doors
closed and any door unlocked, locks
all the doors. The hazard warning
lights will blink and the chime will
sound once to indicate that all doors
are locked. The button will only oper-
ate when the smart key is within
0.7~1 m (28~40 in.) from the outside
door handle. If you want to make
sure that a door has locked or not,
you should check the door lock but-
ton inside the vehicle or pull the out-
side door handle.Even though you press the button,
the doors will not lock and the chime
will sound for 3 seconds if any of the
following occurs:
• The smart key is in the vehicle.
The ignition switch is in the ACC or
ON position.
Any door except the trunk is opened.
Unlocking
Pressing the button of the driver's out-
side door handle with all doors closed
and locked, unlocks the driver's door.
The hazard warning lights will blink
and the chime will sound twice to indi-
cate that the driver's door is unlocked.
Pressing the button in the front pas-
senger's outside door handle with all
doors closed and locked, unlocks all
the doors. The hazard warning lights
will blink and the chime will sound
twice to indicate that all doors are
unlocked. The button will only oper-
ate when the smart key is within
0.7~1 m (28~40 in.) from the outside
door handle.
Start-up
You can start the engine without
inserting the key. For detailed infor-
mation refer to "Starting the engine
with a smart key" in chapter 5.
OTF040008
Page 81 of 466
Features of your vehicle
64
Key operations
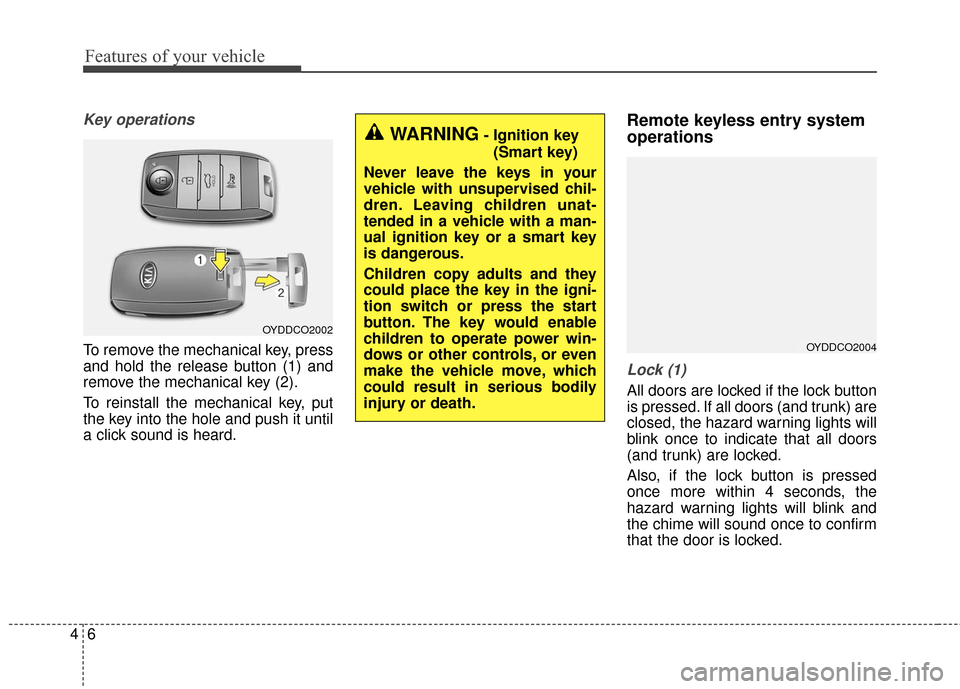
To remove the mechanical key, press
and hold the release button (1) and
remove the mechanical key (2).
To reinstall the mechanical key, put
the key into the hole and push it until
a click sound is heard.
Remote keyless entry system
operations
Lock (1)
All doors are locked if the lock button
is pressed. If all doors (and trunk) are
closed, the hazard warning lights will
blink once to indicate that all doors
(and trunk) are locked.
Also, if the lock button is pressed
once more within 4 seconds, the
hazard warning lights will blink and
the chime will sound once to confirm
that the door is locked.
OYDDCO2002
OYDDCO2004
WARNING- Ignition key(Smart key)
Never leave the keys in your
vehicle with unsupervised chil-
dren. Leaving children unat-
tended in a vehicle with a man-
ual ignition key or a smart key
is dangerous.
Children copy adults and they
could place the key in the igni-
tion switch or press the start
button. The key would enable
children to operate power win-
dows or other controls, or even
make the vehicle move, which
could result in serious bodily
injury or death.
Page 82 of 466
47
Features of your vehicle
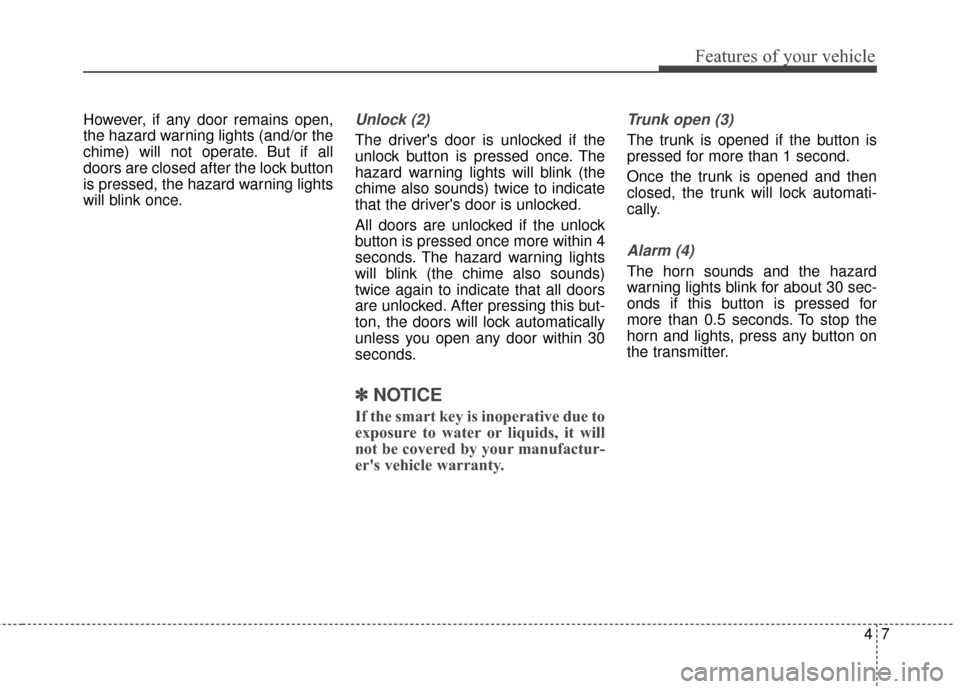
However, if any door remains open,
the hazard warning lights (and/or the
chime) will not operate. But if all
doors are closed after the lock button
is pressed, the hazard warning lights
will blink once.Unlock (2)
The driver's door is unlocked if the
unlock button is pressed once. The
hazard warning lights will blink (the
chime also sounds) twice to indicate
that the driver's door is unlocked.
All doors are unlocked if the unlock
button is pressed once more within 4
seconds. The hazard warning lights
will blink (the chime also sounds)
twice again to indicate that all doors
are unlocked. After pressing this but-
ton, the doors will lock automatically
unless you open any door within 30
seconds.
✽ ✽NOTICE
If the smart key is inoperative due to
exposure to water or liquids, it will
not be covered by your manufactur-
er's vehicle warranty.
Trunk open (3)
The trunk is opened if the button is
pressed for more than 1 second.
Once the trunk is opened and then
closed, the trunk will lock automati-
cally.
Alarm (4)
The horn sounds and the hazard
warning lights blink for about 30 sec-
onds if this button is pressed for
more than 0.5 seconds. To stop the
horn and lights, press any button on
the transmitter.
Page 85 of 466
Features of your vehicle
10
4
The smart key is designed to give
you years of trouble-free use, how-
ever it can malfunction if exposed
to moisture or static electricity. If
you are unsure how to use or
replace the battery, contact an
authorized Kia dealer.
Using the wrong battery can cause the transmitter or smart key to mal-
function. Be sure to use the correct
battery.
An inappropriately dis- posed battery can be harm-
ful to the environment and
human health. Dispose the
battery according to your
local law(s) or regulation.Immobilizer system
Your vehicle may be equipped with
an electronic engine immobilizer sys-
tem to reduce the risk of unautho-
rized vehicle use.
Your immobilizer system is com-
prised of a small transponder in the
ignition key and electronic devices
inside the vehicle.
With the immobilizer system, when-
ever you insert your ignition key into
the ignition switch and turn it to ON,
it checks and determines and verifies
that the ignition key is valid.
If the key is determined to be valid,
the engine will start.
If the key is determined to be invalid,
the engine will not start.
CAUTION- Transmitter
damage
Do not drop, wet or expose thekeyless entry system transmit-ter to heat or sunlight.
IC WARNING
This device complies with
Industry Canada licence-
exempt RSS standard(s).
Operation is subject to the fol-
lowing two conditions: (1) this
device may not cause interfer-
ence, and (2) this device must
accept any interference, includ-
ing interference that may cause
undesired operation of the
device.
Page 87 of 466
Features of your vehicle
12
4
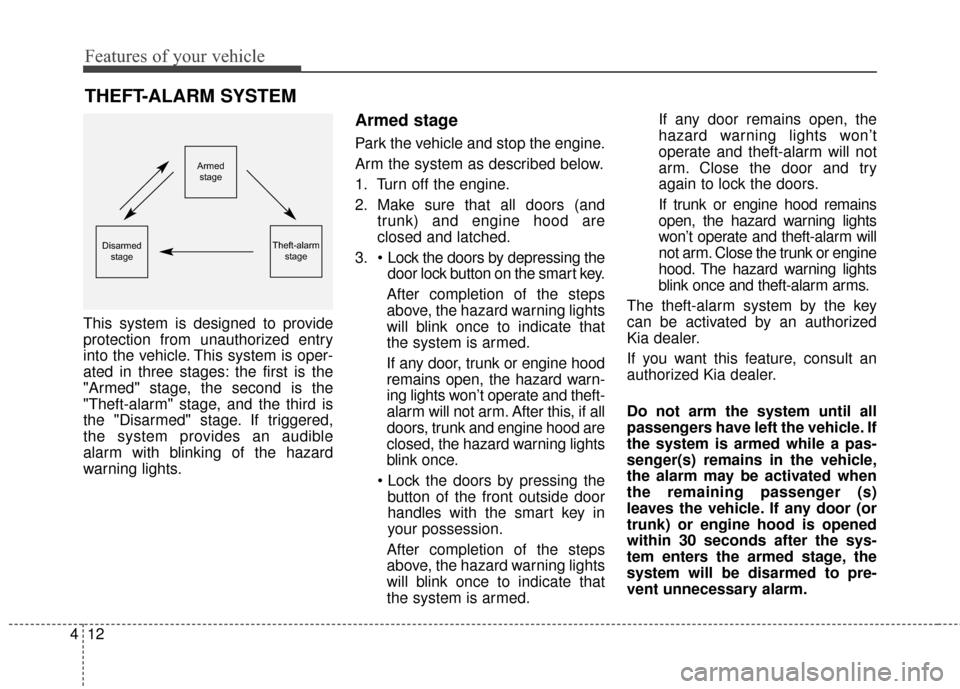
This system is designed to provide
protection from unauthorized entry
into the vehicle. This system is oper-
ated in three stages: the first is the
"Armed" stage, the second is the
"Theft-alarm" stage, and the third is
the "Disarmed" stage. If triggered,
the system provides an audible
alarm with blinking of the hazard
warning lights.
Armed stage
Park the vehicle and stop the engine.
Arm the system as described below.
1. Turn off the engine.
2. Make sure that all doors (and
trunk) and engine hood are
closed and latched.
3. door lock button on the smart key.
After completion of the steps
above, the hazard warning lights
will blink once to indicate that
the system is armed.
If any door, trunk or engine hood
remains open, the hazard warn-
ing lights won’t operate and theft-
alarm will not arm. After this, if all
doors, trunk and engine hood are
closed, the hazard warning lights
blink once.
button of the front outside door
handles with the smart key in
your possession.
After completion of the steps
above, the hazard warning lights
will blink once to indicate that
the system is armed. If any door remains open, the
hazard warning lights won’t
operate and theft-alarm will not
arm. Close the door and try
again to lock the doors.
If trunk or engine hood remains
open, the hazard warning lights
won’t operate and theft-alarm will
not arm. Close the trunk or engine
hood. The hazard warning lights
blink once and theft-alarm arms.
The theft-alarm system by the key
can be activated by an authorized
Kia dealer.
If you want this feature, consult an
authorized Kia dealer.
Do not arm the system until all
passengers have left the vehicle. If
the system is armed while a pas-
senger(s) remains in the vehicle,
the alarm may be activated when
the remaining passenger (s)
leaves the vehicle. If any door (or
trunk) or engine hood is opened
within 30 seconds after the sys-
tem enters the armed stage, the
system will be disarmed to pre-
vent unnecessary alarm.
THEFT-ALARM SYSTEM
Armed stage
Theft-alarm stageDisarmedstage
Page 88 of 466
413
Features of your vehicle
Theft-alarm stage
The alarm will be activated if any of
the following occurs while the system
is armed.
A front or rear door is opened with-out using the smart key (or
mechanical key).
The trunk is opened without using the smart key (or mechanical key).
The engine hood is opened.
The horn will sound and the hazard
warning lights will blink continuously
for approximately 27 seconds. To
turn off the system, unlock the doors
with the smart key.
Disarmed stage
The system will be disarmed when:
- The door unlock button is pressed.
- The button of the front outside door is pressed while carrying the smart
key.
- The engine is started. (within 3 seconds)
After the doors are unlocked, the haz-
ard warning lights will blink twice to
indicate that the system is disarmed.
After pressing the unlock button, if
any door (or trunk) is not opened
within 30 seconds, the system will be
rearmed. Avoid trying to start the engine
while the alarm is activated. The
vehicle starting motor is disabled
during the theft-alarm stage.
If the system is not disarmed with
the smart key, open the doors by
using the mechanical key and start
the engine by directly pressing the
engine Start/Stop button with the
smart key.
If you lose your keys, consult your authorized Kia dealer.
Page 94 of 466
419
Features of your vehicle
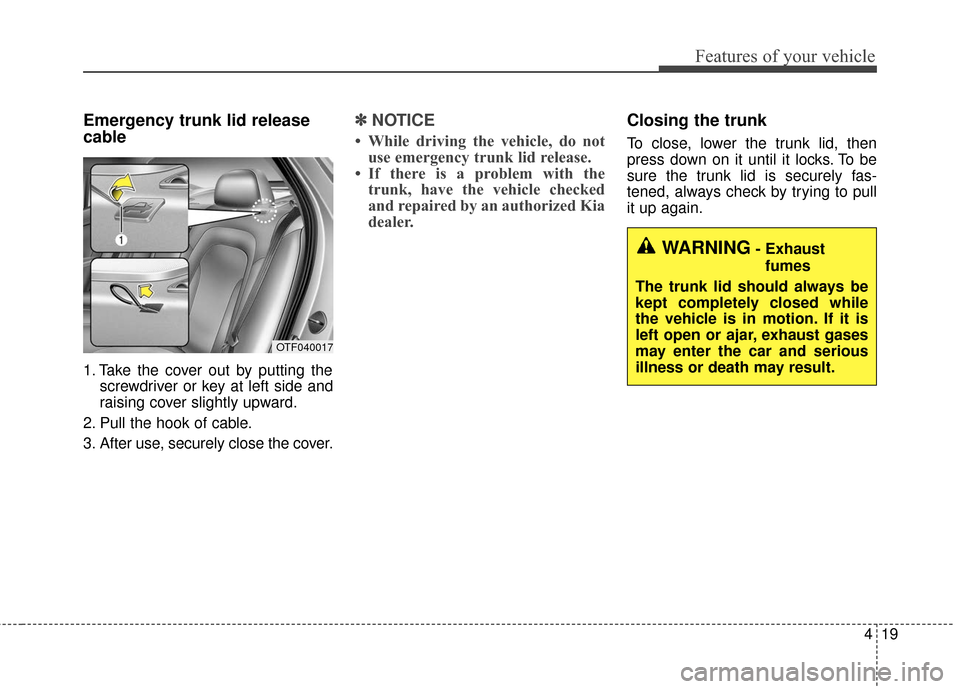
Emergency trunk lid release
cable
1. Take the cover out by putting thescrewdriver or key at left side and
raising cover slightly upward.
2. Pull the hook of cable.
3. After use, securely close the cover.
✽ ✽ NOTICE
• While driving the vehicle, do not
use emergency trunk lid release.
• If there is a problem with the trunk, have the vehicle checked
and repaired by an authorized Kia
dealer.
Closing the trunk
To close, lower the trunk lid, then
press down on it until it locks. To be
sure the trunk lid is securely fas-
tened, always check by trying to pull
it up again.
OTF040017
WARNING- Exhaust
fumes
The trunk lid should always be
kept completely closed while
the vehicle is in motion. If it is
left open or ajar, exhaust gases
may enter the car and serious
illness or death may result.
Page 103 of 466
Features of your vehicle
28
4
Opening the fuel filler lid
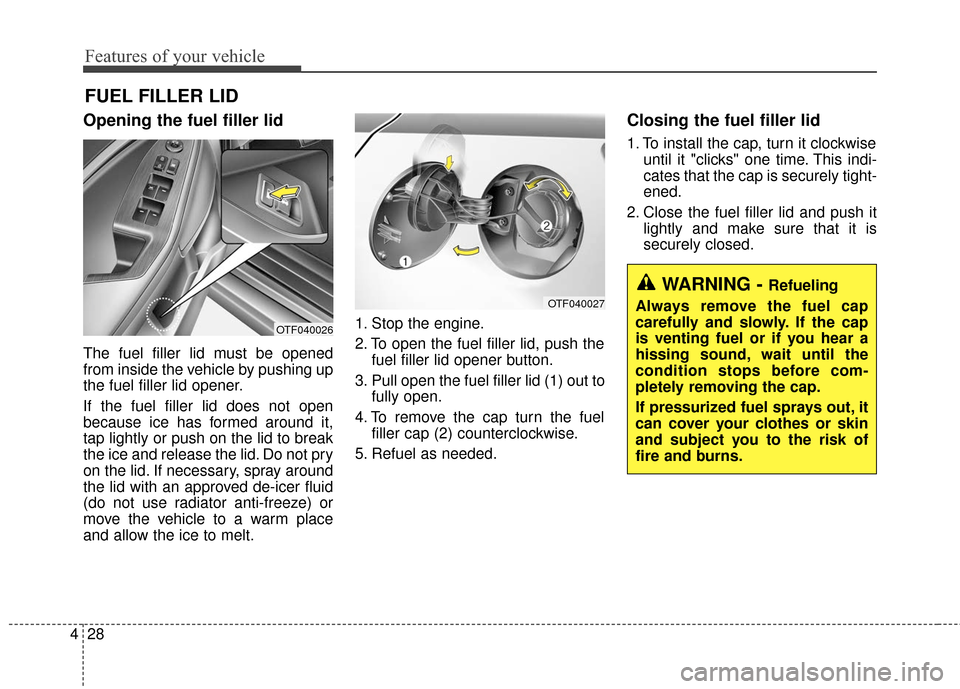
The fuel filler lid must be opened
from inside the vehicle by pushing up
the fuel filler lid opener.
If the fuel filler lid does not open
because ice has formed around it,
tap lightly or push on the lid to break
the ice and release the lid. Do not pry
on the lid. If necessary, spray around
the lid with an approved de-icer fluid
(do not use radiator anti-freeze) or
move the vehicle to a warm place
and allow the ice to melt. 1. Stop the engine.
2. To open the fuel filler lid, push the
fuel filler lid opener button.
3. Pull open the fuel filler lid (1) out to fully open.
4. To remove the cap turn the fuel filler cap (2) counterclockwise.
5. Refuel as needed.
Closing the fuel filler lid
1. To install the cap, turn it clockwise until it "clicks" one time. This indi-
cates that the cap is securely tight-
ened.
2. Close the fuel filler lid and push it lightly and make sure that it is
securely closed.
FUEL FILLER LID
OTF040026
OTF040027
WARNING - Refueling
Always remove the fuel cap
carefully and slowly. If the cap
is venting fuel or if you hear a
hissing sound, wait until the
condition stops before com-
pletely removing the cap.
If pressurized fuel sprays out, it
can cover your clothes or skin
and subject you to the risk of
fire and burns.