tow KIA OPTIMA PHEV 2017 Owner's Manual
[x] Cancel search | Manufacturer: KIA, Model Year: 2017, Model line: OPTIMA PHEV, Model: KIA OPTIMA PHEV 2017Pages: 604, PDF Size: 13.16 MB
Page 234 of 604
Features of your vehicle
104
4
Warning light and message
When the High Beam Assist System
is not working properly, the warning
message (“Check High Beam Assist
System”) will come on for a few sec-
ond. After the message disappears,
the master warning light will illumi-
nate. We recommend you to contact
an authorized Kia dealer. The system may not operate normal-
ly in the below conditions.
When the light from the on-coming
or front vehicle is not detected
because of lamp damage, hidden
from sight, etc.
When the lamp of the on-coming or front vehicle is covered with dust,
snow or water.
When the light from the on-coming or front vehicle is not detected
because of exhaust fume, smoke,
fog, snow, etc.
When the front window is covered with foreign matters such as ice,
dust, fog, or is damaged.
When there is a similar shape lamp with the front vehicle’s lamps.
When it is hard to see because of fog, heavy rain or snow.
When the headlamp is not repaired or replaced at an authorized deal-
er.
When headlamp aiming is not properly adjusted.
When driving on a narrow curved road or rough road. When driving downhill or uphill.
When only part of the vehicle in
front is visible on a crossroad or
curved road.
When there is a traffic light, reflect- ing sign, flashing sign or mirror.
When the road conditions are bad such as being wet or covered with
snow.
When the front vehicle’s head- lamps are off but the fog lamps on.
When a vehicle suddenly appears from a curve.
When the vehicle is tilted from a flat tire or being towed.
When the LDWS (lane departure warning system) warning light illu-
minates. (if equipped)
Page 238 of 604
Features of your vehicle
108
4
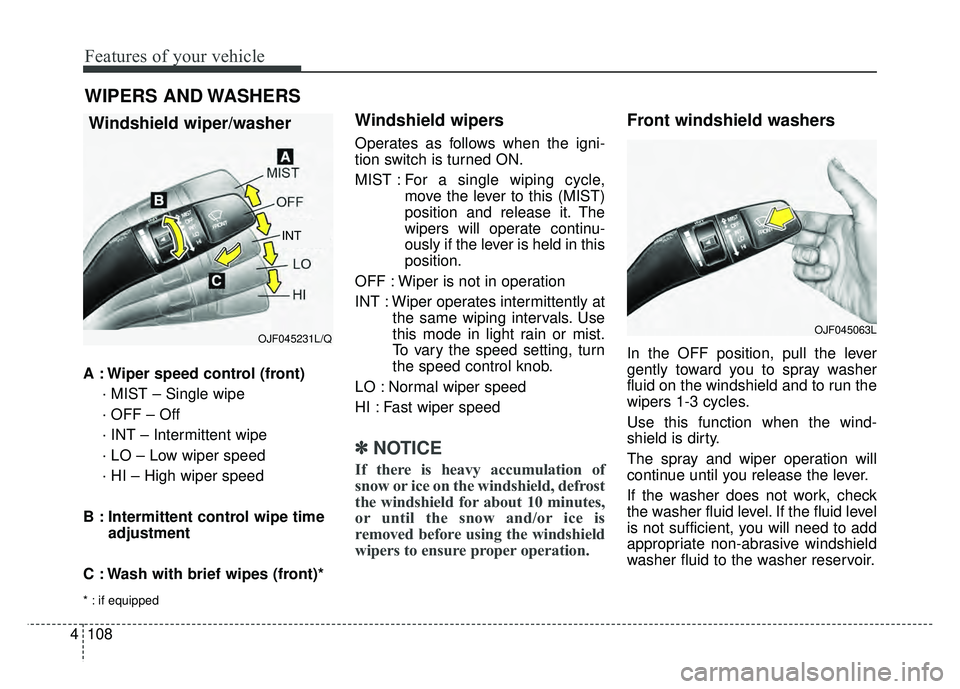
A : Wiper speed control (front)
· MIST – Single wipe
· OFF – Off
· INT – Intermittent wipe
· LO – Low wiper speed
· HI – High wiper speed
B : Intermittent control wipe time adjustment
C : Wash with brief wipes (front)*
* : if equipped
Windshield wipers
Operates as follows when the igni-
tion switch is turned ON.
MIST : For a single wiping cycle,
move the lever to this (MIST)
position and release it. The
wipers will operate continu-
ously if the lever is held in this
position.
OFF : Wiper is not in operation
INT : Wiper operates intermittently at the same wiping intervals. Use
this mode in light rain or mist.
To vary the speed setting, turn
the speed control knob.
LO : Normal wiper speed
HI : Fast wiper speed
✽ ✽ NOTICE
If there is heavy accumulation of
snow or ice on the windshield, defrost
the windshield for about 10 minutes,
or until the snow and/or ice is
removed before using the windshield
wipers to ensure proper operation.
Front windshield washers
In the OFF position, pull the lever
gently toward you to spray washer
fluid on the windshield and to run the
wipers 1-3 cycles.
Use this function when the wind-
shield is dirty.
The spray and wiper operation will
continue until you release the lever.
If the washer does not work, check
the washer fluid level. If the fluid level
is not sufficient, you will need to add
appropriate non-abrasive windshield
washer fluid to the washer reservoir.
WIPERS AND WASHERS
Windshield wiper/washer
INT
OJF045231L/QOJF045063L
Page 249 of 604
4119
Features of your vehicle
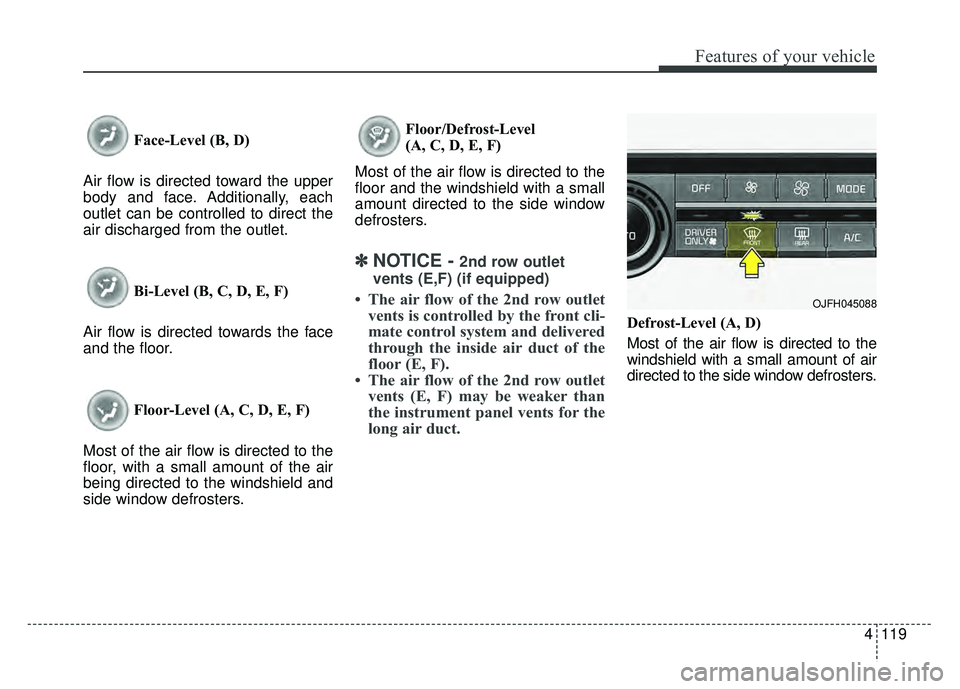
Face-Level (B, D)
Air flow is directed toward the upper
body and face. Additionally, each
outlet can be controlled to direct the
air discharged from the outlet.
Bi-Level (B, C, D, E, F)
Air flow is directed towards the face
and the floor.
Floor-Level (A, C, D, E, F)
Most of the air flow is directed to the
floor, with a small amount of the air
being directed to the windshield and
side window defrosters. Floor/Defrost-Level
(A, C, D, E, F)
Most of the air flow is directed to the
floor and the windshield with a small
amount directed to the side window
defrosters.
✽ ✽ NOTICE - 2nd row outlet
vents (E,F) (if equipped)
• The air flow of the 2nd row outlet vents is controlled by the front cli-
mate control system and delivered
through the inside air duct of the
floor (E, F).
• The air flow of the 2nd row outlet vents (E, F) may be weaker than
the instrument panel vents for the
long air duct.
Defrost-Level (A, D)
Most of the air flow is directed to the
windshield with a small amount of air
directed to the side window defrosters.
OJFH045088
Page 261 of 604
4131
Features of your vehicle
Automatic climate control system
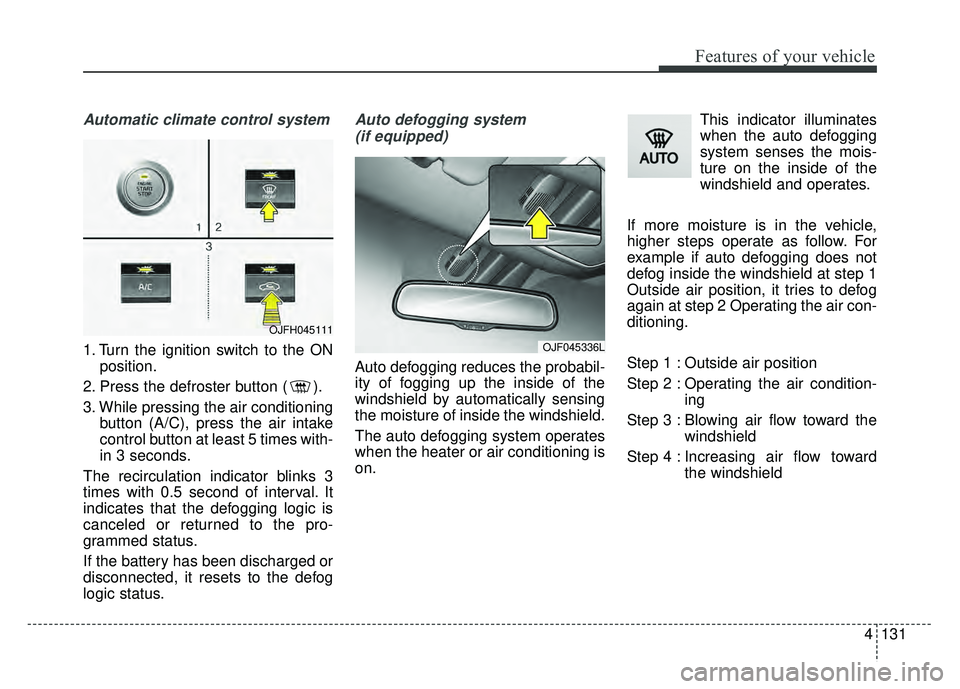
1. Turn the ignition switch to the ONposition.
2. Press the defroster button ( ).
3. While pressing the air conditioning button (A/C), press the air intake
control button at least 5 times with-
in 3 seconds.
The recirculation indicator blinks 3
times with 0.5 second of interval. It
indicates that the defogging logic is
canceled or returned to the pro-
grammed status.
If the battery has been discharged or
disconnected, it resets to the defog
logic status.
Auto defogging system (if equipped)
Auto defogging reduces the probabil-
ity of fogging up the inside of the
windshield by automatically sensing
the moisture of inside the windshield.
The auto defogging system operates
when the heater or air conditioning is
on. This indicator illuminates
when the auto defogging
system senses the mois-
ture on the inside of the
windshield and operates.
If more moisture is in the vehicle,
higher steps operate as follow. For
example if auto defogging does not
defog inside the windshield at step 1
Outside air position, it tries to defog
again at step 2 Operating the air con-
ditioning.
Step 1 : Outside air position
Step 2 : Operating the air condition- ing
Step 3 : Blowing air flow toward the windshield
Step 4 : Increasing air flow toward the windshield
OJF045336L
OJFH045111
Page 267 of 604
4137
Features of your vehicle
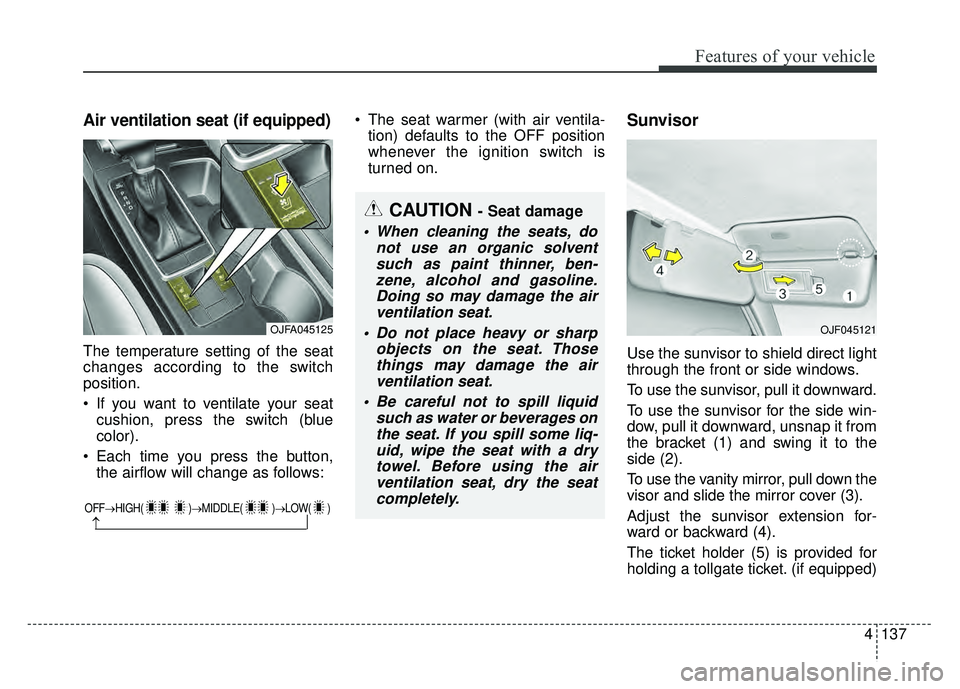
Air ventilation seat (if equipped)
The temperature setting of the seat
changes according to the switch
position.
If you want to ventilate your seatcushion, press the switch (blue
color).
Each time you press the button, the airflow will change as follows: The seat warmer (with air ventila-
tion) defaults to the OFF position
whenever the ignition switch is
turned on.
Sunvisor
Use the sunvisor to shield direct light
through the front or side windows.
To use the sunvisor, pull it downward.
To use the sunvisor for the side win-
dow, pull it downward, unsnap it from
the bracket (1) and swing it to the
side (2).
To use the vanity mirror, pull down the
visor and slide the mirror cover (3).
Adjust the sunvisor extension for-
ward or backward (4).
The ticket holder (5) is provided for
holding a tollgate ticket. (if equipped)
OFF→ HIGH( )→ MIDDLE( )→LOW( )
→
CAUTION - Seat damage
When cleaning the seats, do
not use an organic solventsuch as paint thinner, ben-zene, alcohol and gasoline.Doing so may damage the airventilation seat.
Do not place heavy or sharp objects on the seat. Thosethings may damage the airventilation seat.
Be careful not to spill liquid such as water or beverages onthe seat. If you spill some liq-uid, wipe the seat with a drytowel. Before using the airventilation seat, dry the seatcompletely.
OJFA045125OJF045121
Page 271 of 604

4141
Features of your vehicle
The following must be observed
when installing ANY floor mat to the
vehicle.
Ensure that the floor mats aresecurely attached to the vehicle's
floor mat anchor(s) before driving
the vehicle.
Do not use ANY floor mat that can- not be firmly attached to the vehi-
cle's floor mat anchors.
Do not stack floor mats on top of one another (e.g. all-weather rub-
ber mat on top of a carpeted floor
mat). Only a single floor mat should
be installed in each position.
✽ ✽ NOTICE
Your vehicle was manufactured with
driver's side floor mat anchors that
are designed to securely hold the
floor mat in place. To avoid any
interference with pedal operation,
Kia recommends that only the Kia
floor mat designed for use in your
vehicle be installed.
Side curtain (if equipped)
To use the side curtain:
1. Lift the curtain by the handle (1).
2. Hang the curtain on the hooks on
both sides of the handle.
To avoid injury or damage to the side
curtain and door moldings, lower
side curtain by the handle all the way
back to the stowed position. Do not
release handle after disengaging
from the hooks on the door.
OJF045304
Page 276 of 604
Audio system
55
How vehicle radio works
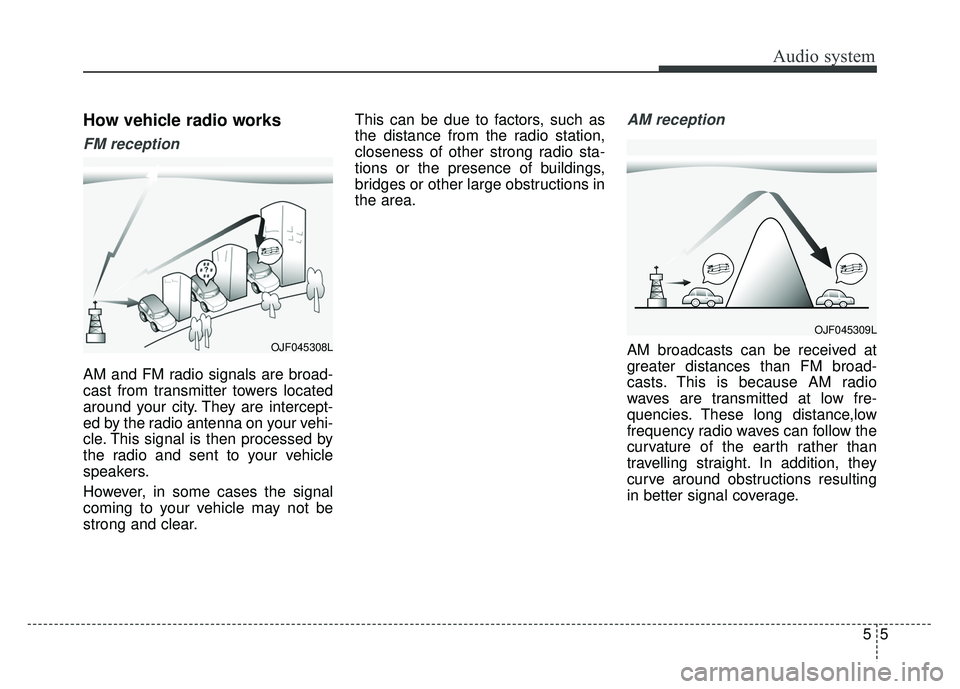
FM reception
AM and FM radio signals are broad-
cast from transmitter towers located
around your city. They are intercept-
ed by the radio antenna on your vehi-
cle. This signal is then processed by
the radio and sent to your vehicle
speakers.
However, in some cases the signal
coming to your vehicle may not be
strong and clear.This can be due to factors, such as
the distance from the radio station,
closeness of other strong radio sta-
tions or the presence of buildings,
bridges or other large obstructions in
the area.
AM reception
AM broadcasts can be received at
greater distances than FM broad-
casts. This is because AM radio
waves are transmitted at low fre-
quencies. These long distance,low
frequency radio waves can follow the
curvature of the earth rather than
travelling straight. In addition, they
curve around obstructions resulting
in better signal coverage.OJF045308L
OJF045309L
Page 339 of 604
Active ECO system. . . . . . . . . . . . . . . . . . . . . . . . . 6-75
. . . . . . . . . . . . . . . . . . . . . . . . . 6-75
Blind spot detection system (BSD) . . . . . . . . . . . . 6-77
LCA (Lane Change Assist) . . . . . . . . . . . . . . . . . . . . 6-78
. . . . . . . . . . . . . . . . . . . . . . . . . 6-83
Lane departure warning system (LDWS) . . . . . . 6-85
. . . . . . . . . . . . . . . . . . . . . . . . . . . 6-87
. . 6-87
false warnings: . . . . . . . . . . . . . . . . . . . . . . . . . . . . . . 6-88
Economical operation . . . . . . . . . . . . . . . . . . . . . . 6-89
Special driving conditions . . . . . . . . . . . . . . . . . . . 6-91
. . . . . . . . . . . . . . . . . 6-91
. . . . . . . . . . . . . . . . . . . . . . . . . . . 6-91
. . . . . . . . . . . . . . . . . . . . . . . . . . . . 6-92
. . . . . . . . . . . . . . . . . . . . . . . . . . . . . . 6-92
. . . . . . . . . . . . . . . . . . . . . . 6-94
. . . . . . . . . . . . . . . . . . . . . . . . . . . . . 6-94
. . . . . . . . . . . . . . . . . . . . . . . . . . . . . 6-94
Winter driving . . . . . . . . . . . . . . . . . . . . . . . . . . . . 6-95
. . . . . . . . . . . . . . . . . . . . . . . 6-95
. . . . . . . . . . 6-97 . . . . . . . . . . . . . . . . . . . . . . 6-97
. . . . . . . 6-97
. . . . . . . . . . . . . . . . . . . . 6-98
. .
6-98
. . . . . . . . . . . . . 6-98
. . . . 6-98
. . . . . . . . . . . . . . . . . . . 6-98
Trailer Towing . . . . . . . . . . . . . . . . . . . . . . . . . . . . 6-98
Vehicle load limit . . . . . . . . . . . . . . . . . . . . . . . . . . 6-99
. . . . . . . . . . . . . . 6-99
. . . . . . . . . . . . . . . . . . . . . . . . . . . 6-102
Vehicle weight . . . . . . . . . . . . . . . . . . . . . . . . . . . . 6-103
. . . . . . . . . . . . . . . . . . . . . . . . . . . 6-103
. . . . . . . . . . . . . . . . . . . . . . . . . . 6-103
. . . . . . . . . . . . . . . . . . . . . . . . . . . . . . . 6-103
. . . . . . . . . . . . . . . . . . . . . 6-103
. . . . . . . . . . . . . . 6-103
. . . . . . . . . . . . . . . . . . 6-103
. . . . . . . . . . . 6-1036
Page 346 of 604
69
Driving your vehicle
1. Always carry the smart key withyou.
2. Make sure the parking brake is applied.
3. Make sure the shift lever is in P (Park).
4. Depress the brake pedal.
5. Press the Engine Start/Stop but- ton. If the hybrid system starts, the
" " indicator will come on.✽ ✽NOTICE
• Do not wait for the engine to warm
up while the vehicle remains sta-
tionary.
Start driving at moderate engine
speeds. (Steep accelerating and
decelerating should be avoided.)
• Always start the vehicle with your foot on the brake pedal. Do not
depress the accelerator while
starting the vehicle. Do not race
the engine while warming it up.
• If ambient temperature is low, the " " indicator may remain illu-
minated longer than the normal
amount of time.
✽ ✽ NOTICE
To prevent damage to the vehicle:
• If the " " indicator turns off
while you are in motion, do not
attempt to move the shift lever to
the P (Park) position.
If traffic and road conditions per-
mit, you may put the shift lever in
the N (Neutral) position while the
vehicle is still moving and press
the Engine Start/Stop button in an
attempt to restart the hybrid sys-
tem.
• Do not push or tow your vehicle to start the hybrid system.
Page 364 of 604
627
Driving your vehicle
Emergency braking
If there is a problem with the brake
pedal while driving, emergency brak-
ing is possible by pulling up and
holding the EPB switch. Braking is
possible only while you are holding
the EPB switch.
✽ ✽NOTICE
During emergency braking by the
EPB, the parking brake warning
light will illuminate to indicate that
the system is operating.
If you notice a continuous noise or
burning smell when the EPB is used
for emergency braking, have your
vehicle checked by an authorized Kia
dealer.
When the EPB (electronic parking
brake) is not released
If the EPB does not release normal-
ly, take your vehicle to an authorized
Kia dealer by loading the vehicle on
a flatbed tow truck and have the sys-
tem checked.
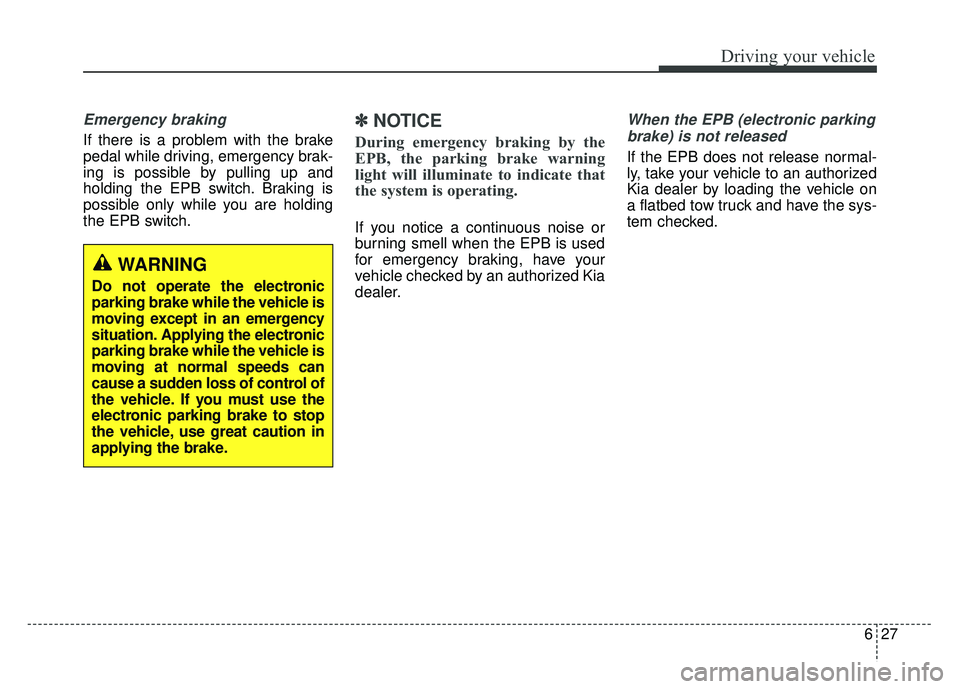
WARNING
Do not operate the electronic
parking brake while the vehicle is
moving except in an emergency
situation. Applying the electronic
parking brake while the vehicle is
moving at normal speeds can
cause a sudden loss of control of
the vehicle. If you must use the
electronic parking brake to stop
the vehicle, use great caution in
applying the brake.