ABS KIA OPTIMA PHEV 2019 User Guide
[x] Cancel search | Manufacturer: KIA, Model Year: 2019, Model line: OPTIMA PHEV, Model: KIA OPTIMA PHEV 2019Pages: 553, PDF Size: 11.97 MB
Page 504 of 553
877
Maintenance
5. Insert a new bulb by inserting itinto the bulb-socket.
6. Install the bulb-socket in the head- lamp assembly by aligning the
tabs on the bulb-socket with the
slots in the headlamp assembly.
Push the bulb-socket into the
headlamp assembly and turn the
bulb-socket clockwise.
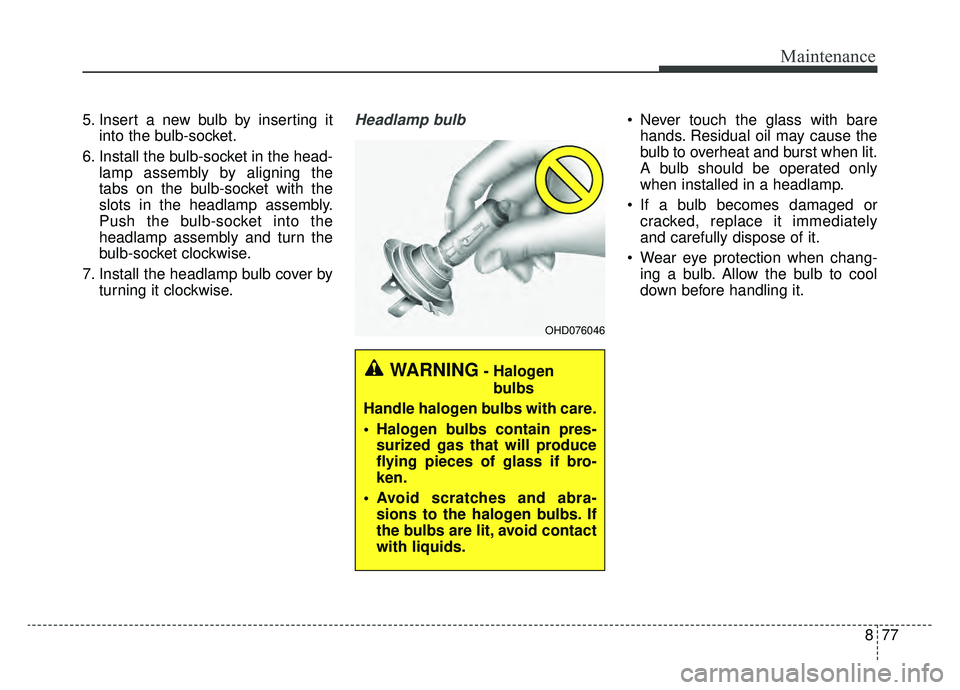
7. Install the headlamp bulb cover by turning it clockwise.Headlamp bulb Never touch the glass with barehands. Residual oil may cause the
bulb to overheat and burst when lit.
A bulb should be operated only
when installed in a headlamp.
If a bulb becomes damaged or cracked, replace it immediately
and carefully dispose of it.
Wear eye protection when chang- ing a bulb. Allow the bulb to cool
down before handling it.
WARNING- Halogen
bulbs
Handle halogen bulbs with care.
Halogen bulbs contain pres- surized gas that will produce
flying pieces of glass if bro-
ken.
Avoid scratches and abra- sions to the halogen bulbs. If
the bulbs are lit, avoid contact
with liquids.
OHD076046
Page 505 of 553
Maintenance
78
8
Headlamp (High beam) bulb
replacement (Headlamp Type A)
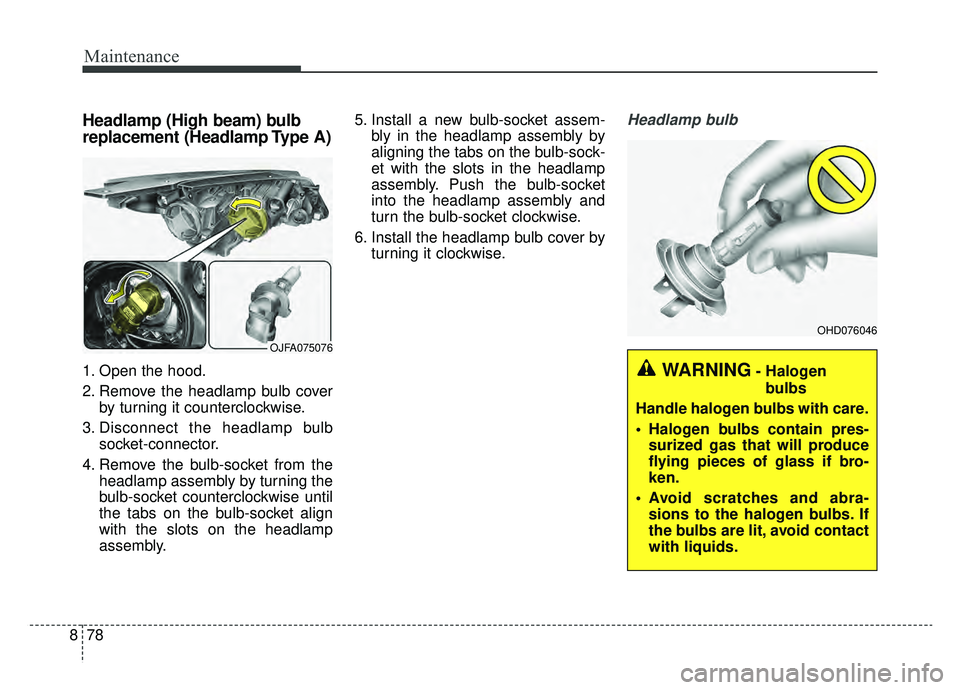
1. Open the hood.
2. Remove the headlamp bulb cover
by turning it counterclockwise.
3. Disconnect the headlamp bulb socket-connector.
4. Remove the bulb-socket from the headlamp assembly by turning the
bulb-socket counterclockwise until
the tabs on the bulb-socket align
with the slots on the headlamp
assembly. 5. Install a new bulb-socket assem-
bly in the headlamp assembly by
aligning the tabs on the bulb-sock-
et with the slots in the headlamp
assembly. Push the bulb-socket
into the headlamp assembly and
turn the bulb-socket clockwise.
6. Install the headlamp bulb cover by turning it clockwise.
Headlamp bulb
OJFA075076
WARNING- Halogen
bulbs
Handle halogen bulbs with care.
Halogen bulbs contain pres- surized gas that will produce
flying pieces of glass if bro-
ken.
Avoid scratches and abra- sions to the halogen bulbs. If
the bulbs are lit, avoid contact
with liquids.
OHD076046
Page 506 of 553

879
Maintenance
Never touch the glass with barehands. Residual oil may cause the
bulb to overheat and burst when lit.
A bulb should be operated only
when installed in a headlamp.
If a bulb becomes damaged or cracked, replace it immediately
and carefully dispose of it.
Wear eye protection when chang- ing a bulb. Allow the bulb to cool
down before handling it.Headlamp (Low/High
beam,LED type) bulb replace-
ment (Headlamp Type B)
If the head lamp (LED) (1,2) does not
operate, have the vehicle checked by
an authorized Kia dealer. The LED
lamps cannot be replaced as a sin-
gle component because they are
part of an integrated unit. The LED
lamps have to be replaced with the
unit. A skilled technician should
check or repair the head lamp (LED),
to avoid damage to related parts of
the vehicle.
Front turn signal lamp bulb
replacement
1. Open the hood.
2. Remove the bulb-socket from the
headlamp assembly by turning the
bulb-socket counterclockwise until
the tabs on the bulb-socket align
with the slots on the headlamp
assembly.
3. Remove the bulb from the bulb- socket by pressing it in and rotat-
ing it counterclockwise until the
tabs on the bulb align with the
slots in the bulb-socket. Pull the
bulb out of the bulb-socket
OJFA075079OJFHP076231N
Page 507 of 553
Maintenance
80
8
4. Insert a new bulb by inserting it
into the bulb-socket and rotating it
until it locks into place.
5. Install the socket in the headlamp assembly by aligning the tabs on
the bulb-socket with the slots in
the assembly. Push the bulb-sock-
et into the headlamp assembly
and turn the socket clockwise.Position lamp + DRL (LED
type) bulb replacement
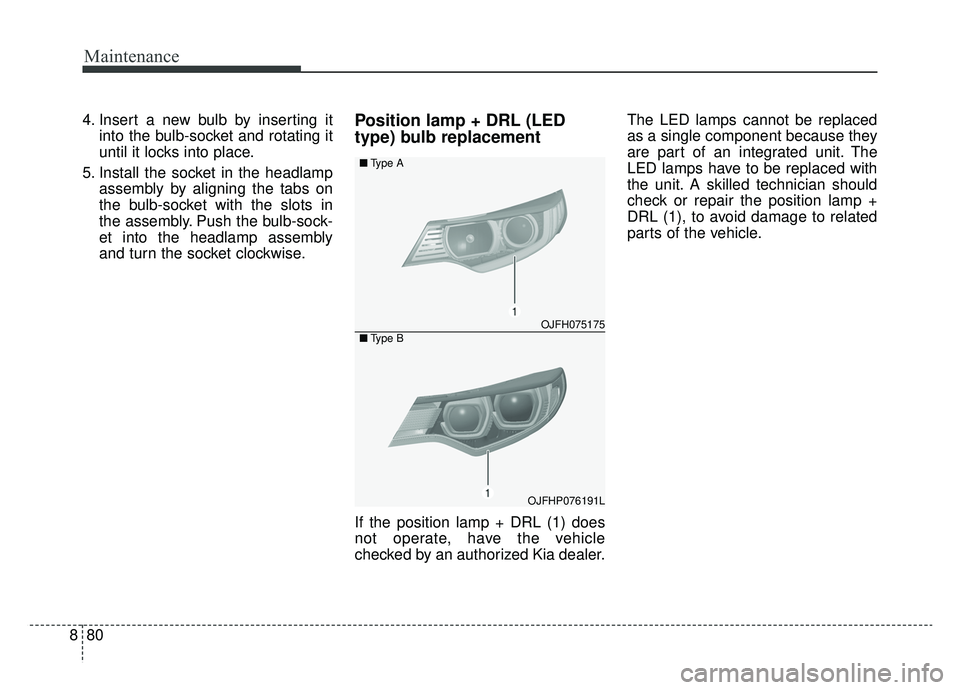
If the position lamp + DRL (1) does
not operate, have the vehicle
checked by an authorized Kia dealer. The LED lamps cannot be replaced
as a single component because they
are part of an integrated unit. The
LED lamps have to be replaced with
the unit. A skilled technician should
check or repair the position lamp +
DRL (1), to avoid damage to related
parts of the vehicle.
OJFH075175
OJFHP076191L
■
Type A
■Type B
Page 509 of 553
Maintenance
82
8
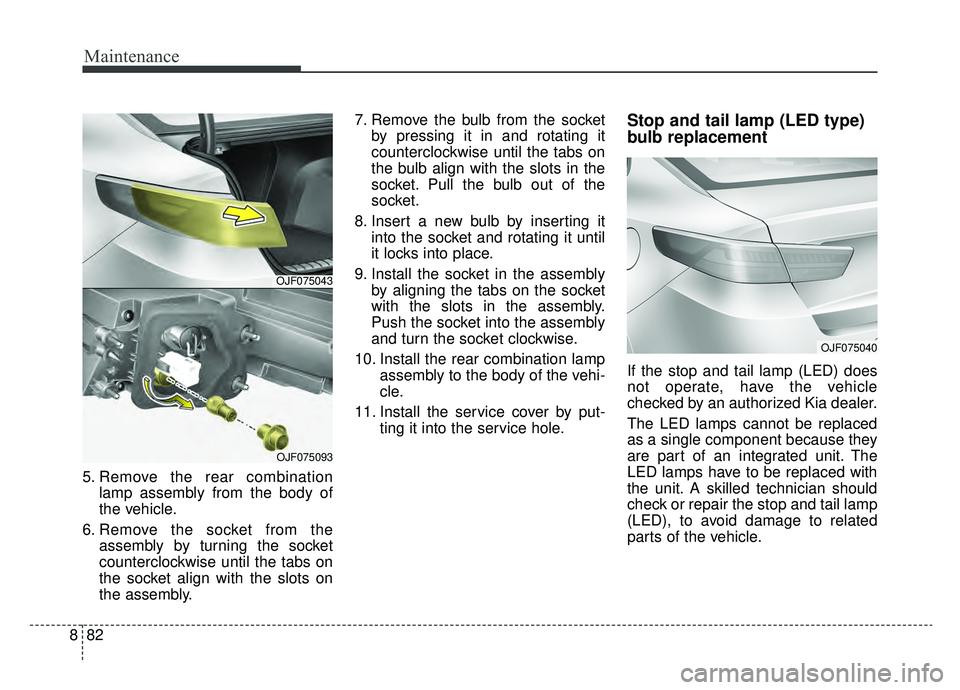
5. Remove the rear combination
lamp assembly from the body of
the vehicle.
6. Remove the socket from the assembly by turning the socket
counterclockwise until the tabs on
the socket align with the slots on
the assembly. 7. Remove the bulb from the socket
by pressing it in and rotating it
counterclockwise until the tabs on
the bulb align with the slots in the
socket. Pull the bulb out of the
socket.
8. Insert a new bulb by inserting it into the socket and rotating it until
it locks into place.
9. Install the socket in the assembly by aligning the tabs on the socket
with the slots in the assembly.
Push the socket into the assembly
and turn the socket clockwise.
10. Install the rear combination lamp assembly to the body of the vehi-
cle.
11. Install the service cover by put- ting it into the service hole.
Stop and tail lamp (LED type)
bulb replacement
If the stop and tail lamp (LED) does
not operate, have the vehicle
checked by an authorized Kia dealer.
The LED lamps cannot be replaced
as a single component because they
are part of an integrated unit. The
LED lamps have to be replaced with
the unit. A skilled technician should
check or repair the stop and tail lamp
(LED), to avoid damage to related
parts of the vehicle.
OJF075043
OJF075093
OJF075040
Page 510 of 553
883
Maintenance
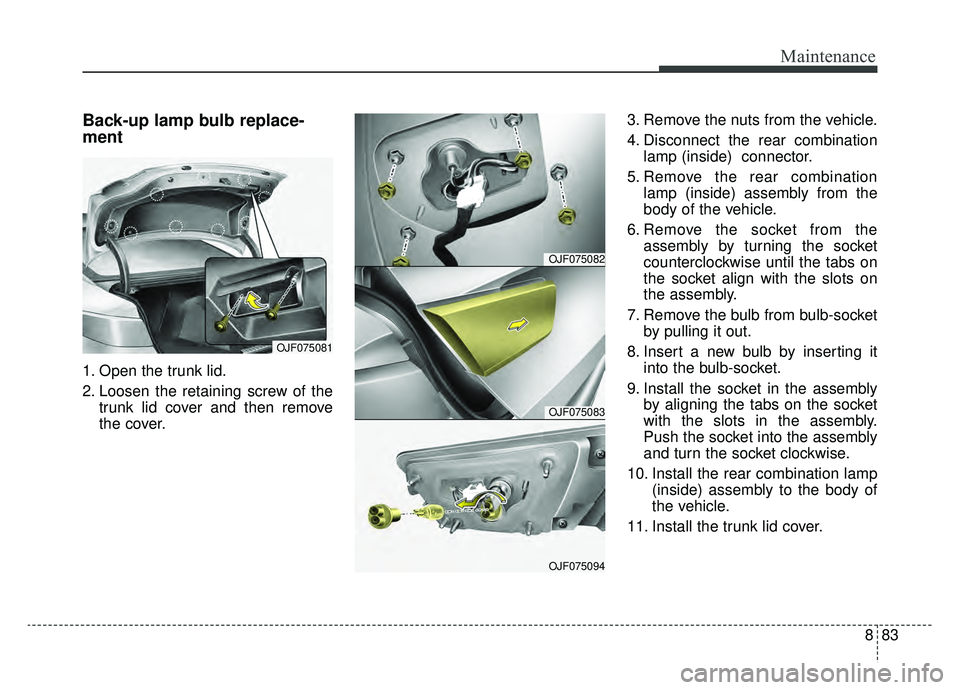
Back-up lamp bulb replace-
ment
1. Open the trunk lid.
2. Loosen the retaining screw of thetrunk lid cover and then remove
the cover. 3. Remove the nuts from the vehicle.
4. Disconnect the rear combination
lamp (inside) connector.
5. Remove the rear combination lamp (inside) assembly from the
body of the vehicle.
6. Remove the socket from the assembly by turning the socket
counterclockwise until the tabs on
the socket align with the slots on
the assembly.
7. Remove the bulb from bulb-socket by pulling it out.
8. Insert a new bulb by inserting it into the bulb-socket.
9. Install the socket in the assembly by aligning the tabs on the socket
with the slots in the assembly.
Push the socket into the assembly
and turn the socket clockwise.
10. Install the rear combination lamp (inside) assembly to the body of
the vehicle.
11. Install the trunk lid cover.
OJF075081
OJF075082
OJF075083
OJF075094
Page 511 of 553
Maintenance
84
8
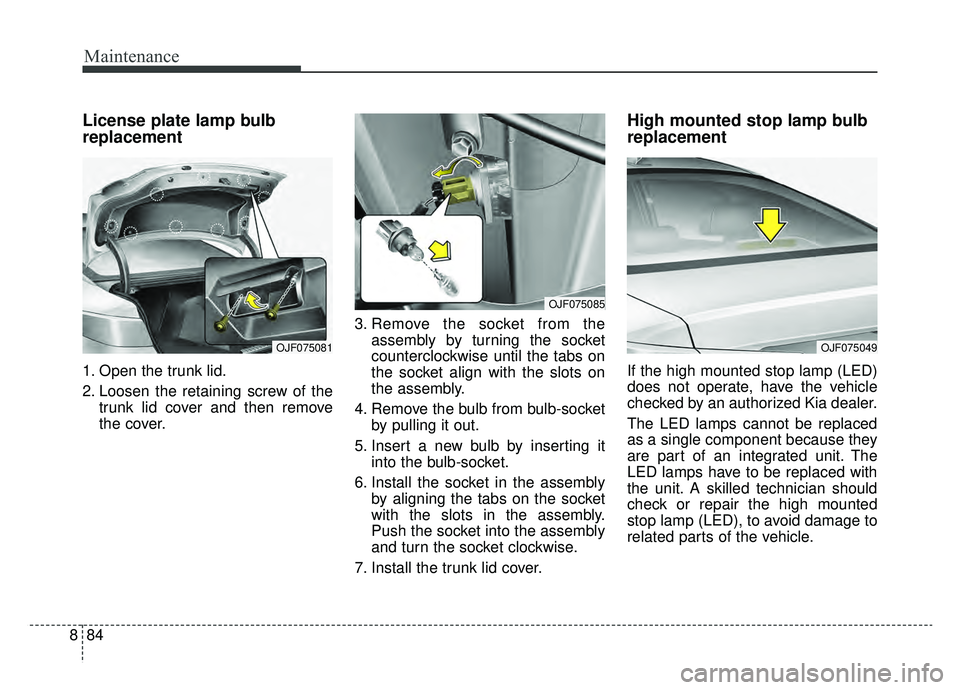
License plate lamp bulb
replacement
1. Open the trunk lid.
2. Loosen the retaining screw of the
trunk lid cover and then remove
the cover. 3. Remove the socket from the
assembly by turning the socket
counterclockwise until the tabs on
the socket align with the slots on
the assembly.
4. Remove the bulb from bulb-socket by pulling it out.
5. Insert a new bulb by inserting it into the bulb-socket.
6. Install the socket in the assembly by aligning the tabs on the socket
with the slots in the assembly.
Push the socket into the assembly
and turn the socket clockwise.
7. Install the trunk lid cover.
High mounted stop lamp bulb
replacement
If the high mounted stop lamp (LED)
does not operate, have the vehicle
checked by an authorized Kia dealer.
The LED lamps cannot be replaced
as a single component because they
are part of an integrated unit. The
LED lamps have to be replaced with
the unit. A skilled technician should
check or repair the high mounted
stop lamp (LED), to avoid damage to
related parts of the vehicle.
OJF075081
OJF075085
OJF075049
Page 513 of 553
Maintenance
86
8
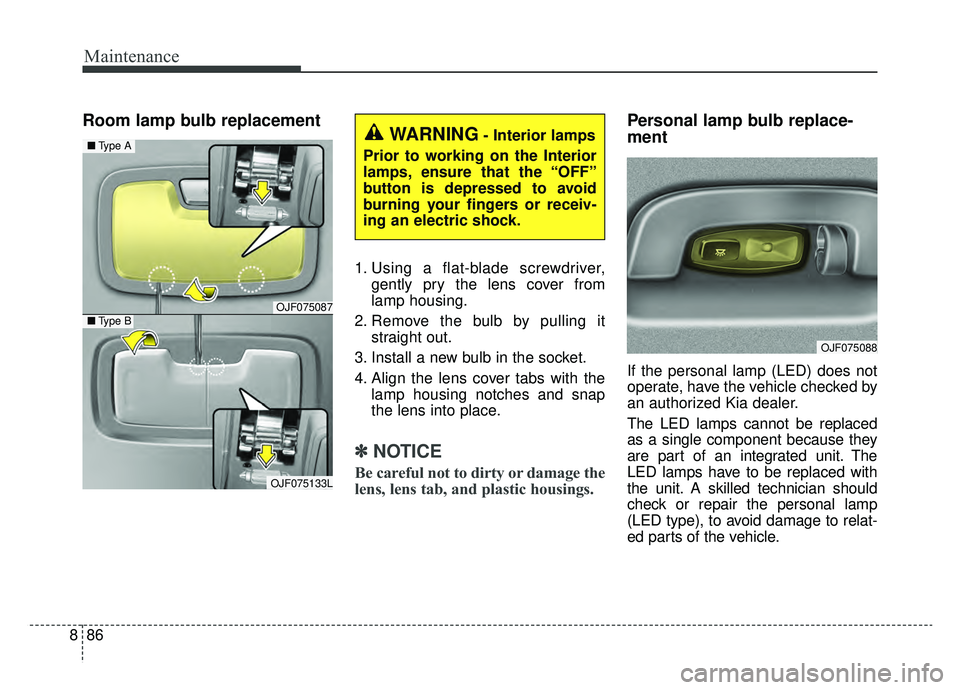
Room lamp bulb replacement
1. Using a flat-blade screwdriver,
gently pry the lens cover from
lamp housing.
2. Remove the bulb by pulling it straight out.
3. Install a new bulb in the socket.
4. Align the lens cover tabs with the lamp housing notches and snap
the lens into place.
✽ ✽NOTICE
Be careful not to dirty or damage the
lens, lens tab, and plastic housings.
Personal lamp bulb replace-
ment
If the personal lamp (LED) does not
operate, have the vehicle checked by
an authorized Kia dealer.
The LED lamps cannot be replaced
as a single component because they
are part of an integrated unit. The
LED lamps have to be replaced with
the unit. A skilled technician should
check or repair the personal lamp
(LED type), to avoid damage to relat-
ed parts of the vehicle.
OJF075087
OJF075133L
■ Type A
■Type B
WARNING- Interior lamps
Prior to working on the Interior
lamps, ensure that the “OFF”
button is depressed to avoid
burning your fingers or receiv-
ing an electric shock.
OJF075088
Page 521 of 553
Maintenance
94
8
Taking care of leather seats
(if equipped)
Vacuum the seat periodically to remove dust and sand on the seat.
It will prevent abrasion or damage of
the leather and maintain its quality.
Wipe the natural leather seat cover often with dry or soft cloth.
Sufficient use of a leather protec- tive may prevent abrasion of the
cover and helps maintain the color.
Be sure to read the instructions
and consult a specialist when
using leather coating or protective
agents.
Light colored (beige, cream beige) leather is easily contaminated and
the stain is noticeable. Clean the
seats frequently.
Avoid wiping with wet cloth. It may cause the surface to crack.
Cleaning the leather seats
(if equipped)
Remove all contaminations instant- ly. Refer to instructions below for
removal of each contaminant.
Cosmetic products(sunscreen, foundation, etc.)
- Apply cleansing cream on a clothand wipe the contaminated point.
Wipe off the cream with a wet
cloth and remove water with a dry
cloth.
Beverages(coffee, soft drink, etc.) - Apply a small amount of neutraldetergent and wipe until contami-
nations do not smear.
Oil - Remove oil immediately withabsorbable cloth and wipe with
stain remover for natural leather
only.
Chewing gum - Harden the gum with ice andremove gradually.
Fabric seat cover using precau-
tions (If equipped)
Please clean the fabric seats regu-
larly with a vacuum cleaner in con-
sideration of fabric material charac-
teristics. If they are heavily soiled
with beverage stains, etc., use a suit-
able interior cleaner. To prevent dam-
age to seat covers, wipe off the seat
covers down to the seams with a
large wiping motion and moderate
pressure using a soft sponge or
microfiber cloth.
Velcro closures on clothing or sharp
objects may cause snagging or
scratches on the surface of the
seats. Make sure not to rub such
objects against the surface.
Page 524 of 553
897
Maintenance
Canister
Fuel vapors generated inside the fuel
tank are absorbed and stored in the
onboard canister. When the engine is
running, the fuel vapors absorbed in
the canister are drawn into the surge
tank through the purge control sole-
noid valve.
Purge Control Solenoid Valve(PCSV)
The purge control solenoid valve is
controlled by the Engine Control
Module (ECM); when the engine
coolant temperature is low during
idling, the PCSV closes so that evap-
orated fuel is not taken into the
engine. After the engine warms up
during ordinary driving, the PCSV
opens to introduce evaporated fuel to
the engine.
3. Exhaust emission control system
The Exhaust Emission Control
System is a highly effective system
which controls exhaust emissions
while maintaining good vehicle per-
formance.
Vehicle modifications
This vehicle should not be modified.
Modification of your vehicle could
affect its performance, safety or
durability and may even violate gov-
ernmental safety and emissions reg-
ulations.
In addition, damage or performance
problems resulting from any modifi-
cation may not be covered under
warranty.
If you use unauthorized electronic
devices, it may cause the vehicle to
operate abnormally, wire damage,
battery discharge and fire. For your
safety, do not use unauthorized
electronic devices.
Engine exhaust gas precautions
(carbon monoxide)
Carbon monoxide can be present with other exhaust fumes.
Therefore, if you smell exhaust
fumes of any kind inside your vehi-
cle, have it inspected and repaired
immediately. If you ever suspect
exhaust fumes are coming into
your vehicle, drive it only with all
the windows fully open. Have your
vehicle checked and repaired
immediately.
WARNING - Exhaust
Engine exhaust gases contain
carbon monoxide (CO). Though
colorless and odorless, it is
dangerous and could be lethal if
inhaled. Follow the instructions
on this page to avoid CO poi-
soning.