KIA PICANTO 2006 Manual Online
Manufacturer: KIA, Model Year: 2006, Model line: PICANTO, Model: KIA PICANTO 2006Pages: 281, PDF Size: 9.89 MB
Page 81 of 281
371
1 23456789
Knowing your vehicle
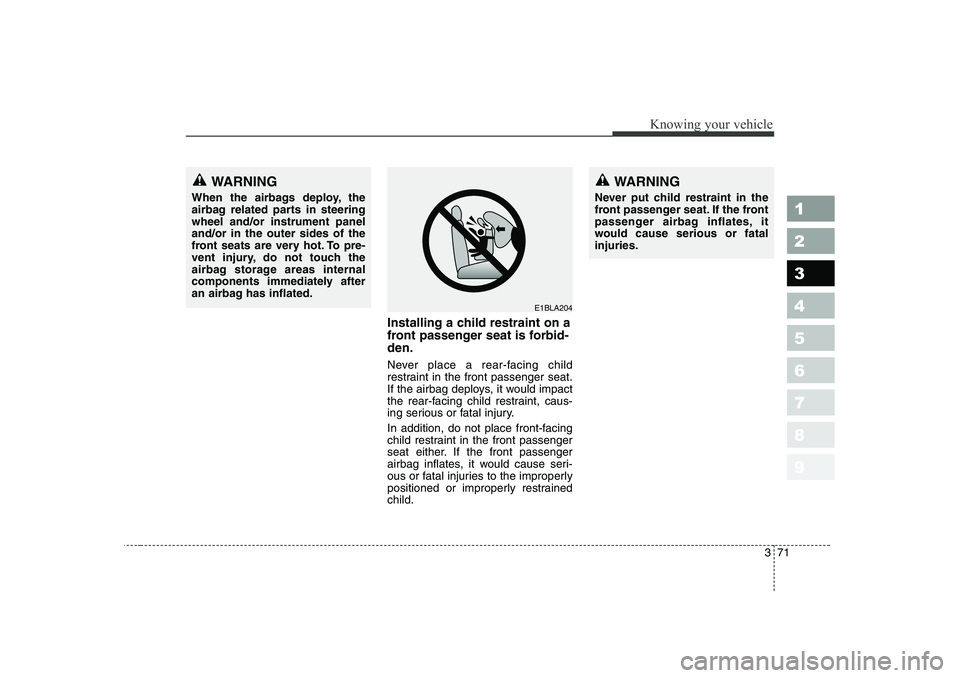
Installing a child restraint on a
front passenger seat is forbid-den.
Never place a rear-facing child
restraint in the front passenger seat.
If the airbag deploys, it would impact
the rear-facing child restraint, caus-
ing serious or fatal injury.
In addition, do not place front-facing
child restraint in the front passenger
seat either. If the front passenger
airbag inflates, it would cause seri-
ous or fatal injuries to the improperly
positioned or improperly restrainedchild.
WARNING
Never put child restraint in the
front passenger seat. If the front
passenger airbag inflates, it
would cause serious or fatalinjuries.WARNING
When the airbags deploy, the
airbag related parts in steeringwheel and/or instrument paneland/or in the outer sides of the
front seats are very hot. To pre-
vent injury, do not touch the
airbag storage areas internal
components immediately after
an airbag has inflated.
E1BLA204
Page 82 of 281
Knowing your vehicle
72
3
1 23456789
Airbag warning light
The purpose of airbag warning light
in your instrument panel is to alert
you of a potential problem with your
airbag - Supplemental RestraintSystem (SRS). When the ignition switch is turned
ON, the indicator light should blink or
illuminate for approximately 6 sec-
onds, then go off.
Have the system checked if:
The light does not turn on briefly
when you turn the ignition ON.
The light stays on after the engine starts.
The light comes on while the vehi- cle is in motion. Airbag (Supplemental
Restraint System) service
Your Supplemental Restraint System
is virtually maintenance-free. There
are no parts which you can service.
You must have the system serviced
under the following circumstances:
If an airbag ever inflates, the airbag
must be replaced. Do not try to
remove or discard the airbag by
yourself. This must be done by an
authorized Kia dealer.
If the airbag warning indicator light alerts you to a problem, have the
airbag system checked as soon as
possible. Otherwise, your airbag
system may be ineffective.
AIR
BAG
Page 83 of 281
373
1 23456789
Knowing your vehicle
When repairing or scrapping thevehicles
Repairing steering wheel, instru- ment panel, center console or
roofs, or installing car audio aroundcenter console or painting front
metal sheet could disable the
airbag system. Have them checked
by an authorized Kia dealer.
When leaving the vehicle at an authorized Kia dealer, inform that
the vehicle is equipped with airbag
system, and leave the owner’s
manual in the vehicle.
Since airbag system contains explosive chemical substances,
contact an authorized Kia dealer
when scrapping the vehicle.
CAUTION
Do not modify any part of the
Supplemental Restraint System. Excessive modification couldmake the airbag system ineffec-tive.
WARNING
Do not modify your steering wheel, seat or any other part of the Supplemental Restraint
System. Modification could
make the system inoperable.
Do not work on the system’s components or wiring. This
could cause the airbags to
inflate inadvertently, possibly
seriously injuring someone.
Working on the system could
also disable the system so
that the airbags would not
deploy in a collision.
Any work on the SRS system, such as removing, installing,
repairing, or any work on the
steering wheel must be per-
formed by a qualified Kia tech-
nician. Improper handling of
the airbag system may result
in serious personal injury.
Page 84 of 281
Knowing your vehicle
74
3
1 23456789
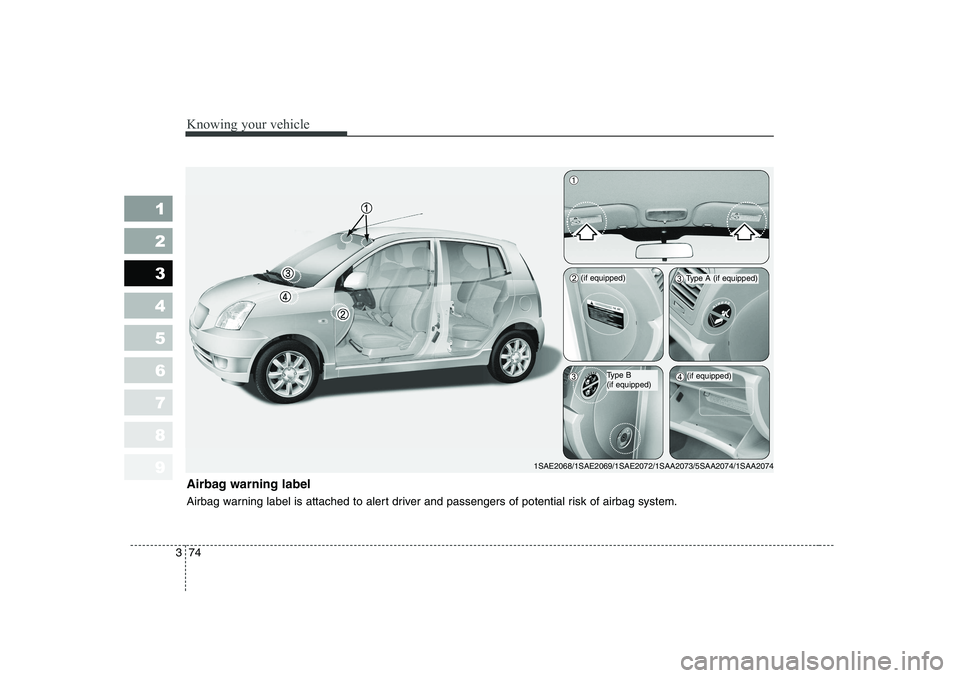
Airbag warning label
Airbag warning label is attached to alert driver and passengers of potential risk of airbag system.
1SAE2068/1SAE2069/1SAE2072/1SAA2073/5SAA2074/1SAA2074
➀
➁➂
➃(if equipped)
Type A (if equipped)
➂Type B (if equipped)
(if equipped)
Page 85 of 281
375
1 23456789
Knowing your vehicle
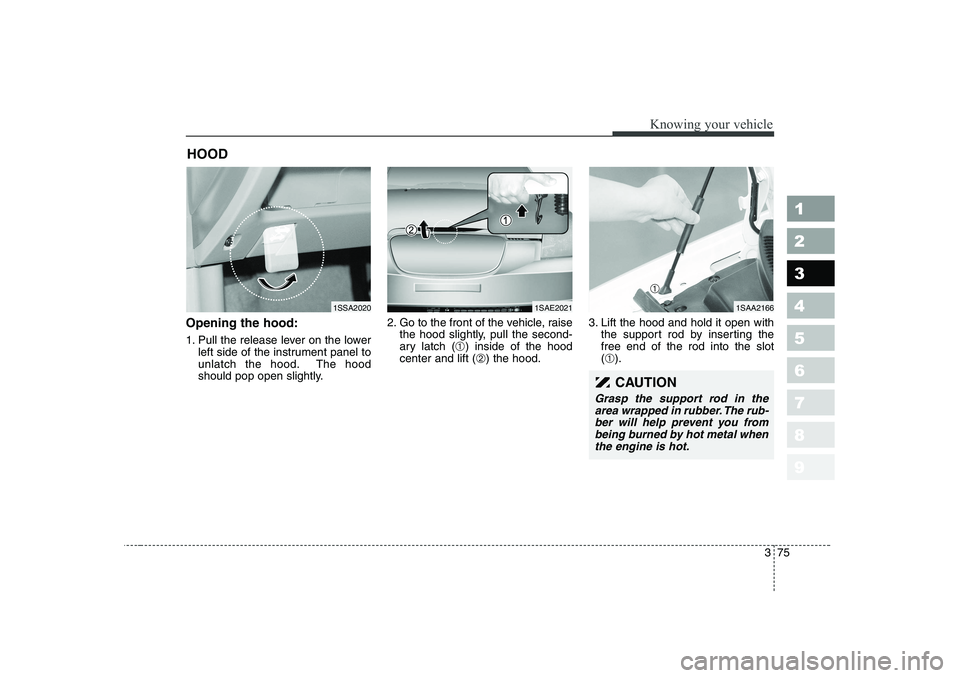
Opening the hood:
1. Pull the release lever on the lowerleft side of the instrument panel to
unlatch the hood. The hood
should pop open slightly. 2. Go to the front of the vehicle, raise
the hood slightly, pull the second-
ary latch ( ➀) inside of the hood
center and lift ( ➁) the hood. 3. Lift the hood and hold it open with
the support rod by inserting thefree end of the rod into the slot(➀ ).
HOOD
1SSA20201SAE20211SAA2166
CAUTION
Grasp the support rod in the
area wrapped in rubber. The rub-ber will help prevent you from being burned by hot metal whenthe engine is hot.
➀
Page 86 of 281

Knowing your vehicle
76
3
1 23456789
CAUTION
To avoid injury from sharp
objects, it is recommended thatprotective gloves be worn whenopening the fuel filler door man- ually.
Closing the hood
1. Before closing the hood, check the following:
All filler caps in engine compart- ment must be correctly installed.
Gloves, rags or any other com- bustible material must be
removed from the engine com-
partment.
2. Secure the support rod in its clip.
3. Lower the hood to about 30 cm (12 inches) height and then let it
drop to properly lock in place.
Make sure the hood is properly
locked before driving. 1. Stop the engine.
2. To open the fuel filler lid, pull the
release lever. 3. Pull the fuel filler lid out to open.
4. To remove the cap, turn the fuel
tank cap counter-clockwise.
5. Refuel as needed.
6. To install the cap, turn it clockwise until it “clicks”. This indicates that the cap is securely tightened.
7. Close the fuel filler lid and push it lightly and make sure that it issecurely closed.
CAUTION
Before closing the hood, make
sure that all engine parts andtools have been removed fromthe engine area and that noone’s hands are near the hoodopening.
Do not leave gloves, rags or any other combustible materi-al in the engine compartment.Doing so may cause a heat- induced fire.
FUEL FILLER LID
1SAA20181SAA2019
Page 87 of 281
377
1 23456789
Knowing your vehicle
WARNING - Refueling
If pressurized fuel sprays out, it can cause serious injuries.
Always remove the fuel cap
carefully and slowly. If the cap is
venting fuel or if you hear a
hissing sound, wait until the
condition stops before com-
pletely removing the cap.WARNING
Automotive fuels are flamma-
ble/explosive materials. When
refueling, please note the fol-
lowing guidelines carefully.
Failure to follow these guide-
lines may result in severe per-
sonal injury, severe burns or
death by fire or explosion.
Before refueling always note the location of the Emergency
Gasoline Shut-Off, if available,
at the gas station facility.
Before touching the fuel noz- zle or fuel filler cap, you
should eliminate potentially
dangerous static electricity
discharge by touching anoth-
er metal part of the front of the
vehicle, a safe distance away
from the fuel filler neck, noz-
zle, or other gas source.
(Continued)(Continued)
Do not get back into a vehicleonce you have begun refuel-
ing. Do not touch, rub or slide
against any item or fabric
(polyester, satin, nylon, etc.)
capable of producing static
electricity. Static electricity
discharge can ignite fuel
vapors resulting in explosion.
If you must re-enter the vehi-
cle, you should once again
eliminate potentially danger-ous static electricity dis-
charge by touching a metal
part of the vehicle, away from
the fuel filler neck, nozzle or
other gasoline source.
When using a portable fuel container be sure to place the
container on the ground prior
to refueling. Static electricity
discharge from the container
can ignite fuel vapors causing
a fire. Once refueling has
begun, contact with the vehi-
cle should be maintained until
the filling is complete.
(Continued)
Page 88 of 281
Knowing your vehicle
78
3
1 23456789
✽✽
NOTICE
Page 89 of 281
379
1 23456789
Knowing your vehicle
Outside rearview mirror Be sure to adjust mirror angles
before driving.
Your vehicle is equipped with both
left-hand and right-hand outside
rearview mirrors. The mirrors can beadjusted remotely with the control
levers or remote switch, dependingon the type of mirror control installed.
The mirror heads can be folded back
to prevent damage during an auto-
matic car wash or when passing in a
narrow street.
✽✽NOTICE
Do not scrape ice off the mirror face; this may damage the surface of
the glass. If ice should restrict move-
ment of the mirror, do not force the
mirror for adjustment. To remove
ice, use a deicer spray, or a sponge
or soft cloth with very warm water.
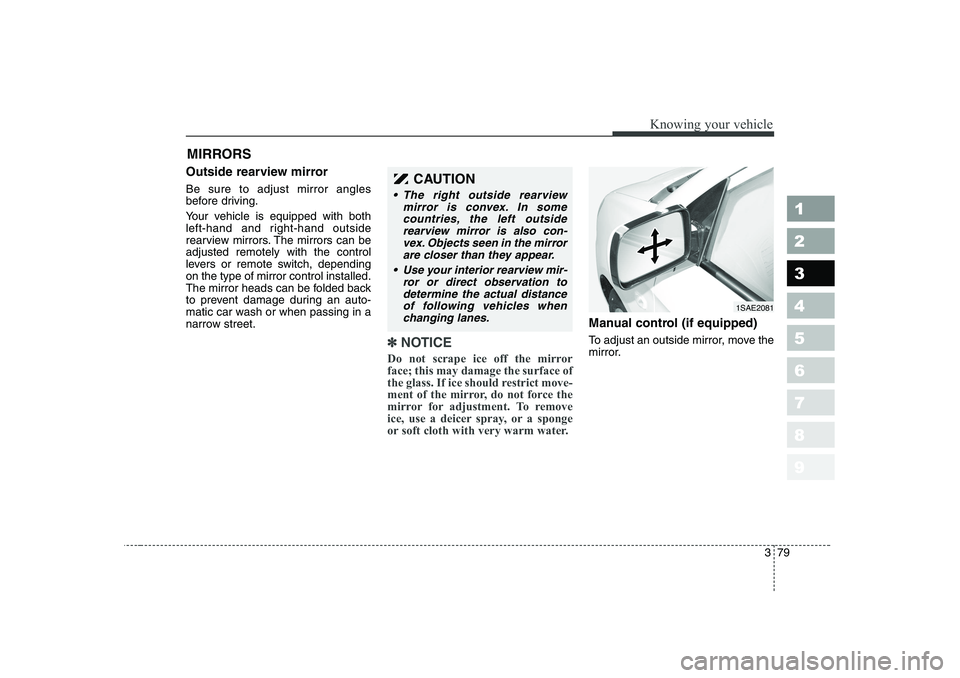
Manual control (if equipped)
To adjust an outside mirror, move the
mirror.
MIRRORS
CAUTION
The right outside rearview
mirror is convex. In somecountries, the left outsiderearview mirror is also con-vex. Objects seen in the mirror are closer than they appear.
Use your interior rearview mir- ror or direct observation todetermine the actual distanceof following vehicles when changing lanes.
1SAE2081
Page 90 of 281
Knowing your vehicle
80
3
1 23456789
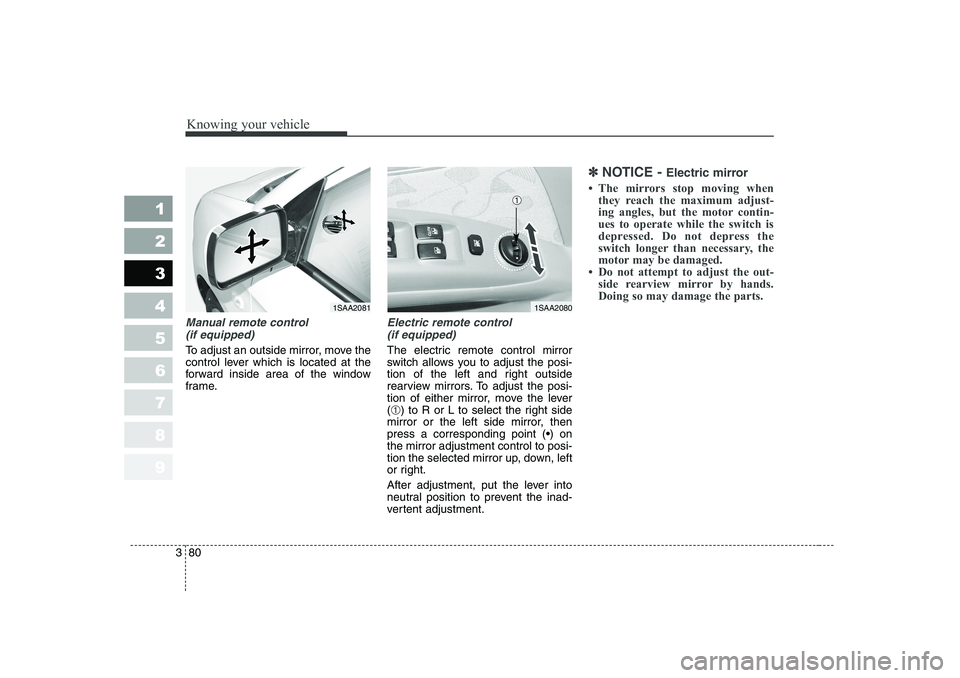
Manual remote control
(if equipped)
To adjust an outside mirror, move the
control lever which is located at the
forward inside area of the window
frame.
Electric remote control (if equipped)
The electric remote control mirror
switch allows you to adjust the posi-
tion of the left and right outside
rearview mirrors. To adjust the posi-
tion of either mirror, move the lever( ➀ ) to R or L to select the right side
mirror or the left side mirror, thenpress a corresponding point () onthe mirror adjustment control to posi-
tion the selected mirror up, down, left
or right.
After adjustment, put the lever into
neutral position to prevent the inad-
vertent adjustment.
✽✽ NOTICE - Electric mirror