check engine KIA Rio 2005 2.G Owner's Guide
[x] Cancel search | Manufacturer: KIA, Model Year: 2005, Model line: Rio, Model: KIA Rio 2005 2.GPages: 238, PDF Size: 2.6 MB
Page 188 of 238
9. Re-install the oil filler cap securely.
10. Start the engine and inspect around the oil filter
seal for leaks. Stop the engine.
Check the oil level and fill to the F mark, if
necessary.
Oil Capacity
Without filter change : 3.2 L (3.38 US qt.)
With filter change : 3.4 L (3.59 US qt.)
Use only the specified engine oil. (Refer to
“Recommended Lubricants’’ later in this section.)
Engine Cooling SystemThe cooling system is a high-pressure type with a
reservoir and is filled with year-round antifreeze
coolant at the factory.
Check the antifreeze protection and coolant level
at least once a year, at the beginning of the winter
season, and before traveling to a colder climate.
Maintenance7-16
✻ ✻
NOTICE
Follow these instructions carefully. An
improper oil filter installation can cause oil
leakage and engine damage.
Although oil filters may have the same
external appearance, their internal designs
differ significantly. These filters are not
interchangeable. To avoid potential engine
damage, use only the specified filter. Consult
an Authorized Kia Dealer.
RIO ENG CNA 7-1.qxd 7/29/05 5:16 PM Page 16
Page 189 of 238
Checking the Coolant Level
Check the condition and connections of all cooling
system hoses and heater hoses. Replace any swollen or
deteriorated hoses.
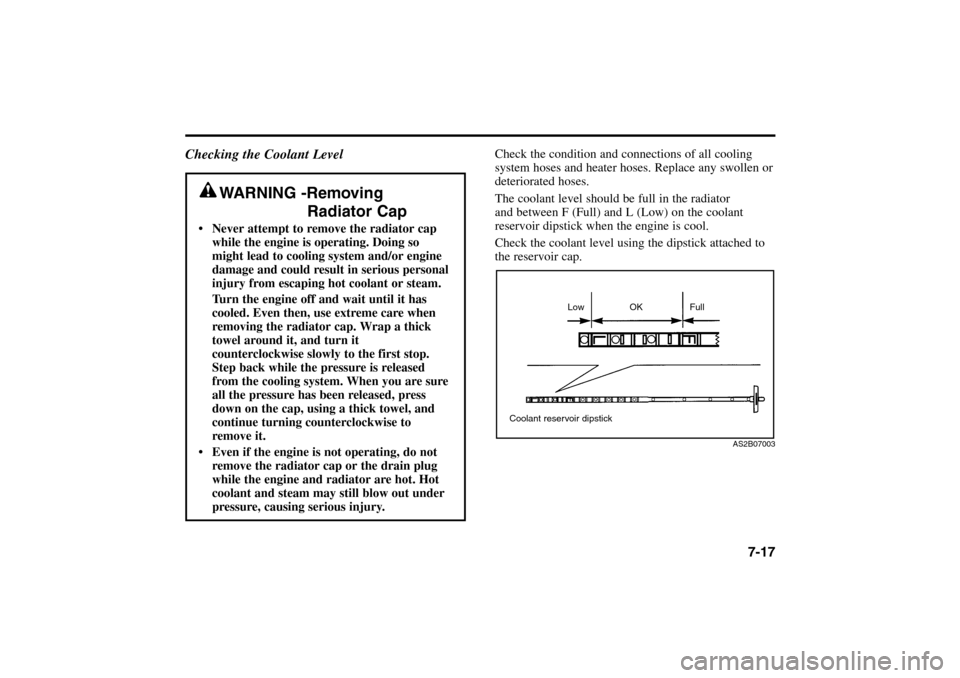
The coolant level should be full in the radiator
and between F (Full) and L (Low) on the coolant
reservoir dipstick when the engine is cool.
Check the coolant level using the dipstick attached to
the reservoir cap.
7-17
WARNING -Removing
Radiator Cap
Never attempt to remove the radiator cap
while the engine is operating. Doing so
might lead to cooling system and/or engine
damage and could result in serious personal
injury from escaping hot coolant or steam.
Turn the engine off and wait until it has
cooled. Even then, use extreme care when
removing the radiator cap. Wrap a thick
towel around it, and turn it
counterclockwise slowly to the first stop.
Step back while the pressure is released
from the cooling system. When you are sure
all the pressure has been released, press
down on the cap, using a thick towel, and
continue turning counterclockwise to
remove it.
Even if the engine is not operating, do not
remove the radiator cap or the drain plug
while the engine and radiator are hot. Hot
coolant and steam may still blow out under
pressure, causing serious injury.
AS2B07003
Coolant reservoir dipstickLow OK Full
RIO ENG CNA 7-1.qxd 7/29/05 5:16 PM Page 17
Page 191 of 238
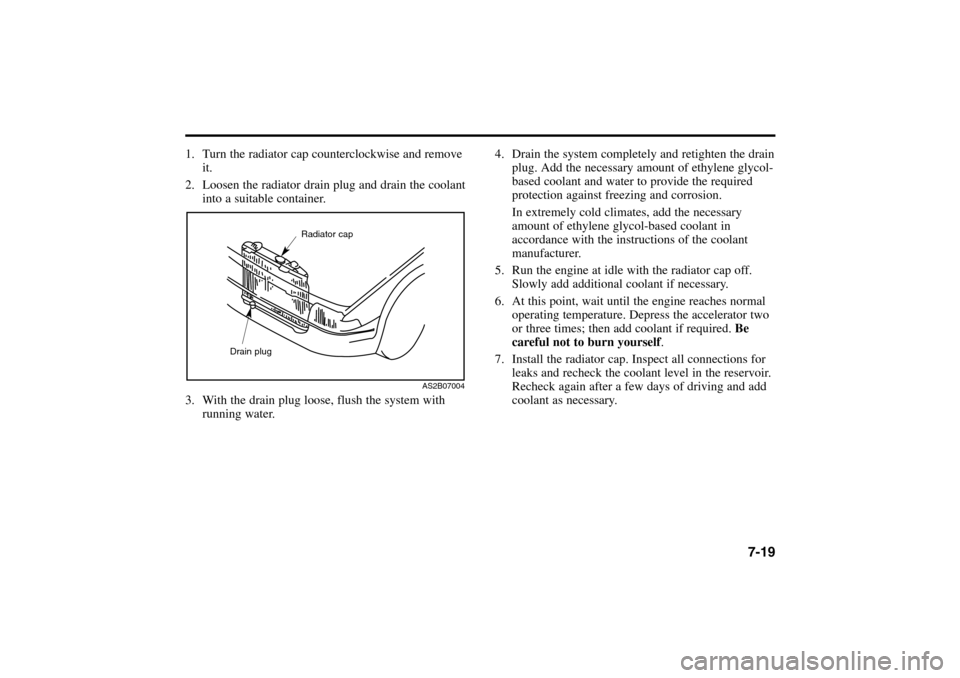
1. Turn the radiator cap counterclockwise and remove
it.
2. Loosen the radiator drain plug and drain the coolant
into a suitable container.
3. With the drain plug loose, flush the system with
running water.
4. Drain the system completely and retighten the drain
plug. Add the necessary amount of ethylene glycol-
based coolant and water to provide the required
protection against freezing and corrosion.
In extremely cold climates, add the necessary
amount of ethylene glycol-based coolant in
accordance with the instructions of the coolant
manufacturer.
5. Run the engine at idle with the radiator cap off.
Slowly add additional coolant if necessary.
6. At this point, wait until the engine reaches normal
operating temperature. Depress the accelerator two
or three times; then add coolant if required. Be
careful not to burn yourself.
7. Install the radiator cap. Inspect all connections for
leaks and recheck the coolant level in the reservoir.
Recheck again after a few days of driving and add
coolant as necessary.
7-19
AS2B07004
Radiator cap
Drain plug
RIO ENG CNA 7-1.qxd 7/29/05 5:16 PM Page 19
Page 194 of 238
Power Steering (If Equipped)Checking the Power Steering Fluid LevelThe power steering fluid level should be checked
periodically.
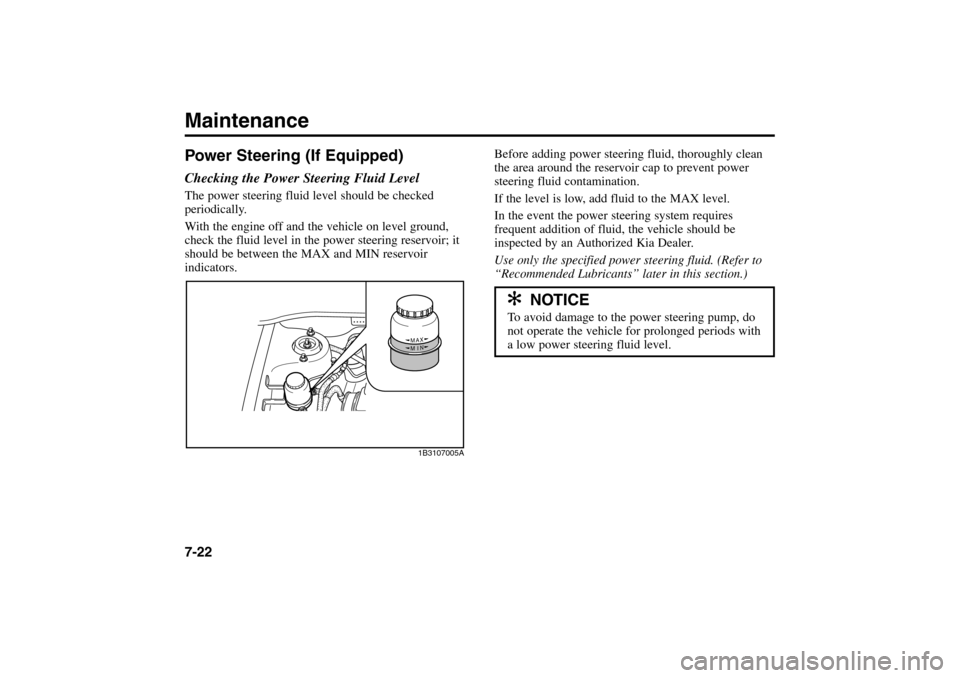
With the engine off and the vehicle on level ground,
check the fluid level in the power steering reservoir; it
should be between the MAX and MIN reservoir
indicators.
MAXMIN
Before adding power steering fluid, thoroughly clean
the area around the reservoir cap to prevent power
steering fluid contamination.
If the level is low, add fluid to the MAX level.
In the event the power steering system requires
frequent addition of fluid, the vehicle should be
inspected by an Authorized Kia Dealer.
Use only the specified power steering fluid. (Refer to
“Recommended Lubricants’’ later in this section.)
Maintenance7-22
✻ ✻
NOTICE
To avoid damage to the power steering pump, do
not operate the vehicle for prolonged periods with
a low power steering fluid level.
1B3107005A
RIO ENG CNA 7-1.qxd 7/29/05 5:16 PM Page 22
Page 196 of 238
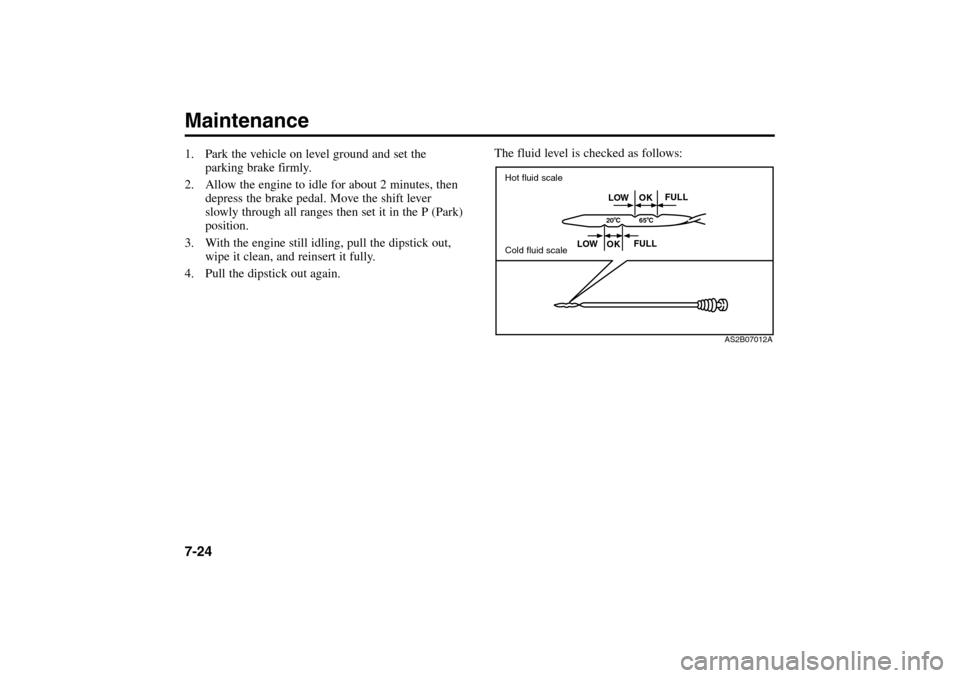
Maintenance7-241. Park the vehicle on level ground and set the
parking brake firmly.
2. Allow the engine to idle for about 2 minutes, then
depress the brake pedal. Move the shift lever
slowly through all ranges then set it in the P (Park)
position.
3. With the engine still idling, pull the dipstick out,
wipe it clean, and reinsert it fully.
4. Pull the dipstick out again.The fluid level is checked as follows:
OK LOW
OK20 C
65 C
FULL
LOWFULL
AS2B07012A
Hot fluid scale
Cold fluid scale
RIO ENG CNA 7-2.qxd 7/29/05 5:18 PM Page 24
Page 198 of 238
Body LubricationAll moving points of the body, such as doors, hood
hinges and locks, should be lubricated each time the
engine oil is changed.
Use a non-freezing lubricant on locks during cold
weather.
Make sure the engine hood secondary latch keeps the
hood from opening when the primary latch is released.
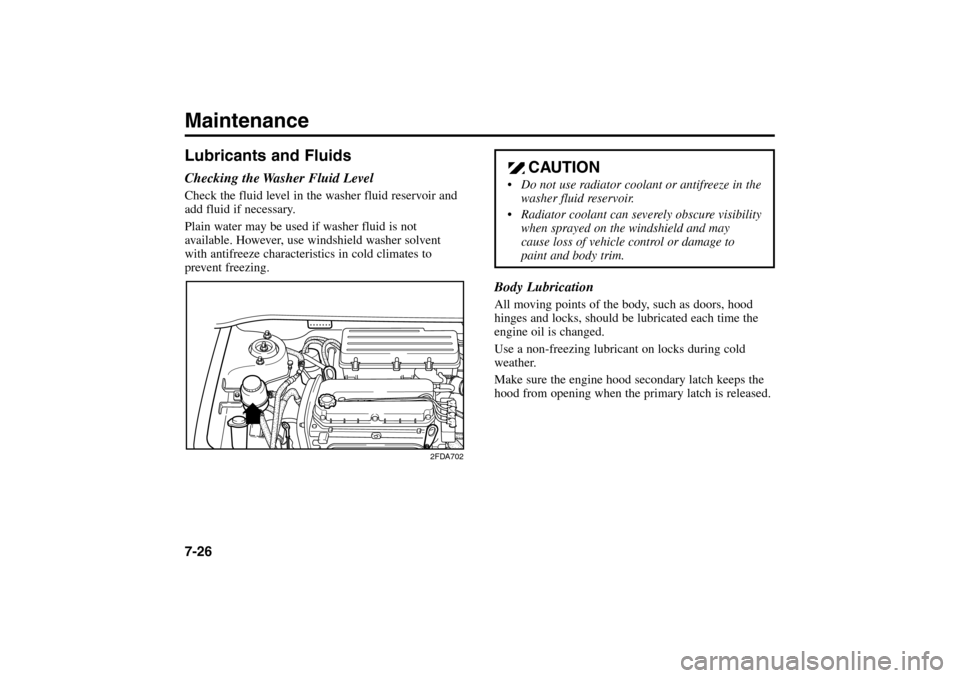
Lubricants and FluidsChecking the Washer Fluid LevelCheck the fluid level in the washer fluid reservoir and
add fluid if necessary.
Plain water may be used if washer fluid is not
available. However, use windshield washer solvent
with antifreeze characteristics in cold climates to
prevent freezing.Maintenance7-26
CAUTION
Do not use radiator coolant or antifreeze in the
washer fluid reservoir.
Radiator coolant can severely obscure visibility
when sprayed on the windshield and may
cause loss of vehicle control or damage to
paint and body trim.
2FDA702
RIO ENG CNA 7-2.qxd 7/29/05 5:18 PM Page 26
Page 205 of 238
7-33
WARNING - Recharging Battery
When recharging the battery, observe the
following precautions:
The battery must be removed from the
vehicle and placed in an area with good
ventilation.
Do not allow cigarettes, sparks, or flame
near the battery.
Watch the battery during charging, and stop
or reduce the charging rate if the battery
cells begin gasing (boiling) violently or if the
temperature of the electrolyte of any cell
exceeds 49°C (120°F).
Wear eye protection when checking the
battery during charging.
(Continued)
(Continued)
Disconnect the battery charger in the
following order.
1. Turn off the battery charger main switch.
2. Unhook the negative clamp from the
negative battery terminal.
3. Unhook the positive clamp from the
positive battery terminal.✻ ✻
NOTICE
Before performing battery maintenance or
recharging, turn OFF all accessories and stop
the engine.
When remounted battery, disconnect the
negative (–) battery cable first. When re-
installing the battery, reconnect the negative (–)
battery cable last.
RIO ENG CNA 7-2.qxd 7/29/05 5:18 PM Page 33
Page 220 of 238
Maintenance7-48
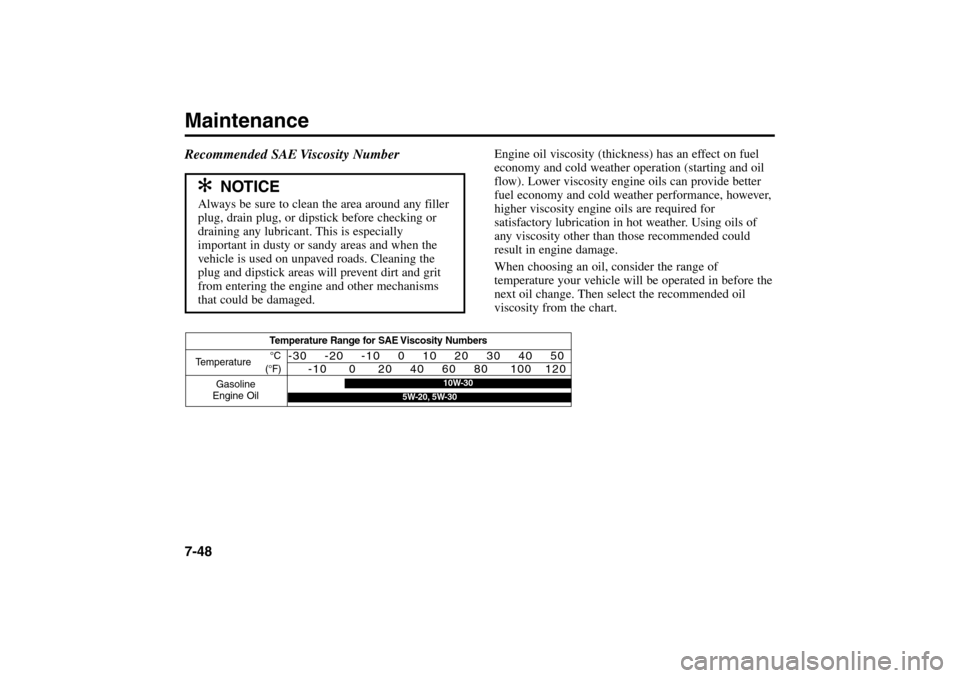
Engine oil viscosity (thickness) has an effect on fuel
economy and cold weather operation (starting and oil
flow). Lower viscosity engine oils can provide better
fuel economy and cold weather performance, however,
higher viscosity engine oils are required for
satisfactory lubrication in hot weather. Using oils of
any viscosity other than those recommended could
result in engine damage.
When choosing an oil, consider the range of
temperature your vehicle will be operated in before the
next oil change. Then select the recommended oil
viscosity from the chart.
✻ ✻
NOTICE
Always be sure to clean the area around any filler
plug, drain plug, or dipstick before checking or
draining any lubricant. This is especially
important in dusty or sandy areas and when the
vehicle is used on unpaved roads. Cleaning the
plug and dipstick areas will prevent dirt and grit
from entering the engine and other mechanisms
that could be damaged.
Recommended SAE Viscosity Number
Temperature Range for SAE Viscosity Numbers
Temperature
Gasoline
Engine Oil°C
(°F)
-30 -20 -10 0 10 20 30 40 50
-10 0 20 40 60 80 100 120
10W-30
5W-20, 5W-30
RIO ENG CNA 7-2.qxd 7/29/05 5:18 PM Page 48