ignition KIA Rio 2008 2.G User Guide
[x] Cancel search | Manufacturer: KIA, Model Year: 2008, Model line: Rio, Model: KIA Rio 2008 2.GPages: 219, PDF Size: 5.17 MB
Page 23 of 219
Knowing your vehicle
14 3
Power windows (if equipped)
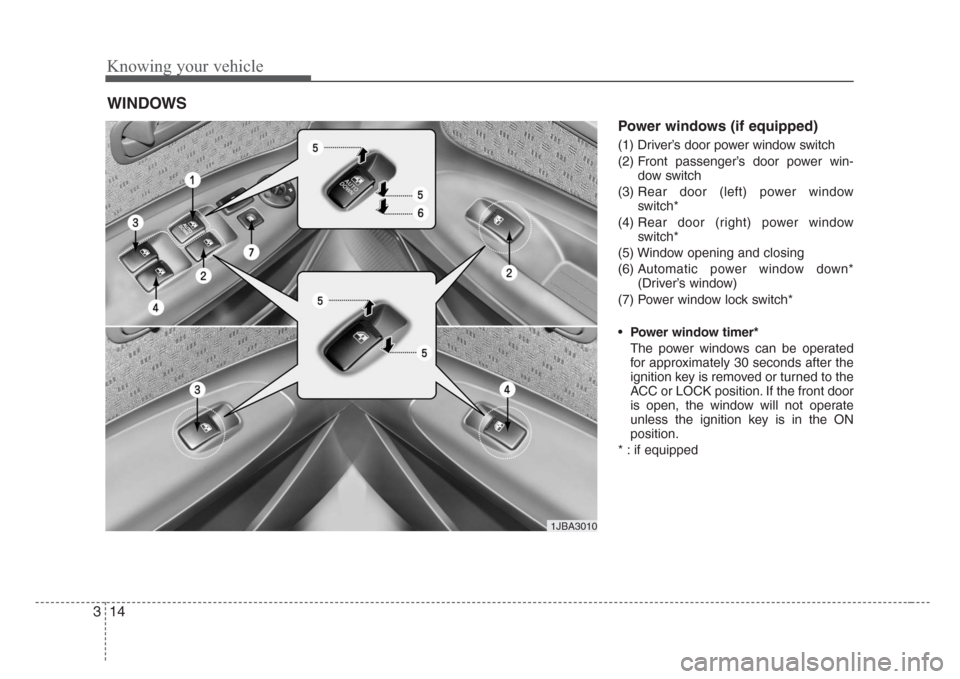
(1) Driver’s door power window switch
(2) Front passenger’s door power win-
dow switch
(3) Rear door (left) power window
switch*
(4) Rear door (right) power window
switch*
(5) Window opening and closing
(6) Automatic power window down*
(Driver’s window)
(7) Power window lock switch*
•Power window timer*
The power windows can be operated
for approximately 30 seconds after the
ignition key is removed or turned to the
ACC or LOCK position. If the front door
is open, the window will not operate
unless the ignition key is in the ON
position.
* : if equipped
WINDOWS
1JBA3010
Page 24 of 219
315
Knowing your vehicle
Power windows (if equipped)
The ignition switch must be in the ON
position for power windows to operate.
Each door has a power window switch
that controls that door’s window.
However, the driver has a power window
lock switch which can block the operation
of passenger windows.
If you notice buffeting and pulsation
(wind shock) with either side window
open, you should open the opposite win-
dow slightly to reduce the condition.
✽
NOTICE
• To prevent the power window system
from the possibility of damage, do not
open or close two windows at the same
time. This will also ensure the longevi-
ty of the fuse.
• Never try to operate the main switch
on the driver's door and the individ-
ual door window switch in opposing
directions at the same time. If this is
done, the window will stop and cannot
be opened or closed.
Window opening and closing
The driver’s door has a master power
window switch that controls all the win-
dows in the vehicle. To open or close a
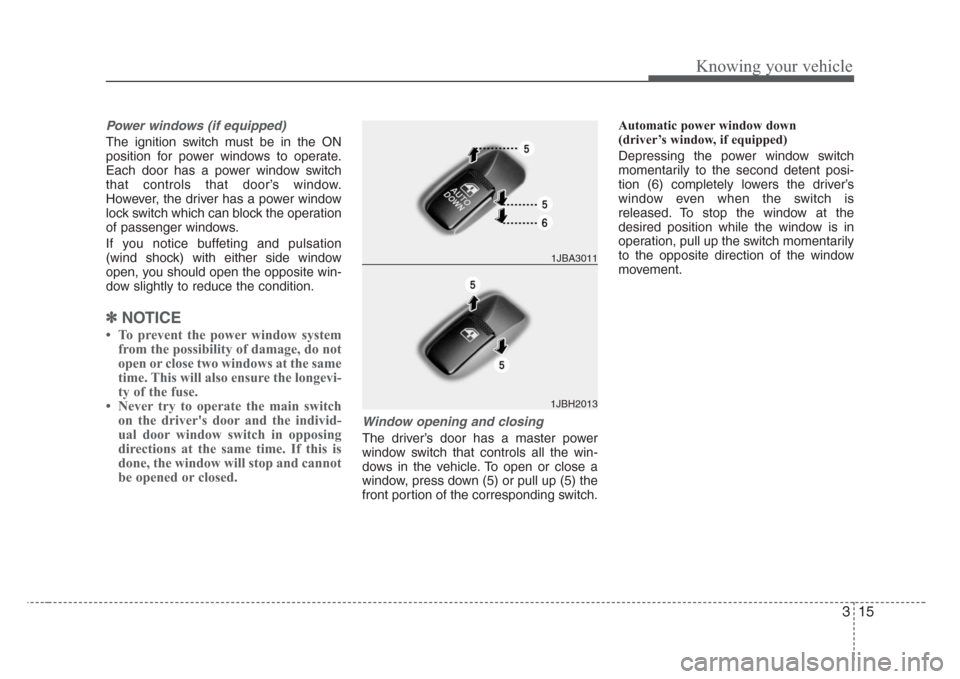
window, press down (5) or pull up (5) the
front portion of the corresponding switch.Automatic power window down
(driver’s window, if equipped)
Depressing the power window switch
momentarily to the second detent posi-
tion (6) completely lowers the driver’s
window even when the switch is
released. To stop the window at the
desired position while the window is in
operation, pull up the switch momentarily
to the opposite direction of the window
movement.
1JBH20131JBA3011
Page 29 of 219
Knowing your vehicle
20 3
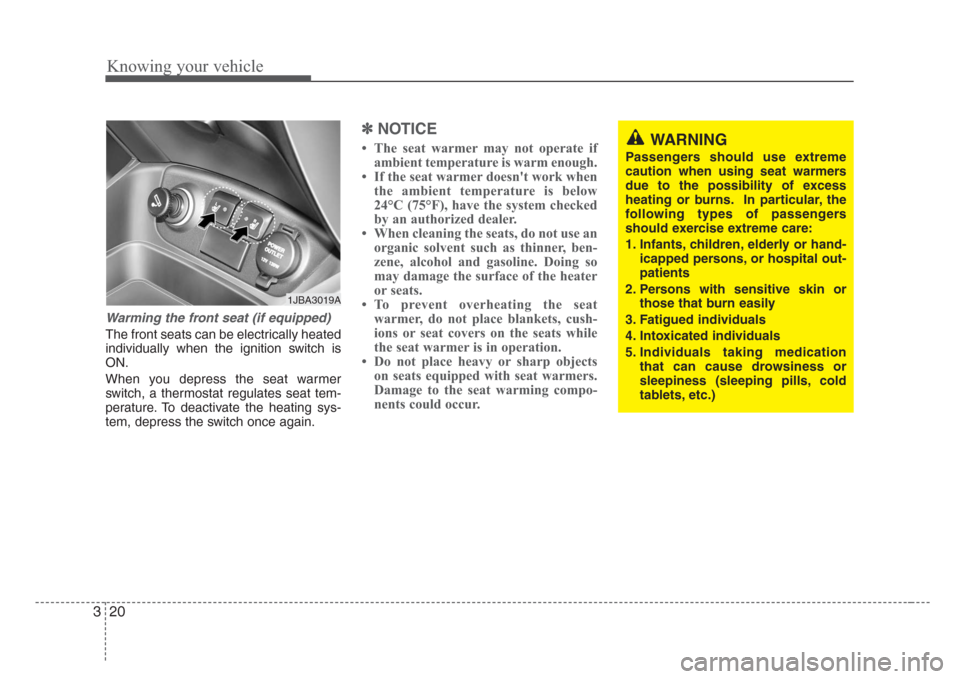
Warming the front seat (if equipped)
The front seats can be electrically heated
individually when the ignition switch is
ON.
When you depress the seat warmer
switch, a thermostat regulates seat tem-
perature. To deactivate the heating sys-
tem, depress the switch once again.
✽
NOTICE
• The seat warmer may not operate if
ambient temperature is warm enough.
• If the seat warmer doesn't work when
the ambient temperature is below
24°C (75°F), have the system checked
by an authorized dealer.
• When cleaning the seats, do not use an
organic solvent such as thinner, ben-
zene, alcohol and gasoline. Doing so
may damage the surface of the heater
or seats.
• To prevent overheating the seat
warmer, do not place blankets, cush-
ions or seat covers on the seats while
the seat warmer is in operation.
• Do not place heavy or sharp objects
on seats equipped with seat warmers.
Damage to the seat warming compo-
nents could occur.
1JBA3019A
WARNING
Passengers should use extreme
caution when using seat warmers
due to the possibility of excess
heating or burns. In particular, the
following types of passengers
should exercise extreme care:
1. Infants, children, elderly or hand-
icapped persons, or hospital out-
patients
2. Persons with sensitive skin or
those that burn easily
3. Fatigued individuals
4. Intoxicated individuals
5. Individuals taking medication
that can cause drowsiness or
sleepiness (sleeping pills, cold
tablets, etc.)
Page 40 of 219
331
Knowing your vehicle
Safety belt warning light and
chime
As a reminder to the driver and passen-
ger, safety belt warning light will blink for
approximately 6 seconds each time you
turn the ignition switch ON.
If the driver's lap/shoulder belt is not fas-
tened when the key is turned ON or if it is
disconnected after the key is turn ON,
the safety belt warning light will blink for
approximately 6 seconds.If the driver's lap/shoulder belt is not fas-
tened when the key is turned ON or if it is
disconnected after the key is turned ON,
the safety belt warning chime will sound
for approximately 6 seconds. (if equipped)
If the driver’s lap/shoulder belt is not fas-
tened within 30 seconds after the engine
is started, the safety belt warning light
and chime will activate for six seconds.
This cycle will repeat 11 times with an
interval of 24 seconds between cycles.
WARNING- Safety belt
care
• A damaged belt may not give you
the protection you need in an
accident.
•Inspect your safety belts periodi-
cally for excessive wear or dam-
age. Pull out each belt fully and
look for fraying, cuts, burns or
other damage. Pull the safety belt
out and let it retract a number of
times. Make sure that the
lap/shoulder belts return smooth-
ly and easily into the retractor.
• Check the latches to make sure
they latch and release without
interference or delay.
• Never close the doors on any part
of the lap or shoulder belt.
• Any belt not in good condition or
in good working order should be
promptly replaced.
CAUTION
Never close the doors on any part
of the lap or shoulder belt. It can
damage the safety belt or buckle
which could increase the risk of
injury in case of an accident.
1GQA2083
Page 58 of 219
349
Knowing your vehicle
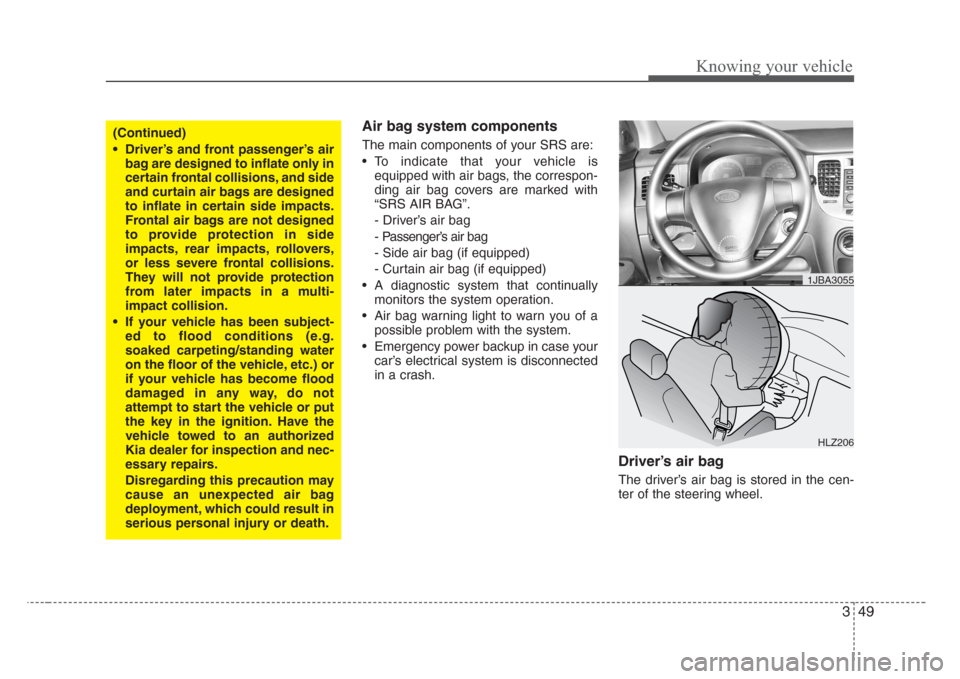
Air bag system components
The main components of your SRS are:
• To indicate that your vehicle is
equipped with air bags, the correspon-
ding air bag covers are marked with
“SRS AIR BAG”.
- Driver’s air bag
- Passenger’s air bag
- Side air bag (if equipped)
- Curtain air bag (if equipped)
• A diagnostic system that continually
monitors the system operation.
• Air bag warning light to warn you of a
possible problem with the system.
• Emergency power backup in case your
car’s electrical system is disconnected
in a crash.
Driver’s air bag
The driver’s air bag is stored in the cen-
ter of the steering wheel.
(Continued)
• Driver’s and front passenger’s air
bag are designed to inflate only in
certain frontal collisions, and side
and curtain air bags are designed
to inflate in certain side impacts.
Frontal air bags are not designed
to provide protection in side
impacts, rear impacts, rollovers,
or less severe frontal collisions.
They will not provide protection
from later impacts in a multi-
impact collision.
• If your vehicle has been subject-
ed to flood conditions (e.g.
soaked carpeting/standing water
on the floor of the vehicle, etc.) or
if your vehicle has become flood
damaged in any way, do not
attempt to start the vehicle or put
the key in the ignition. Have the
vehicle towed to an authorized
Kia dealer for inspection and nec-
essary repairs.
Disregarding this precaution may
cause an unexpected air bag
deployment, which could result in
serious personal injury or death.
HLZ206
1JBA3055
Page 67 of 219
Knowing your vehicle
58 3
Air bag system operation
• Air bags only operate when the ignition
switch is turned to the ON or START
positions.
• Air bags inflate instantly in the event of
serious frontal or side collision (if
equipped with side air bag or curtain
air bag) in order to help protect the
occupants from serious physical injury.
• There is no single vehicle speed at
which the air bags will inflate.
• Air bag deployment depends on a
number of factors including vehicle
speed, angles of impact and the densi-
ty and stiffness of the vehicles or
objects which your vehicle hits in the
collision. However, factors are not limit-
ed to those mentioned above.
• The front air bags will completely
inflate and deflate in an instant.
It is virtually impossible for you to see
the air bags inflate during an accident.
It is much more likely that you will sim-
ply see the deflated air bags hanging
out of their storage compartments after
the collision.• In order to help provide protection in a
severe collision, the air bags must
inflate rapidly. The speed of air bag
inflation is a consequence of the
extremely short time in which a collision
occurs and the need to get the air bag
between the occupant and the vehicle
structures before the occupant impacts
those structures. This speed of inflation
reduces the risk of serious or life-
threatening injuries in a severe collision
and is thus a necessary part of air bag
design.
However, air bag inflation can also
cause injuries which normally can
include facial abrasions, bruises and
broken bones, and sometimes more
serious injuries because the inflation
speed also causes the air bags to
expand with a great deal of force.
• There are even circumstances
under which contact with the steer-
ing wheel air bag can cause fatal
injuries,especially if the occupant
is positioned excessively close to
the steering wheel.WARNING - Seated
positioning
• To avoid severe personal injury or
death caused by deploying air
bags in a collision, the driver
should sit as far back from the
steering wheel air bag as possible
(at least 250 mm (10 inches) away).
The front passenger should
always move their seat as far back
as possible and sit back in their
seat.
• Air bag inflates instantly in an
event of collision, passengers
may be injured by the air bag
expansion force if they are not in
proper position.
• Air bag inflation may cause
injuries which normally include
facial or bodily abrasions, injuries
by the broken glasses or burns by
the explosives.
Page 69 of 219
Knowing your vehicle
60 3
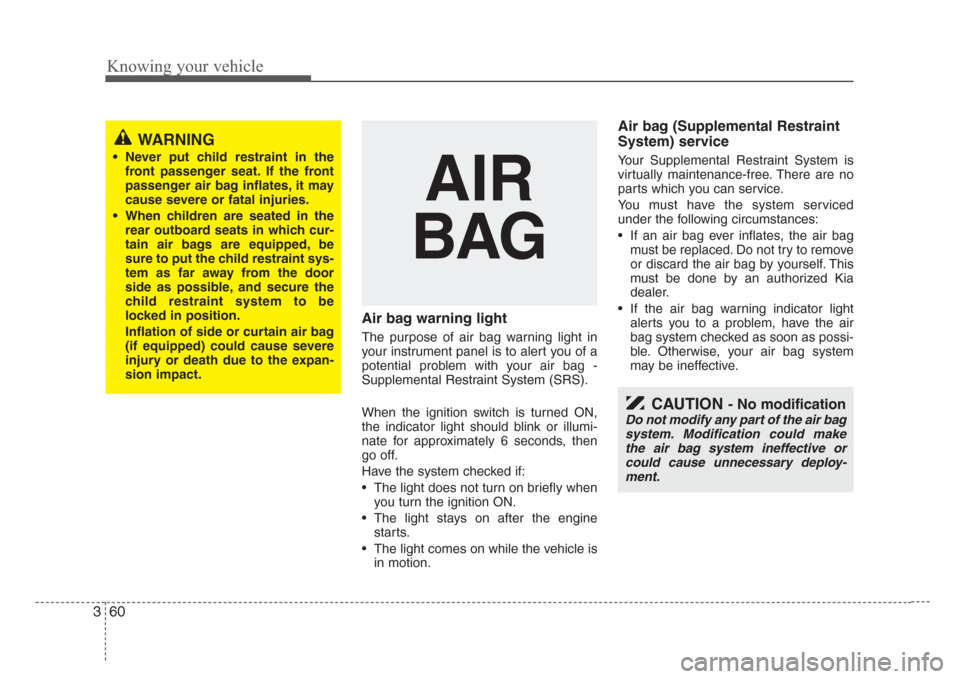
Air bag warning light
The purpose of air bag warning light in
your instrument panel is to alert you of a
potential problem with your air bag -
Supplemental Restraint System (SRS).
When the ignition switch is turned ON,
the indicator light should blink or illumi-
nate for approximately 6 seconds, then
go off.
Have the system checked if:
• The light does not turn on briefly when
you turn the ignition ON.
• The light stays on after the engine
starts.
• The light comes on while the vehicle is
in motion.
Air bag (Supplemental Restraint
System) service
Your Supplemental Restraint System is
virtually maintenance-free. There are no
parts which you can service.
You must have the system serviced
under the following circumstances:
• If an air bag ever inflates, the air bag
must be replaced. Do not try to remove
or discard the air bag by yourself. This
must be done by an authorized Kia
dealer.
• If the air bag warning indicator light
alerts you to a problem, have the air
bag system checked as soon as possi-
ble. Otherwise, your air bag system
may be ineffective.
WARNING
• Never put child restraint in the
front passenger seat. If the front
passenger air bag inflates, it may
cause severe or fatal injuries.
• When children are seated in the
rear outboard seats in which cur-
tain air bags are equipped, be
sure to put the child restraint sys-
tem as far away from the door
side as possible, and secure the
child restraint system to be
locked in position.
Inflation of side or curtain air bag
(if equipped) could cause severe
injury or death due to the expan-
sion impact.
AIR
BAG
CAUTION - No modification
Do not modify any part of the air bag
system. Modification could make
the air bag system ineffective or
could cause unnecessary deploy-
ment.
Page 80 of 219
371
Knowing your vehicle
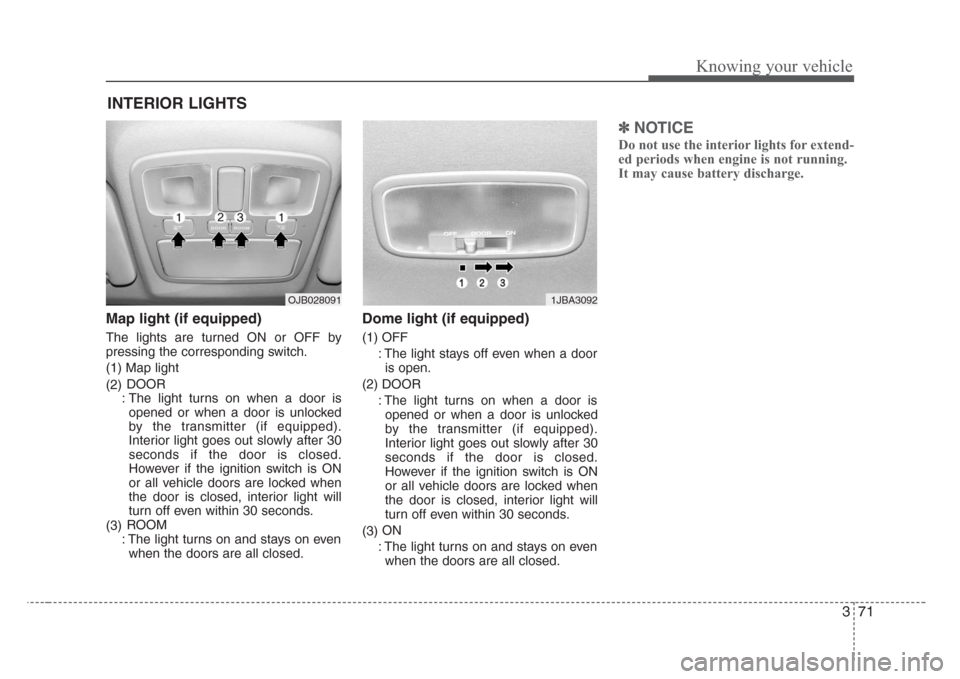
Map light (if equipped)
The lights are turned ON or OFF by
pressing the corresponding switch.
(1) Map light
(2)DOOR
: The light turns on when a door is
opened or when a door is unlocked
by the transmitter (if equipped).
Interior light goes out slowly after 30
seconds if the door is closed.
However if the ignition switch is ON
or all vehicle doors are locked when
the door is closed, interior light will
turn off even within 30 seconds.
(3)ROOM
: The light turns on and stays on even
when the doors are all closed.
Dome light (if equipped)
(1) OFF
: The light stays off even when a door
is open.
(2) DOOR
: The light turns on when a door is
opened or when a door is unlocked
by the transmitter (if equipped).
Interior light goes out slowly after 30
seconds if the door is closed.
However if the ignition switch is ON
or all vehicle doors are locked when
the door is closed, interior light will
turn off even within 30 seconds.
(3)ON
: The light turns on and stays on even
when the doors are all closed.
✽
NOTICE
Do not use the interior lights for extend-
ed periods when engine is not running.
It may cause battery discharge.
INTERIOR LIGHTS
1JBA3092OJB028091
Page 84 of 219
375
Knowing your vehicle
✽
NOTICE
• Use the power outlet when the engine
is running, and remove a plug from
the power outlet after using the elec-
tric appliance. Using the power outlet
excessively or while the engine is not
running or leaving appliances plugged
into the power outlet when not in use
will cause battery discharge
• Only use the electric appliances which
are less than 12V and 10A in electric
capacity.
• Adjust the air-conditioner or heater to
the lowest operation level when you
have to use the power socket while
using air-conditioner or heater.
• Close the cover when not in use.
• Some electronic devices can cause
electronic interference when plugged
into a vehicle’s power outlet. These
devices may cause excessive audio
static and malfunctions in other elec-
tronic systems or devices used in your
vehicle.
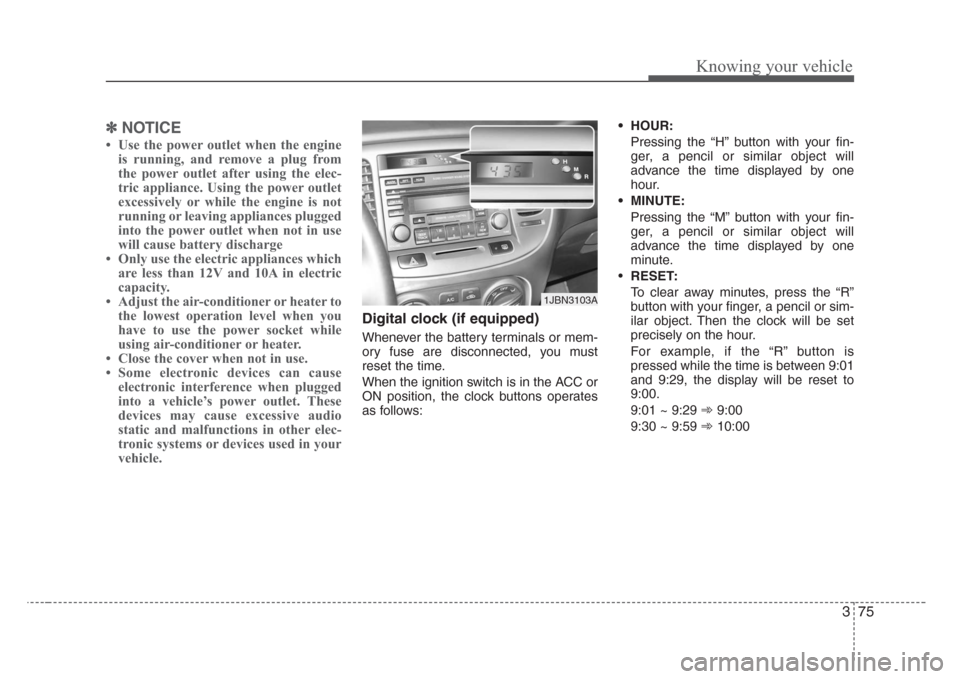
Digital clock (if equipped)
Whenever the battery terminals or mem-
ory fuse are disconnected, you must
reset the time.
When the ignition switch is in the ACC or
ON position, the clock buttons operates
as follows:• HOUR:
Pressing the “H” button with your fin-
ger, a pencil or similar object will
advance the time displayed by one
hour.
• MINUTE:
Pressing the “M” button with your fin-
ger, a pencil or similar object will
advance the time displayed by one
minute.
•RESET:
To clear away minutes, press the “R”
button with your finger, a pencil or sim-
ilar object. Then the clock will be set
precisely on the hour.
For example, if the “R” button is
pressed while the time is between 9:01
and 9:29, the display will be reset to
9:00.
9:01 ~ 9:29 ➾9:00
9:30 ~ 9:59 ➾10:00
1JBN3103A
Page 85 of 219
Knowing your vehicle
76 3
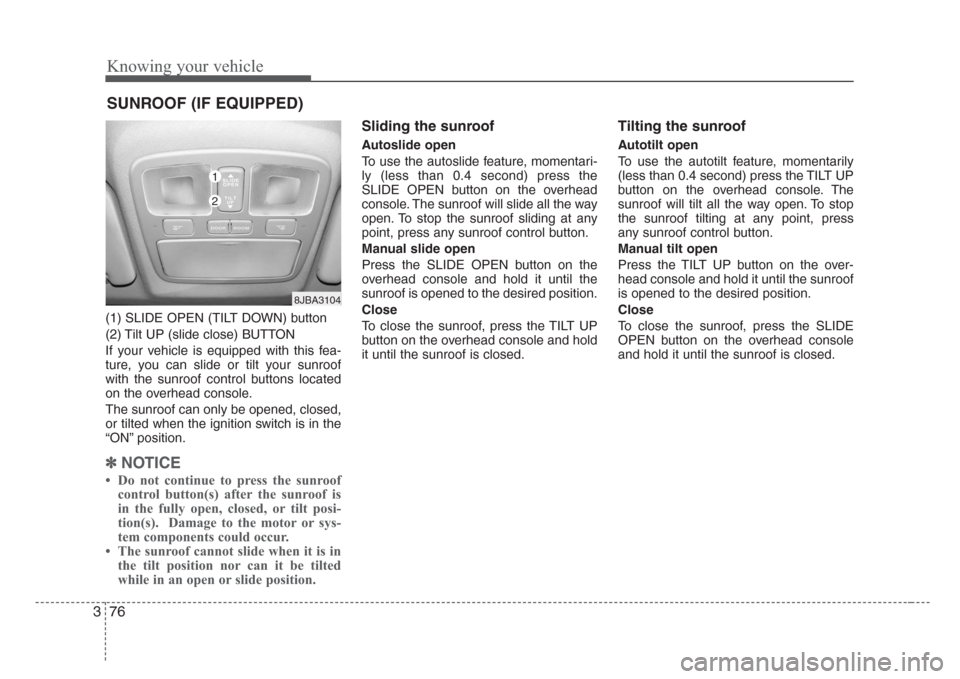
(1) SLIDE OPEN (TILT DOWN) button
(2) Tilt UP (slide close) BUTTON
If your vehicle is equipped with this fea-
ture, you can slide or tilt your sunroof
with the sunroof control buttons located
on the overhead console.
The sunroof can only be opened, closed,
or tilted when the ignition switch is in the
“ON” position.
✽
NOTICE
• Do not continue to press the sunroof
control button(s) after the sunroof is
in the fully open, closed, or tilt posi-
tion(s). Damage to the motor or sys-
tem components could occur.
• The sunroof cannot slide when it is in
the tilt position nor can it be tilted
while in an open or slide position.
Sliding the sunroof
Autoslide open
To use the autoslide feature, momentari-
ly (less than 0.4 second) press the
SLIDE OPEN button on the overhead
console. The sunroof will slide all the way
open. To stop the sunroof sliding at any
point, press any sunroof control button.
Manual slide open
Press the SLIDE OPEN button on the
overhead console and hold it until the
sunroof is opened to the desired position.
Close
To close the sunroof, press the TILT UP
button on the overhead console and hold
it until the sunroof is closed.
Tilting the sunroof
Autotilt open
To use the autotilt feature, momentarily
(less than 0.4 second) press the TILT UP
button on the overhead console. The
sunroof will tilt all the way open. To stop
the sunroof tilting at any point, press
any sunroof control button.
Manual tilt open
Press the TILT UP button on the over-
head console and hold it until the sunroof
is opened to the desired position.
Close
To close the sunroof, press the SLIDE
OPEN button on the overhead console
and hold it until the sunroof is closed.
SUNROOF (IF EQUIPPED)
8JBA3104
1
2