window KIA Rio 2008 2.G User Guide
[x] Cancel search | Manufacturer: KIA, Model Year: 2008, Model line: Rio, Model: KIA Rio 2008 2.GPages: 219, PDF Size: 5.17 MB
Page 61 of 219
Knowing your vehicle
52 3
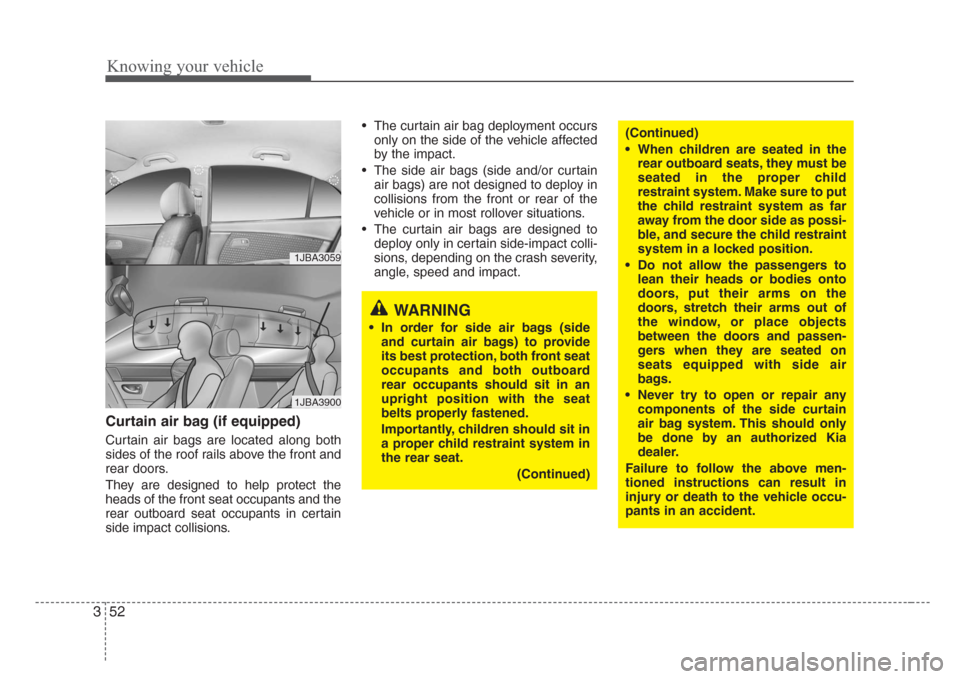
Curtain air bag (if equipped)
Curtain air bags are located along both
sides of the roof rails above the front and
rear doors.
They are designed to help protect the
heads of the front seat occupants and the
rear outboard seat occupants in certain
side impact collisions.• The curtain air bag deployment occurs
only on the side of the vehicle affected
by the impact.
• The side air bags (side and/or curtain
air bags) are not designed to deploy in
collisions from the front or rear of the
vehicle or in most rollover situations.
• The curtain air bags are designed to
deploy only in certain side-impact colli-
sions, depending on the crash severity,
angle, speed and impact.
1JBA3059
1JBA3900
WARNING
• In order for side air bags (side
and curtain air bags) to provide
its best protection, both front seat
occupants and both outboard
rear occupants should sit in an
upright position with the seat
belts properly fastened.
Importantly, children should sit in
a proper child restraint system in
the rear seat.
(Continued)
(Continued)
• When children are seated in the
rear outboard seats, they must be
seated in the proper child
restraint system. Make sure to put
the child restraint system as far
away from the door side as possi-
ble, and secure the child restraint
system in a locked position.
• Do not allow the passengers to
lean their heads or bodies onto
doors, put their arms on the
doors,stretch their arms out of
the window, or place objects
between the doors and passen-
gers when they are seated on
seats equipped with side air
bags.
• Never try to open or repair any
components of the side curtain
air bag sys
tem. This should only
be done by an authorized Kia
dealer.
Failure to follow the above men-
tioned instructions can result in
injury or death to the vehicle occu-
pants in an accident.
Page 68 of 219
359
Knowing your vehicle
Noise and smoke
When the air bags inflate, they make a
loud noise and they leave smoke and
powder in the air inside of the vehicle.
This is normal. After the air bag inflates,
you may feel substantial discomfort in
breathing due to the contact of your
chest to both the safety belt and the air
bag, as well as from breathing the smoke
and powder.We strongly urge you to
open your doors and/or windows as
soon as possible after impact in order
to reduce discomfort and prevent pro-
longed exposure to the smoke and
powder.
Though the smoke and powder are non-
toxic, it may cause irritation to the skin
(eyes, nose and throat etc.). Wash and
rinse with cold water immediately and
consult a doctor if symptoms persist.
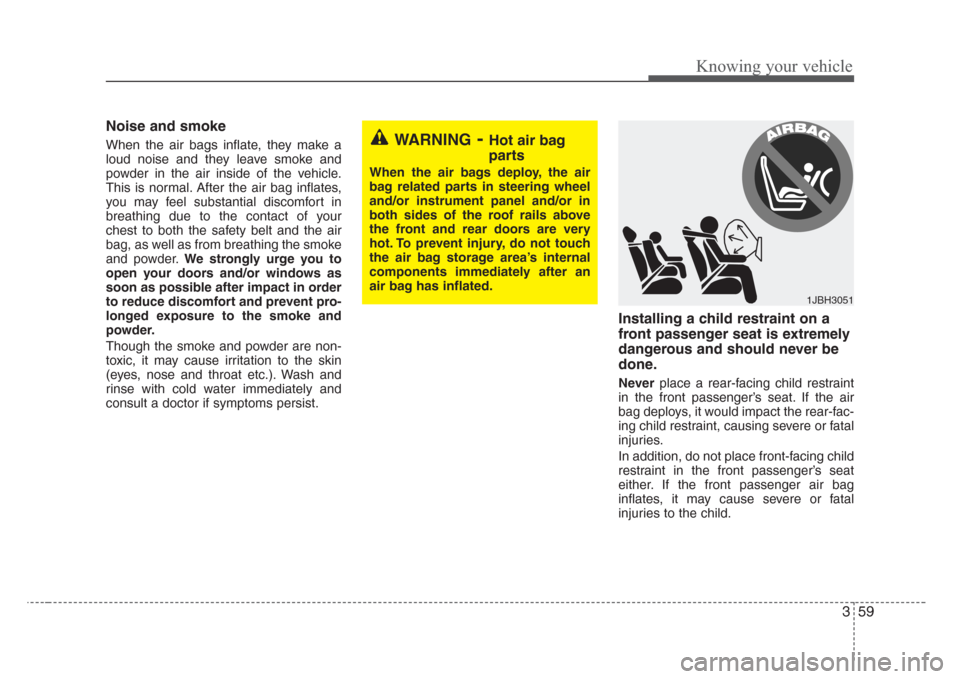
Installing a child restraint on a
front passenger seat is extremely
dangerous and should never be
done.
Neverplace a rear-facing child restraint
in the front passenger’s seat. If the air
bag deploys, it would impact the rear-fac-
ing child restraint, causing severe or fatal
injuries.
In addition, do not place front-facing child
restraint in the front passenger’s seat
either. If the front passenger air bag
inflates, it may cause severe or fatal
injuries to the child.
WARNING-Hot air bag
parts
When the air bags deploy, the air
bag related parts in steering wheel
and/or instrument panel and/or in
both sides of the roof rails above
the front and rear doors are very
hot. To prevent injury, do not touch
the air bag storage area’s internal
components immediately after an
air bag has inflated.
1JBH3051
Page 77 of 219
Knowing your vehicle
68 3
Outside rearview mirror
Be sure to adjust mirror angles before
driving.
Your vehicle is equipped with both left-
hand and right-hand outside rearview
mirrors. The mirrors can be adjusted
remotely with the control levers or remote
switch, depending on the type of mirror
control installed. The mirror heads can be
folded back to prevent damage during an
automatic car wash or when passing in a
narrow street.
✽
NOTICE
Do not scrape ice off the mirror face;
this may damage the surface of the
glass. If ice should restrict movement of
the mirror, do not force the mirror for
adjustment. To remove ice, use a deicer
spray, or a sponge or soft cloth with very
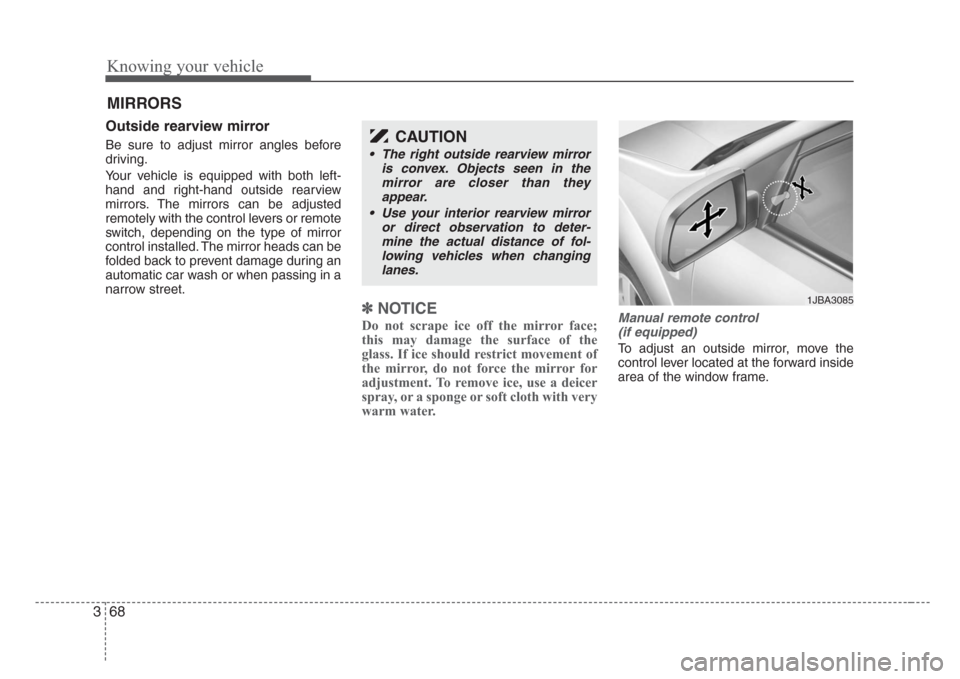
warm water. Manual remote control
(if equipped)
To adjust an outside mirror, move the
control lever located at the forward inside
area of the window frame.
MIRRORS
CAUTION
• The right outside rearview mirror
is convex. Objects seen in the
mirror are closer than they
appear.
•Use your interior rearview mirror
or direct observation to deter-
mine the actual distance of fol-
lowing vehicles when changing
lanes.
1JBA3085
Page 79 of 219
Knowing your vehicle
70 3
Outside rearview mirror heater
(if equipped)
The outside rearview mirror heater is
automatically turned on when the rear
window defroster is turned on. To heat
the outside rearview mirror glass, push
the button for the rear window defroster.
The rearview mirror heater (and rear win-
dow defroster) will not operate unless the
engine is running.
The outside rearview mirror glass will be
heated for defrosting or defogging and
will give you improved rear vision in
inclement weather conditions. Push the
button again to turn the heater off. The
outside rearview mirror heater automati-
cally turns off after 20 minutes.
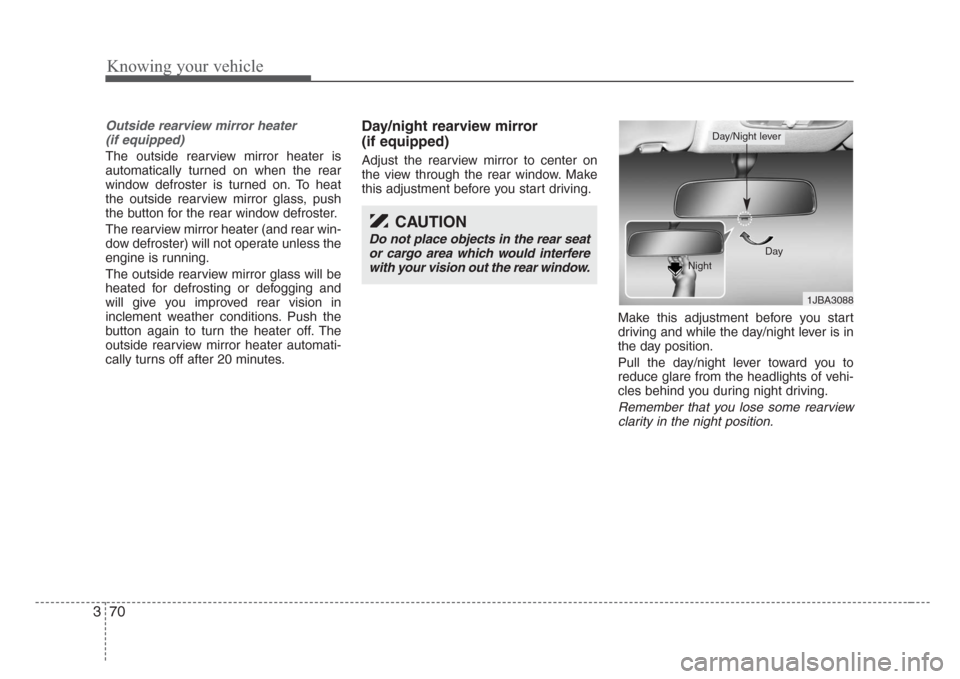
Day/night rearview mirror
(if equipped)
Adjust the rearview mirror to center on
the view through the rear window. Make
this adjustment before you start driving.
Make this adjustment before you start
driving and while the day/night lever is in
the day position.
Pull the day/night lever toward you to
reduce glare from the headlights of vehi-
cles behind you during night driving.
Remember that you lose some rearview
clarity in the night position.
CAUTION
Do not place objects in the rear seat
or cargo area which would interfere
with your vision out the rear window.
1JBA3088 Day
Night
Day/Night lever
Page 83 of 219
Knowing your vehicle
74 3
Sunvisor
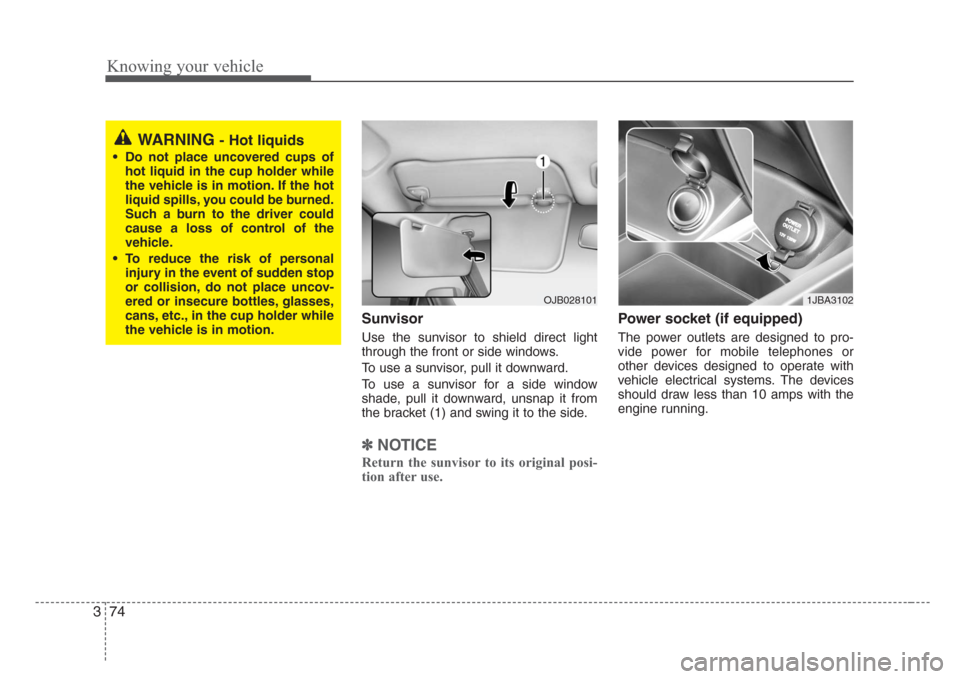
Use the sunvisor to shield direct light
through the front or side windows.
To use a sunvisor, pull it downward.
To use a sunvisor for a side window
shade, pull it downward, unsnap it from
the bracket (1) and swing it to the side.
✽
NOTICE
Return the sunvisor to its original posi-
tion after use.
Power socket (if equipped)
The power outlets are designed to pro-
vide power for mobile telephones or
other devices designed to operate with
vehicle electrical systems. The devices
should draw less than 10 amps with the
engine running.
WARNING - Hot liquids
• Do not place uncovered cups of
hot liquid in the cup holder while
the vehicle is in motion. If the hot
liquid spills, you could be burned.
Such a burn to the driver could
cause a loss of control of the
vehicle.
• To reduce the risk of personal
injury in the event of sudden stop
or collision, do not place uncov-
ered or insecure bottles, glasses,
cans, etc., in the cup holder while
the vehicle is in motion.
OJB0281011JBA3102
Page 91 of 219
Knowing your vehicle
82 3
Care of cassette tapes
(if equipped)
• Because the thickness of a cassette tape
with the total playback time of over 60
minutes (C-60) are too thin, we suggest
that you do not use any of them to avoid
having tapes being tangled.
• To achieve better sound quality, periodi-
cally clean the tape head using a cotton
stick with colorless alcohol (once per
month).
• If a tape is too loose, fasten it to reel by
winding with objects like a pencil.
• Because dust or foreign objects on a cas-
sette tape may damage the playback
head, always store tapes in their cases
when not in use.
• Make sure cassette tapes are kept away
from magnetic devices (TV, stereo sys-
tem, etc) in order to achieve better sound
quality.
• Be certain that no objects or substances
other than cassette tapes are inserted
into the cassette tape player.
• Because tape media can be distorted
when exposed to direct sunlight, Do not
leave cassette tapes on the seats, dash-
board or near the back windshield.
Care of disc (if equipped)
• If the temperature inside the car is too
high, open the car windows for ventila-
tion before using your car audio.
• It is illegal to copy and use
MP3/WMA/AAC/WAVE files without
permission. Use CDs that are created
only by lawful means.
• Do not apply volatile agents such as
benzene and thinner, normal cleaners
and magnetic sprays made for ana-
logue disc onto CDs.
• To prevent the disc surface from get-
ting damaged. Hold and carry CDs by
the edges or the edges of the center
hole only.
• Clean the disc surface with a piece of
soft cloth before playback (wipe it from
the center to the outside edge.)
• Do not damage the disc surface or
attach pieces of sticky tape or paper
onto it.
• Make sure on undesirable matter other
than CDs are inserted into the CD
player (Do not insert more than one
CD at a time).• Keep CDs in their cases after use to
protect them from scratches or dirt.
• Depending on the type of CD-R/CD-
RW CDs, certain CDs may not operate
normally according to manufacturing
companies or making and recording
methods. In such circumstances, if you
still continue to use those CDs, they
may cause the malfunction of your car
audio system.
✽
NOTICE-Playing an
Incompatible Copy-Protected
Audio CD
Some copy-protected CDs, which do not
comply with the international audio CD
standards(Red Book), may not play on
your car audio. Please note that if you
try to play copy protected CDs and the
CD player of your car audio is not per-
forming to your expectation, this may be
caused by those CDs and not a defect in
the device itself. Please replace those
CDs.
Page 134 of 219
Driving your vehicle
28 4
If the washer does not work, check the
washer fluid level. If the fluid level is not
sufficient, you will need to add appropri-
ate non-abrasive windshield washer fluid
to the washer reservoir.
The reservoir filler neck is located in the
front of the engine compartment on the
passenger side.
✽
NOTICE
To prevent possible damage to the wash-
er pump, do not operate the washer
when the fluid reservoir is empty.
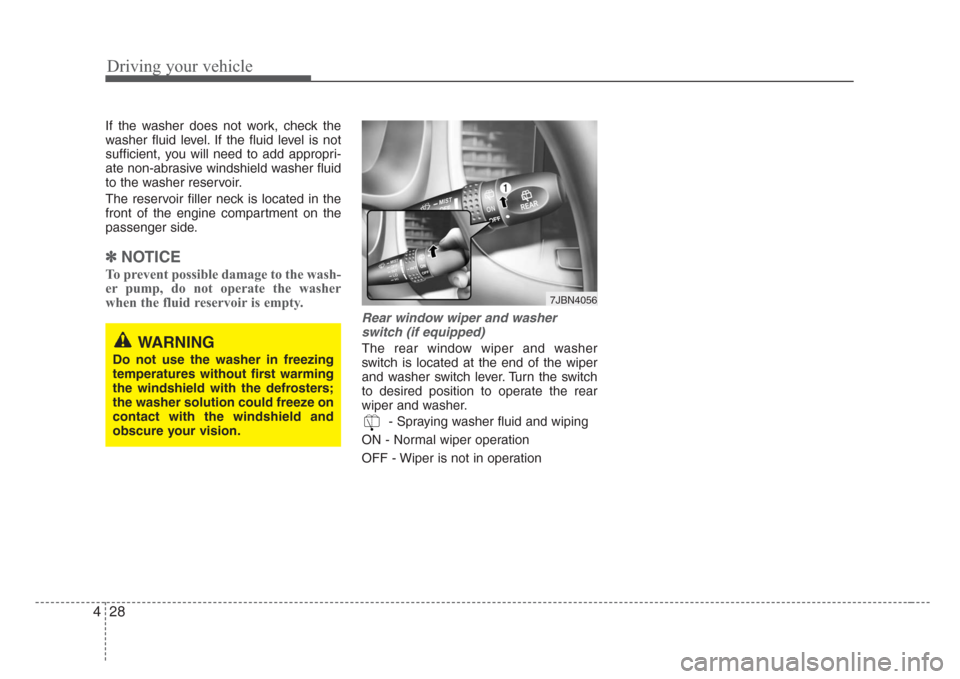
Rear window wiper and washer
switch (if equipped)
The rear window wiper and washer
switch is located at the end of the wiper
and washer switch lever. Turn the switch
to desired position to operate the rear
wiper and washer.
- Spraying washer fluid and wiping
ON - Normal wiper operation
OFF - Wiper is not in operationWARNING
Do not use the washer in freezing
temperatures without first warming
the windshield with the defrosters;
the washer solution could freeze on
contact with the windshield and
obscure your vision.
7JBN4056
Page 135 of 219
429
Driving your vehicle
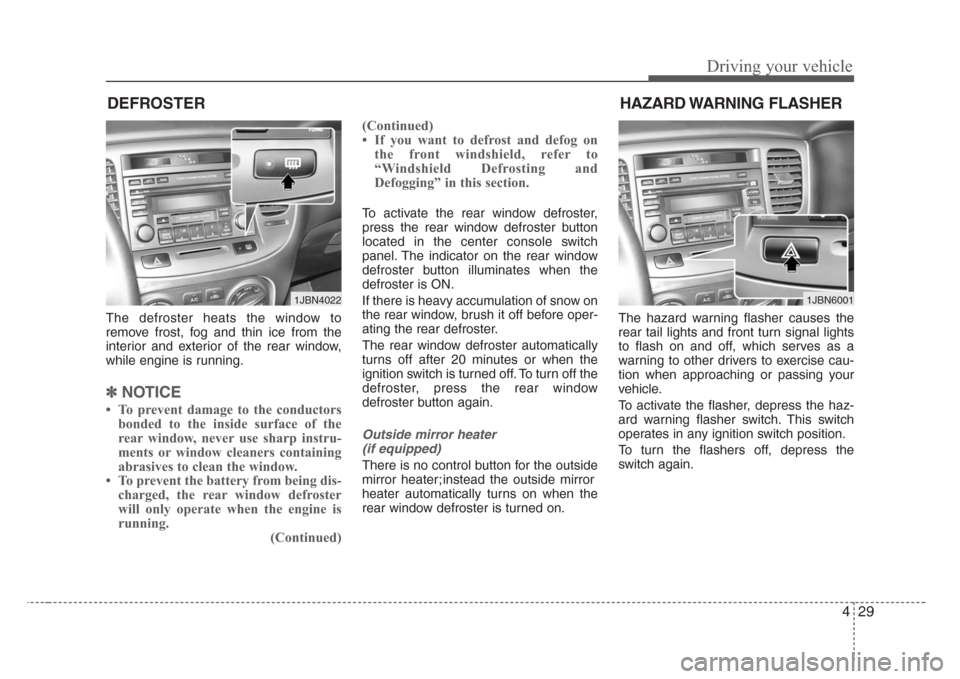
The defroster heats the window to
remove frost, fog and thin ice from the
interior and exterior of the rear window,
while engine is running.
✽
NOTICE
• To prevent damage to the conductors
bonded to the inside surface of the
rear window, never use sharp instru-
ments or window cleaners containing
abrasives to clean the window.
• To prevent the battery from being dis-
charged, the rear window defroster
will only operate when the engine is
running.
(Continued)(Continued)
• If you want to defrost and defog on
the front windshield, refer to
“Windshield Defrosting and
Defogging” in this section.
To activate the rear window defroster,
press the rear window defroster button
located in the center console switch
panel. The indicator on the rear window
defroster button illuminates when the
defroster is ON.
If there is heavy accumulation of snow on
the rear window, brush it off before oper-
ating the rear defroster.
The rear window defroster automatically
turns off after 20 minutes or when the
ignition switch is turned off. To turn off the
defroster, press the rear window
defroster button again.
Outside mirror heater
(if equipped)
There is no control button for the outside
mirror heater; instead the outside mirror
heater automatically turns on when the
rear window defroster is turned on.The hazard warning flasher causes the
rear tail lights and front turn signal lights
to flash on and off, which serves as a
warning to other drivers to exercise cau-
tion when approaching or passing your
vehicle.
To activate the flasher, depress the haz-
ard warning flasher switch. This switch
operates in any ignition switch position.
To turn the flashers off, depress the
switch again.
DEFROSTER
1JBN4022
HAZARD WARNING FLASHER
1JBN6001
Page 139 of 219
433
Driving your vehicle
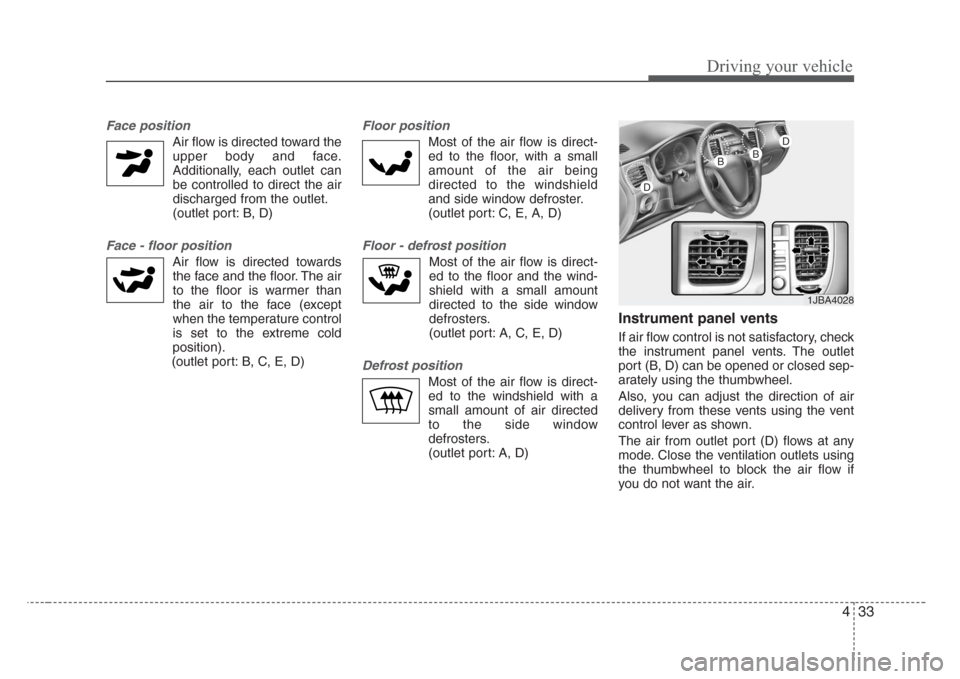
Face position
Air flow is directed toward the
upper body and face.
Additionally, each outlet can
be controlled to direct the air
discharged from the outlet.
(outlet port: B, D)
Face - floor position
Air flow is directed towards
the face and the floor. The air
to the floor is warmer than
the air to the face (except
when the temperature control
is set to the extreme cold
position).
(outlet port: B, C, E, D)
Floor position
Most of the air flow is direct-
ed to the floor, with a small
amount of the air being
directed to the windshield
and side window defroster.
(outlet port: C, E, A, D)
Floor - defrost position
Most of the air flow is direct-
ed to the floor and the wind-
shield with a small amount
directed to the side window
defrosters.
(outlet port: A, C, E, D)
Defrost position
Most of the air flow is direct-
ed to the windshield with a
small amount of air directed
to the side window
defrosters.
(outlet port: A, D)
Instrument panel vents
If air flow control is not satisfactory, check
the instrument panel vents. The outlet
port (B, D) can be opened or closed sep-
arately using the thumbwheel.
Also, you can adjust the direction of air
delivery from these vents using the vent
control lever as shown.
The air from outlet port (D) flows at any
mode. Close the ventilation outlets using
the thumbwheel to block the air flow if
you do not want the air.
1JBA4028
D
BB
D
Page 140 of 219
Driving your vehicle
34 4
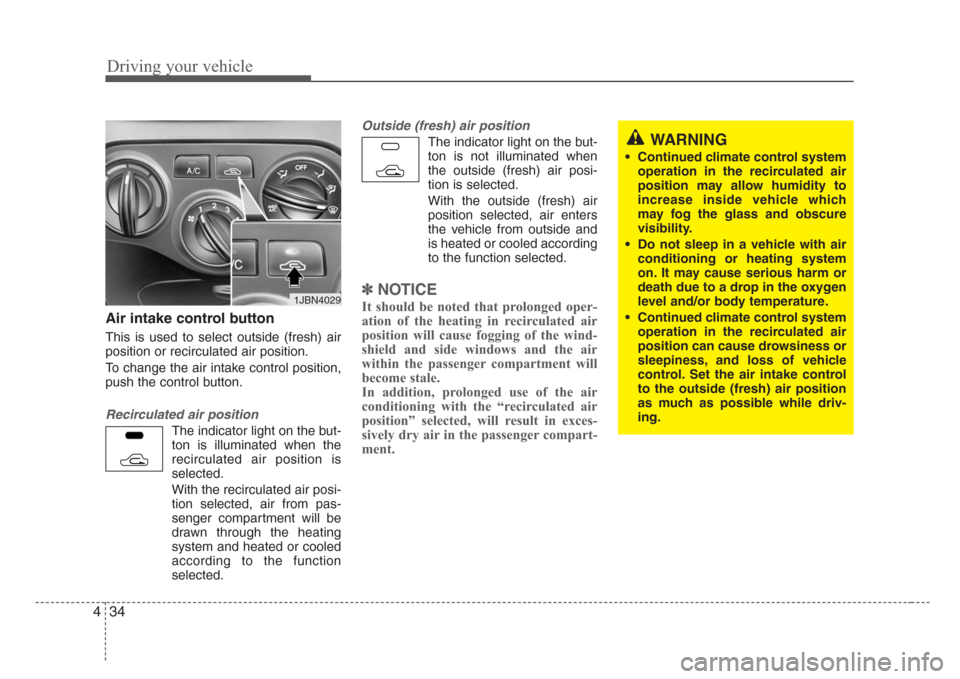
Air intake control button
This is used to select outside (fresh) air
position or recirculated air position.
To change the air intake control position,
push the control button.
Recirculated air position
The indicator light on the but-
ton is illuminated when the
recirculated air position is
selected.
With the recirculated air posi-
tion selected, air from pas-
senger compartment will be
drawn through the heating
system and heated or cooled
according to the function
selected.
Outside (fresh) air position
The indicator light on the but-
ton is not illuminated when
the outside (fresh) air posi-
tion is selected.
With the outside (fresh) air
position selected, air enters
the vehicle from outside and
is heated or cooled according
to the function selected.
✽
NOTICE
It should be noted that prolonged oper-
ation of the heating in recirculated air
position will cause fogging of the wind-
shield and side windows and the air
within the passenger compartment will
become stale.
In addition, prolonged use of the air
conditioning with the “recirculated air
position” selected, will result in exces-
sively dry air in the passenger compart-
ment.1JBN4029
WARNING
• Continued climate control system
operation in the recirculated air
position may allow humidity to
increase inside vehicle which
may fog the glass and obscure
visibility.
• Do not sleep in a vehicle with air
conditioning or heating system
on. It may cause serious harm or
death due to a drop in the oxygen
level and/or body temperature.
• Continued climate control system
operation in the recirculated air
position can cause drowsiness or
sleepiness, and loss of vehicle
control. Set the air intake control
to the outside (fresh) air position
as much as possible while driv-
ing.