Side mirrors KIA Rio 2008 2.G Owner's Manual
[x] Cancel search | Manufacturer: KIA, Model Year: 2008, Model line: Rio, Model: KIA Rio 2008 2.GPages: 219, PDF Size: 5.17 MB
Page 60 of 219
351
Knowing your vehicle
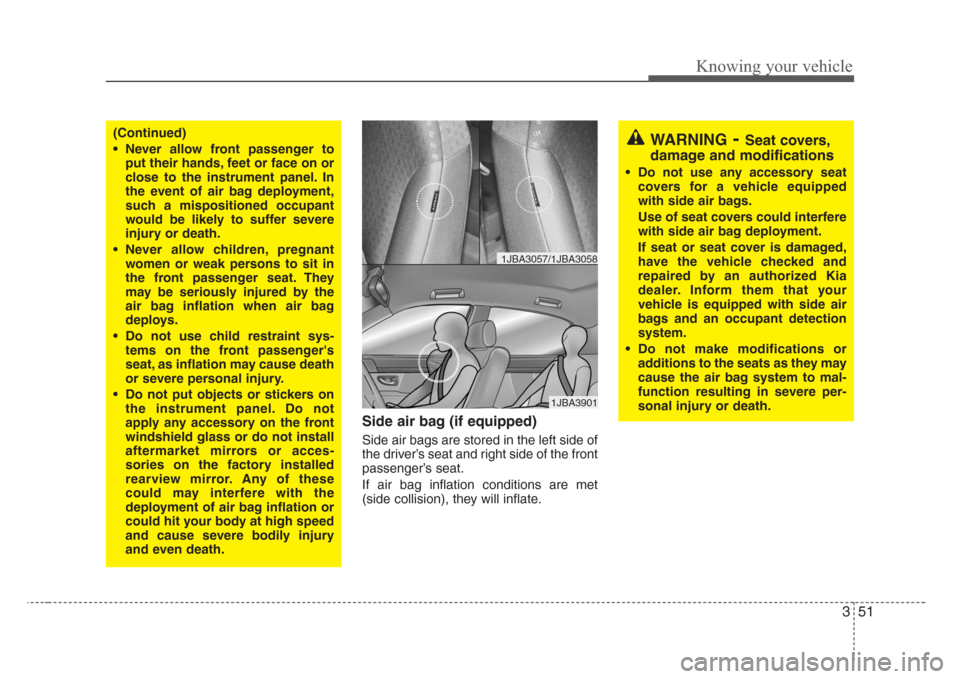
Side air bag (if equipped)
Side air bags are stored in the left side of
the driver’s seat and right side of the front
passenger’s seat.
If air bag inflation conditions are met
(side collision), they will inflate.
(Continued)
• Never allow front passenger to
put their hands, feet or face on or
close to the instrument panel. In
the event of air bag deployment,
such a mispositioned occupant
would be likely to suffer severe
injury or death.
• Never allow children, pregnant
women or weak persons to sit in
the front passenger seat. They
may be seriously injured by the
air bag inflation when air bag
deploys.
• Do not use child restraint sys-
tems on the front passenger's
seat, as inflation may cause death
or severe personal injury.
• Do not put objects or stickers on
the instrument panel. Do not
apply any accessory on the front
windshield glass or do not install
aftermarket mirrors or acces-
sories on the factory ins
talled
rearview mirror. Any of these
could may interfere with the
deployment of air bag inflation or
could hit your body at high speed
and cause severe bodily injury
and even death.
1JBA3901
1JBA3057/1JBA3058
WARNING-Seat covers,
damage and modifications
• Do not use any accessory seat
covers for a vehicle equipped
with side air bags.
Use of seat covers could interfere
with side air bag deployment.
If seat or seat cover is damaged,
have the vehicle checked and
repaired by an authorized Kia
dealer. Inform them that your
vehicle is equipped with side air
bags and an occupant detection
system.
• Do not make modifications or
additions to the seats as they may
cause the air bag system to mal-
function resulting in severe per-
sonal injury or death.
Page 77 of 219
Knowing your vehicle
68 3
Outside rearview mirror
Be sure to adjust mirror angles before
driving.
Your vehicle is equipped with both left-
hand and right-hand outside rearview
mirrors. The mirrors can be adjusted
remotely with the control levers or remote
switch, depending on the type of mirror
control installed. The mirror heads can be
folded back to prevent damage during an
automatic car wash or when passing in a
narrow street.
✽
NOTICE
Do not scrape ice off the mirror face;
this may damage the surface of the
glass. If ice should restrict movement of
the mirror, do not force the mirror for
adjustment. To remove ice, use a deicer
spray, or a sponge or soft cloth with very
warm water. Manual remote control
(if equipped)
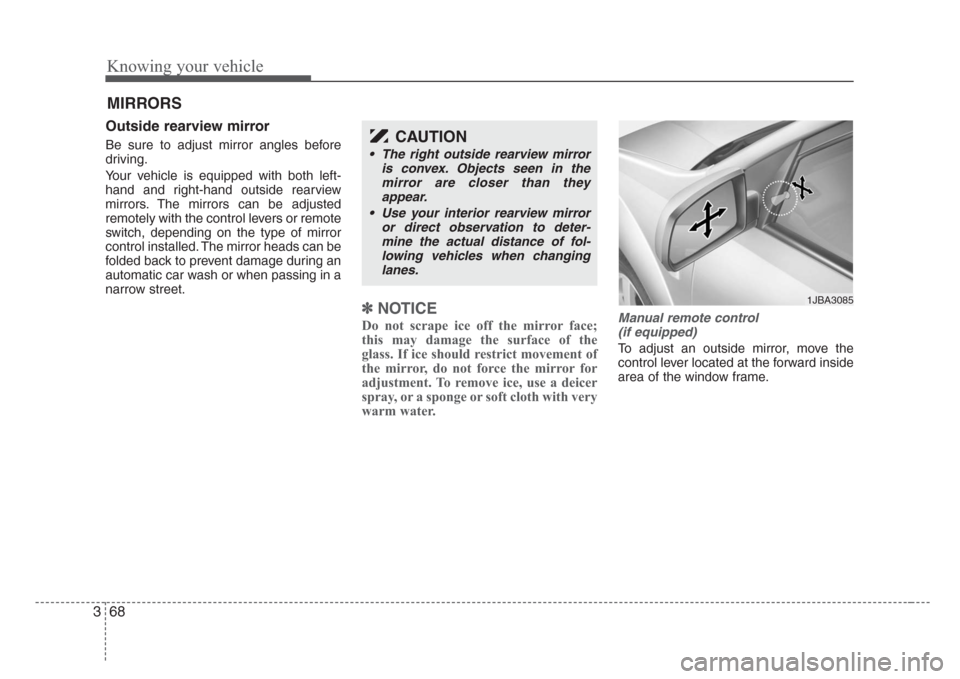
To adjust an outside mirror, move the
control lever located at the forward inside
area of the window frame.
MIRRORS
CAUTION
• The right outside rearview mirror
is convex. Objects seen in the
mirror are closer than they
appear.
•Use your interior rearview mirror
or direct observation to deter-
mine the actual distance of fol-
lowing vehicles when changing
lanes.
1JBA3085
Page 78 of 219
369
Knowing your vehicle
Electric remote control
(if equipped)
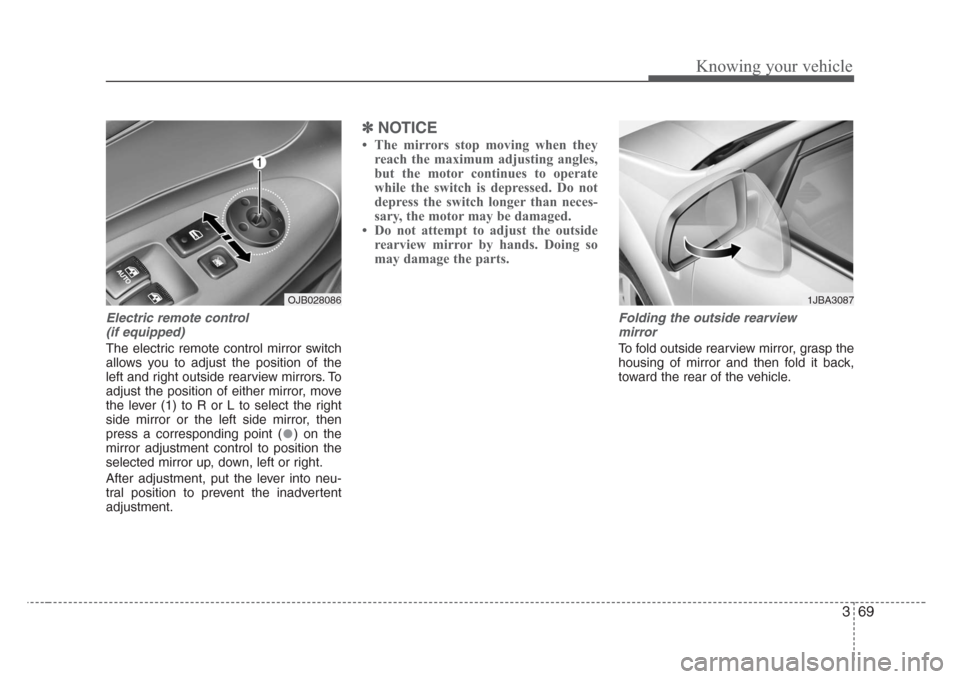
The electric remote control mirror switch
allows you to adjust the position of the
left and right outside rearview mirrors. To
adjust the position of either mirror, move
the lever (1) to R or L to select the right
side mirror or the left side mirror, then
press a corresponding point ( ) on the
mirror adjustment control to position the
selected mirror up, down, left or right.
After adjustment, put the lever into neu-
tral position to prevent the inadvertent
adjustment.
✽
NOTICE
• The mirrors stop moving when they
reach the maximum adjusting angles,
but the motor continues to operate
while the switch is depressed. Do not
depress the switch longer than neces-
sary, the motor may be damaged.
• Do not attempt to adjust the outside
rearview mirror by hands. Doing so
may damage the parts.
Folding the outside rearview
mirror
To fold outside rearview mirror, grasp the
housing of mirror and then fold it back,
toward the rear of the vehicle.
1JBA3087OJB028086
Page 143 of 219
437
Driving your vehicle
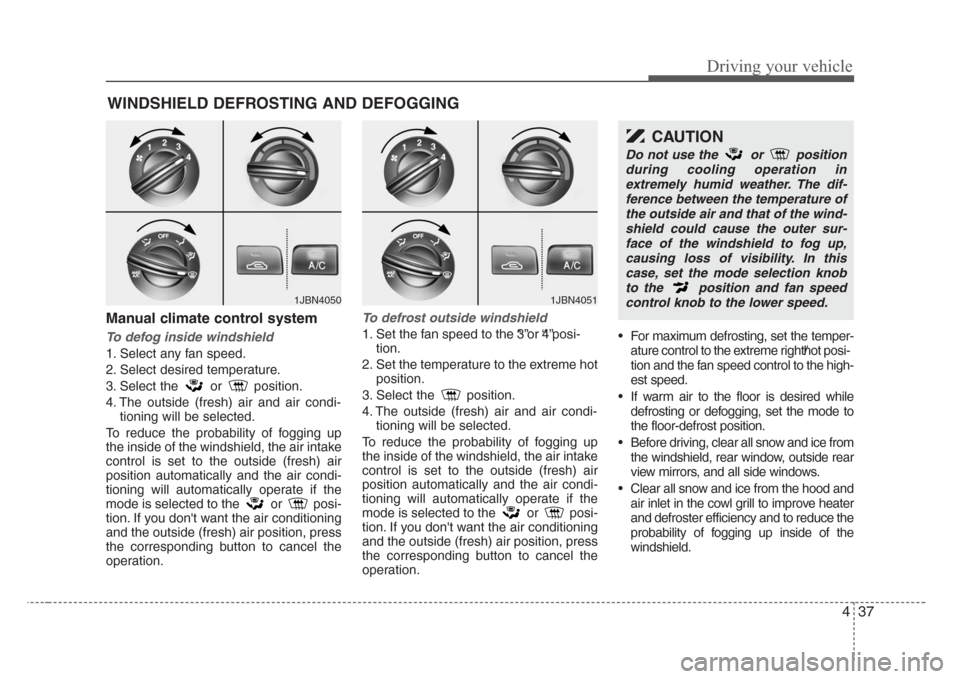
Manual climate control system
To defog inside windshield
1. Select any fan speed.
2. Select desired temperature.
3. Select the or position.
4. The outside (fresh) air and air condi-
tioning will be selected.
To reduce the probability of fogging up
the inside of the windshield, the air intake
control is set to the outside (fresh) air
position automatically and the air condi-
tioning will automatically operate if the
mode is selected to the or posi-
tion. If you don't want the air conditioning
and the outside (fresh) air position, press
the corresponding button to cancel the
operation.
To defrost outside windshield
1. Set the fan speed to the “3”or “4”posi-
tion.
2. Set the temperature to the extreme hot
position.
3. Select the position.
4. The outside (fresh) air and air condi-
tioning will be selected.
To reduce the probability of fogging up
the inside of the windshield, the air intake
control is set to the outside (fresh) air
position automatically and the air condi-
tioning will automatically operate if the
mode is selected to the or posi-
tion. If you don't want the air conditioning
and the outside (fresh) air position, press
the corresponding button to cancel the
operation.• For maximum defrosting, set the temper-
ature control to the extreme right/hot posi-
tion and the fan speed control to the high-
est speed.
• If warm air to the floor is desired while
defrosting or defogging, set the mode to
the floor-defrost position.
• Before driving, clear all snow and ice from
the windshield, rear window, outside rear
view mirrors, and all side windows.
• Clear all snow and ice from the hood and
air inlet in the cowl grill to improve heater
and defroster efficiency and to reduce the
probability of fogging up inside of the
windshield.
WINDSHIELD DEFROSTING AND DEFOGGING
1JBN40501JBN4051
CAUTION
Do not use the or position
during cooling operation in
extremely humid weather. The dif-
ference between the temperature of
the outside air and that of the wind-
shield could cause the outer sur-
face of the windshield to fog up,
causing loss of visibility. In this
case,set the mode selection knob
to the position and fan speed
control knob to the lower speed.
Page 147 of 219
Driving tips
4 5
BEFORE DRIVING
Before entering vehicle:
• Be sure that all windows, outside mir-
ror(s), and outside lights are clean.
• Check the condition of the tires.
• Check under the vehicle for any sign of
leaks.
• Be sure there are no obstacles behind
you if you intend to back up.
Necessary inspections
Fluid levels, such as engine oil, engine
coolant, brake fluid, and washer fluid
should be checked on a regular basis,
with the exact interval depending on the
fluid. Further details are provided in
Section 7, Maintenance.
Before starting
• Close and lock all doors.
• Position the seat so that all controls are
easily reached.
• Adjust the inside and outside rearview
mirrors.
• Be sure that all lights work.
• Check all gauges.
• Check the operation of warning lights
when the ignition switch is turned to
the ON position.
• Release the parking brake and make
sure the brake warning light goes out.
For safe operation, be sure you are famil-
iar with your vehicle and its equipment.WARNING- Driving under
the influence of alcohol or
drugs
Drinking and driving is dangerous.
Drunk driving is the number one
contributor to the highway death
toll each year. Even a small amount
of alcohol will affect your reflexes,
perceptions and judgement. Driving
while under the influence of drugs
is as dangerous or more dangerous
than driving drunk.
You are much more likely to have a
serious accident if you drink or take
drugs and drive.
If you are drinking or taking drugs,
don’t drive. Do not ride with a driv-
er who has been drinking or taking
drugs. Choose a designated driver
or call a cab.
Page 150 of 219
57
Driving tips
Driving at night
Because night driving presents more
hazards than driving in the daylight, here
are some important tips to remember:
• Slow down and keep more distance
between you and other vehicles, as it
may be more difficult to see at night,
especially in areas where there may
not be any street lights.
• Adjust your mirrors to reduce the glare
from other driver's headlights.
• Keep your headlights clean and prop-
erly aimed on vehicles not equipped
with the automatic headlight aiming
feature. Dirty or improperly aimed
headlights will make it much more diffi-
cult to see at night.
• Avoid staring directly at the headlights
of oncoming vehicles. You could be
temporarily blinded, and it will take
several seconds for your eyes to read-
just to the darkness.
Driving in the rain
Rain and wet roads can make driving
dangerous, especially if you’re not pre-
pared for the slick pavement. Here are a
few things to consider when driving in the
rain:
• A heavy rainfall will make it harder to
see and will increase the distance
needed to stop your vehicle, so slow
down.
• Keep your windshield wiping equip-
ment in good shape. Replace your
windshield wiper blades when they
show signs of streaking or missing
areas on the windshield.
• If your tires are not in good condition,
making a quick stop on wet pavement
can cause a skid and possibly lead to
an accident. Be sure your tires are in
good shape.
• Turn on your headlights to make it eas-
ier for others to see you.
• Driving too fast through large puddles
can affect your brakes. If you must go
through puddles, try to drive through
them slowly.
• If you believe you may have gotten
your brakes wet, apply them lightly
while driving until normal braking oper-
ation returns.
Winter driving
• We recommend that you carry emer-
gency equipment, including tire chains,
a window scraper, windshield de-icer,
a bag of sand or salt, flares, a small
shovel and jumper cables.
• Make sure you have sufficient ethyl-
ene-glycol coolant in the radiator.
• Check the battery condition and
cables. Cold temperatures reduce the
output capability of any battery, so it
must be in excellent condition to pro-
vide enough winter starting power.
• Make sure the engine oil viscosity is
suitable for cold weather.
• Check the ignition system for loose
connections and damage.
• Use antifreeze-formulated windshield
washer fluid. (Do not use engine
coolant antifreeze.)
• Do not use the parking brake if it might
freeze. When parking, shift to 1 (First)
or R (Reverse) with a manual transaxle
or P (Park) with an automatic transaxle
and block the rear wheels.