climate control KIA Rio 2008 2.G Owner's Manual
[x] Cancel search | Manufacturer: KIA, Model Year: 2008, Model line: Rio, Model: KIA Rio 2008 2.GPages: 219, PDF Size: 5.17 MB
Page 8 of 219
23
Your vehicle at a glance
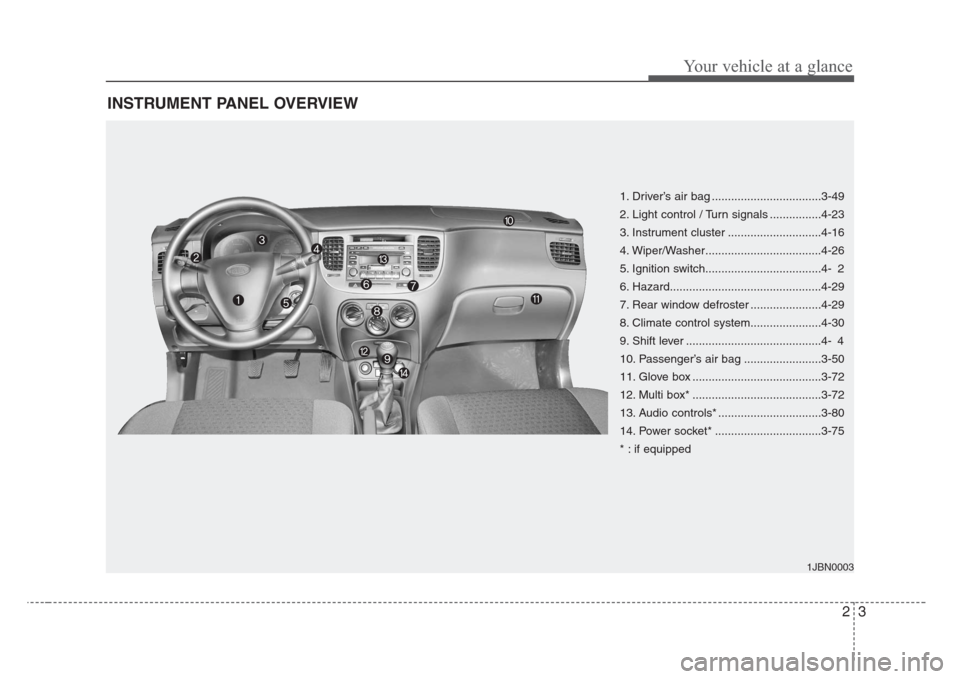
INSTRUMENT PANEL OVERVIEW
1. Driver’s air bag ..................................3-49
2. Light control / Turn signals ................4-23
3. Instrument cluster .............................4-16
4. Wiper/Washer....................................4-26
5. Ignition switch....................................4- 2
6. Hazard...............................................4-29
7. Rear window defroster ......................4-29
8. Climate control system......................4-30
9. Shift lever ..........................................4- 4
10. Passenger’s air bag ........................3-50
11. Glove box ........................................3-72
12. Multi box* ........................................3-72
13. Audio controls* ................................3-80
14. Power socket* .................................3-75
* : if equipped
1JBN0003
Page 107 of 219
4
Ignition switch / 4-2
Starting the engine / 4-3
Manual transaxle / 4-4
Automatic transaxle / 4-6
Brake system / 4-9
Steering wheel / 4-14
Instrument cluster / 4-16
Gauges / 4-17
Warnings and indicators / 4-19
Lighting / 4-23
Wipers and washers / 4-26
Defroster / 4-29
Hazard warning flasher / 4-29
Climate control system / 4-30
Windshield defrosting and defogging / 4-37
Driving your vehicle
Page 136 of 219
Driving your vehicle
30 4
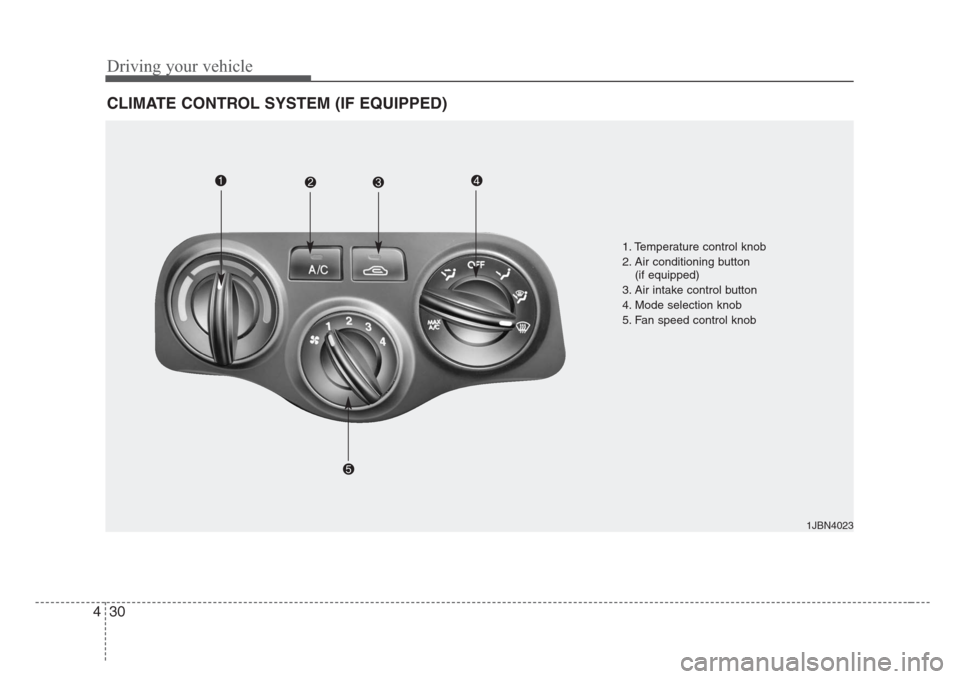
CLIMATE CONTROL SYSTEM (IF EQUIPPED)
1JBN4023
1. Temperature control knob
2. Air conditioning button
(if equipped)
3. Air intake control button
4. Mode selection knob
5. Fan speed control knob
Page 140 of 219
Driving your vehicle
34 4
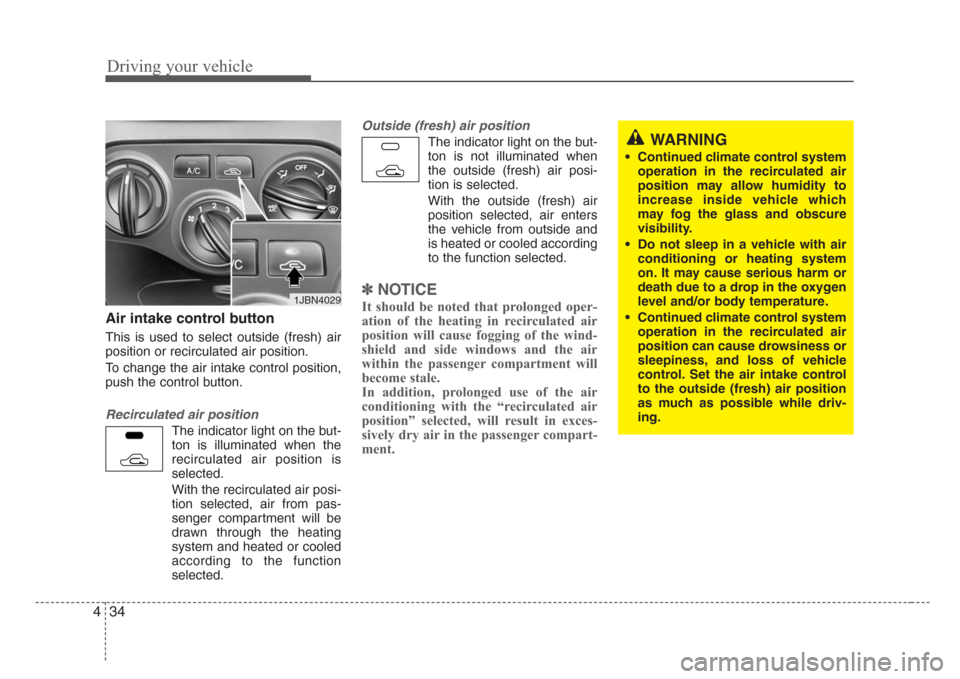
Air intake control button
This is used to select outside (fresh) air
position or recirculated air position.
To change the air intake control position,
push the control button.
Recirculated air position
The indicator light on the but-
ton is illuminated when the
recirculated air position is
selected.
With the recirculated air posi-
tion selected, air from pas-
senger compartment will be
drawn through the heating
system and heated or cooled
according to the function
selected.
Outside (fresh) air position
The indicator light on the but-
ton is not illuminated when
the outside (fresh) air posi-
tion is selected.
With the outside (fresh) air
position selected, air enters
the vehicle from outside and
is heated or cooled according
to the function selected.
✽
NOTICE
It should be noted that prolonged oper-
ation of the heating in recirculated air
position will cause fogging of the wind-
shield and side windows and the air
within the passenger compartment will
become stale.
In addition, prolonged use of the air
conditioning with the “recirculated air
position” selected, will result in exces-
sively dry air in the passenger compart-
ment.1JBN4029
WARNING
• Continued climate control system
operation in the recirculated air
position may allow humidity to
increase inside vehicle which
may fog the glass and obscure
visibility.
• Do not sleep in a vehicle with air
conditioning or heating system
on. It may cause serious harm or
death due to a drop in the oxygen
level and/or body temperature.
• Continued climate control system
operation in the recirculated air
position can cause drowsiness or
sleepiness, and loss of vehicle
control. Set the air intake control
to the outside (fresh) air position
as much as possible while driv-
ing.
Page 143 of 219
437
Driving your vehicle
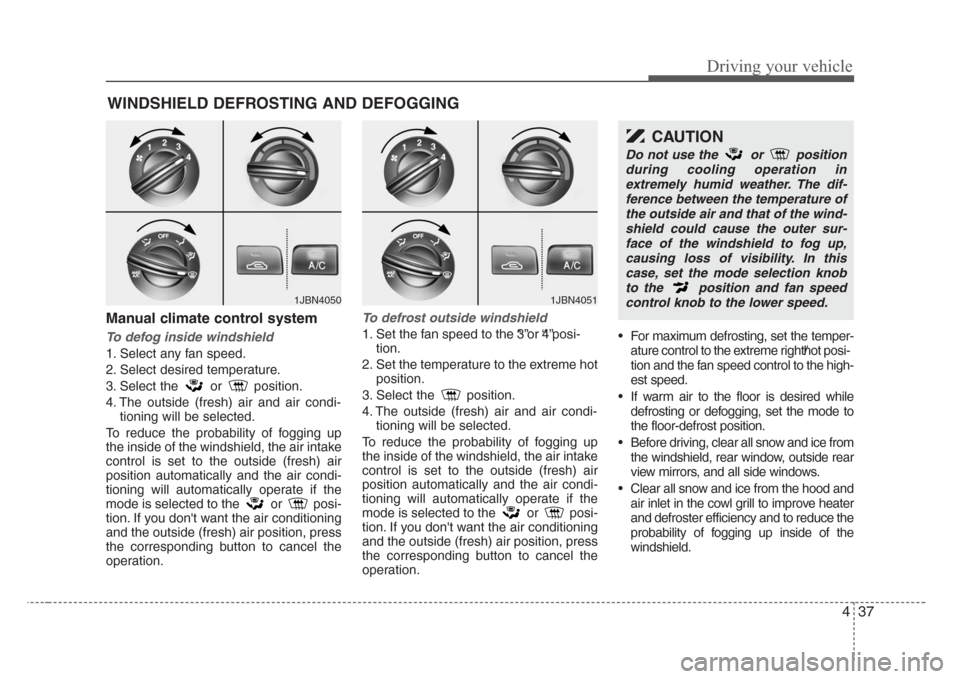
Manual climate control system
To defog inside windshield
1. Select any fan speed.
2. Select desired temperature.
3. Select the or position.
4. The outside (fresh) air and air condi-
tioning will be selected.
To reduce the probability of fogging up
the inside of the windshield, the air intake
control is set to the outside (fresh) air
position automatically and the air condi-
tioning will automatically operate if the
mode is selected to the or posi-
tion. If you don't want the air conditioning
and the outside (fresh) air position, press
the corresponding button to cancel the
operation.
To defrost outside windshield
1. Set the fan speed to the “3”or “4”posi-
tion.
2. Set the temperature to the extreme hot
position.
3. Select the position.
4. The outside (fresh) air and air condi-
tioning will be selected.
To reduce the probability of fogging up
the inside of the windshield, the air intake
control is set to the outside (fresh) air
position automatically and the air condi-
tioning will automatically operate if the
mode is selected to the or posi-
tion. If you don't want the air conditioning
and the outside (fresh) air position, press
the corresponding button to cancel the
operation.• For maximum defrosting, set the temper-
ature control to the extreme right/hot posi-
tion and the fan speed control to the high-
est speed.
• If warm air to the floor is desired while
defrosting or defogging, set the mode to
the floor-defrost position.
• Before driving, clear all snow and ice from
the windshield, rear window, outside rear
view mirrors, and all side windows.
• Clear all snow and ice from the hood and
air inlet in the cowl grill to improve heater
and defroster efficiency and to reduce the
probability of fogging up inside of the
windshield.
WINDSHIELD DEFROSTING AND DEFOGGING
1JBN40501JBN4051
CAUTION
Do not use the or position
during cooling operation in
extremely humid weather. The dif-
ference between the temperature of
the outside air and that of the wind-
shield could cause the outer sur-
face of the windshield to fog up,
causing loss of visibility. In this
case,set the mode selection knob
to the position and fan speed
control knob to the lower speed.
Page 177 of 219
7
Maintenance services / 7-2
Maintenance schedule / 7-3
Owner maintenance / 7-7
Engine compartment / 7-9
Engine oil / 7-10
Engine cooling system / 7-11
Brake fluid / 7-13
Drive belts / 7-14
Power steering / 7-14
Automatic transaxle / 7-15
Lubricants and fluids / 7-16
Air cleaner / 7-17
Climate control air filter / 7-18
Wiper blades / 7-19
Battery / 7-21
Tires and wheels / 7-23
Lubricant specifications / 7-32
Exterior care / 7-33
Interior care / 7-35
Maintenance
Page 194 of 219
Maintenance
18 7
CLIMATE CONTROL AIR FILTER (IF EQUIPPED)
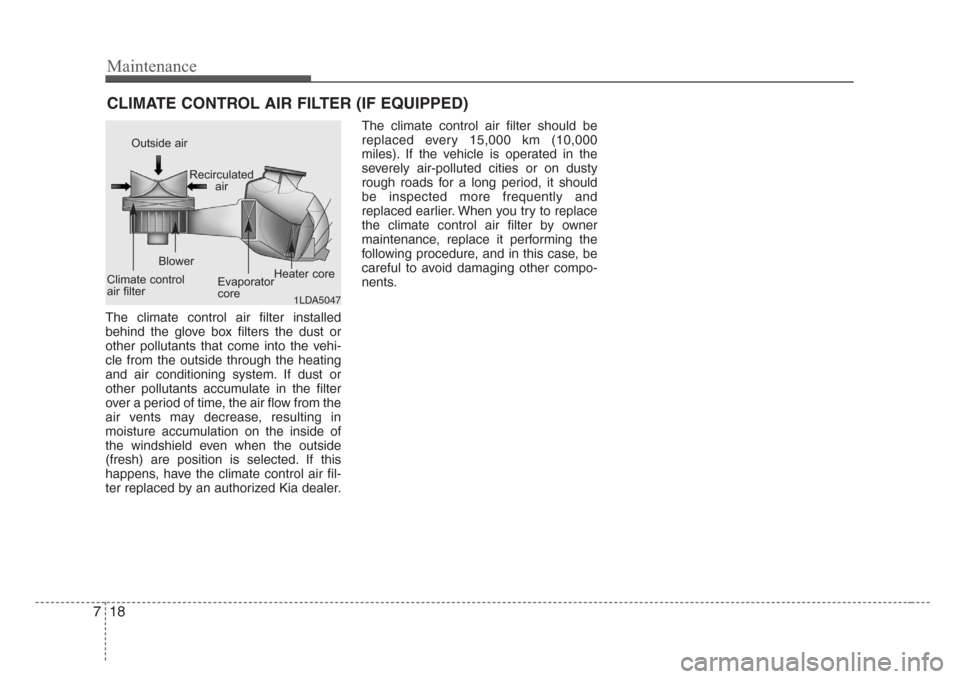
The climate control air filter installed
behind the glove box filters the dust or
other pollutants that come into the vehi-
cle from the outside through the heating
and air conditioning system. If dust or
other pollutants accumulate in the filter
over a period of time, the air flow from the
air vents may decrease, resulting in
moisture accumulation on the inside of
the windshield even when the outside
(fresh) are position is selected. If this
happens, have the climate control air fil-
ter replaced by an authorized Kia dealer.The climate control air filter should be
replaced every 15,000 km (10,000
miles). If the vehicle is operated in the
severely air-polluted cities or on dusty
rough roads for a long period, it should
be inspected more frequently and
replaced earlier. When you try to replace
the climate control air filter by owner
maintenance, replace it performing the
following procedure, and in this case, be
careful to avoid damaging other compo-
nents.
1LDA5047
Outside air
Recirculated
air
Climate control
air filterBlower
Evaporator
coreHeater core
Page 206 of 219
Maintenance
30 7
4. Tire ply composition and mate-
rial
The number of layers or plies of rub-
ber-coated fabric in the tire. Tire
manufacturers also must indicate the
materials in the tire, which include
steel, nylon, polyester, and others.
The letter "R" means radial ply con-
struction; the letter "D" means diago-
nal or bias ply construction; and the
letter "B" means belted-bias ply con-
struction.
5. Maximum permissible inflation
pressure
This number is the greatest amount
of air pressure that should be put in
the tire. Do not exceed the maximum
permissible inflation pressure. Refer
to the Tire and Loading Information
label for recommended inflation
pressure.
6. Maximum load rating
This number indicates the maximum
load in kilograms and pounds that
can be carried by the tire. When
replacing the tires on the vehicle,
always use a tire that has the same
load rating as the factory installed
tire.
7. Uniform tire quality grading
The following information relates to
the tire grading system developed by
the Canadian Motor Vehicle Safety
Standard (CMVSS) for grading tires
by tread wear, traction and tempera-
ture performance.Tread wear
The tread wear grade is a compara-
tive rating based on the wear rate of
the tire when tested under controlled
conditions on a specified govern-
ment test course. For example, a tire
graded 150 would wear one-and-a-
half times as well on the government
course as a tire graded 100.
The relative performance of tires
depends upon the actual conditions
of their use. However, performance
may differ from the norm because of
variations in driving habits, service
practices and differences in road
characteristics and climate.
These grades are molded on the
side-walls of passenger vehicle tires.
The tires available as standard or
optional equipment on Kia vehicles
may vary with respect to grade.
WARNING
Tires degrade over time, even
when they are not being used.
Regardless of the remaining
tread, it is recommended that
tires generally be replaced after
six (6) years of normal service.
Heat caused by hot climates or
frequent high loading condi-
tions can accelerate the aging
process. Failure to follow this
warning can result in sudden
tire failure, which could lead to a
loss of control and an accident
involving serious injury or
death.
Page 218 of 219
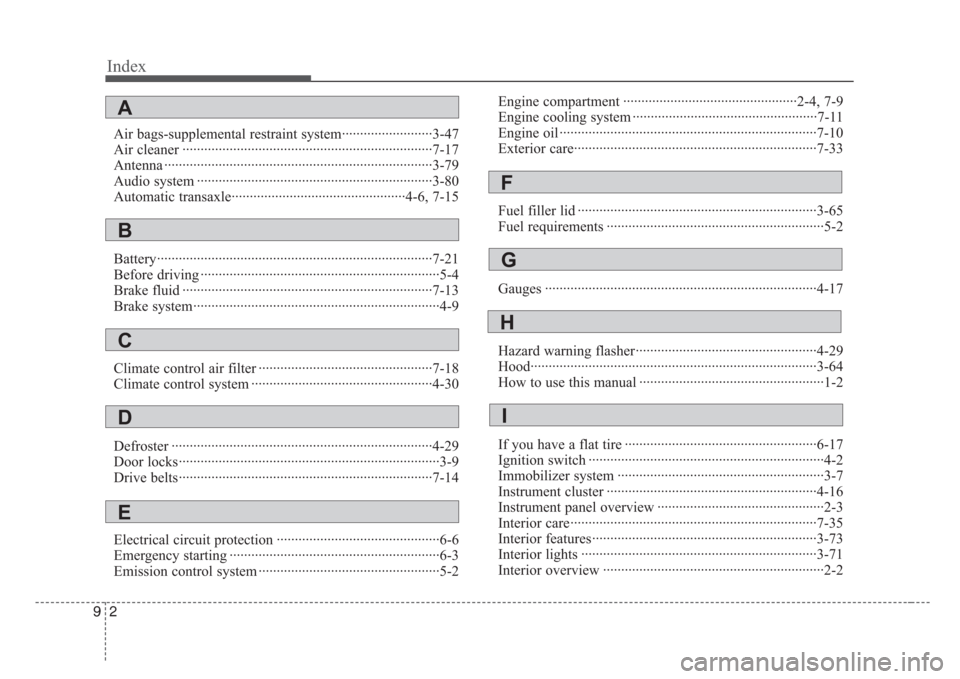
Index
2 9
Air bags-supplemental restraint system·························3-47
Air cleaner ·····································································7-17
Antenna ··········································································3-79
Audio system ·································································3-80
Automatic transaxle················································4-6, 7-15
Battery············································································7-21
Before driving ··································································5-4
Brake fluid ·····································································7-13
Brake system····································································4-9
Climate control air filter ················································7-18
Climate control system ··················································4-30
Defroster ········································································4-29
Door locks········································································3-9
Drive belts······································································7-14
Electrical circuit protection ·············································6-6
Emergency starting ··························································6-3
Emission control system ··················································5-2Engine compartment ················································2-4, 7-9
Engine cooling system ···················································7-11
Engine oil ·······································································7-10
Exterior care···································································7-33
Fuel filler lid ··································································3-65
Fuel requirements ····························································5-2
Gauges ···········································································4-17
Hazard warning flasher··················································4-29
Hood···············································································3-64
How to use this manual ···················································1-2
If you have a flat tire ·····················································6-17
Ignition switch ·································································4-2
Immobilizer system ·························································3-7
Instrument cluster ··························································4-16
Instrument panel overview ··············································2-3
Interior care····································································7-35
Interior features······························································3-73
Interior lights ·································································3-71
Interior overview ·····························································2-2
A
B
C
E
D
F
G
H
I