KIA Rio 2012 3.G Owner's Manual
Manufacturer: KIA, Model Year: 2012, Model line: Rio, Model: KIA Rio 2012 3.GPages: 385, PDF Size: 9.68 MB
Page 171 of 385
Features of your vehicle
96
4
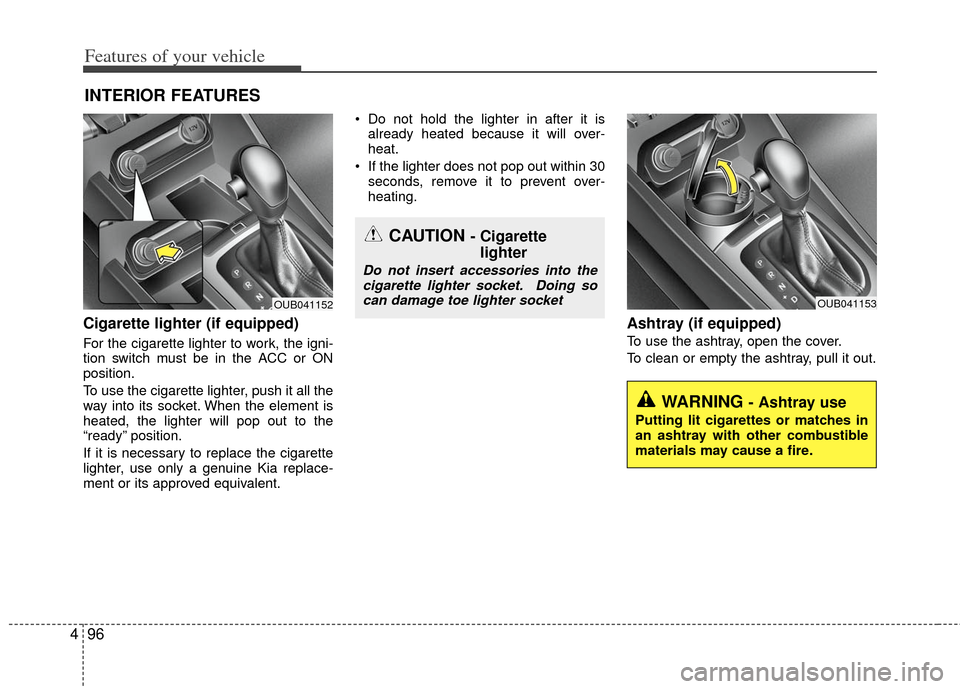
Cigarette lighter (if equipped)
For the cigarette lighter to work, the igni-
tion switch must be in the ACC or ON
position.
To use the cigarette lighter, push it all the
way into its socket. When the element is
heated, the lighter will pop out to the
“ready” position.
If it is necessary to replace the cigarette
lighter, use only a genuine Kia replace-
ment or its approved equivalent. Do not hold the lighter in after it is
already heated because it will over-
heat.
If the lighter does not pop out within 30 seconds, remove it to prevent over-
heating.
Ashtray (if equipped)
To use the ashtray, open the cover.
To clean or empty the ashtray, pull it out.
INTERIOR FEATURES
OUB041153OUB041152
WARNING - Ashtray use
Putting lit cigarettes or matches in
an ashtray with other combustible
materials may cause a fire.
CAUTION - Cigarettelighter
Do not insert accessories into the
cigarette lighter socket. Doing socan damage toe lighter socket
Page 172 of 385
497
Features of your vehicle
Cup holder
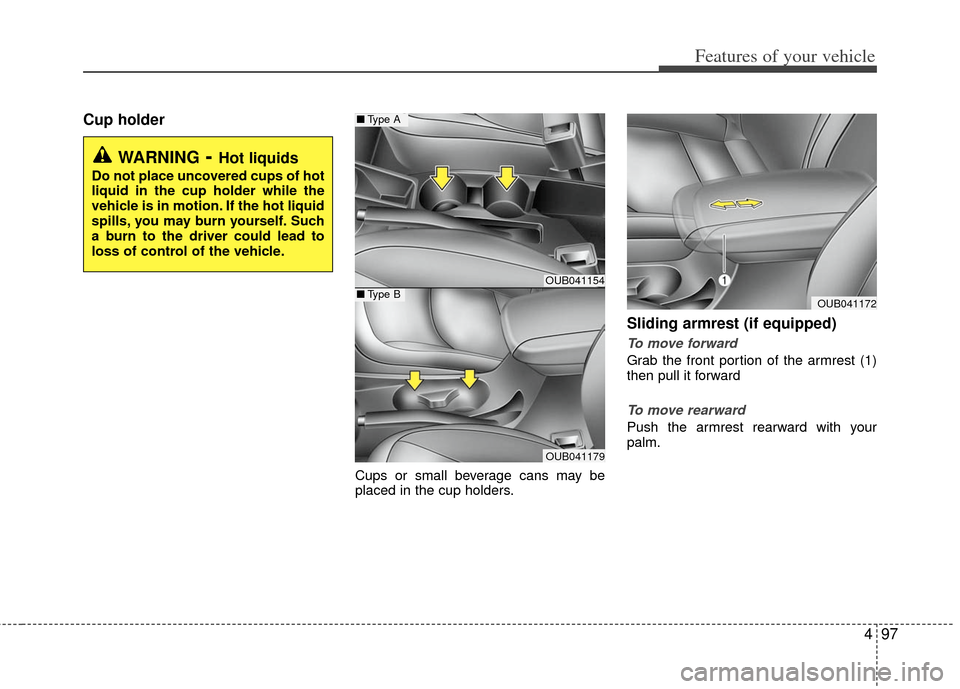
Cups or small beverage cans may be
placed in the cup holders.
Sliding armrest (if equipped)
To move forward
Grab the front portion of the armrest (1)
then pull it forward
To move rearward
Push the armrest rearward with your
palm.
WARNING- Hot liquids
Do not place uncovered cups of hot
liquid in the cup holder while the
vehicle is in motion. If the hot liquid
spills, you may burn yourself. Such
a burn to the driver could lead to
loss of control of the vehicle.
OUB041154
OUB041179
■Type A
■Type BOUB041172
Page 173 of 385
Features of your vehicle
98
4
Photo frame (if equipped)
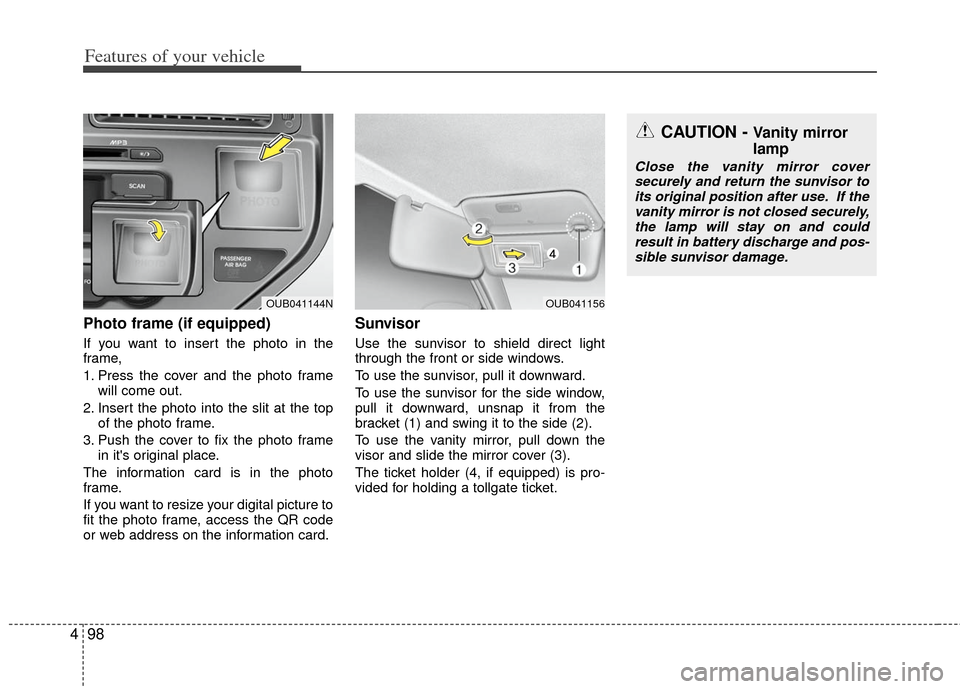
If you want to insert the photo in the
frame,
1. Press the cover and the photo frame
will come out.
2. Insert the photo into the slit at the top of the photo frame.
3. Push the cover to fix the photo frame in it's original place.
The information card is in the photo
frame.
If you want to resize your digital picture to
fit the photo frame, access the QR code
or web address on the information card.
Sunvisor
Use the sunvisor to shield direct light
through the front or side windows.
To use the sunvisor, pull it downward.
To use the sunvisor for the side window,
pull it downward, unsnap it from the
bracket (1) and swing it to the side (2).
To use the vanity mirror, pull down the
visor and slide the mirror cover (3).
The ticket holder (4, if equipped) is pro-
vided for holding a tollgate ticket.
OUB041156
CAUTION - Vanity mirror
lamp
Close the vanity mirror cover securely and return the sunvisor to its original position after use. If thevanity mirror is not closed securely,the lamp will stay on and couldresult in battery discharge and pos- sible sunvisor damage.
OUB041144N
Page 174 of 385
499
Features of your vehicle
Power outlet (if equipped)
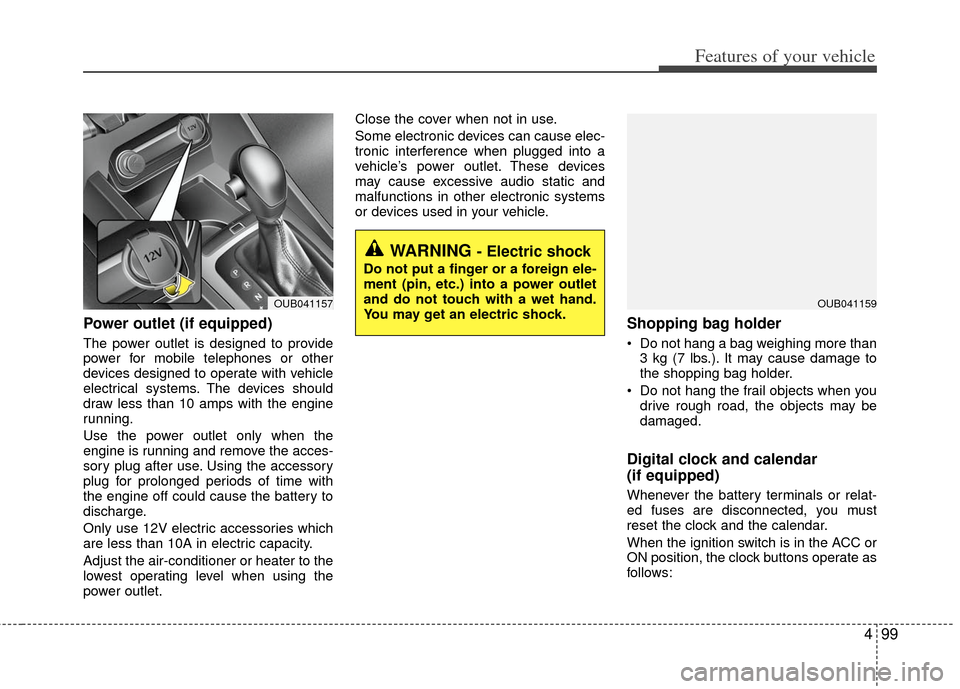
The power outlet is designed to provide
power for mobile telephones or other
devices designed to operate with vehicle
electrical systems. The devices should
draw less than 10 amps with the engine
running.
Use the power outlet only when the
engine is running and remove the acces-
sory plug after use. Using the accessory
plug for prolonged periods of time with
the engine off could cause the battery to
discharge.
Only use 12V electric accessories which
are less than 10A in electric capacity.
Adjust the air-conditioner or heater to the
lowest operating level when using the
power outlet.Close the cover when not in use.
Some electronic devices can cause elec-
tronic interference when plugged into a
vehicle’s power outlet. These devices
may cause excessive audio static and
malfunctions in other electronic systems
or devices used in your vehicle.
Shopping bag holder
Do not hang a bag weighing more than
3 kg (7 lbs.). It may cause damage to
the shopping bag holder.
Do not hang the frail objects when you drive rough road, the objects may be
damaged.
Digital clock and calendar
(if equipped)
Whenever the battery terminals or relat-
ed fuses are disconnected, you must
reset the clock and the calendar.
When the ignition switch is in the ACC or
ON position, the clock buttons operate as
follows:
WARNING - Electric shock
Do not put a finger or a foreign ele-
ment (pin, etc.) into a power outlet
and do not touch with a wet hand.
You may get an electric shock.
OUB041159OUB041157
Page 175 of 385
![KIA Rio 2012 3.G Owners Manual Features of your vehicle
100
4
Setup the clock and calender
With audio off
1. Press the [SETUP] or [Clock] button
(1) until the clock of the display blinks.
2. Set the clock by turning the knob (2) an KIA Rio 2012 3.G Owners Manual Features of your vehicle
100
4
Setup the clock and calender
With audio off
1. Press the [SETUP] or [Clock] button
(1) until the clock of the display blinks.
2. Set the clock by turning the knob (2) an](/img/2/2935/w960_2935-174.png)
Features of your vehicle
100
4
Setup the clock and calender
With audio off
1. Press the [SETUP] or [Clock] button
(1) until the clock of the display blinks.
2. Set the clock by turning the knob (2) and press it. With audio on
1. Press the [SETUP] or [Clock] button
(1) until the clock adjust mode dis-
played.
2. Set the clock by turning the knob(2) and press it.
Clothes hanger (if equipped)
To use the hanger, pull down the upper
portion of hanger.
OUB041161N
WARNING
Do not adjust the clock while driv-
ing. You may lose your steering
control and cause an accident that
results in severe personal injury or
death.
CAUTION - Hanging clothing
Do not hang heavy clothes, since
those may damage the hook.
OUN026348
Page 176 of 385
4101
Features of your vehicle
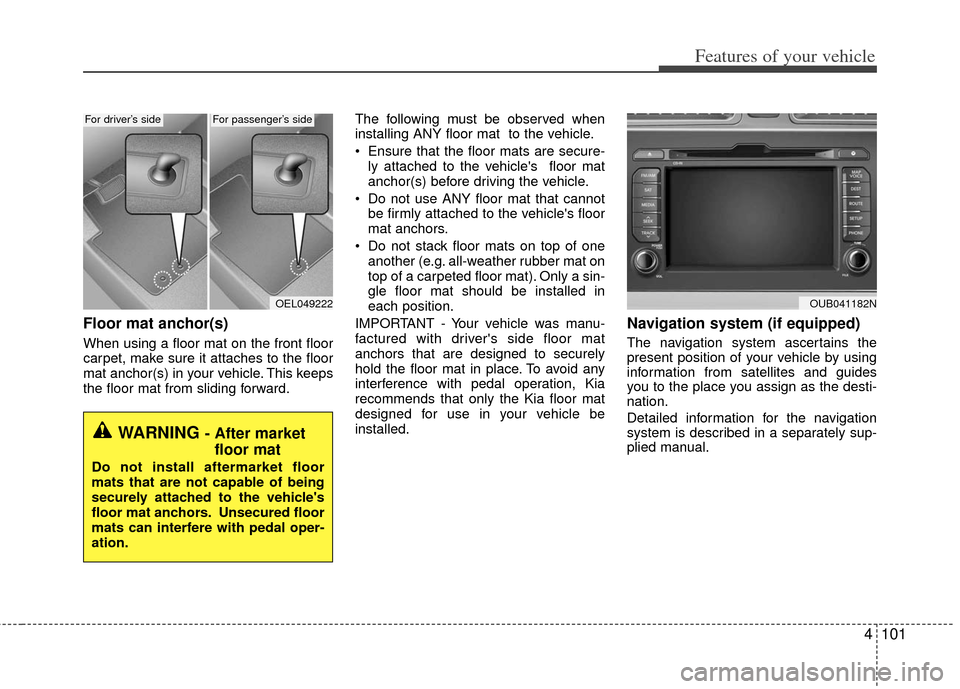
Floor mat anchor(s)
When using a floor mat on the front floor
carpet, make sure it attaches to the floor
mat anchor(s) in your vehicle. This keeps
the floor mat from sliding forward.The following must be observed when
installing ANY floor mat to the vehicle.
Ensure that the floor mats are secure-
ly attached to the vehicle's floor mat
anchor(s) before driving the vehicle.
Do not use ANY floor mat that cannot be firmly attached to the vehicle's floor
mat anchors.
Do not stack floor mats on top of one another (e.g. all-weather rubber mat on
top of a carpeted floor mat). Only a sin-
gle floor mat should be installed in
each position.
IMPORTANT - Your vehicle was manu-
factured with driver's side floor mat
anchors that are designed to securely
hold the floor mat in place. To avoid any
interference with pedal operation, Kia
recommends that only the Kia floor mat
designed for use in your vehicle be
installed.
Navigation system (if equipped)
The navigation system ascertains the
present position of your vehicle by using
information from satellites and guides
you to the place you assign as the desti-
nation.
Detailed information for the navigation
system is described in a separately sup-
plied manual.
OEL049222
WARNING - After market floor mat
Do not install aftermarket floor
mats that are not capable of being
securely attached to the vehicle's
floor mat anchors. Unsecured floor
mats can interfere with pedal oper-
ation.
OUB041182N
For driver’s sideFor passenger’s side
Page 177 of 385
Features of your vehicle
102
4
If you install an aftermarket HID head
lamp, your vehicle’s audio and electronic
device may malfunction.
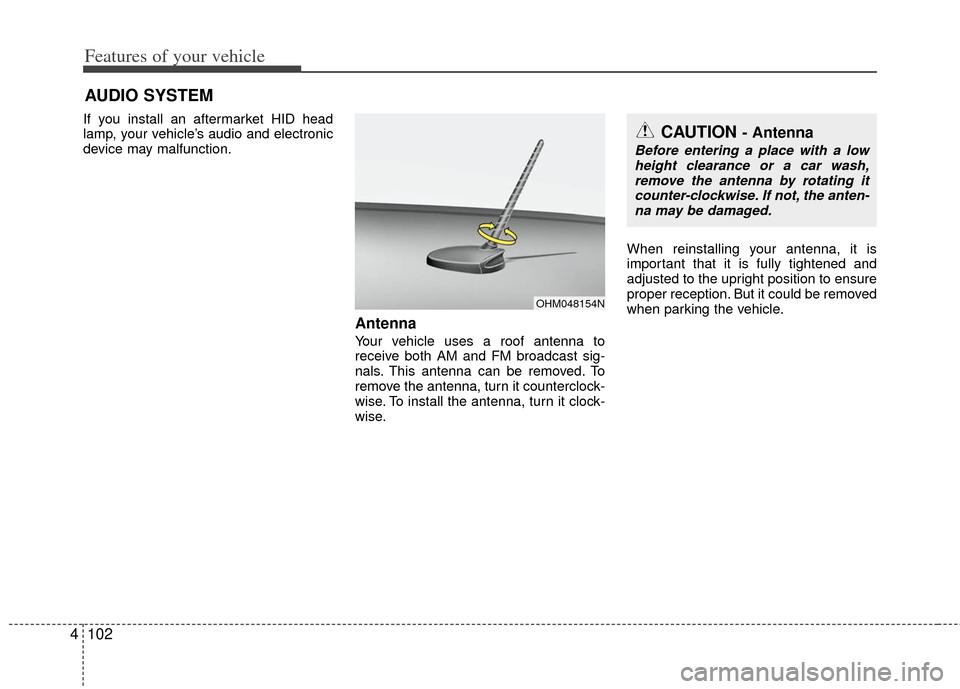
Antenna
Your vehicle uses a roof antenna to
receive both AM and FM broadcast sig-
nals. This antenna can be removed. To
remove the antenna, turn it counterclock-
wise. To install the antenna, turn it clock-
wise. When reinstalling your antenna, it is
important that it is fully tightened and
adjusted to the upright position to ensure
proper reception. But it could be removed
when parking the vehicle.
AUDIO SYSTEM
OHM048154N
CAUTION - Antenna
Before entering a place with a low
height clearance or a car wash,remove the antenna by rotating it counter-clockwise. If not, the anten-na may be damaged.
Page 178 of 385
4103
Features of your vehicle
Steering wheel audio control
(if equipped)
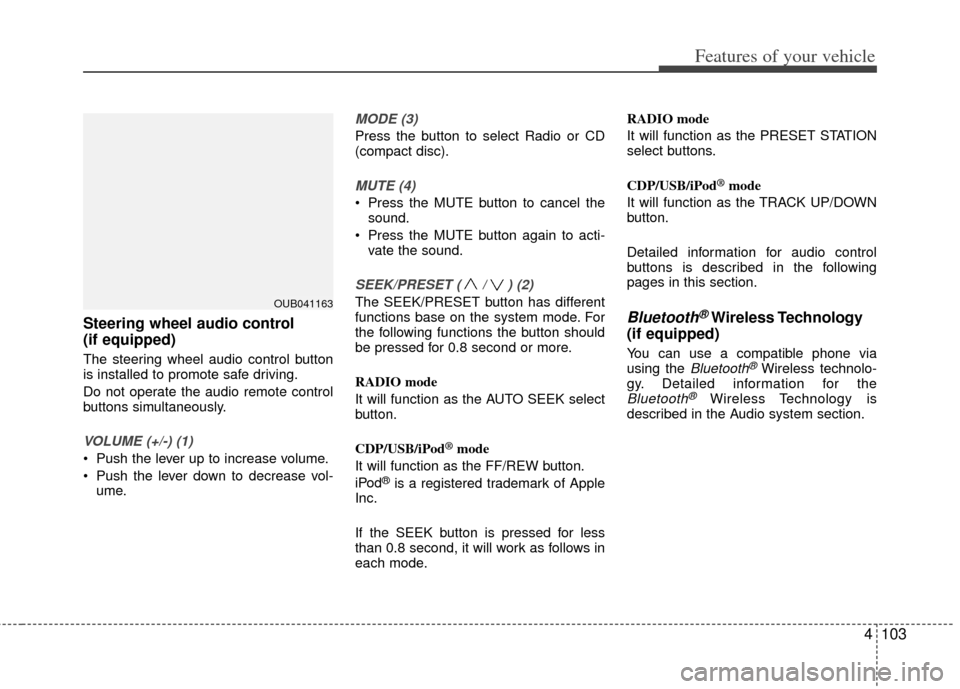
The steering wheel audio control button
is installed to promote safe driving.
Do not operate the audio remote control
buttons simultaneously.
VOLUME (+/-) (1)
Push the lever up to increase volume.
Push the lever down to decrease vol-ume.
MODE (3)
Press the button to select Radio or CD
(compact disc).
MUTE (4)
Press the MUTE button to cancel thesound.
Press the MUTE button again to acti- vate the sound.
SEEK/PRESET ( / ) (2)
The SEEK/PRESET button has different
functions base on the system mode. For
the following functions the button should
be pressed for 0.8 second or more.
RADIO mode
It will function as the AUTO SEEK select
button.
CDP/USB/iPod
®mode
It will function as the FF/REW button.
iPod
®is a registered trademark of Apple
Inc.
If the SEEK button is pressed for less
than 0.8 second, it will work as follows in
each mode. RADIO mode
It will function as the PRESET STATION
select buttons.
CDP/USB/iPod
®mode
It will function as the TRACK UP/DOWN
button.
Detailed information for audio control
buttons is described in the following
pages in this section.
Bluetooth®Wireless Technology
(if equipped)
You can use a compatible phone via
using the Bluetooth®Wireless technolo-
gy. Detailed information for the
Bluetooth®Wireless Technology is
described in the Audio system section.
OUB041163
Page 179 of 385
Features of your vehicle
104
4
Aux, USB and iPod®*
(if equipped)
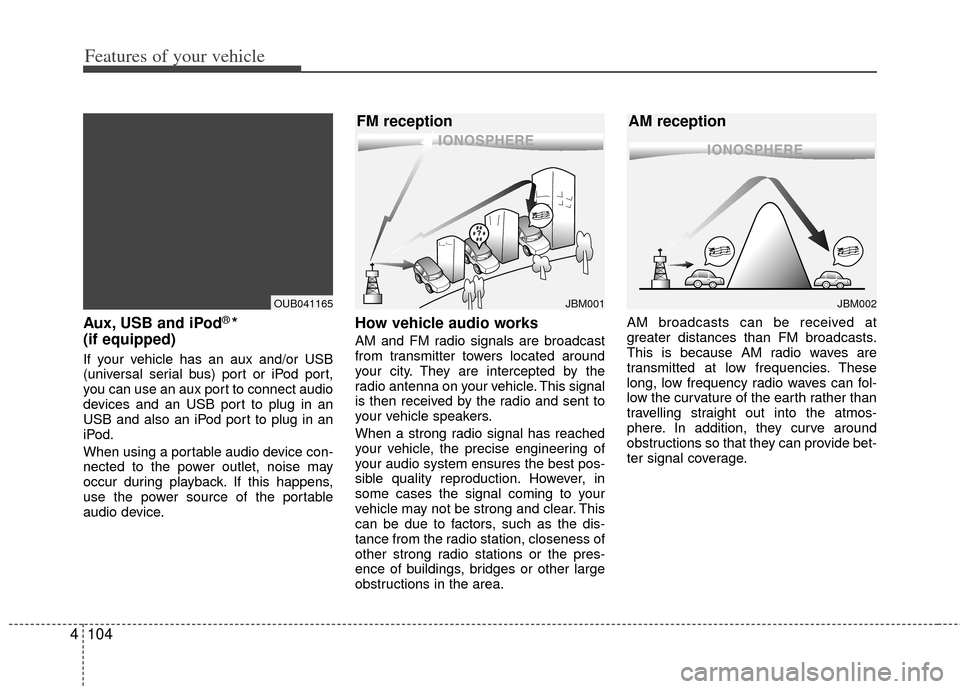
If your vehicle has an aux and/or USB
(universal serial bus) port or iPod port,
you can use an aux port to connect audio
devices and an USB port to plug in an
USB and also an iPod port to plug in an
iPod.
When using a portable audio device con-
nected to the power outlet, noise may
occur during playback. If this happens,
use the power source of the portable
audio device.
How vehicle audio works
AM and FM radio signals are broadcast
from transmitter towers located around
your city. They are intercepted by the
radio antenna on your vehicle. This signal
is then received by the radio and sent to
your vehicle speakers.
When a strong radio signal has reached
your vehicle, the precise engineering of
your audio system ensures the best pos-
sible quality reproduction. However, in
some cases the signal coming to your
vehicle may not be strong and clear. This
can be due to factors, such as the dis-
tance from the radio station, closeness of
other strong radio stations or the pres-
ence of buildings, bridges or other large
obstructions in the area. AM broadcasts can be received at
greater distances than FM broadcasts.
This is because AM radio waves are
transmitted at low frequencies. These
long, low frequency radio waves can fol-
low the curvature of the earth rather than
travelling straight out into the atmos-
phere. In addition, they curve around
obstructions so that they can provide bet-
ter signal coverage.
JBM001
FM reception
OUB041165JBM002
AM reception
Page 180 of 385
4105
Features of your vehicle
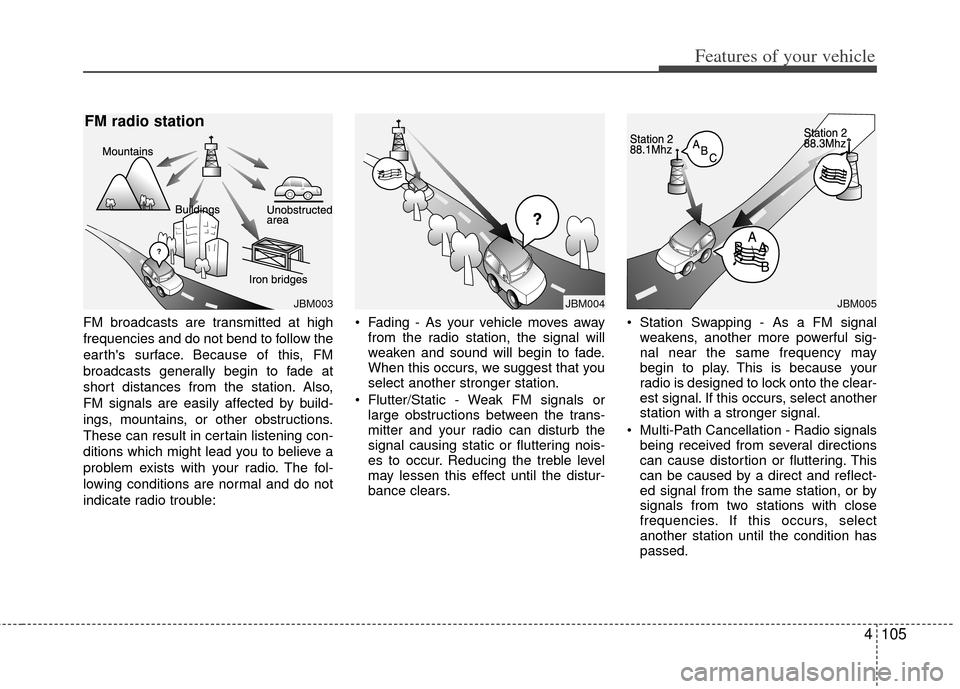
FM broadcasts are transmitted at high
frequencies and do not bend to follow the
earth's surface. Because of this, FM
broadcasts generally begin to fade at
short distances from the station. Also,
FM signals are easily affected by build-
ings, mountains, or other obstructions.
These can result in certain listening con-
ditions which might lead you to believe a
problem exists with your radio. The fol-
lowing conditions are normal and do not
indicate radio trouble: Fading - As your vehicle moves away
from the radio station, the signal will
weaken and sound will begin to fade.
When this occurs, we suggest that you
select another stronger station.
Flutter/Static - Weak FM signals or large obstructions between the trans-
mitter and your radio can disturb the
signal causing static or fluttering nois-
es to occur. Reducing the treble level
may lessen this effect until the distur-
bance clears. Station Swapping - As a FM signal
weakens, another more powerful sig-
nal near the same frequency may
begin to play. This is because your
radio is designed to lock onto the clear-
est signal. If this occurs, select another
station with a stronger signal.
Multi-Path Cancellation - Radio signals being received from several directions
can cause distortion or fluttering. This
can be caused by a direct and reflect-
ed signal from the same station, or by
signals from two stations with close
frequencies. If this occurs, select
another station until the condition has
passed.
JBM004JBM003
FM radio station
JBM005