tow KIA Rio 2015 3.G User Guide
[x] Cancel search | Manufacturer: KIA, Model Year: 2015, Model line: Rio, Model: KIA Rio 2015 3.GPages: 398, PDF Size: 7.61 MB
Page 138 of 398
Features of your vehicle
72
4
High beam operation
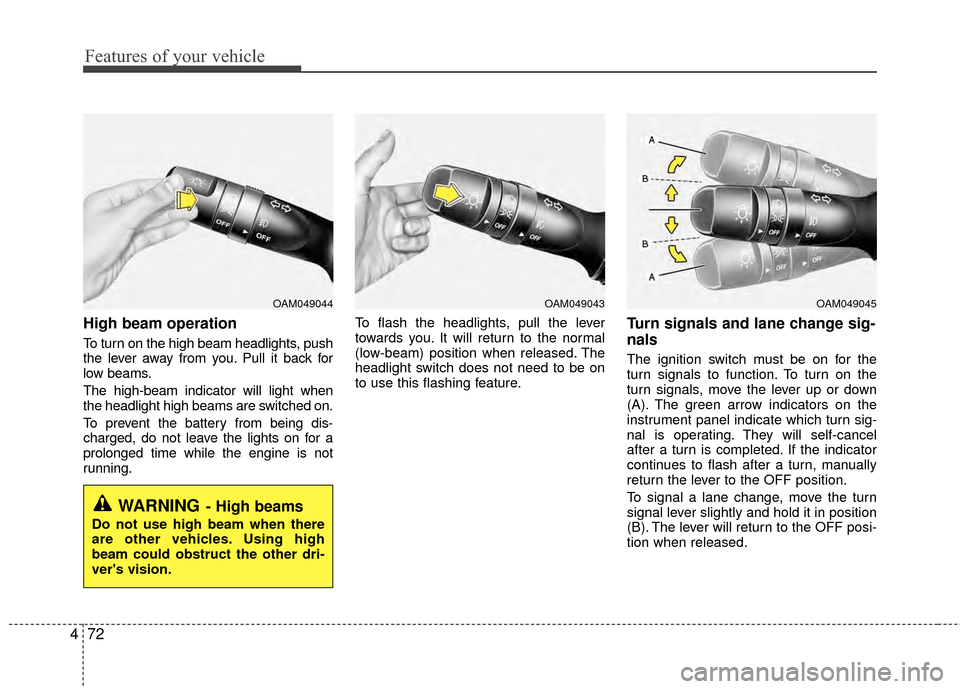
To turn on the high beam headlights, push
the lever away from you. Pull it back for
low beams.
The high-beam indicator will light when
the headlight high beams are switched on.
To prevent the battery from being dis-
charged, do not leave the lights on for a
prolonged time while the engine is not
running. To flash the headlights, pull the lever
towards you. It will return to the normal
(low-beam) position when released. The
headlight switch does not need to be on
to use this flashing feature.
Turn signals and lane change sig-
nals
The ignition switch must be on for the
turn signals to function. To turn on the
turn signals, move the lever up or down
(A). The green arrow indicators on the
instrument panel indicate which turn sig-
nal is operating. They will self-cancel
after a turn is completed. If the indicator
continues to flash after a turn, manually
return the lever to the OFF position.
To signal a lane change, move the turn
signal lever slightly and hold it in position
(B). The lever will return to the OFF posi-
tion when released.
OAM049044
WARNING- High beams
Do not use high beam when there
are other vehicles. Using high
beam could obstruct the other dri-
ver's vision.
OAM049045OAM049043
Page 142 of 398
Features of your vehicle
76
4
Windshield washers
In the OFF position, pull the lever gently
toward you to spray washer fluid on the
windshield and to run the wipers 1-3
cycles.
Use this function when the windshield is
dirty.
The spray and wiper operation will con-
tinue until you release the lever. If the
washer does not work, check the washer
fluid level.
If the fluid level is not sufficient, you will
need to add appropriate non-abrasive
windshield washer fluid to the washer
reservoir.
The reservoir filler neck is located in the
front of the engine compartment on the
passenger side.CAUTION - Washer pump
To prevent possible damage to the
washer pump, do not operate thewasher when the fluid reservoir is empty.
WARNING- Obscured visibility
Do not use the washer in freezing
temperatures without first warming
the windshield with the defrosters;
the washer solution could freeze on
the windshield and obscure your
vision.
CAUTION - Wiper position
When washing the vehicle, set the
wiper switch in the off position tostop the auto wiper operation.
The wiper may operate and be dam-aged if the switch is set in the AUTOmode while washing the vehicle.
Page 149 of 398
483
Features of your vehicle
Mode selection
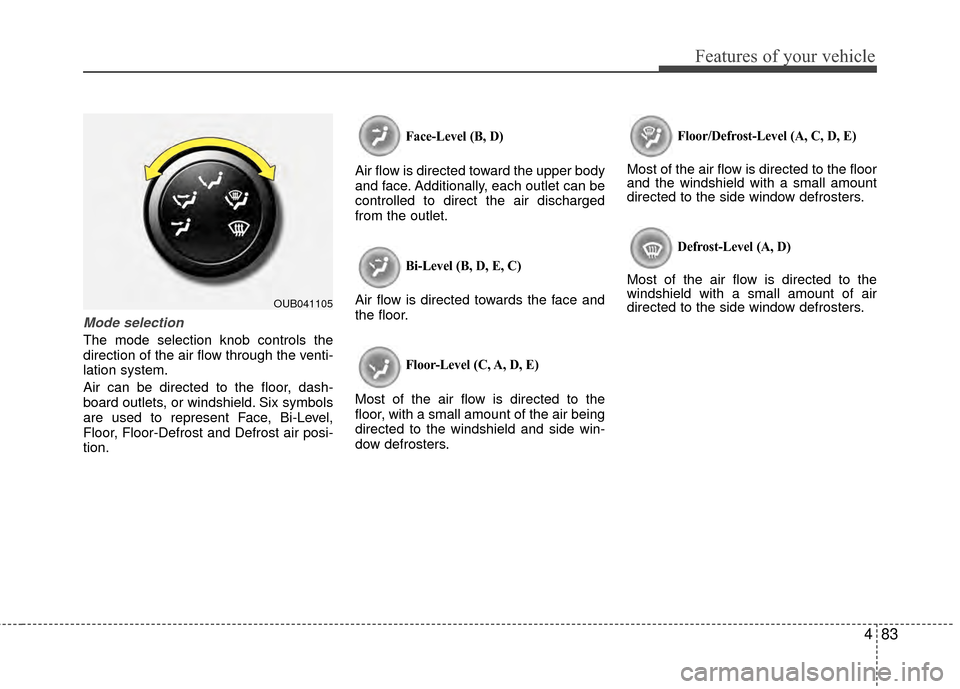
The mode selection knob controls the
direction of the air flow through the venti-
lation system.
Air can be directed to the floor, dash-
board outlets, or windshield. Six symbols
are used to represent Face, Bi-Level,
Floor, Floor-Defrost and Defrost air posi-
tion.
Face-Level (B, D)
Air flow is directed toward the upper body
and face. Additionally, each outlet can be
controlled to direct the air discharged
from the outlet.
Bi-Level (B, D, E, C)
Air flow is directed towards the face and
the floor.
Floor-Level (C, A, D, E)
Most of the air flow is directed to the
floor, with a small amount of the air being
directed to the windshield and side win-
dow defrosters.
Floor/Defrost-Level (A, C, D, E)
Most of the air flow is directed to the floor
and the windshield with a small amount
directed to the side window defrosters.
Defrost-Level (A, D)
Most of the air flow is directed to the
windshield with a small amount of air
directed to the side window defrosters.
OUB041105
Page 170 of 398
Features of your vehicle
104
4
Aux, USB and iPod®*
(if equipped)
If your vehicle has an AUX and/or USB
(universal serial bus) port or iPod®port,
you can use an AUX port to connect
audio devices and an USB port to plug in
an USB and also an iPod
®port to plug in
an iPod®.
iPod®mobile digital device sold sepa-
rately. Connectivity may require use of
the Kia accessory cable.
When using a portable audio device con-
nected to the power outlet, noise may
occur during playback. If this happens,
use the power source of the portable
audio device.
How vehicle audio works
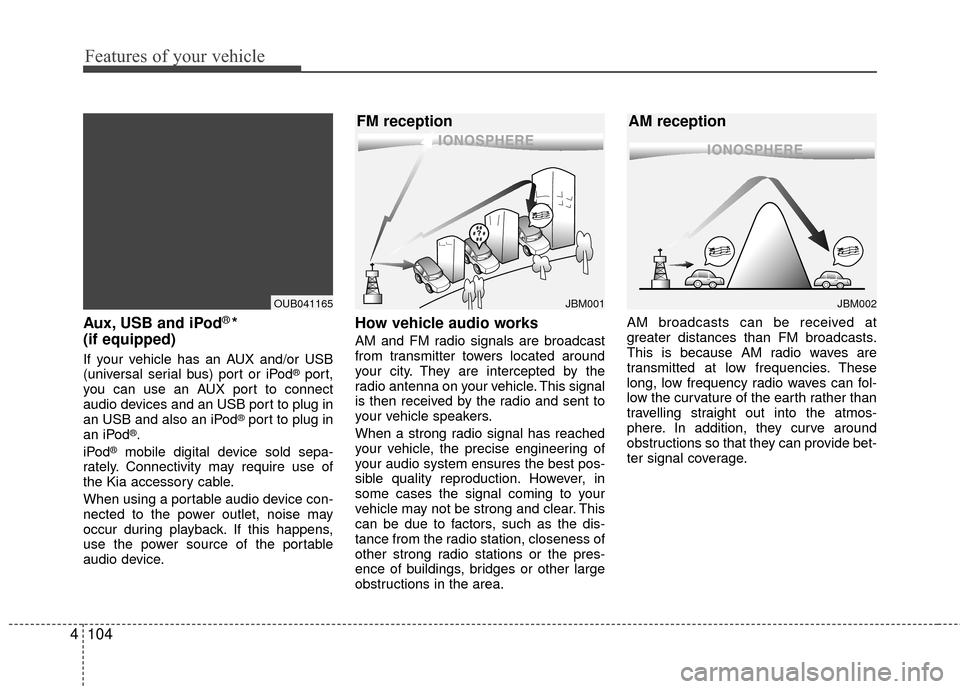
AM and FM radio signals are broadcast
from transmitter towers located around
your city. They are intercepted by the
radio antenna on your vehicle. This signal
is then received by the radio and sent to
your vehicle speakers.
When a strong radio signal has reached
your vehicle, the precise engineering of
your audio system ensures the best pos-
sible quality reproduction. However, in
some cases the signal coming to your
vehicle may not be strong and clear. This
can be due to factors, such as the dis-
tance from the radio station, closeness of
other strong radio stations or the pres-
ence of buildings, bridges or other large
obstructions in the area. AM broadcasts can be received at
greater distances than FM broadcasts.
This is because AM radio waves are
transmitted at low frequencies. These
long, low frequency radio waves can fol-
low the curvature of the earth rather than
travelling straight out into the atmos-
phere. In addition, they curve around
obstructions so that they can provide bet-
ter signal coverage.
JBM001
FM reception
OUB041165JBM002
AM reception
Page 226 of 398
5
Before driving / 5-3
Key positions / 5-4
ENGINE START/STOP button / 5-6
Starting the engine / 5-9
Manual transaxle / 5-12
Automatic transaxle / 5-15
Brake system / 5-21
Cruise control system / 5-32
ISG (Idle Stop and Go) system / 5-37
Active eco system / 5-41
Economical operation / 5-42
Special driving conditions / 5-44
Winter driving / 5-48
Trailer towing / 5-50
Vehicle load limit / 5-51
Vehicle weight / 5-56
Driving your vehicle
Page 230 of 398
55
Driving your vehicle
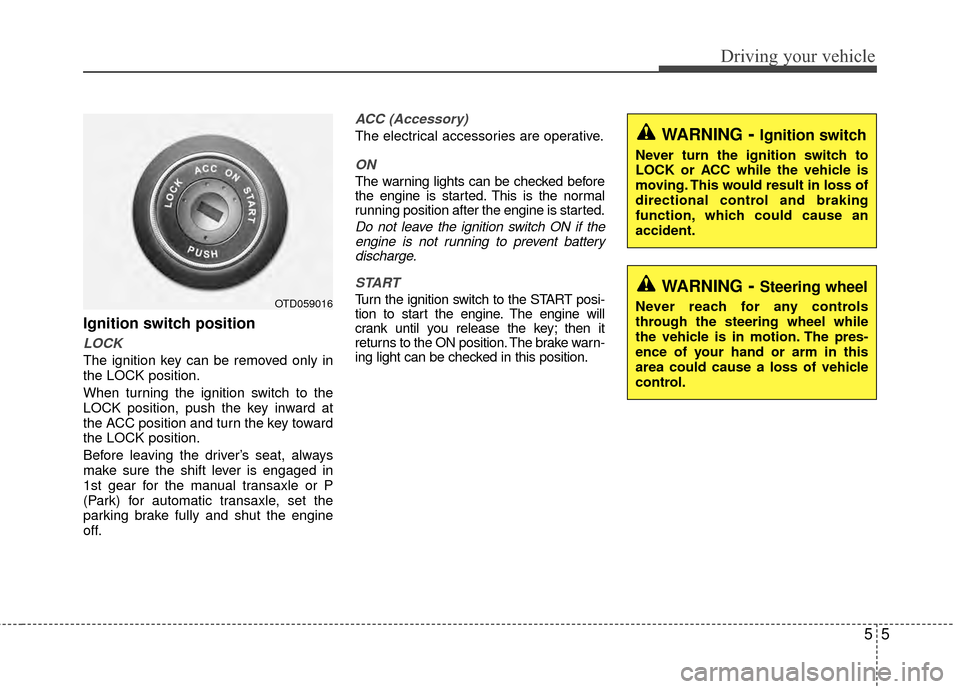
Ignition switch position
LOCK
The ignition key can be removed only in
the LOCK position.
When turning the ignition switch to the
LOCK position, push the key inward at
the ACC position and turn the key toward
the LOCK position.
Before leaving the driver’s seat, always
make sure the shift lever is engaged in
1st gear for the manual transaxle or P
(Park) for automatic transaxle, set the
parking brake fully and shut the engine
off.
ACC (Accessory)
The electrical accessories are operative.
ON
The warning lights can be checked before
the engine is started. This is the normal
running position after the engine is started.
Do not leave the ignition switch ON if theengine is not running to prevent batterydischarge.
START
Turn the ignition switch to the START posi-
tion to start the engine. The engine will
crank until you release the key; then it
returns to the ON position. The brake warn-
ing light can be checked in this position.OTD059016
WARNING- Ignition switch
Never turn the ignition switch to
LOCK or ACC while the vehicle is
moving. This would result in loss of
directional control and braking
function, which could cause an
accident.
WARNING- Steering wheel
Never reach for any controls
through the steering wheel while
the vehicle is in motion. The pres-
ence of your hand or arm in this
area could cause a loss of vehicle
control.
Page 269 of 398
Driving your vehicle
44
5
Hazardous driving conditions
When hazardous driving conditions are
encountered such as water, snow, ice,
mud, sand, or similar hazards, follow
these suggestions:
Drive cautiously and allow extra dis-
tance for braking.
Avoid sudden braking or steering.
When braking with non-ABS brakes pump the brake pedal with a light up-
and-down motion until the vehicle is
stopped. Do not pump the brake pedal on a vehi-
cle equipped with ABS.
If stalled in snow, mud, or sand, use
second gear. Accelerate slowly to
avoid spinning the drive wheels.
Use sand, rock salt, or other non-slip material under the drive wheels to pro-
vide traction when stalled in ice, snow,
or mud.
Rocking the vehicle
If it is necessary to rock the vehicle to free
it from snow, sand, or mud, first turn the
steering wheel right and left to clear the
area around your front wheels. Then, shift
back and forth between 1st (First) and R
(Reverse) in vehicles equipped with a
manual transaxle or R (Reverse) and any
forward gear in vehicles equipped with an
automatic transaxle. Do not race the
engine, and spin the wheels as little as
possible. If you are still stuck after a few
tries, have the vehicle pulled out by a tow
vehicle to avoid engine overheating and
possible damage to the transaxle.
The ESC system should be turned OFF
prior to rocking the vehicle.
SPECIAL DRIVING CONDITIONS
WARNING - Downshifting
Do not downshift with an automatic
transaxle while driving on slippery
surfaces. The sudden change in
tire speed could cause the tires to
skid and result in an accident.
CAUTION - Vehicle rocking
Prolonged rocking may causeengine overheating, transaxle dam-age or failure, and tire damage.
Page 275 of 398
Driving your vehicle
50
5
Don't let your parking brake
freeze
Under some conditions your parking
brake can freeze in the engaged position.
This is most likely to happen when there
is an accumulation of snow or ice around
or near the rear brakes or if the brakes
are wet. If there is a risk the parking
brake may freeze, apply it only temporar-
ily while you put the shift lever in P (auto-
matic transaxle) or in first or reverse gear
(manual transaxle) and block the rear
wheels so the vehicle cannot roll. Then
release the parking brake.
Don't let ice and snow accumu-
late underneath
Under some conditions, snow and ice
can build up under the fenders and inter-
fere with the steering. When driving in
severe winter conditions where this may
happen, you should periodically check
underneath the car to be sure the move-
ment of the front wheels and the steering
components is not obstructed.
Carry emergency equipment
Depending on the severity of the weath-
er you should carry appropriate emer-
gency equipment. Some of the items you
may want to carry include tow straps or
chains, flashlight, emergency flares,
sand, a shovel, jumper cables, a window
scraper, gloves, ground cloth, coveralls, a
blanket, etc. We do not recommend using this
vehicle for trailer towing.
TRAILER TOWING
Page 277 of 398
Driving your vehicle
52
5
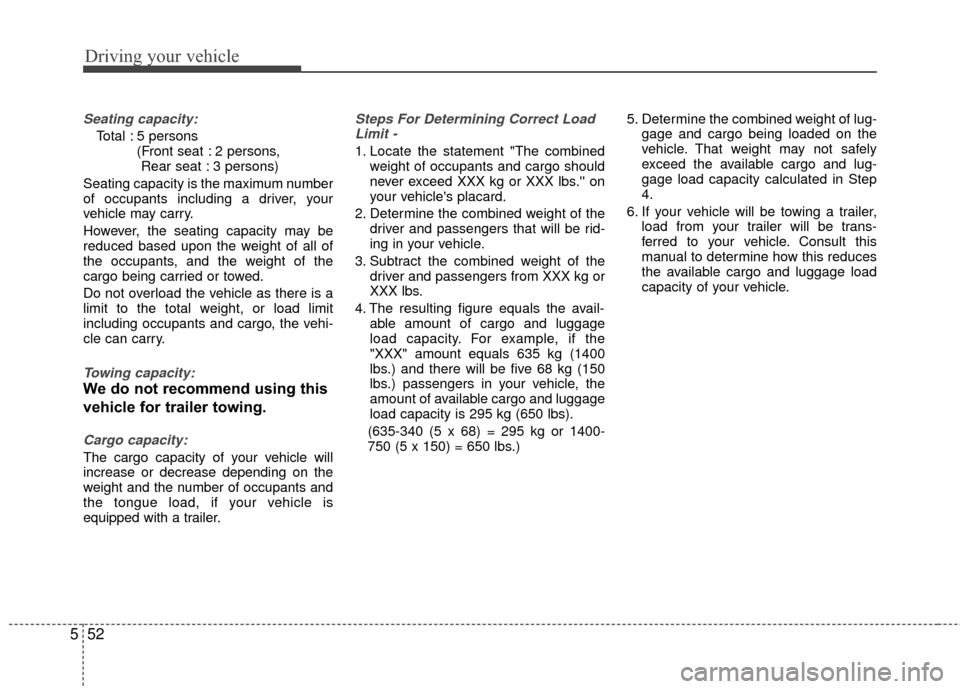
Seating capacity:
Total : 5 persons
(Front seat : 2 persons, Rear seat : 3 persons)
Seating capacity is the maximum number
of occupants including a driver, your
vehicle may carry.
However, the seating capacity may be
reduced based upon the weight of all of
the occupants, and the weight of the
cargo being carried or towed.
Do not overload the vehicle as there is a
limit to the total weight, or load limit
including occupants and cargo, the vehi-
cle can carry.
Towing capacity:
We do not recommend using this
vehicle for trailer towing.
Cargo capacity:
The cargo capacity of your vehicle will
increase or decrease depending on the
weight and the number of occupants and
the tongue load, if your vehicle is
equipped with a trailer.
Steps For Determining Correct Load Limit -
1. Locate the statement "The combined weight of occupants and cargo should
never exceed XXX kg or XXX lbs.'' on
your vehicle's placard.
2. Determine the combined weight of the driver and passengers that will be rid-
ing in your vehicle.
3. Subtract the combined weight of the driver and passengers from XXX kg or
XXX lbs.
4. The resulting figure equals the avail- able amount of cargo and luggage
load capacity. For example, if the
"XXX" amount equals 635 kg (1400
lbs.) and there will be five 68 kg (150
lbs.) passengers in your vehicle, the
amount of available cargo and luggage
load capacity is 295 kg (650 lbs).
(635-340 (5 x 68) = 295 kg or 1400-
750 (5 x 150) = 650 lbs.) 5. Determine the combined weight of lug-
gage and cargo being loaded on the
vehicle. That weight may not safely
exceed the available cargo and lug-
gage load capacity calculated in Step
4.
6. If your vehicle will be towing a trailer, load from your trailer will be trans-
ferred to your vehicle. Consult this
manual to determine how this reduces
the available cargo and luggage load
capacity of your vehicle.
Page 282 of 398
6
Road warning / 6-2
In case of an emergency while driving / 6-2
If the engine will not start / 6-3
Emergency starting / 6-4
If the engine overheats / 6-7
Tire pressure monitoring system (TPMS) / 6-8
If you have a flat tire / 6-13, 21
Towing / 6-27
What to do in an emergency