headlamp KIA RIO 2022 Owners Manual
[x] Cancel search | Manufacturer: KIA, Model Year: 2022, Model line: RIO, Model: KIA RIO 2022Pages: 528, PDF Size: 11.8 MB
Page 143 of 528
Features of your vehicle
64
4
LCD DISPLAY (FOR TYPE B CLUSTER)
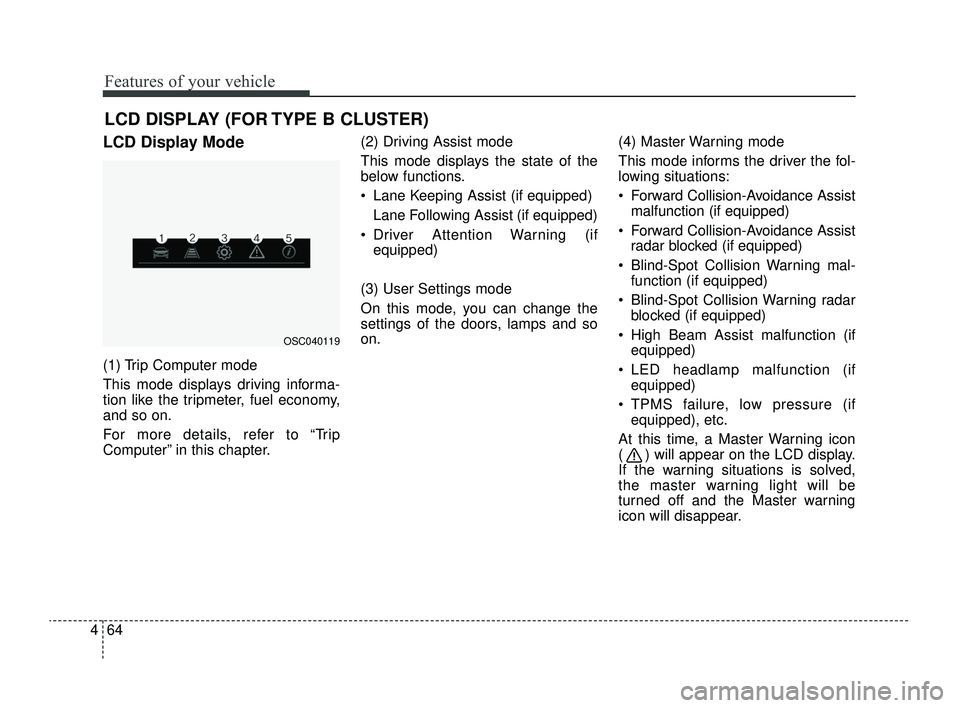
LCD Display Mode
(1) Trip Computer mode
This mode displays driving informa-
tion like the tripmeter, fuel economy,
and so on.
For more details, refer to “Trip
Computer” in this chapter. (2) Driving Assist mode
This mode displays the state of the
below functions.
Lane Keeping Assist (if equipped)
Lane Following Assist (if equipped)
Driver Attention Warning (if equipped)
(3) User Settings mode
On this mode, you can change the
settings of the doors, lamps and so
on. (4) Master Warning mode
This mode informs the driver the fol-
lowing situations:
Forward Collision-Avoidance Assist
malfunction (if equipped)
Forward Collision-Avoidance Assist radar blocked (if equipped)
Blind-Spot Collision Warning mal- function (if equipped)
Blind-Spot Collision Warning radar blocked (if equipped)
High Beam Assist malfunction (if equipped)
LED headlamp malfunction (if equipped)
TPMS failure, low pressure (if equipped), etc.
At this time, a Master Warning icon
( ) will appear on the LCD display.
If the warning situations is solved,
the master warning light will be
turned off and the Master warning
icon will disappear.
OSC040119
SC PE USA 4.QXP 9/9/2021 6:04 PM Page 64
Page 164 of 528
485
Features of your vehicle
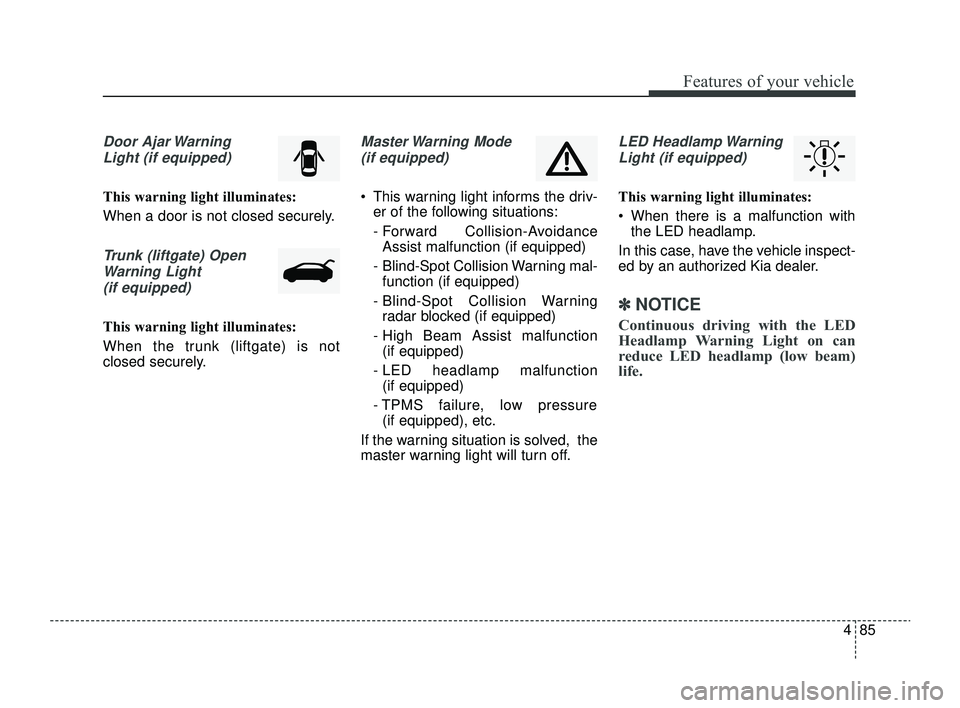
Door Ajar WarningLight (if equipped)
This warning light illuminates:
When a door is not closed securely.
Trunk (liftgate) OpenWarning Light(if equipped)
This warning light illuminates:
When the trunk (liftgate) is not
closed securely.
Master Warning Mode (if equipped)
This warning light informs the driv- er of the following situations:
- Forward Collision-AvoidanceAssist malfunction (if equipped)
- Blind-Spot Collision Warning mal- function (if equipped)
- Blind-Spot Collision Warning radar blocked (if equipped)
- High Beam Assist malfunction (if equipped)
- LED headlamp malfunction (if equipped)
- TPMS failure, low pressure (if equipped), etc.
If the warning situation is solved, the
master warning light will turn off.
LED Headlamp Warning Light (if equipped)
This warning light illuminates:
When there is a malfunction with the LED headlamp.
In this case, have the vehicle inspect-
ed by an authorized Kia dealer.
✽ ✽ NOTICE
Continuous driving with the LED
Headlamp Warning Light on can
reduce LED headlamp (low beam)
life.
SC PE USA 4.QXP 9/9/2021 6:05 PM Page 85
Page 171 of 528

Features of your vehicle
92
4
Battery saver function
The purpose of this feature is to pre-
vent the battery from being dis-
charged if the lights are left in the ON
position.
The system automatically shuts off
the parking lights after the engine is
off and the driver's door is opened.
However, the position lamps stay ON
even when the driver-side door is
opened if the light switch is operated
after the engine is turned off.
If necessary, to keep the lamps on
turn the position lamps OFF and ON
again using the headlamp switch on
the steering column after the engine
is turned off.
Headlight escort function
(if equipped)
The headlights (and/or taillights) will
remain on for approximately 5 min-
utes after the ignition key is removed
or turned to the ACC or LOCK posi-
tion. However, if the driver’s door is
opened and closed, the headlights
are turned off after 15 seconds.
The headlights can be turned off by
pressing the lock button on the trans-
mitter twice or turning off the light
switch from the headlight or Auto
light position.
If the driver gets out of the vehicle
through other doors (except driver's
door), the battery saver function
does not operate and the headlight
escort function does not turn off
automatically. Therefore, causing the
battery to be discharged. In this
case, make sure to turn off the lamp
before getting out of the vehicle.
If the headlights are not working
properly have your vehicle inspected
by an authorized Kia dealer.
Don't attempt to inspect or replace
the wiring yourself to prevent mal-
function.
Headlight welcome function
(if equipped)
When the headlight switch is in the
ON or AUTO position and all doors
(and liftgate) are closed and locked,
if you press the door unlock button
on the transmitter, the headlights will
come on for about 15 seconds.
If the headlight switch is in the AUTO
position, the function can only oper-
ate at night.
At this time, if you press the door
unlock button again or door lock but-
ton on the transmitter, the headlights
will turn off immediately.
LIGHTING
SC PE USA 4.QXP 9/9/2021 6:05 PM Page 92
Page 175 of 528
Features of your vehicle
96
4
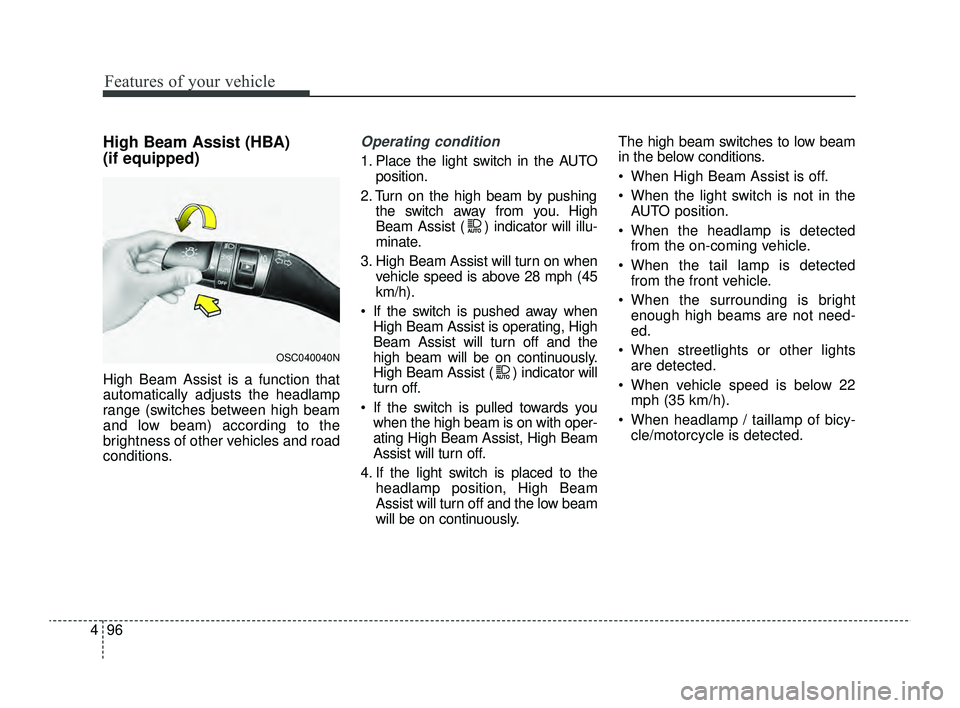
High Beam Assist (HBA)
(if equipped)
High Beam Assist is a function that
automatically adjusts the headlamp
range (switches between high beam
and low beam) according to the
brightness of other vehicles and road
conditions.
Operating condition
1. Place the light switch in the AUTO
position.
2. Turn on the high beam by pushing the switch away from you. High
Beam Assist ( ) indicator will illu-
minate.
3. High Beam Assist will turn on when vehicle speed is above 28 mph (45
km/h).
If the switch is pushed away when High Beam Assist is operating, High
Beam Assist will turn off and the
high beam will be on continuously.
High Beam Assist ( ) indicator will
turn off.
If the switch is pulled towards you when the high beam is on with oper-
ating High Beam Assist, High Beam
Assist will turn off.
4. If the light switch is placed to the headlamp position, High Beam
Assist will turn off and the low beam
will be on continuously. The high beam switches to low beam
in the below conditions.
When High Beam Assist is off.
When the light switch is not in the
AUTO position.
When the headlamp is detected from the on-coming vehicle.
When the tail lamp is detected from the front vehicle.
When the surrounding is bright enough high beams are not need-
ed.
When streetlights or other lights are detected.
When vehicle speed is below 22 mph (35 km/h).
When headlamp / taillamp of bicy- cle/motorcycle is detected.
OSC040040N
SC PE USA 4.QXP 9/9/2021 6:05 PM Page 96
Page 285 of 528

551
Driving your vehicle
The camera sensor recognition islimited
The vehicle in front is too small to be detected. (for example a motor-
cycle etc.)
The vehicle in front is an oversize vehicle or trailer that is too big to
be detected by the camera recog-
nition function. (for example a trac-
tor trailer, etc.)
The camera's field of view is not well illuminated. (either too dark or
too much reflection or too much
backlight that obscures the field of
view)
The vehicle in front does not have their rear lights or their rear lights
does not turned ON or their rear
lights are located unusually.
The outside brightness changes suddenly, for example when enter-
ing or exiting a tunnel.
Light coming from a street light or an oncoming vehicle is reflected on
a wet road surface such as a pud-
dle in the road.
The field of view in front is obstructed by sun glare or head
light of oncoming vehicle. The windshield glass is fogged up;
a clear view of the road is obstruct-
ed.
The vehicle in front is driving errat- ically.
The vehicle is on unpaved or uneven rough surfaces, or road
with sudden gradient changes.
The vehicle is driven near areas containing metal substances as a
construction zone, railroad, etc.
The vehicle drives inside a building, such as a basement parking lot.
The camera does not recognize the entire vehicle in front.
The camera is damaged.
The brightness outside is too low such as when the headlamps are
not on at night or the vehicle is
going through a tunnel.
The shadow is on the road by a median strip, trees, etc.
The vehicle drives through a toll- gate.
The windshield glass is fogged up; a clear view of the road is obstruct-
ed. The rear part of the vehicle in front
is not normally visible. (The vehicle
turns in other direction or the vehi-
cle is overturned.)
The adverse road conditions cause excessive vehicle vibrations while
driving.
The sensor recognition changes suddenly when passing over a
speed bump.
The vehicle in front is moving verti- cally to the driving direction.
The vehicle in front is stopped ver- tically.
The vehicle in front is driving towards your vehicle or reversing.
You are on a roundabout and the vehicle in front circles.
SC PE USA 5.QXP 9/9/2021 6:18 PM Page 51
Page 389 of 528
• Radial-ply tires . . . . . . . . . . . . . . . . . . . . . . . . . . . . . . 7-55
• Low aspect ratio tire . . . . . . . . . . . . . . . . . . . . . . . . . . 7-56
Fuses . . . . . . . . . . . . . . . . . . . . . . . . . . . . . . . . . . . . \
7-57
• Inner panel fuse replacement . . . . . . . . . . . . . . . . . . . 7-59
• Memory fuse . . . . . . . . . . . . . . . . . . . . . . . . . . . . . . . . 7-60
• Engine compartment fuse replacement. . . . . . . . . . . 7-61
• Fuse/relay panel description. . . . . . . . . . . . . . . . . . . . 7-63
Light bulbs . . . . . . . . . . . . . . . . . . . . . . . . . . . . . . . 7-72
• Bulb replacement precaution . . . . . . . . . . . . . . . . . . 7-72
• Light bulb position (Front). . . . . . . . . . . . . . . . . . . . . 7-74
• Light bulb position (Rear) (5 Door) . . . . . . . . . . . . . 7-75
• Light bulb position (Rear) (4 Door) . . . . . . . . . . . . . 7-76
• Light bulb position (Side) . . . . . . . . . . . . . . . . . . . . . . 7-77
• Headlamp (Low/High beam) (Bulb type)bulb replacement (Headlamp Type A) . . . . . . . . . . 7-77
• Headlamp (Low/High beam) (Bulb type) bulb replacement (Headlamp Type B) . . . . . . . . . . 7-78
• Front turn signal lamp bulb replacement (Headlamp Type A) . . . . . . . . . . . . . . . . . . . . . . . . . . 7-80
• Front turn signal lamp bulb replacement (Headlamp Type B, C) . . . . . . . . . . . . . . . . . . . . . . . 7-80
• Position lamp bulb replacement (Headlamp Type A) . . . . . . . . . . . . . . . . . . . . . . . . . . 7-81
• Side marker (front) (Bulb type) bulb replacement (Headlamp Type A) . . . . . . . . . . . . . . . . . . . . . . . . . . 7-82 • Static bending light replacement
(Headlamp Type B, C) . . . . . . . . . . . . . . . . . . . . . . . 7-82
• Front fog lamp (Bulb type) bulb replacement . . . . . 7-83
• Headlamp (Low/High beam) (LED type) bulb replacement (Headlamp Type C) . . . . . . . . . . 7-84
• Position lamp + DRL (LED type) bulb replacement . . . . . . . . . . . . . . . . . . . . . . . . . . . . . . . . 7-84
• Side marker (front) (LED type) bulb replacement (Headlamp Type B, C) . . . . . . . . . . . . . . . . . . . . . . . 7-84
• Side repeater lamp (LED type) bulb replacement . 7-85
• Side repeater lamp (bulb type) bulb replacement . . 7-85
• Rear turn signal lamp bulb replacement (for 5 door) . . . . . . . . . . . . . . . . . . . . . . . . . . . . . . . . . 7-86
• Back-up lamp bulb replacement (for 5 door) . . . . . . 7-87
• Stop and tail lamp bulb replacement (for 5 door) . . 7-88
• Tail lamp (inside) bulb replacement (for 5 door) . . . 7-89
• Side marker (rear) (Bulb type) bulb replacement (Rear combination lamp Type A) (for 5 door) . . . . 7-90
• Stop and tail lamp (LED type) bulb replacement (for 5 door) . . . . . . . . . . . . . . . . . . . . . . . . . . . . . . . . . 7-91
• Side marker (rear) (LED type) bulb replacement (Rear combination lamp Type B) (for 5 door) . . . . 7-91
• License plate lamp bulb replacement . . . . . . . . . . . . 7-92
• High mounted stop lamp bulb replacement (for 5 door) . . . . . . . . . . . . . . . . . . . . . . . . . . . . . . . . . 7-92
7
SC PE USA 7.qxp 9/9/2021 6:26 PM Page 2
Page 427 of 528

Maintenance
40
7
✽ ✽
NOTICE
If you connect unauthorized elec-
tronic devices to the battery, the bat-
tery may be discharged. Never use
unauthorized devices.
Recharging the battery
Your vehicle has a maintenance-free,
calcium-based battery.
If the battery becomes discharged
in a short time (because, for exam-
ple, the headlamps or interior
lamps were left on while the vehi-
cle was not in use), recharge it by
slow charging (trickle) for 10 hours.
If the battery gradually discharges because of high electric load while
the vehicle is being used, recharge
it at 20-30A for two hours.WARNING- Risk of elec-
trocution
Never touch the electrical igni-
tion system while the vehicle is
running. This system works
with high voltage which can
shock you.
WARNING- Recharging Battery
Never attempt to recharge the
battery when the battery cables
are connected.
WARNING - Battery lead
compound
Battery posts, terminals, and
related accessories contain
lead and lead compounds.
Wash hands after handling.
SC PE USA 7.qxp 9/9/2021 6:27 PM Page 40
Page 446 of 528
759
Maintenance
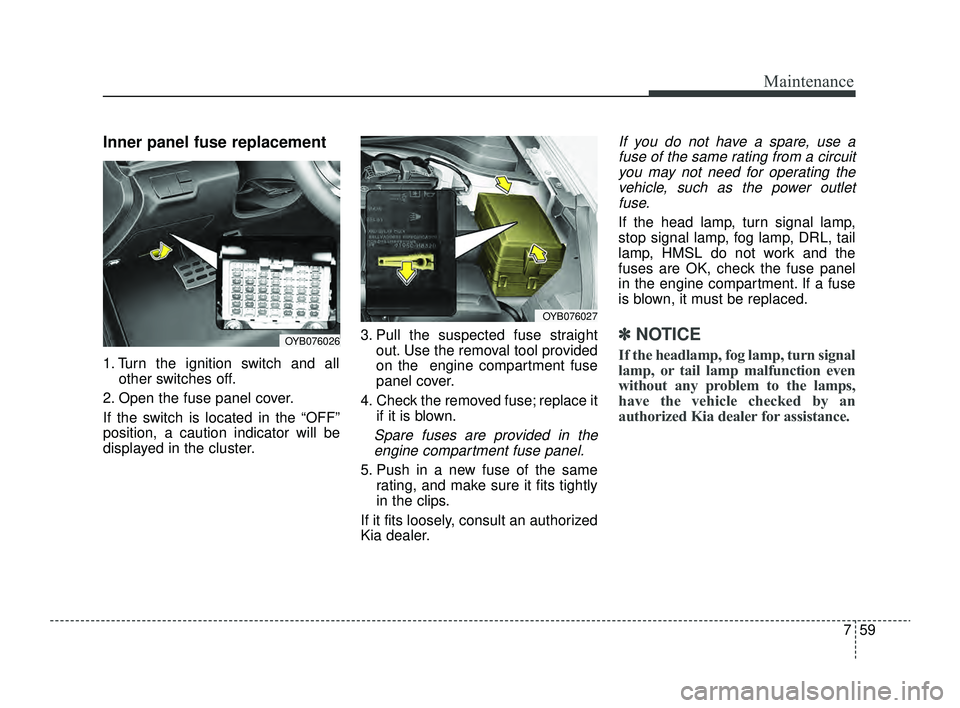
Inner panel fuse replacement
1. Turn the ignition switch and allother switches off.
2. Open the fuse panel cover.
If the switch is located in the “OFF”
position, a caution indicator will be
displayed in the cluster. 3. Pull the suspected fuse straight
out. Use the removal tool provided
on the engine compartment fuse
panel cover.
4. Check the removed fuse; replace it if it is blown.
Spare fuses are provided in theengine compartment fuse panel.
5. Push in a new fuse of the same rating, and make sure it fits tightly
in the clips.
If it fits loosely, consult an authorized
Kia dealer.
If you do not have a spare, use a fuse of the same rating from a circuityou may not need for operating thevehicle, such as the power outletfuse.
If the head lamp, turn signal lamp,
stop signal lamp, fog lamp, DRL, tail
lamp, HMSL do not work and the
fuses are OK, check the fuse panel
in the engine compartment. If a fuse
is blown, it must be replaced.
✽ ✽ NOTICE
If the headlamp, fog lamp, turn signal
lamp, or tail lamp malfunction even
without any problem to the lamps,
have the vehicle checked by an
authorized Kia dealer for assistance.
OYB076026
OYB076027
SC PE USA 7.qxp 9/9/2021 6:28 PM Page 59
Page 459 of 528

Maintenance
72
7
LIGHT BULBS
Bulb replacement precaution
Please keep extra bulbs on hand
with appropriate wattage ratings in
case of emergencies.
Refer to “Bulb Wattage” in chapter 8.
When changing lamps, first turn off
the engine at a safe place, firmly
apply the parking brake and detach
the battery’s negative (-) terminal.
Use only bulbs of the specified
wattage. Lamp part malfunction due to net-work failure
The headlamp, taillight, and fog light
may light up when the head lamp
switch is turned ON, and not light up
when the taillight or for light switch is
turned ON. This may be cause by
network failure or vehicle electrical
control system malfunction. If there is
a problem, we recommend the sys-
tem be serviced by an authorized Kia
dealer.
Lamp part malfunction due to elec- trical control system stabilization
A normally functioning lamp may
flicker momentarily. This momentary
occurrence is due to stabilization
function of the vehicle's electrical
control system. If the lamp soon
returns to normal, the vehicle does
not require service.
However, if the lamp goes out after
the momentary flickering, or the flick-
ering continues, we recommend the
system be serviced by an authorized
Kia dealer.
WARNING- Working on the lights
Prior to working on the lights,
firmly apply the parking brake,
ensure that the ignition switch
is turned to the LOCK position
and turn off the lights to avoid
sudden movement of the vehi-
cle and burning your fingers or
receiving an electric shock.
CAUTION -Light replace-
ment
Be sure to replace the burned- out bulb with one of the samewattage rating. Otherwise, itmay cause damage to the fuseor electric wiring system.
CAUTION -Headlamp
Lens
To prevent damage, do notclean the headlamp lens withchemical solvents or strongdetergents.
SC PE USA 7.qxp 9/9/2021 6:28 PM Page 72
Page 460 of 528

773
Maintenance
✽ ✽NOTICE
• If the light bulb or lamp connector
is removed while the lamp is still
on, the fuse box's electronic sys-
tem may log it as a malfunction.
Therefore, a lamp malfunction
incident may be recorded as a
Diagnostic Trouble Code (DTC) in
the fuse box.
• It is normal for an operating lamp to flicker momentarily. This is due
to a stabilization function of the
vehicle’s electronic control device.
If the lamp lights up normally
after momentarily blinking, then
it is functioning as normal.
However, if the lamp continues to
flicker several times or turns off
completely, there may be an error
in the vehicle’s electronic control
device. Please have the vehicle
checked by an authorized Kia
dealer immediately.
✽ ✽ NOTICE
We recommend that the headlight
aiming be adjusted after an accident
or after the headlight assembly is rein-
stalled at an authorized Kia dealer.
✽ ✽NOTICE
You can find moisture inside the lens
of lamps after a car wash or driving
in the rain. It is a natural event
caused by the temperature differ-
ence between the inside and the out-
side of the lamp and does not mean a
problem with its functions. The
moisture inside the lamp will disap-
pear if you drive the vehicle with the
headlamp turned on, however, the
level at which the moisture is
removed may differ depending on
the size / location / condition of the
lamp. If the moisture continues to
stay inside the lamp, we recommend
that you have the vehicle checked by
an authorized Kia dealer.
If you don’t have the necessary tools,
the correct bulbs and the expertise,
consult an authorized Kia dealer. In
many cases, it is difficult to replace
vehicle light bulbs because other
parts of the vehicle must be removed
before you can get to the bulb. This is
especially true if you have to remove
the headlamp assembly to get to the
bulb(s).
Removing/installing the headlamp
assembly can result in damage to
the vehicle.
If non-genuine parts or substandard
bulbs are used, it may lead to blow-
ing a fuse or other wiring damage.
Do not install extra lamps or LEDs to
the vehicle. If additional lights are
installed, it may lead to lamp mal-
functions and flickering. Additionally,
the fuse box and other wiring may be
damaged.
SC PE USA 7.qxp 9/9/2021 6:28 PM Page 73