interior lights KIA RIO HATCHBACK 2008 Owners Manual
[x] Cancel search | Manufacturer: KIA, Model Year: 2008, Model line: RIO HATCHBACK, Model: KIA RIO HATCHBACK 2008Pages: 219, PDF Size: 5.17 MB
Page 10 of 219
3
Keys / 3-2
Remote keyless entry / 3-3
Theft-alarm system / 3-5
Immobilizer system / 3-7
Door locks / 3-9
Windows / 3-14
Seat / 3-17
Safety belts / 3-27
Air bags-supplemental restraint system / 3-47
Trunk / 3-62
Hood / 3-64
Fuel filler lid / 3-65
Mirrors / 3-68
Interior lights / 3-71
Storage compartment / 3-72
Interior features / 3-73
Sunroof / 3-76
Luggage net / 3-78
Antenna / 3-79
Audio system / 3-80
Knowing your vehicle
Page 80 of 219
371
Knowing your vehicle
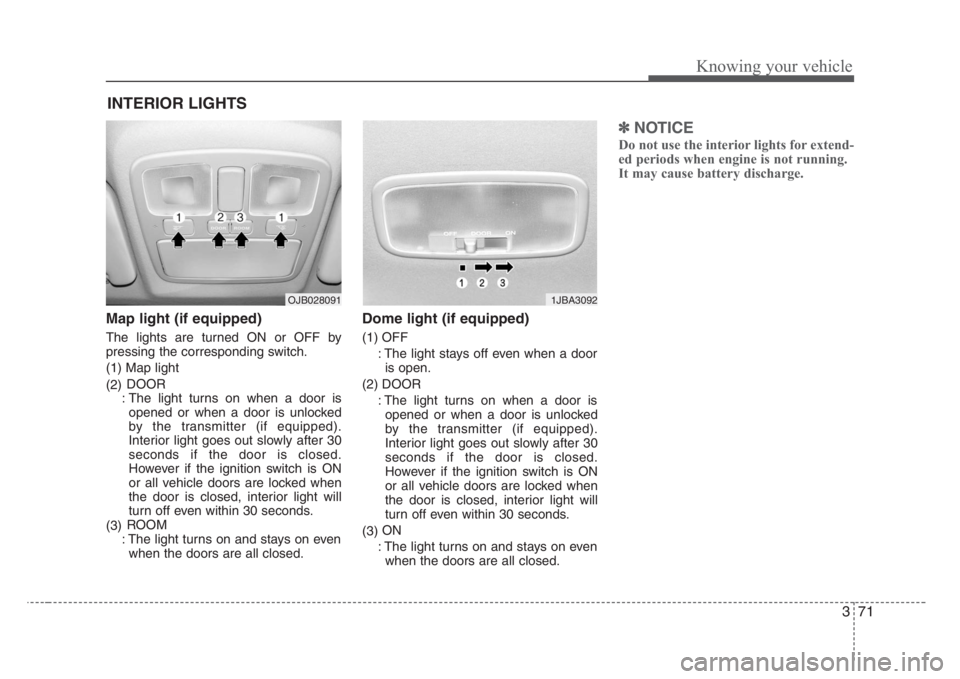
Map light (if equipped)
The lights are turned ON or OFF by
pressing the corresponding switch.
(1) Map light
(2)DOOR
: The light turns on when a door is
opened or when a door is unlocked
by the transmitter (if equipped).
Interior light goes out slowly after 30
seconds if the door is closed.
However if the ignition switch is ON
or all vehicle doors are locked when
the door is closed, interior light will
turn off even within 30 seconds.
(3)ROOM
: The light turns on and stays on even
when the doors are all closed.
Dome light (if equipped)
(1) OFF
: The light stays off even when a door
is open.
(2) DOOR
: The light turns on when a door is
opened or when a door is unlocked
by the transmitter (if equipped).
Interior light goes out slowly after 30
seconds if the door is closed.
However if the ignition switch is ON
or all vehicle doors are locked when
the door is closed, interior light will
turn off even within 30 seconds.
(3)ON
: The light turns on and stays on even
when the doors are all closed.
✽
NOTICE
Do not use the interior lights for extend-
ed periods when engine is not running.
It may cause battery discharge.
INTERIOR LIGHTS
1JBA3092OJB028091
Page 135 of 219
429
Driving your vehicle
The defroster heats the window to
remove frost, fog and thin ice from the
interior and exterior of the rear window,
while engine is running.
✽
NOTICE
• To prevent damage to the conductors
bonded to the inside surface of the
rear window, never use sharp instru-
ments or window cleaners containing
abrasives to clean the window.
• To prevent the battery from being dis-
charged, the rear window defroster
will only operate when the engine is
running.
(Continued)(Continued)
• If you want to defrost and defog on
the front windshield, refer to
“Windshield Defrosting and
Defogging” in this section.
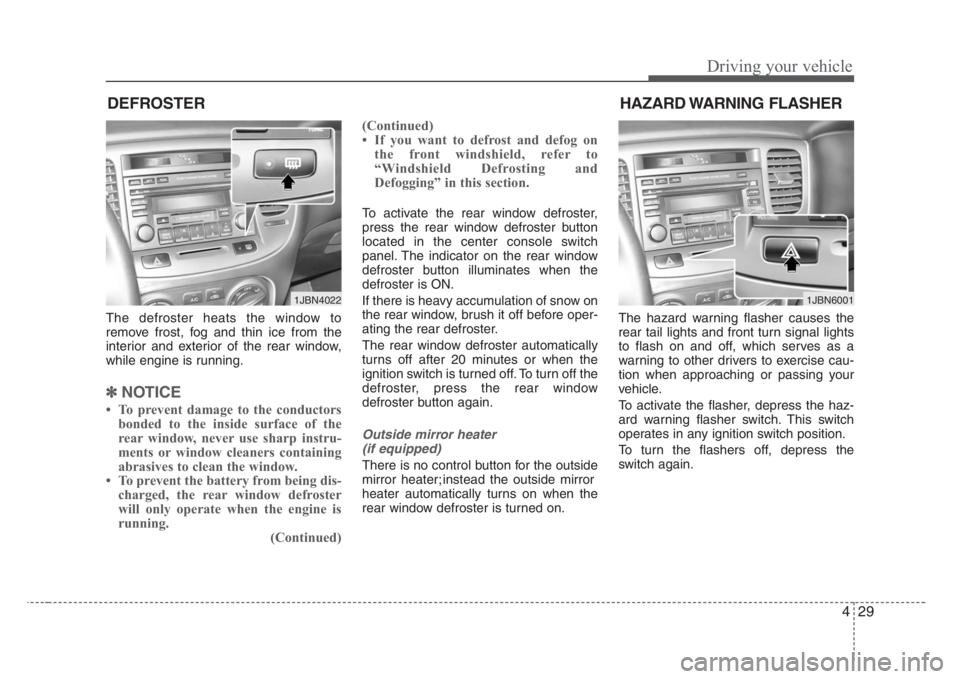
To activate the rear window defroster,
press the rear window defroster button
located in the center console switch
panel. The indicator on the rear window
defroster button illuminates when the
defroster is ON.
If there is heavy accumulation of snow on
the rear window, brush it off before oper-
ating the rear defroster.
The rear window defroster automatically
turns off after 20 minutes or when the
ignition switch is turned off. To turn off the
defroster, press the rear window
defroster button again.
Outside mirror heater
(if equipped)
There is no control button for the outside
mirror heater; instead the outside mirror
heater automatically turns on when the
rear window defroster is turned on.The hazard warning flasher causes the
rear tail lights and front turn signal lights
to flash on and off, which serves as a
warning to other drivers to exercise cau-
tion when approaching or passing your
vehicle.
To activate the flasher, depress the haz-
ard warning flasher switch. This switch
operates in any ignition switch position.
To turn the flashers off, depress the
switch again.
DEFROSTER
1JBN4022
HAZARD WARNING FLASHER
1JBN6001
Page 166 of 219
In case of an emergency
12 6
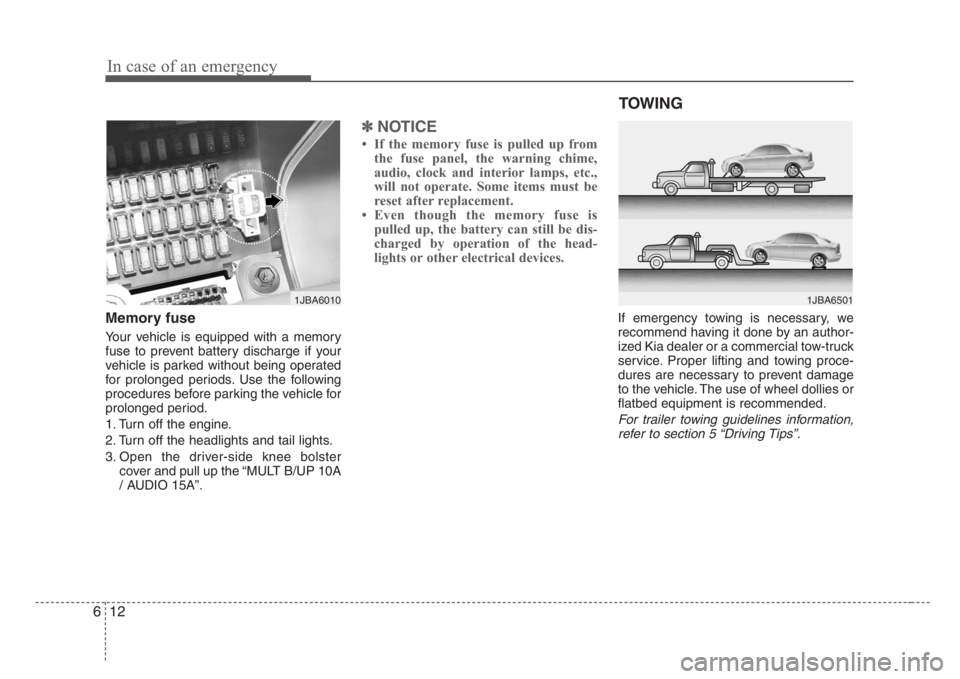
Memory fuse
Your vehicle is equipped with a memory
fuse to prevent battery discharge if your
vehicle is parked without being operated
for prolonged periods. Use the following
procedures before parking the vehicle for
prolonged period.
1. Turn off the engine.
2. Turn off the headlights and tail lights.
3. Open the driver-side knee bolster
cover and pull up the “MULT B/UP 10A
/ AUDIO 15A”.
✽
NOTICE
• If the memory fuse is pulled up from
the fuse panel, the warning chime,
audio, clock and interior lamps, etc.,
will not operate. Some items must be
reset after replacement.
• Even though the memory fuse is
pulled up, the battery can still be dis-
charged by operation of the head-
lights or other electrical devices.
If emergency towing is necessary, we
recommend having it done by an author-
ized Kia dealer or a commercial tow-truck
service. Proper lifting and towing proce-
dures are necessary to prevent damage
to the vehicle. The use of wheel dollies or
flatbed equipment is recommended.
For trailer towing guidelines information,
refer to section 5 “Driving Tips”.
1JBA6010
TOWING
1JBA6501
Page 198 of 219
Maintenance
22 7
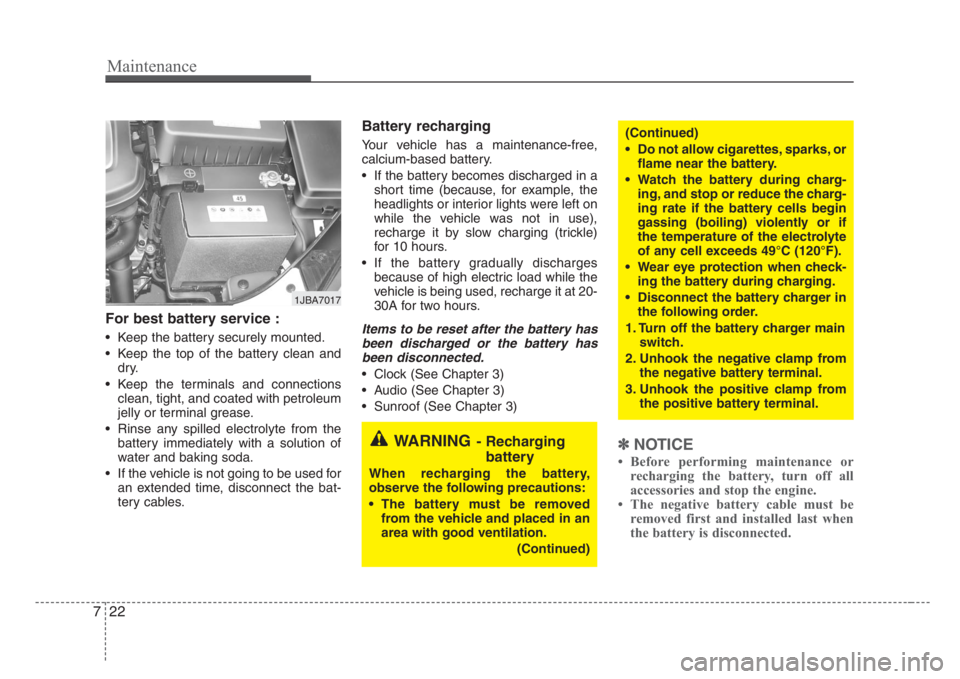
For best battery service :
• Keep the battery securely mounted.
• Keep the top of the battery clean and
dry.
• Keep the terminals and connections
clean, tight, and coated with petroleum
jelly or terminal grease.
• Rinse any spilled electrolyte from the
battery immediately with a solution of
water and baking soda.
• If the vehicle is not going to be used for
an extended time, disconnect the bat-
tery cables.
Battery recharging
Your vehicle has a maintenance-free,
calcium-based battery.
• If the battery becomes discharged in a
short time (because, for example, the
headlights or interior lights were left on
while the vehicle was not in use),
recharge it by slow charging (trickle)
for 10 hours.
• If the battery gradually discharges
because of high electric load while the
vehicle is being used, recharge it at 20-
30A for two hours.
Items to be reset after the battery has
been discharged or the battery has
been disconnected.
• Clock (See Chapter 3)
• Audio (See Chapter 3)
• Sunroof (See Chapter 3)
✽
NOTICE
• Before performing maintenance or
recharging the battery, turn off all
accessories and stop the engine.
• The negative battery cable must be
removed first and installed last when
the battery is disconnected.
1JBA7017
WARNING- Recharging
battery
When recharging the battery,
observe the following precautions:
• The battery must be removed
from the vehicle and placed in an
area with good ventilation.
(Continued)
(Continued)
• Do not allow cigarettes,sparks,or
flame near the battery.
• Watch the battery during charg-
ing, and stop or reduce the charg-
ing rate if the battery cells begin
gassing (boiling) violently or if
the temperature of the electrolyte
of any cell exceeds 49°C (120°F).
• Wear eye protection when check-
ing the battery during charging.
•Disconnect the battery charger in
the following order.
1. Turn off the battery charger main
switch.
2. Unhook the negative clamp from
the negative battery terminal.
3. Unhook the positive clamp from
the positive battery terminal.
Page 218 of 219
Index
2 9
Air bags-supplemental restraint system·························3-47
Air cleaner ·····································································7-17
Antenna ··········································································3-79
Audio system ·································································3-80
Automatic transaxle················································4-6, 7-15
Battery············································································7-21
Before driving ··································································5-4
Brake fluid ·····································································7-13
Brake system····································································4-9
Climate control air filter ················································7-18
Climate control system ··················································4-30
Defroster ········································································4-29
Door locks········································································3-9
Drive belts······································································7-14
Electrical circuit protection ·············································6-6
Emergency starting ··························································6-3
Emission control system ··················································5-2Engine compartment ················································2-4, 7-9
Engine cooling system ···················································7-11
Engine oil ·······································································7-10
Exterior care···································································7-33
Fuel filler lid ··································································3-65
Fuel requirements ····························································5-2
Gauges ···········································································4-17
Hazard warning flasher··················································4-29
Hood···············································································3-64
How to use this manual ···················································1-2
If you have a flat tire ·····················································6-17
Ignition switch ·································································4-2
Immobilizer system ·························································3-7
Instrument cluster ··························································4-16
Instrument panel overview ··············································2-3
Interior care····································································7-35
Interior features······························································3-73
Interior lights ·································································3-71
Interior overview ·····························································2-2
A
B
C
E
D
F
G
H
I