child lock KIA RIO HATCHBACK 2012 Owners Manual
[x] Cancel search | Manufacturer: KIA, Model Year: 2012, Model line: RIO HATCHBACK, Model: KIA RIO HATCHBACK 2012Pages: 385, PDF Size: 9.68 MB
Page 6 of 385
I3
Index
Cargo capacity ··················\
··················\
··················\
·········5-52
Cargo weight ··················\
··················\
··················\
············5-56
Center console storage ··················\
··················\
···············4-92
Central door lock switch··················\
··················\
············4-17
Certification label ··················\
··················\
···············5-54, 8-7
Changing tires ··················\
··················\
··················\
··········6-14
Checking tire inflation pressure··················\
··················\
·7-38
Child restraint system ··················\
··················\
················3-22Lower anchor ··················\
··················\
··················\
·········3-27
Seat belt ··················\
··················\
··················\
·················3-24\
Tether anchor system ··················\
··················\
···············3-26
Child-protector rear door lock ··················\
··················\
···4-18
Cigarette lighter ··················\
··················\
··················\
·······4-96
Climate control air filter ··················\
··················\
···4-81, 7-32
Clock (Digital) ··················\
··················\
··················\
·········4-99
Clothes hanger ··················\
··················\
··················\
·······4-100
Combined instrument, see instrument cluster ···············4-41
Compact spare tire ··················\
··················\
··················\
···6-19
Compact spare tire replacement ··················\
··················\
7-41
Coolant ··················\
··················\
··················\
··················\
···7-26
Cooling fluid, see engine coolant ··················\
················7-26
Crankcase emission control system ··················\
·············7-66
Cruise control system ··················\
··················\
················5-32
Cup holder ··················\
··················\
··················\
···············4-97
Curtain air bag ··················\
··················\
··················\
·········3-45 Dashboard illumination, see instrument panel
illumination··················\
··················\
··················\
············4-42
Dashboard, see instrument cluster ··················\
···············4-41
Defogging (Windshield) ··················\
··················\
············4-90
Defogging logic (Windshield) ··················\
··················\
···4-91
Defroster (Rear window) ··················\
··················\
···········4-80
Defrosting (Windshield) ··················\
··················\
············4-90
Digital clock··················\
··················\
··················\
·············4-99
Dimensions ··················\
··················\
··················\
················8-2
Display illumination, see instrument panel illumination··················\
··················\
··················\
············4-42
Displays, see instrument cluster ··················\
··················\
4-41
Door locks··················\
··················\
··················\
················4-15 Central door lock switch ··················\
··················\
·········4-17
Child-protector rear door lock ··················\
··················\
·4-18
Drinks holders, see cup holders··················\
··················\
·4-97
Driver's 3-point seat belt ··················\
··················\
············3-14
Driver's and passenger's front air bag ··················\
··········3-41
Driving at night ··················\
··················\
··················\
········5-45
Driving in flooded areas ··················\
··················\
············5-46
Driving in the rain··················\
··················\
··················\
····5-46D
Page 38 of 385
Safety features of your vehicle
16
3
Seat belts - Front passenger and rear
seat 3-point system with combinationlocking retractor
To fasten your seat belt:
Combination retractor type seat belts are
installed in the rear seat positions to help
accommodate the installation of child
restraint systems. Although a combina-
tion retractor is also installed in the front
passenger seat position, it is strongly
recommended that children always be
seated in the rear seat. NEVER place
any infant restraint system in the front
seat of the vehicle.
This type of seat belt combines the fea-
tures of both an emergency locking
retractor seat belt and an automatic lock-
ing retractor seat belt. To fasten your seat
belt, pull it out of the retractor and insert
the metal tab into the buckle. There will
be an audible "click" when the tab locks
into the buckle. When not securing a
child restraint, the seat belt operates in
the same way as the driver's seat belt
(Emergency Locking Retractor Type). It
automatically adjusts to the proper length
only after the lap belt portion of the seat
belt is adjusted manually so that it fits
snugly around your hips. When the seat belt is fully extended from
the retractor to allow the installation of a
child restraint system, the seat belt oper-
ation changes to allow the belt to retract,
but not to extend (Automatic Locking
Retractor Type). Refer to “Using a child
restraint system” in this section.
To convert from the automatic locking
feature to the emergency locking opera-
tion mode, allow the unbuckled seat belt
to fully retract.
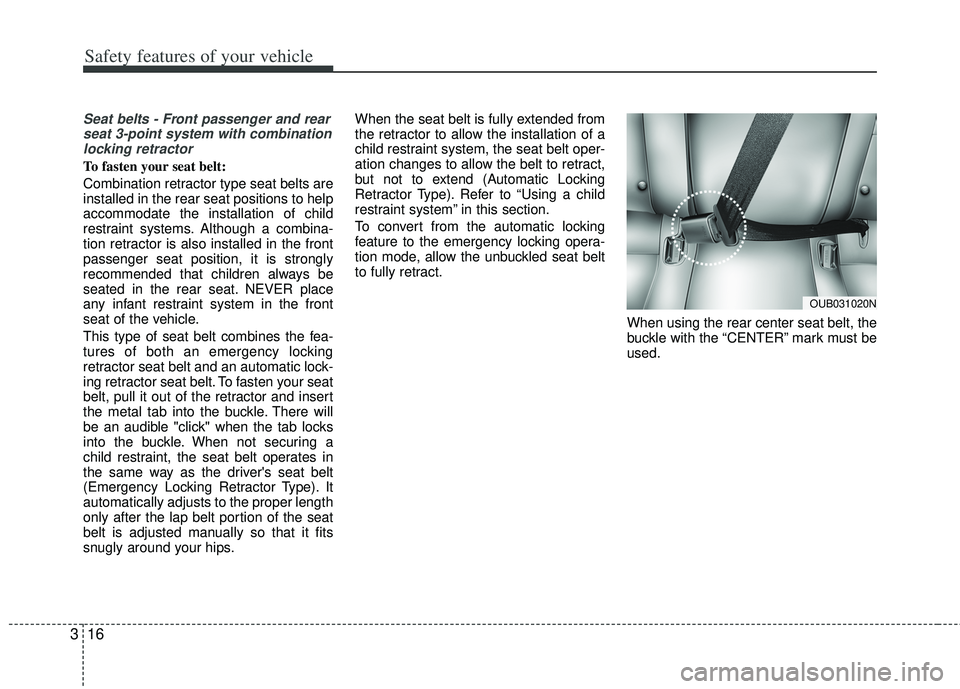
When using the rear center seat belt, the
buckle with the “CENTER” mark must be
used.
OUB031020N
Page 46 of 385
Safety features of your vehicle
24
3
Since all passenger seat belts move
freely under normal conditions and only
lock under extreme or emergency condi-
tions (emergency lock mode), you must
manually change these seat belts to the
auto lock mode to secure a child
restraint.
If the seat belt does not operate as
described in this section, have the sys-
tem checked immediately by your author-
ized Kia dealer.
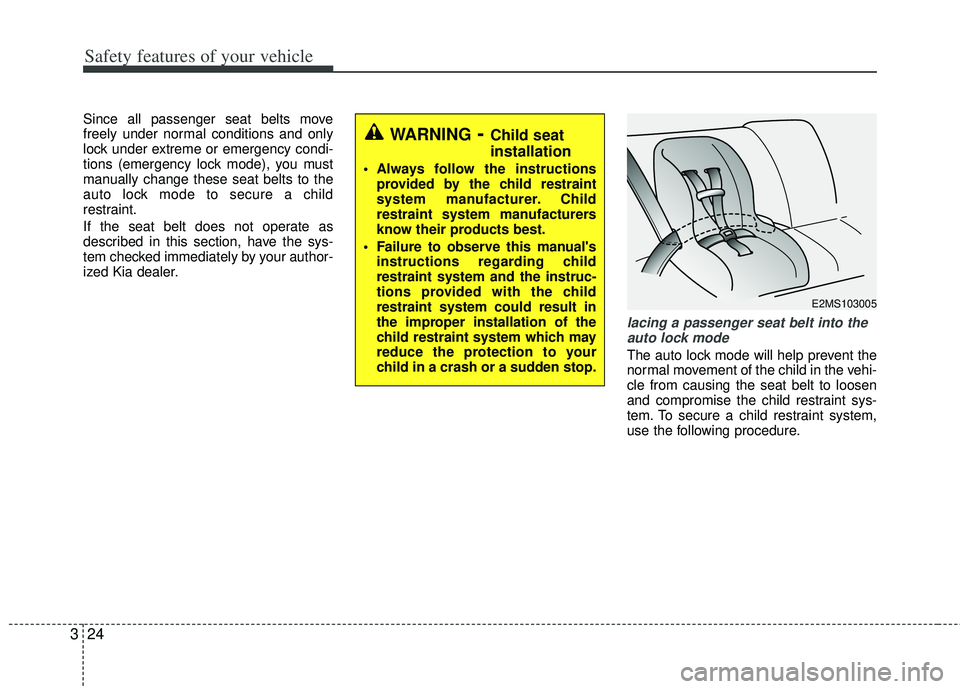
lacing a passenger seat belt into the
auto lock mode
The auto lock mode will help prevent the
normal movement of the child in the vehi-
cle from causing the seat belt to loosen
and compromise the child restraint sys-
tem. To secure a child restraint system,
use the following procedure.
WARNING- Child seat
installation
Always follow the instructions provided by the child restraint
system manufacturer. Child
restraint system manufacturers
know their products best.
Failure to observe this manual's instructions regarding child
restraint system and the instruc-
tions provided with the child
restraint system could result in
the improper installation of the
child restraint system which may
reduce the protection to your
child in a crash or a sudden stop.
E2MS103005
Page 47 of 385
325
Safety features of your vehicle
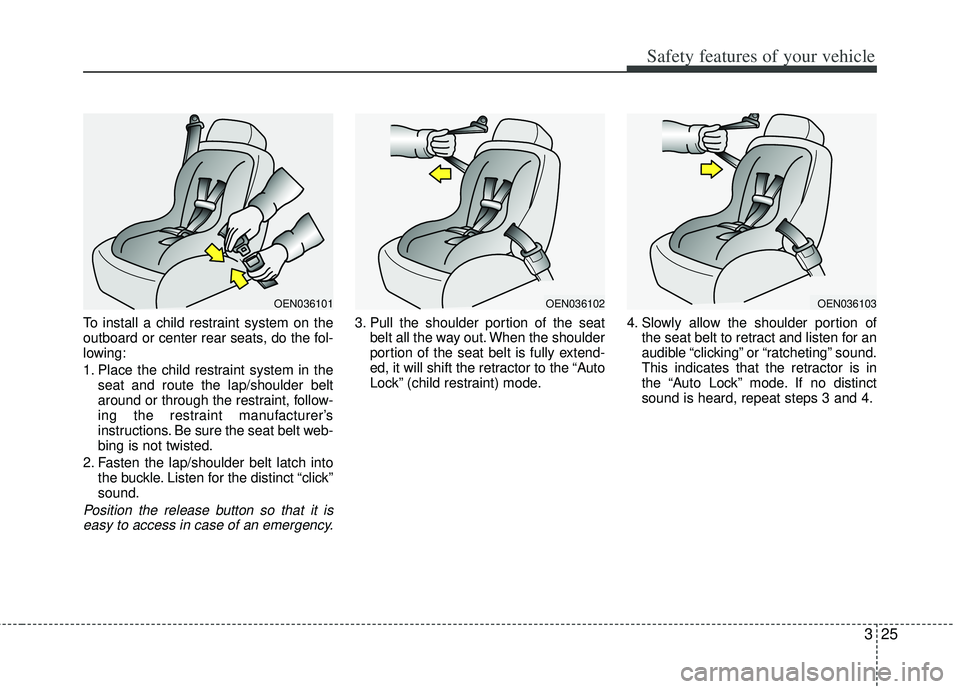
To install a child restraint system on the
outboard or center rear seats, do the fol-
lowing:
1. Place the child restraint system in theseat and route the lap/shoulder belt
around or through the restraint, follow-
ing the restraint manufacturer’s
instructions. Be sure the seat belt web-
bing is not twisted.
2. Fasten the lap/shoulder belt latch into the buckle. Listen for the distinct “click”
sound.
Position the release button so that it iseasy to access in case of an emergency.
3. Pull the shoulder portion of the seat belt all the way out. When the shoulder
portion of the seat belt is fully extend-
ed, it will shift the retractor to the “Auto
Lock” (child restraint) mode. 4. Slowly allow the shoulder portion of
the seat belt to retract and listen for an
audible “clicking” or “ratcheting” sound.
This indicates that the retractor is in
the “Auto Lock” mode. If no distinct
sound is heard, repeat steps 3 and 4.
OEN036101OEN036102OEN036103
Page 48 of 385
Safety features of your vehicle
26
3
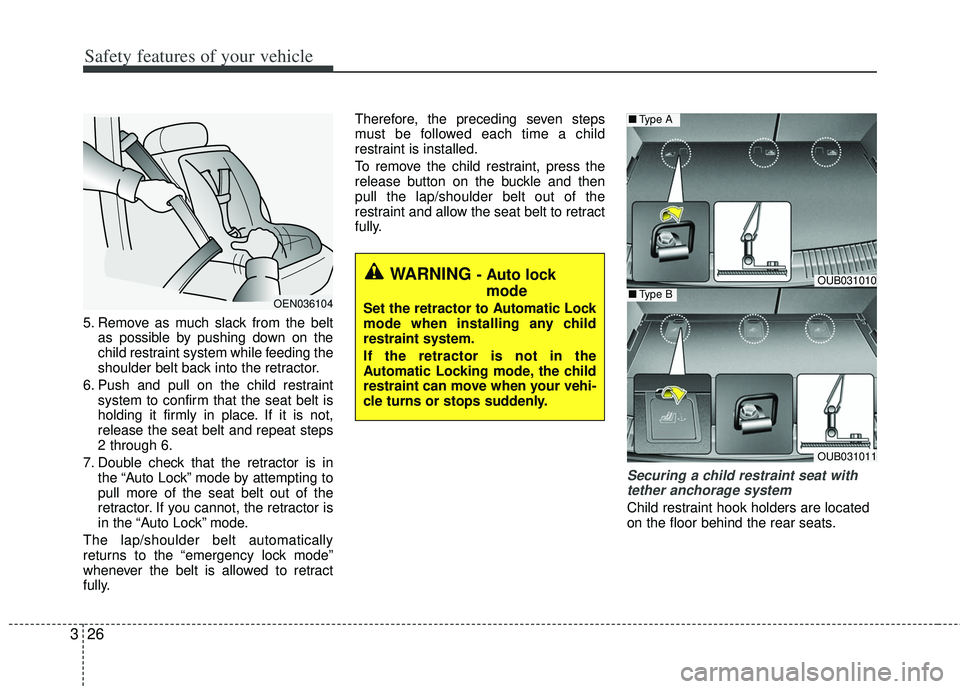
5. Remove as much slack from the belt
as possible by pushing down on the
child restraint system while feeding the
shoulder belt back into the retractor.
6. Push and pull on the child restraint system to confirm that the seat belt is
holding it firmly in place. If it is not,
release the seat belt and repeat steps
2 through 6.
7. Double check that the retractor is in the “Auto Lock” mode by attempting to
pull more of the seat belt out of the
retractor. If you cannot, the retractor is
in the “Auto Lock” mode.
The lap/shoulder belt automatically
returns to the “emergency lock mode”
whenever the belt is allowed to retract
fully. Therefore, the preceding seven steps
must be followed each time a child
restraint is installed.
To remove the child restraint, press the
release button on the buckle and then
pull the lap/shoulder belt out of the
restraint and allow the seat belt to retract
fully.
Securing a child restraint seat with
tether anchorage system
Child restraint hook holders are located
on the floor behind the rear seats.
OEN036104
WARNING - Auto lock mode
Set the retractor to Automatic Lock
mode when installing any child
restraint system.
If the retractor is not in the
Automatic Locking mode, the child
restraint can move when your vehi-
cle turns or stops suddenly.
OUB031010
OUB031011
■ Type A
■Type B
Page 50 of 385
Safety features of your vehicle
28
3
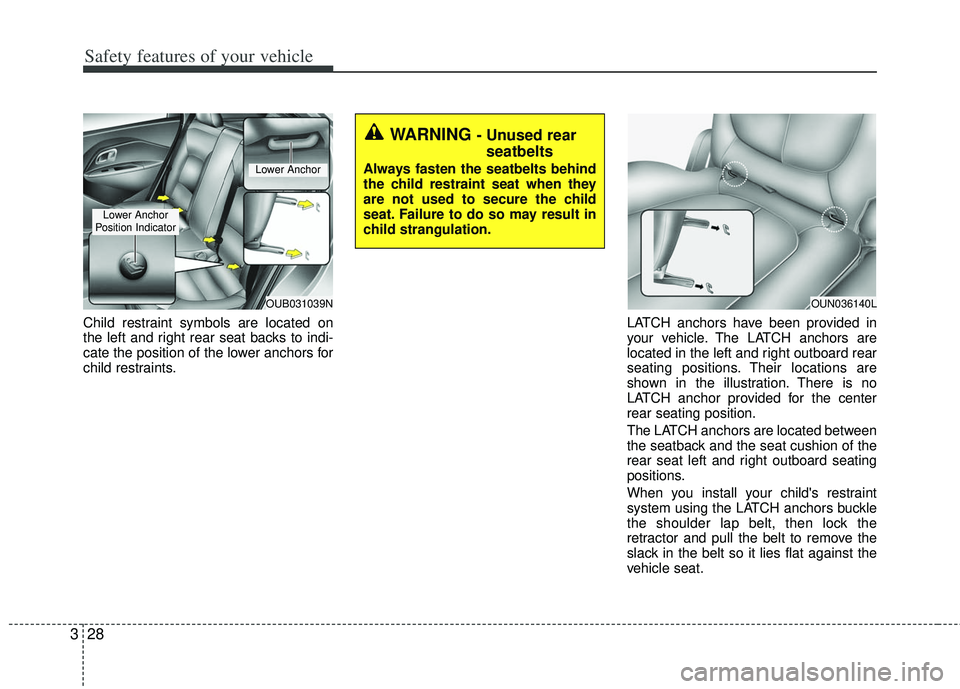
Child restraint symbols are located on
the left and right rear seat backs to indi-
cate the position of the lower anchors for
child restraints. LATCH anchors have been provided in
your vehicle. The LATCH anchors are
located in the left and right outboard rear
seating positions. Their locations are
shown in the illustration. There is no
LATCH anchor provided for the center
rear seating position.
The LATCH anchors are located between
the seatback and the seat cushion of the
rear seat left and right outboard seating
positions.
When you install your child's restraint
system using the LATCH anchors buckle
the shoulder lap belt, then lock the
retractor and pull the belt to remove the
slack in the belt so it lies flat against the
vehicle seat.
OUB031039N
Lower Anchor
Position Indicator
Lower Anchor
WARNING - Unused rear seatbelts
Always fasten the seatbelts behind
the child restraint seat when they
are not used to secure the child
seat. Failure to do so may result in
child strangulation.
OUN036140L
Page 92 of 385
417
Features of your vehicle
If a power door lock ever fails to function
while you are in the vehicle, try one or
more of the following techniques to exit:
Operate the door unlock featurerepeatedly (both electronic and manu-
al) while simultaneously pulling on the
door handle.
Operate the other door locks and han- dles, front and rear.
Lower a front window and use the key to unlock the door from outside.
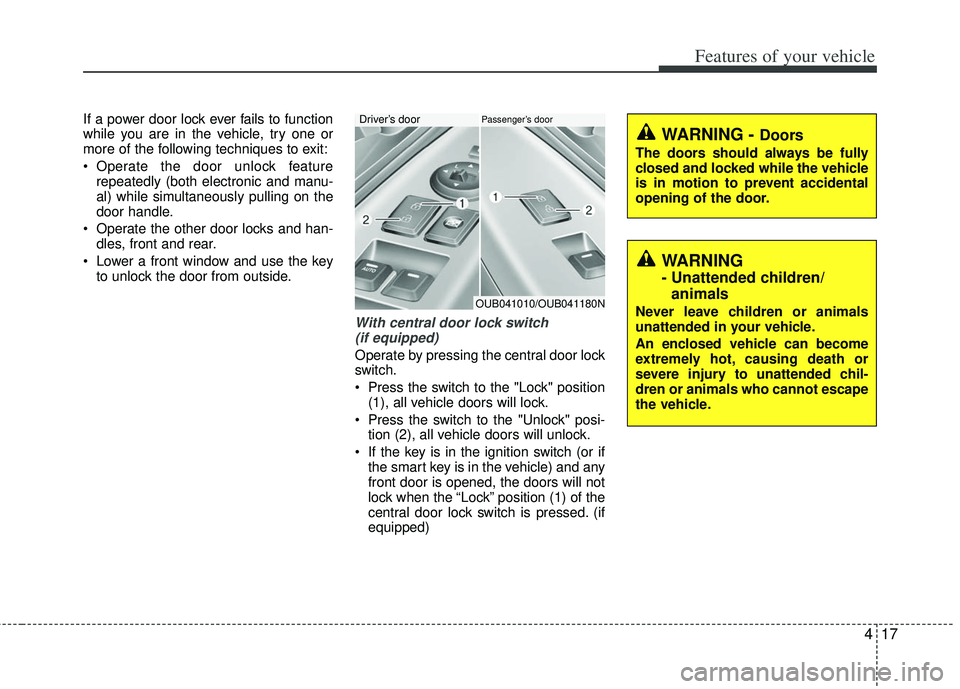
With central door lock switch (if equipped)
Operate by pressing the central door lock
switch.
Press the switch to the "Lock" position (1), all vehicle doors will lock.
Press the switch to the "Unlock" posi- tion (2), all vehicle doors will unlock.
If the key is in the ignition switch (or if the smart key is in the vehicle) and any
front door is opened, the doors will not
lock when the “Lock” position (1) of the
central door lock switch is pressed. (if
equipped)
OUB041010/OUB041180N
Driver’s doorPassenger’s door
WARNING
- Unattended children/animals
Never leave children or animals
unattended in your vehicle.
An enclosed vehicle can become
extremely hot, causing death or
severe injury to unattended chil-
dren or animals who cannot escape
the vehicle.
WARNING - Doors
The doors should always be fully
closed and locked while the vehicle
is in motion to prevent accidental
opening of the door.
Page 93 of 385
Features of your vehicle
18
4
Impact sensing door unlock sys-
tem (if equipped)
All doors will automatically unlock when
an impact causes the air bags to deploy.
Auto door lock/unlock feature
(if equipped)
All doors will automatically lock when
the transaxle shift lever is shifted out of
P (Park).
All doors will automatically unlock when the transaxle shift lever is shifted
into P (Park). An authorized Kia dealer can activate or
deactivate some auto door lock/ unlock
features as follows;
Auto door unlock by using the driver's
door lock button
Auto door lock/unlock by shifting the transaxle shift lever out of P (Park) or
into P (Park)
Auto door unlock when the ignition key is removed from the ignition switch (for
smart key, when the ENGINE
START/STOP button is turned to the
OFF position)
If you want to activate or deactivate some
door lock/unlock feature, consult an
authorized Kia dealer.
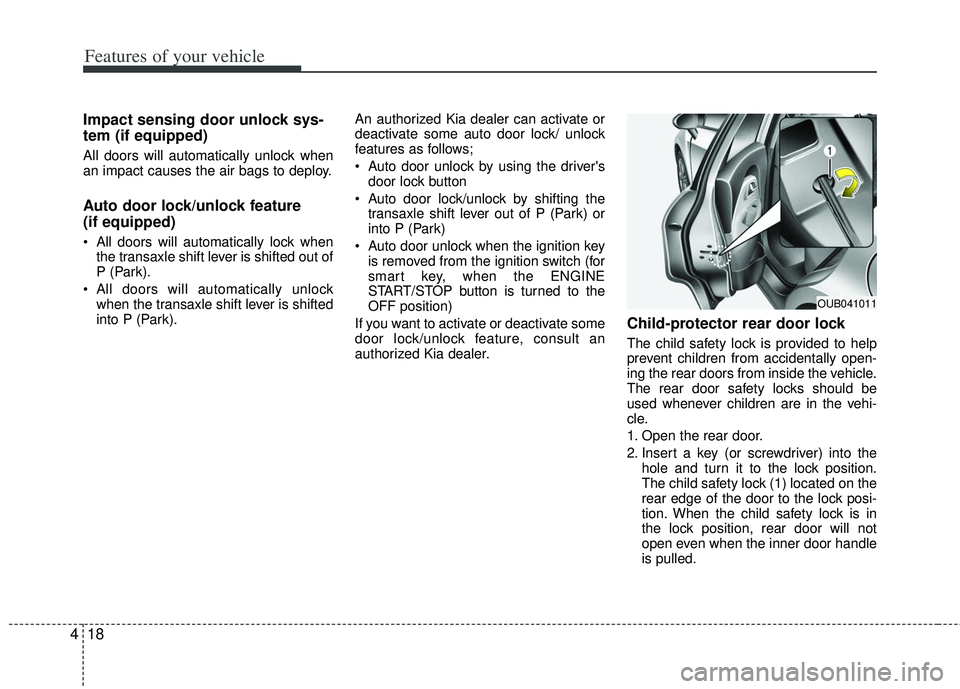
Child-protector rear door lock
The child safety lock is provided to help
prevent children from accidentally open-
ing the rear doors from inside the vehicle.
The rear door safety locks should be
used whenever children are in the vehi-
cle.
1. Open the rear door.
2. Insert a key (or screwdriver) into the hole and turn it to the lock position.
The child safety lock (1) located on the
rear edge of the door to the lock posi-
tion. When the child safety lock is in
the lock position, rear door will not
open even when the inner door handle
is pulled.
OUB041011
Page 94 of 385
419
Features of your vehicle
3. Close the rear door.
To open the rear door, pull the outside
door handle.
Even though the doors may be unlocked,
the rear door will not open by pulling the
inner door handle until the rear door child
safety lock is unlocked.
WARNING- Rear doorlocks
Use the rear door safety locks
whenever children are in the vehi-
cle. If a child accidently opens the
rear doors while the vehicle is
motion, he can fall out.
Page 100 of 385
425
Features of your vehicle
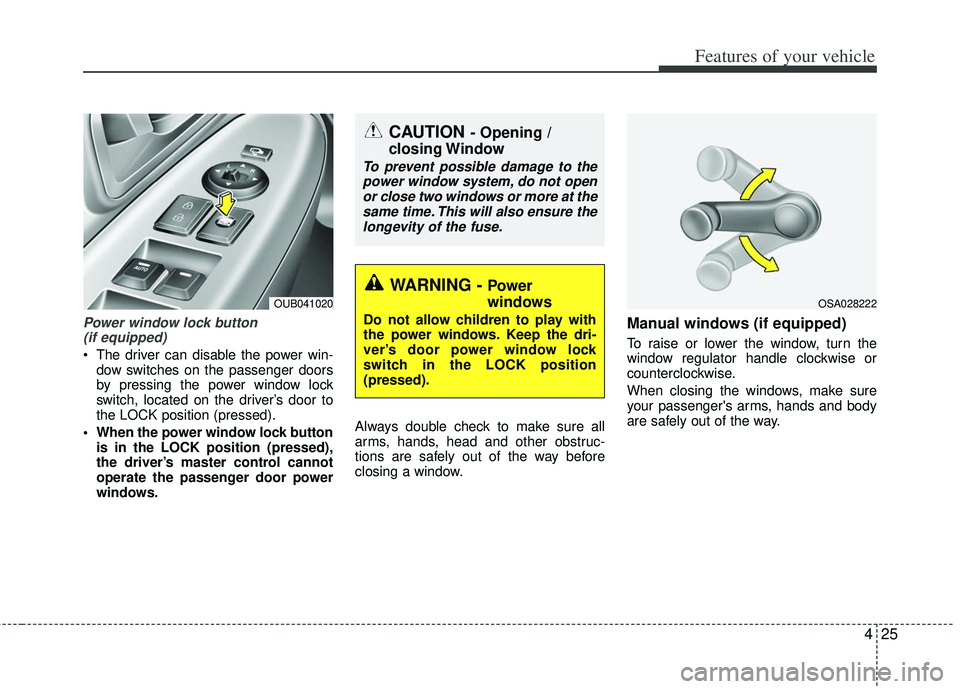
Power window lock button (if equipped)
The driver can disable the power win-
dow switches on the passenger doors
by pressing the power window lock
switch, located on the driver’s door to
the LOCK position (pressed).
When the power window lock button is in the LOCK position (pressed),
the driver’s master control cannot
operate the passenger door power
windows. Always double check to make sure all
arms, hands, head and other obstruc-
tions are safely out of the way before
closing a window.
Manual windows (if equipped)
To raise or lower the window, turn the
window regulator handle clockwise or
counterclockwise.
When closing the windows, make sure
your passenger's arms, hands and body
are safely out of the way.
CAUTION - Opening /
closing Window
To prevent possible damage to the
power window system, do not openor close two windows or more at thesame time. This will also ensure thelongevity of the fuse.
WARNING - Power
windows
Do not allow children to play with
the power windows. Keep the dri-
ver’s door power window lock
switch in the LOCK position
(pressed).
OUB041020OSA028222