Esc KIA Rondo 2008 2.G Owner's Manual
[x] Cancel search | Manufacturer: KIA, Model Year: 2008, Model line: Rondo, Model: KIA Rondo 2008 2.GPages: 341, PDF Size: 6.23 MB
Page 2 of 341
i Thank you for choosing a KIA vehicle.
When you require service, remember that your dealer knows
your vehicle best. Your dealer has factory-trained technicians,
recommended special tools, genuine KIA replacement parts
and is dedicated to your complete satisfaction.
Because subsequent owners require this important information
as well, this publication should remain with the vehicle if it is
sold.
This manual will familiarize you with operational, mainte-
nance and safety information about your new vehicle. It is sup-
plemented by a Warranty and Consumer Information manual
that provides important information on all warranties regarding
your vehicle.
We urge you to read these publications carefully and follow the
recommendations to help assure enjoyable and safe operation
of your new vehicle.
KIA offers a great variety of options, components and features
for its various models. Therefore, some of the equipment
described in this manual, along with the various illustrations,
may not be applicable to your particular vehicle. The information and specifications provided in this manual
were accurate at the time of printing. KIA reserves the right to
discontinue or change specifications or design at any time
without notice and without incurring any obligation. If you
have questions, always check with your KIA dealer.
We assure you of our continuing interest in your motoring
pleasure and satisfaction in your KIA vehicle.
© 2007 Kia Motors Corp.
All rights reserved. Reproduction by any means, electronic or
mechanical, including photocopying, recording, or by any
information storage and retrieval system or translation in
whole or part is not permitted without written authorization
from Kia Motors Corporation.
Printed in KoreaForeword
Page 8 of 341
15
Introduction
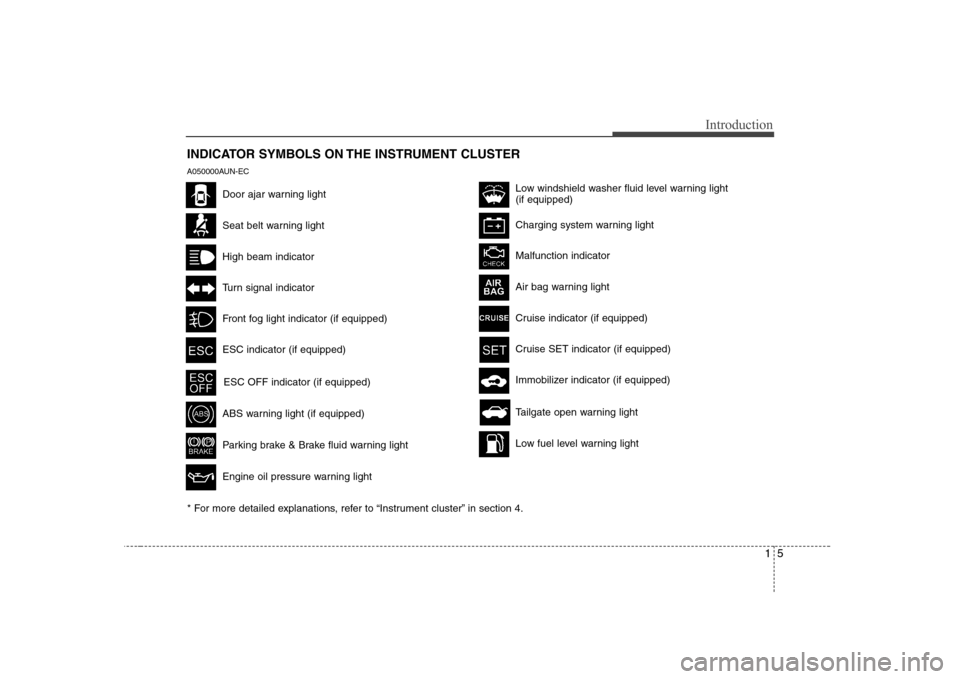
INDICATOR SYMBOLS ON THE INSTRUMENT CLUSTER
Door ajar warning lightSeat belt warning lightHigh beam indicatorTurn signal indicatorFront fog light indicator (if equipped)ABS warning light (if equipped)Parking brake & Brake fluid warning lightEngine oil pressure warning lightESC indicator (if equipped)ESC OFF indicator (if equipped)
Malfunction indicatorAir bag warning lightCruise indicator (if equipped)Cruise SET indicator (if equipped)Immobilizer indicator (if equipped) Low fuel level warning light Tailgate open warning light
* For more detailed explanations, refer to “Instrument cluster” in section 4.Charging system warning lightLow windshield washer fluid level warning light
(if equipped)
A050000AUN-EC
Page 10 of 341
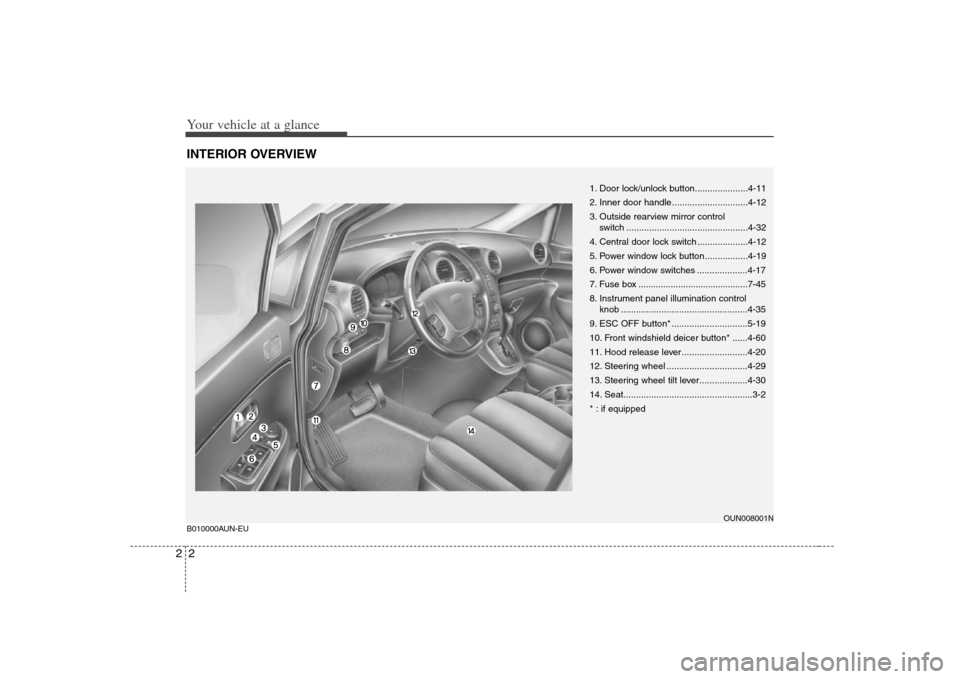
Your vehicle at a glance2 2INTERIOR OVERVIEWB010000AUN-EU
1. Door lock/unlock button.....................4-11
2. Inner door handle ..............................4-12
3. Outside rearview mirror control
switch ................................................4-32
4. Central door lock switch ....................4-12
5. Power window lock button.................4-19
6. Power window switches ....................4-17
7. Fuse box ............................................7-45
8. Instrument panel illumination control
knob ..................................................4-35
9. ESC OFF button* ..............................5-19
10. Front windshield deicer button* ......4-60
11. Hood release lever ..........................4-20
12. Steering wheel ................................4-29
13. Steering wheel tilt lever...................4-30
14. Seat...................................................3-2
* : if equipped
OUN008001N
Page 37 of 341
Safety features of your vehicle24 3There will be an audible “click” when the
tab locks in the buckle. The seat belt
automatically adjusts to the proper length
only after the lap belt is adjusted manu-
ally so that it fits snugly around your hips.
If you lean forward in a slow, easy
motion, the belt will extend and let you
move around. If there is a sudden stop or
impact, the belt will lock into position. It
will also lock if you try to lean forward too
quickly.
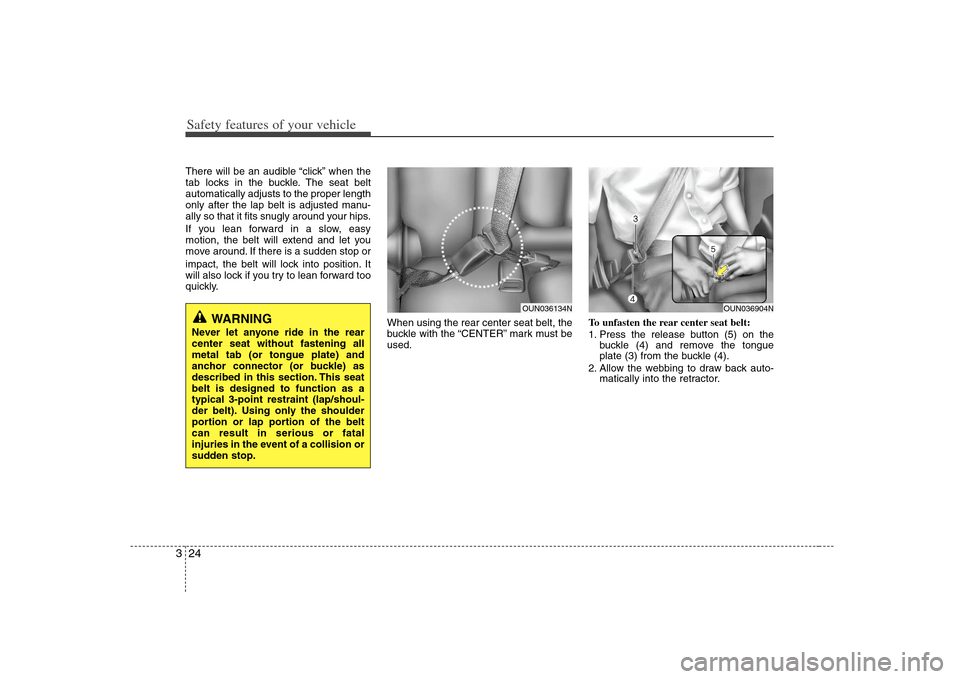
When using the rear center seat belt, the
buckle with the “CENTER” mark must be
used.To unfasten the rear center seat belt:
1. Press the release button (5) on the
buckle (4) and remove the tongue
plate (3) from the buckle (4).
2. Allow the webbing to draw back auto-
matically into the retractor.
WARNING
Never let anyone ride in the rear
center seat without fastening all
metal tab (or tongue plate) and
anchor connector (or buckle) as
described in this section. This seat
belt is designed to function as a
typical 3-point restraint (lap/shoul-
der belt). Using only the shoulder
portion or lap portion of the belt
can result in serious or fatal
injuries in the event of a collision or
sudden stop.
OUN036134N
OUN036904N
Page 47 of 341
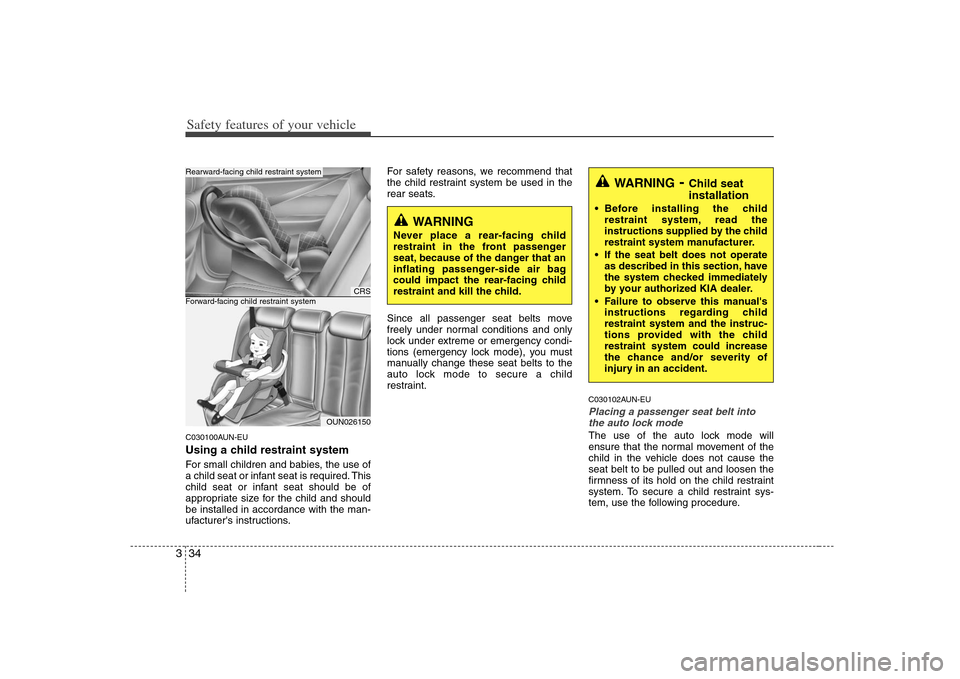
Safety features of your vehicle34 3C030100AUN-EUUsing a child restraint systemFor small children and babies, the use of
a child seat or infant seat is required. This
child seat or infant seat should be of
appropriate size for the child and should
be installed in accordance with the man-
ufacturer's instructions.For safety reasons, we recommend that
the child restraint system be used in the
rear seats.
Since all passenger seat belts move
freely under normal conditions and only
lock under extreme or emergency condi-
tions (emergency lock mode), you must
manually change these seat belts to the
auto lock mode to secure a child
restraint.
C030102AUN-EUPlacing a passenger seat belt into
the auto lock mode The use of the auto lock mode will
ensure that the normal movement of the
child in the vehicle does not cause the
seat belt to be pulled out and loosen the
firmness of its hold on the child restraint
system. To secure a child restraint sys-
tem, use the following procedure.
CRS
OUN026150
Forward-facing child restraint systemRearward-facing child restraint system
WARNING
- Child seat
installation
Before installing the child
restraint system, read the
instructions supplied by the child
restraint system manufacturer.
If the seat belt does not operate
as described in this section, have
the system checked immediately
by your authorized KIA dealer.
Failure to observe this manual's
instructions regarding child
restraint system and the instruc-
tions provided with the child
restraint system could increase
the chance and/or severity of
injury in an accident.
WARNING
Never place a rear-facing child
restraint in the front passenger
seat, because of the danger that an
inflating passenger-side air bag
could impact the rear-facing child
restraint and kill the child.
Page 88 of 341
49
Features of your vehicle
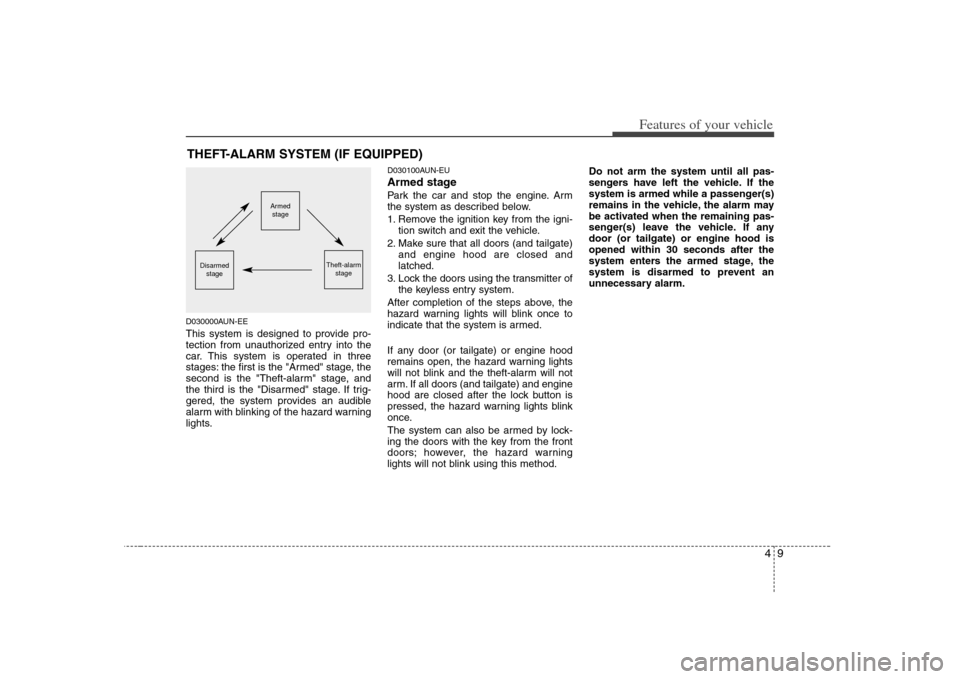
D030000AUN-EEThis system is designed to provide pro-
tection from unauthorized entry into the
car. This system is operated in three
stages: the first is the "Armed" stage, the
second is the "Theft-alarm" stage, and
the third is the "Disarmed" stage. If trig-
gered, the system provides an audible
alarm with blinking of the hazard warning
lights.
D030100AUN-EUArmed stagePark the car and stop the engine. Arm
the system as described below.
1. Remove the ignition key from the igni-
tion switch and exit the vehicle.
2. Make sure that all doors (and tailgate)
and engine hood are closed and
latched.
3. Lock the doors using the transmitter of
the keyless entry system.
After completion of the steps above, the
hazard warning lights will blink once to
indicate that the system is armed.
If any door (or tailgate) or engine hood
remains open, the hazard warning lights
will not blink and the theft-alarm will not
arm. If all doors (and tailgate) and engine
hood are closed after the lock button is
pressed, the hazard warning lights blink
once.
The system can also be armed by lock-
ing the doors with the key from the front
doors; however, the hazard warning
lights will not blink using this method.Do not arm the system until all pas-
sengers have left the vehicle. If the
system is armed while a passenger(s)
remains in the vehicle, the alarm may
be activated when the remaining pas-
senger(s) leave the vehicle. If any
door (or tailgate) or engine hood is
opened within 30 seconds after the
system enters the armed stage, the
system is disarmed to prevent an
unnecessary alarm.
THEFT-ALARM SYSTEM (IF EQUIPPED)
Armed
stage
Theft-alarm
stage
Disarmed
stage
Page 92 of 341
413
Features of your vehicle
When pushing down on the front por-
tion (1) of the switch, all vehicle doors
will lock.
When pushing down on the rear por-
tion (2) of the switch, all vehicle doors
will unlock.
If the key is in the ignition switch and
any front door is open, the doors will
not lock when the front portion (1) of
central door lock switch is pressed
WARNING
- Unlocked
vehicles
Leaving your vehicle unlocked can
invite theft or possible harm to you
or others from someone hiding in
your vehicle while you are gone.
Always remove the ignition key,
engage the parking brake, close all
windows and lock all doors when
leaving your vehicle unattended.
WARNING
- Unattended
children
An enclosed vehicle can become
extremely hot, causing death or
severe injury to unattended chil-
dren or animals who cannot escape
the vehicle. Furthermore, children
might operate features of the vehi-
cle that could injure them, or they
could encounter other harm, possi-
bly from someone gaining entry to
the vehicle. Never leave children or
animals unattended in your vehicle.
WARNING -
Doors
The doors should always be fully
closed and locked while the vehi-
cle is in motion to prevent acci-
dental opening of the door.
Locked doors will also discour-
age potential intruders when the
vehicle stops or slows.
Be careful when opening doors
and watch for vehicles, motorcy-
cles, bicycles or pedestrians
approaching the vehicle in the
path of the door. Opening a door
when something is approaching
can cause damage or injury.
Page 126 of 341
447
Features of your vehicle
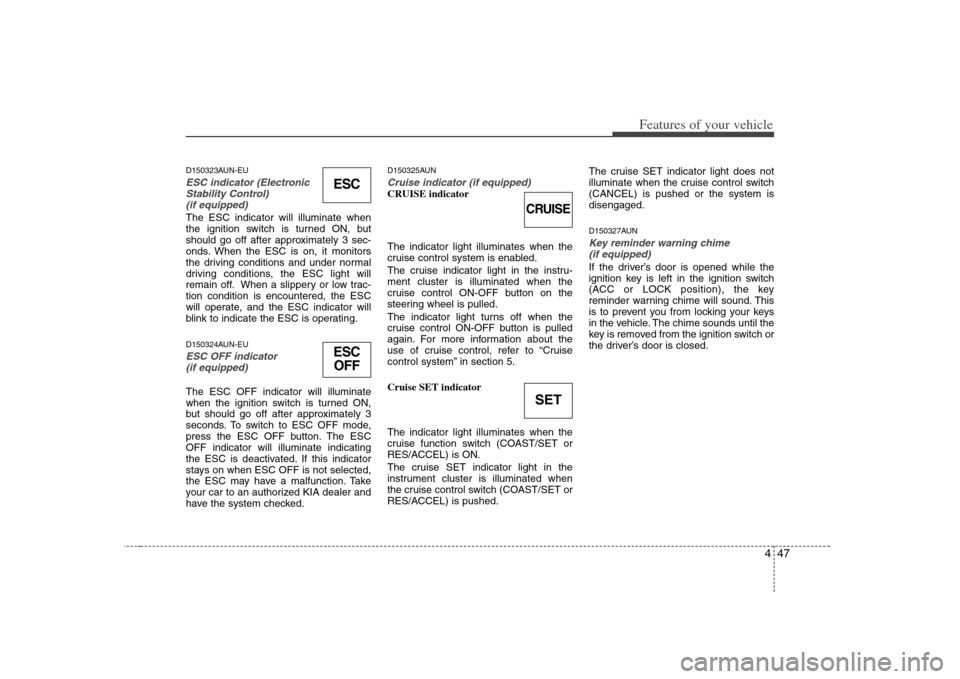
D150323AUN-EUESC indicator (Electronic
Stability Control)
(if equipped)The ESC indicator will illuminate when
the ignition switch is turned ON, but
should go off after approximately 3 sec-
onds. When the ESC is on, it monitors
the driving conditions and under normal
driving conditions, the ESC light will
remain off. When a slippery or low trac-
tion condition is encountered, the ESC
will operate, and the ESC indicator will
blink to indicate the ESC is operating.D150324AUN-EUESC OFF indicator
(if equipped)The ESC OFF indicator will illuminate
when the ignition switch is turned ON,
but should go off after approximately 3
seconds. To switch to ESC OFF mode,
press the ESC OFF button. The ESC
OFF indicator will illuminate indicating
the ESC is deactivated. If this indicator
stays on when ESC OFF is not selected,
the ESC may have a malfunction. Take
your car to an authorized KIA dealer and
have the system checked.
D150325AUNCruise indicator (if equipped)CRUISE indicator
The indicator light illuminates when the
cruise control system is enabled.
The cruise indicator light in the instru-
ment cluster is illuminated when the
cruise control ON-OFF button on the
steering wheel is pulled.
The indicator light turns off when the
cruise control ON-OFF button is pulled
again. For more information about the
use of cruise control, refer to “Cruise
control system” in section 5.
Cruise SET indicator
The indicator light illuminates when the
cruise function switch (COAST/SET or
RES/ACCEL) is ON.
The cruise SET indicator light in the
instrument cluster is illuminated when
the cruise control switch (COAST/SET or
RES/ACCEL) is pushed.The cruise SET indicator light does not
illuminate when the cruise control switch
(CANCEL) is pushed or the system is
disengaged.
D150327AUNKey reminder warning chime
(if equipped)If the driver’s door is opened while the
ignition key is left in the ignition switch
(ACC or LOCK position), the key
reminder warning chime will sound. This
is to prevent you from locking your keys
in the vehicle. The chime sounds until the
key is removed from the ignition switch or
the driver’s door is closed.
ESCESC
OFF
CRUISESET
Page 148 of 341
469
Features of your vehicle
✽ ✽
NOTICE• When using the air conditioning sys-
tem, monitor the temperature gauge
closely while driving up hills or in
heavy traffic when outside tempera-
tures are high. Air conditioning sys-
tem operation may cause engine over-
heating. Continue to use the blower
fan but turn the air conditioning sys-
tem off if the temperature gauge indi-
cates engine overheating.
• When opening the windows in humid
weather air conditioning may create
water droplets inside the vehicle.
Since excessive water droplets may
cause damage to electrical equipment,
air conditioning should only be run
with the windows closed.
Air conditioning system operation tips
If the vehicle has been parked in direct
sunlight during hot weather, open the
windows for a short time to let the hot
air inside the vehicle escape.
To help reduce moisture inside of the
windows on rainy or humid days,
decrease the humidity inside the vehi-
cle by operating the air conditioning
system.
During air conditioning system opera-
tion, you may occasionally notice a
slight change in engine speed as the
air conditioning compressor cycles.
This is a normal system operation
characteristic.
Use the air conditioning system every
month only for a few minutes to ensure
maximum system performance.
When using the air conditioning sys-
tem, you may notice clear water drip-
ping (or even puddling) on the ground
under the passenger side of the vehi-
cle. This is a normal system operation
characteristic.
Operating the air conditioning system
in the recirculated air position provides
maximum cooling, however, continual
operation in this mode may cause the
air inside the vehicle to become stale.
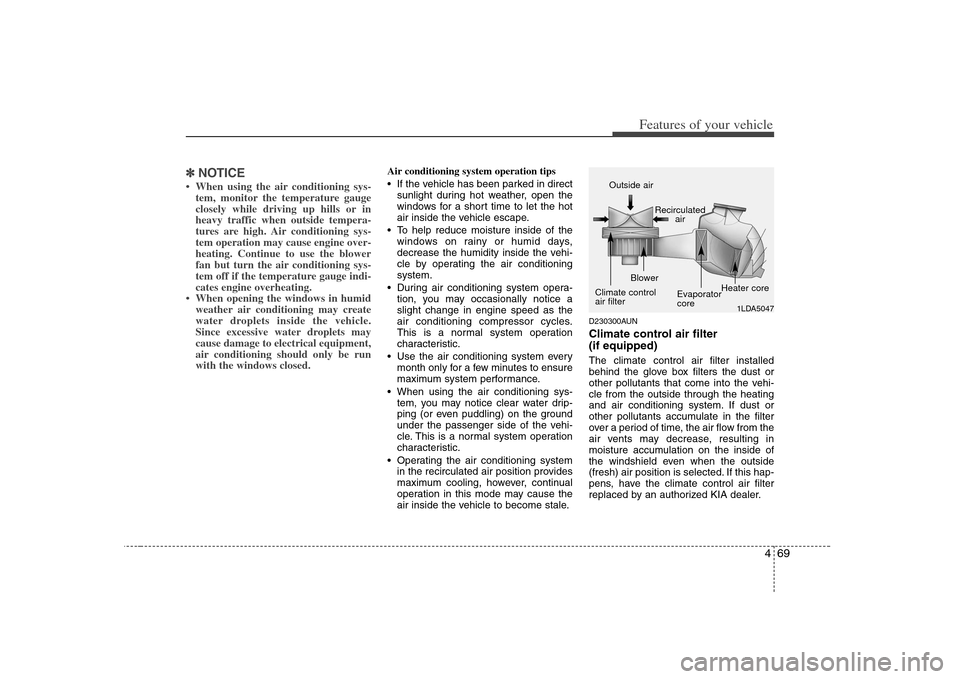
D230300AUNClimate control air filter
(if equipped)The climate control air filter installed
behind the glove box filters the dust or
other pollutants that come into the vehi-
cle from the outside through the heating
and air conditioning system. If dust or
other pollutants accumulate in the filter
over a period of time, the air flow from the
air vents may decrease, resulting in
moisture accumulation on the inside of
the windshield even when the outside
(fresh) air position is selected. If this hap-
pens, have the climate control air filter
replaced by an authorized KIA dealer.
1LDA5047
Outside air
Recirculated
air
Climate control
air filterBlower
Evaporator
coreHeater core
Page 173 of 341
Features of your vehicle94 4MODE (1)Press the button to select Radio, Tape (if
equipped) or CD (compact disc).VOLUME (VOL
▲/▼) (3)
• Press the up button (▲) to increase
volume.
Press the down button (▼) to decrease
volume.SEEK/PRESET (
▲/▼) (2)
If the SEEK/PRESET button is pressed
for 0.8 second or more, it will work as fol-
lows in each mode.
RADIO mode
It will function as the AUTO SEEK select
button.
TAPE mode
It will function as the FF/REW button.
CDP mode
It will function as the FF/REW button.
CDC mode
It will function as the DISC UP/DOWN
button.If the SEEK/PRESET button is pressed
for less than 0.8 second, it will work as
follows in each mode.
RADIO mode
It will function as the PRESET STATION
select buttons.
TAPE mode
It will function as the AUTO MUSIC
Search(AMS) button.
CDP mode
It will function as the TRACK UP/DOWN
button.
CDC mode
It will function as the TRACK UP/DOWN
button.
Detailed information for audio control
buttons is described in the following
pages in this section.
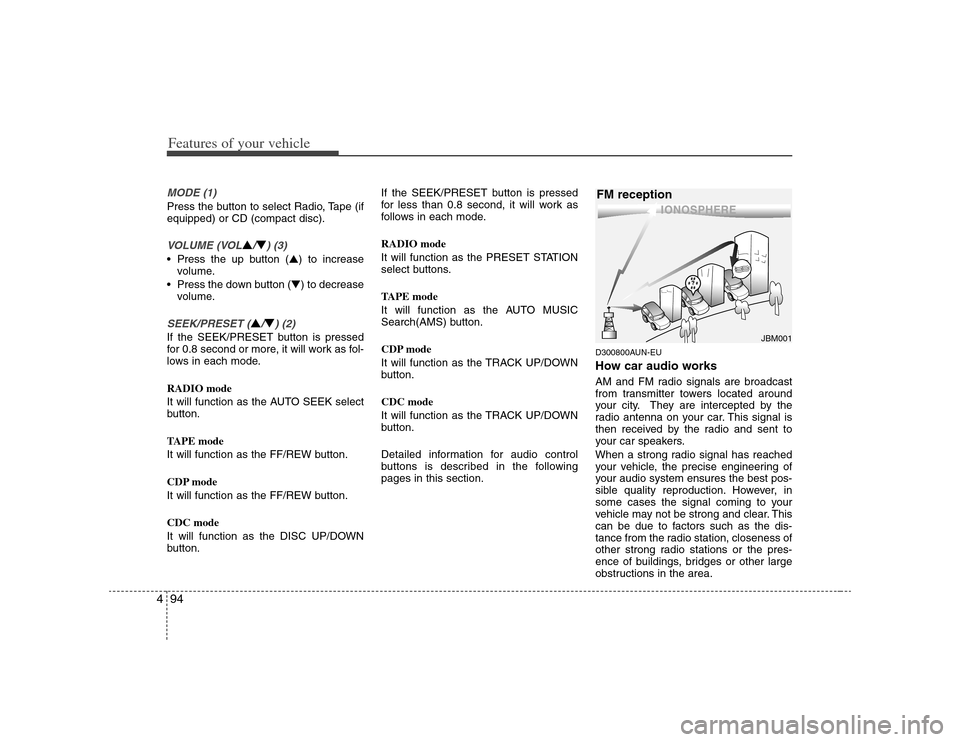
D300800AUN-EUHow car audio worksAM and FM radio signals are broadcast
from transmitter towers located around
your city. They are intercepted by the
radio antenna on your car. This signal is
then received by the radio and sent to
your car speakers.
When a strong radio signal has reached
your vehicle, the precise engineering of
your audio system ensures the best pos-
sible quality reproduction. However, in
some cases the signal coming to your
vehicle may not be strong and clear. This
can be due to factors such as the dis-
tance from the radio station, closeness of
other strong radio stations or the pres-
ence of buildings, bridges or other large
obstructions in the area.
¢¢¢
JBM001
FM reception