section 4 KIA Rondo 2012 2.G Owner's Guide
[x] Cancel search | Manufacturer: KIA, Model Year: 2012, Model line: Rondo, Model: KIA Rondo 2012 2.GPages: 338, PDF Size: 6.52 MB
Page 250 of 338
549
Driving your vehicle
E160000AUN
This section will guide you in the proper
loading of your vehicle and/or trailer, to
keep your loaded vehicle weight within its
design rating capability, with or without a
trailer. Properly loading your vehicle will
provide maximum return of the vehicle
design performance. Before loading your
vehicle, familiarize yourself with the fol-
lowing terms for determining your vehi-
cle's weight ratings, with or without a
trailer, from the vehicle's specifications
and the certification label:
E160100AUN
Base curb weight
This is the weight of the vehicle including
a full tank of fuel and all standard equip-
ment. It does not include passengers,
cargo, or optional equipment.
E160200AUN
Vehicle curb weight
This is the weight of your new vehicle
when you picked it up from your dealer
plus any aftermarket equipment.
E160300AUN
Cargo weight
This figure includes all weight added to
the Base Curb Weight, including cargo
and optional equipment.
E160400AUN
GAW (Gross axle weight)
This is the total weight placed on each
axle (front and rear) - including vehicle
curb weight and all payload.
E160500AUN
GAWR (Gross axle weight rating)
This is the maximum allowable weight
that can be carried by a single axle (front
or rear). These numbers are shown on
the certification label.
The total load on each axle must never
exceed its GAWR.
E160600AUN
GVW (Gross vehicle weight)
This is the Base Curb Weight plus actual
Cargo Weight plus passengers.
E160700AUN-EU
GVWR (Gross vehicle weight rating)
This is the maximum allowable weight of
the fully loaded vehicle (including all
options, equipment, passengers and
cargo). The GVWR is shown on the cer-
tification label located on the driver’s
door sill.
VEHICLE WEIGHT
Page 255 of 338
65
What to do in an emergency
F040101AUN
Jump starting procedure
1. Make sure the booster battery is 12-volt and that its negative terminal is
grounded.
2. If the booster battery is in another vehicle, do not allow the vehicles to
touch.
3. Turn off all unnecessary electrical loads. 4. Connect the jumper cables in the exact
sequence shown in the illustration.
First connect one end of a jumper
cable to the positive terminal of the
discharged battery (1), then connect
the other end to the positive terminal
on the booster battery (2).
Proceed to connect one end of the
other jumper cable to the negative ter-
minal of the booster battery (3), then
the other end to a solid, stationary,
metallic point (for example, the engine
lifting bracket) away from the battery
(4). Do not connect it to or near any
part that moves when the engine is
cranked.
Do not allow the jumper cables to con-
tact anything except the correct battery
terminals or the correct ground. Do not
lean over the battery when making
connections. 5. Start the engine of the vehicle with the
booster battery and let it run at 2,000
rpm, then start the engine of the vehi-
cle with the discharged battery.
If the cause of your battery discharging isnot apparent, you should have your vehi-cle checked by an authorized Kia dealer.
F040200AUN-EU
Push-starting
Vehicles equipped with automatic
transaxle cannot be push-started.
Follow the directions in this section for
jump-starting.
WARNING- Battery
• Keep all flames or sparks away from the battery. The battery pro-
duces hydrogen gas which may
explode if exposed to flame or
sparks.
Do not attempt to jump start the vehicle if the discharged battery
is frozen or if the electrolyte level
is low; the battery may rupture or
explode.
CAUTION- Battery cables
Do not connect the jumper cablefrom the negative terminal of thebooster battery to the negative ter-minal of the discharged battery.This can cause the discharged bat-tery to overheat and crack, releas-ing battery acid.
WARNING
Never tow a vehicle to start it
because the sudden surge forward
when the engine starts could cause
a collision with the tow vehicle.
Page 267 of 338
617
What to do in an emergency
TOWING
F080100AUN
Towing service
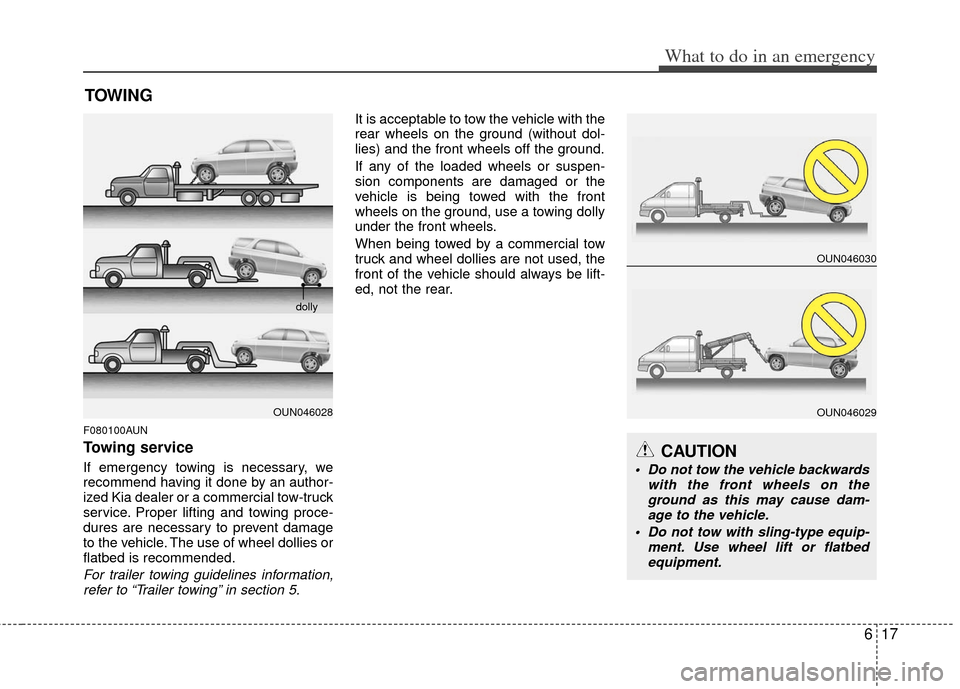
If emergency towing is necessary, we
recommend having it done by an author-
ized Kia dealer or a commercial tow-truck
service. Proper lifting and towing proce-
dures are necessary to prevent damage
to the vehicle. The use of wheel dollies or
flatbed is recommended.
For trailer towing guidelines information,refer to “Trailer towing” in section 5.
It is acceptable to tow the vehicle with the
rear wheels on the ground (without dol-
lies) and the front wheels off the ground.
If any of the loaded wheels or suspen-
sion components are damaged or the
vehicle is being towed with the front
wheels on the ground, use a towing dolly
under the front wheels.
When being towed by a commercial tow
truck and wheel dollies are not used, the
front of the vehicle should always be lift-
ed, not the rear.
OUN046028
OUN046030
OUN046029
CAUTION
Do not tow the vehicle backwards with the front wheels on theground as this may cause dam- age to the vehicle.
Do not tow with sling-type equip- ment. Use wheel lift or flatbedequipment.
dolly
Page 275 of 338
75
Maintenance
G020200AUN-EU
Owner maintenance precautions
Improper or incomplete service may
result in problems. This section gives
instructions only for the maintenance
items that are easy to perform.
As explained earlier in this section, sev-
eral procedures can be done only by an
authorized Kia dealer with special tools.
✽ ✽NOTICE
Improper owner maintenance during
the warranty period may affect warran-
ty coverage. For details, read the sepa-
rate Warranty & Consumer Information
manual provided with the vehicle. If
you're unsure about any servicing or
maintenance procedure, have it done by
an authorized Kia dealer.
WARNING- Maintenance
work
Performing maintenance work on
a vehicle can be dangerous. You
can be seriously injured while
performing some maintenance
procedures. If you lack sufficient
knowledge and experience or the
proper tools and equipment to do
the work, have it done by an
authorized Kia dealer.
Working under the hood with the engine running is dangerous. It
becomes even more dangerous
when you wear jewelry or loose
clothing. These can become
entangled in moving parts and
result in injury. Therefore, if you
must run the engine while work-
ing under the hood, make certain
that you remove all jewelry (espe-
cially rings, bracelets, watches,
and necklaces) and all neckties,
scarves, and similar loose cloth-
ing before getting near the
engine or cooling fans.
Page 286 of 338
Maintenance
16
7
ENGINE OIL
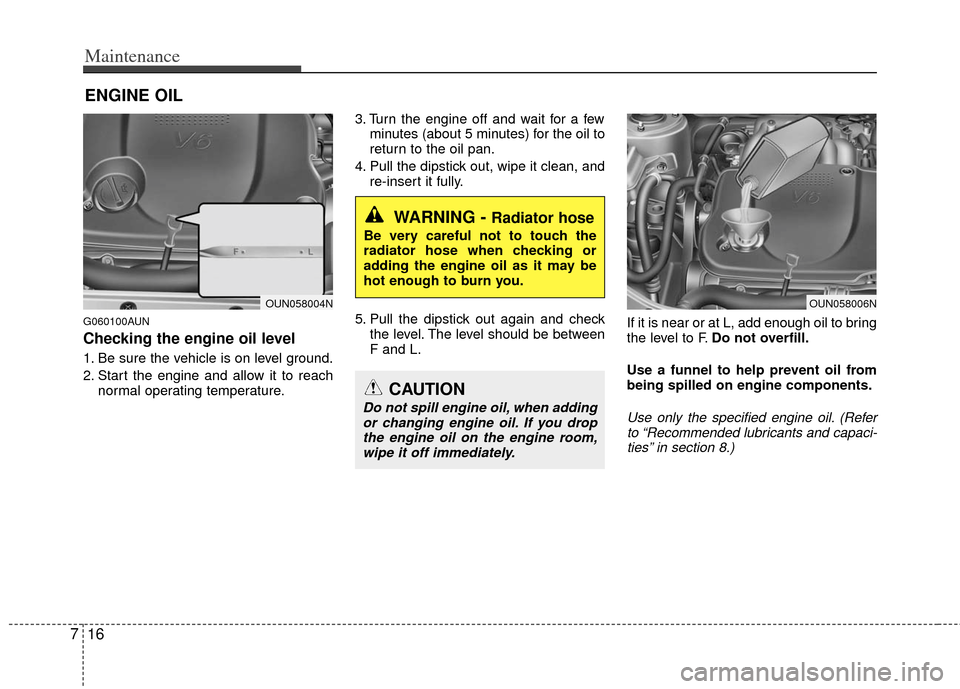
G060100AUN
Checking the engine oil level
1. Be sure the vehicle is on level ground.
2. Start the engine and allow it to reach
normal operating temperature. 3. Turn the engine off and wait for a few
minutes (about 5 minutes) for the oil to
return to the oil pan.
4. Pull the dipstick out, wipe it clean, and re-insert it fully.
5. Pull the dipstick out again and check the level. The level should be between
F and L. If it is near or at L, add enough oil to bring
the level to F.
Do not overfill.
Use a funnel to help prevent oil from
being spilled on engine components.
Use only the specified engine oil. (Refer to “Recommended lubricants and capaci-ties” in section 8.)
WARNING - Radiator hose
Be very careful not to touch the
radiator hose when checking or
adding the engine oil as it may be
hot enough to burn you.
OUN058004NOUN058006N
CAUTION
Do not spill engine oil, when adding or changing engine oil. If you dropthe engine oil on the engine room,wipe it off immediately.
Page 287 of 338
717
Maintenance
G060200AUN
Changing the engine oil and filter
Have engine oil and filter changed by an
authorized Kia dealer according to the
Maintenance Schedule at the beginning
of this section.
G070000AUN
The high-pressure cooling system has a
reservoir filled with year-round antifreeze
coolant. The reservoir is filled at the fac-
tory.
Check the antifreeze protection and
coolant level at least once a year, at the
beginning of the winter season, and
before traveling to a colder climate.
G070100AUN
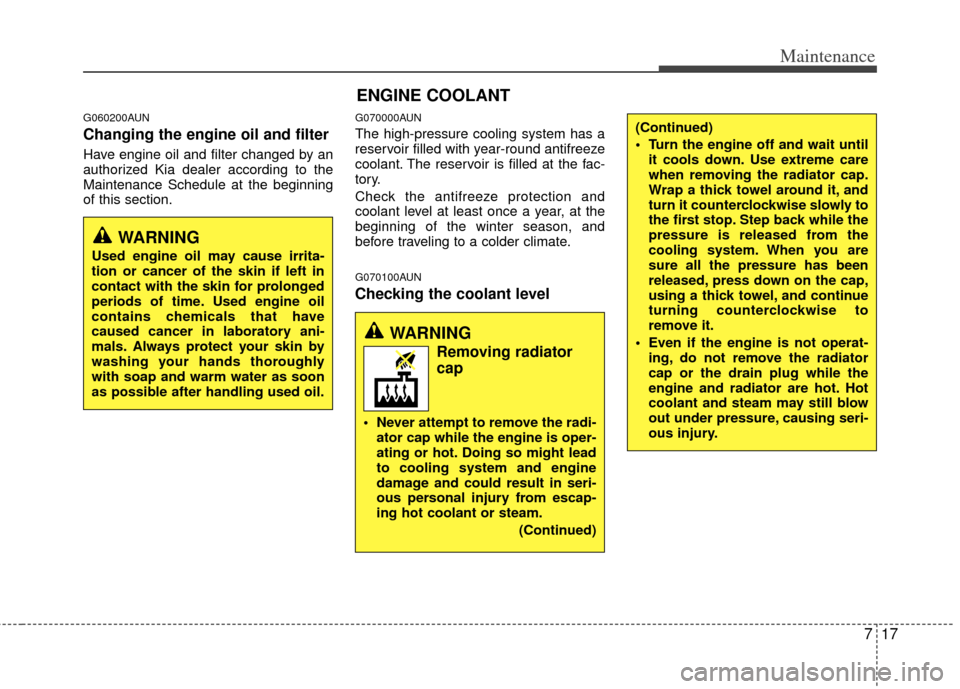
Checking the coolant level
WARNING
Used engine oil may cause irrita-
tion or cancer of the skin if left in
contact with the skin for prolonged
periods of time. Used engine oil
contains chemicals that have
caused cancer in laboratory ani-
mals. Always protect your skin by
washing your hands thoroughly
with soap and warm water as soon
as possible after handling used oil.
ENGINE COOLANT
WARNING
Removing radiator
cap
Never attempt to remove the radi-ator cap while the engine is oper-
ating or hot. Doing so might lead
to cooling system and engine
damage and could result in seri-
ous personal injury from escap-
ing hot coolant or steam.
(Continued)
(Continued)
Turn the engine off and wait untilit cools down. Use extreme care
when removing the radiator cap.
Wrap a thick towel around it, and
turn it counterclockwise slowly to
the first stop. Step back while the
pressure is released from the
cooling system. When you are
sure all the pressure has been
released, press down on the cap,
using a thick towel, and continue
turning counterclockwise to
remove it.
Even if the engine is not operat- ing, do not remove the radiator
cap or the drain plug while the
engine and radiator are hot. Hot
coolant and steam may still blow
out under pressure, causing seri-
ous injury.
Page 289 of 338
719
Maintenance
G070200AUN
Changing the coolant
Have coolant changed by an authorized
Kia dealer according to the Maintenance
Schedule at the beginning of this section.
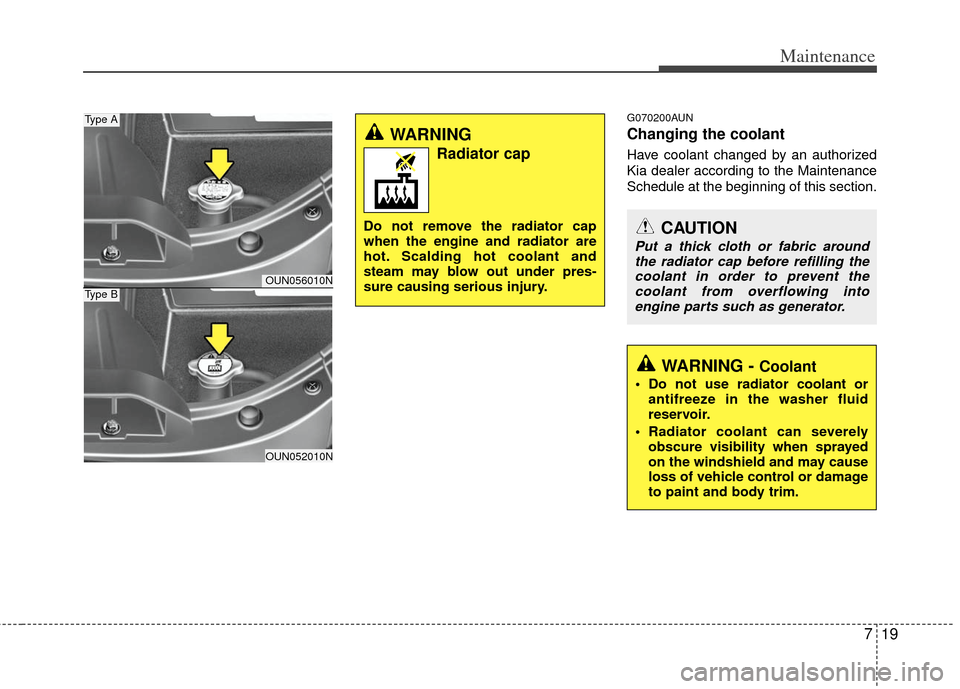
WARNING
Radiator cap
Do not remove the radiator cap
when the engine and radiator are
hot. Scalding hot coolant and
steam may blow out under pres-
sure causing serious injury.CAUTION
Put a thick cloth or fabric aroundthe radiator cap before refilling thecoolant in order to prevent the coolant from overflowing intoengine parts such as generator.
WARNING - Coolant
Do not use radiator coolant or antifreeze in the washer fluid
reservoir.
Radiator coolant can severely obscure visibility when sprayed
on the windshield and may cause
loss of vehicle control or damage
to paint and body trim.
OUN056010N
OUN052010N
Type A
Type B
Page 290 of 338
Maintenance
20
7
BRAKE FLUID
G080100AUN-EU
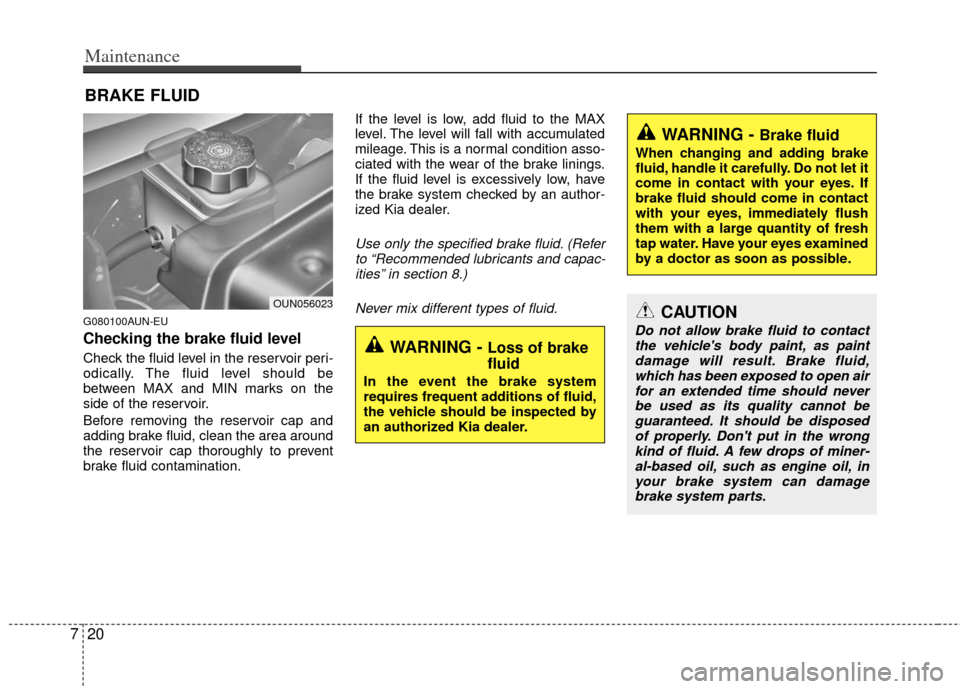
Checking the brake fluid level
Check the fluid level in the reservoir peri-
odically. The fluid level should be
between MAX and MIN marks on the
side of the reservoir.
Before removing the reservoir cap and
adding brake fluid, clean the area around
the reservoir cap thoroughly to prevent
brake fluid contamination. If the level is low, add fluid to the MAX
level. The level will fall with accumulated
mileage. This is a normal condition asso-
ciated with the wear of the brake linings.
If the fluid level is excessively low, have
the brake system checked by an author-
ized Kia dealer.
Use only the specified brake fluid. (Refer
to “Recommended lubricants and capac-ities” in section 8.)
Never mix different types of fluid.
WARNING - Brake fluid
When changing and adding brake
fluid, handle it carefully. Do not let it
come in contact with your eyes. If
brake fluid should come in contact
with your eyes, immediately flush
them with a large quantity of fresh
tap water. Have your eyes examined
by a doctor as soon as possible.
WARNING - Loss of brake
fluid
In the event the brake system
requires frequent additions of fluid,
the vehicle should be inspected by
an authorized Kia dealer.
OUN056023CAUTION
Do not allow brake fluid to contactthe vehicle's body paint, as paintdamage will result. Brake fluid, which has been exposed to open airfor an extended time should neverbe used as its quality cannot be guaranteed. It should be disposedof properly. Don't put in the wrong kind of fluid. A few drops of miner-al-based oil, such as engine oil, in your brake system can damagebrake system parts.
Page 291 of 338
721
Maintenance
POWER STEERING FLUID
G090100AUN
Checking the power steering fluid
level
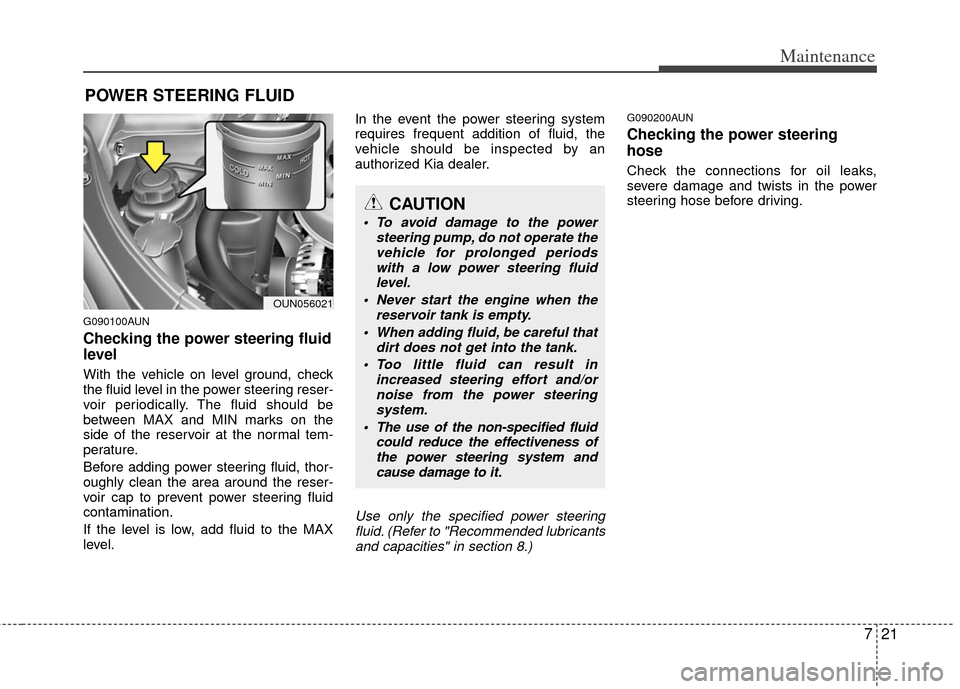
With the vehicle on level ground, check
the fluid level in the power steering reser-
voir periodically. The fluid should be
between MAX and MIN marks on the
side of the reservoir at the normal tem-
perature.
Before adding power steering fluid, thor-
oughly clean the area around the reser-
voir cap to prevent power steering fluid
contamination.
If the level is low, add fluid to the MAX
level.In the event the power steering system
requires frequent addition of fluid, the
vehicle should be inspected by an
authorized Kia dealer.
Use only the specified power steering
fluid. (Refer to "Recommended lubricantsand capacities" in section 8.)
G090200AUN
Checking the power steering
hose
Check the connections for oil leaks,
severe damage and twists in the power
steering hose before driving.
CAUTION
To avoid damage to the power steering pump, do not operate thevehicle for prolonged periodswith a low power steering fluidlevel.
Never start the engine when the reservoir tank is empty.
When adding fluid, be careful that dirt does not get into the tank.
Too little fluid can result in increased steering effort and/ornoise from the power steeringsystem.
The use of the non-specified fluid could reduce the effectiveness ofthe power steering system andcause damage to it.
OUN056021
Page 293 of 338
723
Maintenance
✽
✽NOTICE
“COLD” range is for reference only and
should NOT be used to determine
transaxle fluid level.
✽ ✽NOTICE
New automatic transaxle fluid should be
red. The red dye is added so the assem-
bly plant can identify it as automatic
transaxle fluid and distinguish it from
engine oil or antifreeze. The red dye,
which is not an indicator of fluid quali-
ty, is not permanent. As the vehicle is
driven, the automatic transaxle fluid
will begin to look darker. The color may
eventually appear light brown.
Therefore, have an authorized Kia deal-
er change the automatic transaxle fluid
according to the Scheduled
Maintenance at the beginning of this
section.
Use only the specified automatic
transaxle fluid. (Refer to "Recommended
lubricants
andcapacities" in section 8.)
G100200AUN
Changing the automatic transaxle
fluid
Have automatic transaxle fluid changed
by an authorized Kia dealer according to
the Maintenance Schedule at the begin-
ning of this section.
WARNING- Parking brake
To avoid sudden movement of the
vehicle, apply parking brake and
depress the brake pedal before
moving the shift lever.
CAUTION
Low fluid level causes transaxle
slippage. Overfilling can causefoaming, loss of fluid and transaxlemalfunction.
The use of a non-specified fluid could result in transaxle malfunc-tion and failure.