tow KIA Rondo 2016 3.G User Guide
[x] Cancel search | Manufacturer: KIA, Model Year: 2016, Model line: Rondo, Model: KIA Rondo 2016 3.GPages: 586, PDF Size: 22.03 MB
Page 149 of 586
453
Features of your vehicle
Inside rearview mirror
Adjust the rearview mirror so that the
center view through the rear window
is seen. Make this adjustment before
you start driving.
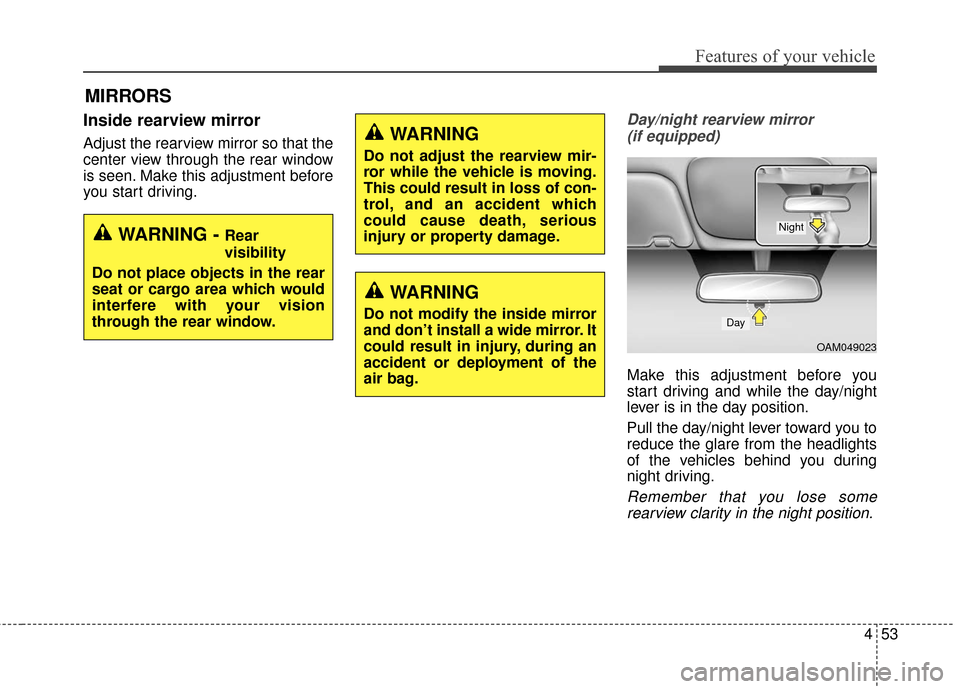
Day/night rearview mirror (if equipped)
Make this adjustment before you
start driving and while the day/night
lever is in the day position.
Pull the day/night lever toward you to
reduce the glare from the headlights
of the vehicles behind you during
night driving.
Remember that you lose somerearview clarity in the night position.
MIRRORS
WARNING - Rear
visibility
Do not place objects in the rear
seat or cargo area which would
interfere with your vision
through the rear window.
WARNING
Do not adjust the rearview mir-
ror while the vehicle is moving.
This could result in loss of con-
trol, and an accident which
could cause death, serious
injury or property damage.
WARNING
Do not modify the inside mirror
and don’t install a wide mirror. It
could result in injury, during an
accident or deployment of the
air bag.
OAM049023
Day
Night
Page 152 of 586
Features of your vehicle
56
4
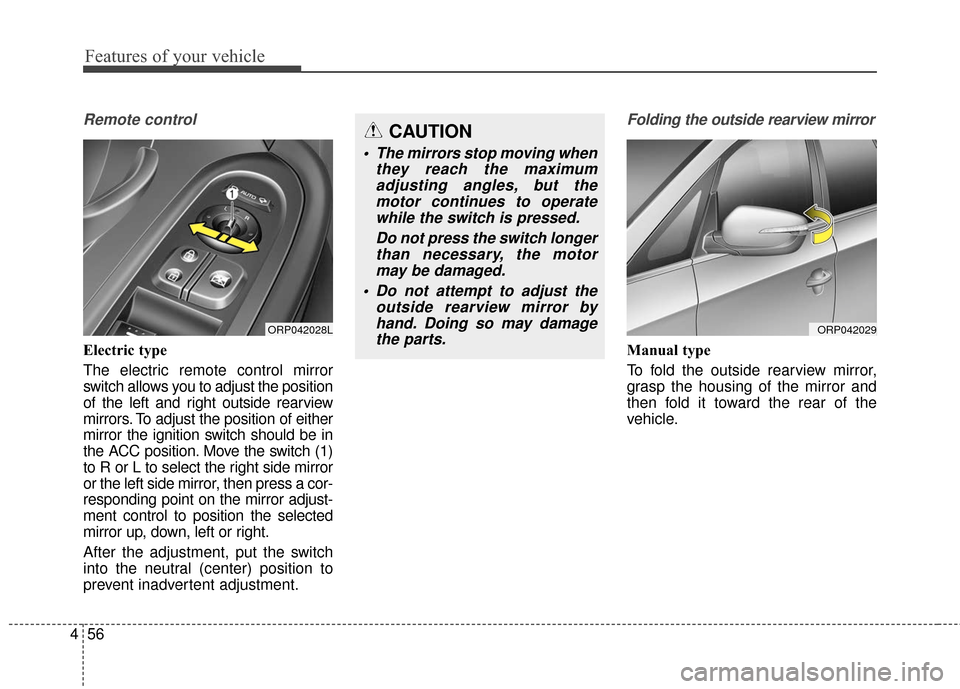
Remote control
Electric type
The electric remote control mirror
switch allows you to adjust the position
of the left and right outside rearview
mirrors. To adjust the position of either
mirror the ignition switch should be in
the ACC position. Move the switch (1)
to R or L to select the right side mirror
or the left side mirror, then press a cor-
responding point on the mirror adjust-
ment control to position the selected
mirror up, down, left or right.
After the adjustment, put the switch
into the neutral (center) position to
prevent inadvertent adjustment.
Folding the outside rearview mirror
Manual type
To fold the outside rearview mirror,
grasp the housing of the mirror and
then fold it toward the rear of the
vehicle.
ORP042028L
CAUTION
The mirrors stop moving when
they reach the maximumadjusting angles, but themotor continues to operatewhile the switch is pressed.
Do not press the switch longerthan necessary, the motormay be damaged.
Do not attempt to adjust the outside rearview mirror byhand. Doing so may damagethe parts.
ORP042029
Page 157 of 586
461
Features of your vehicle
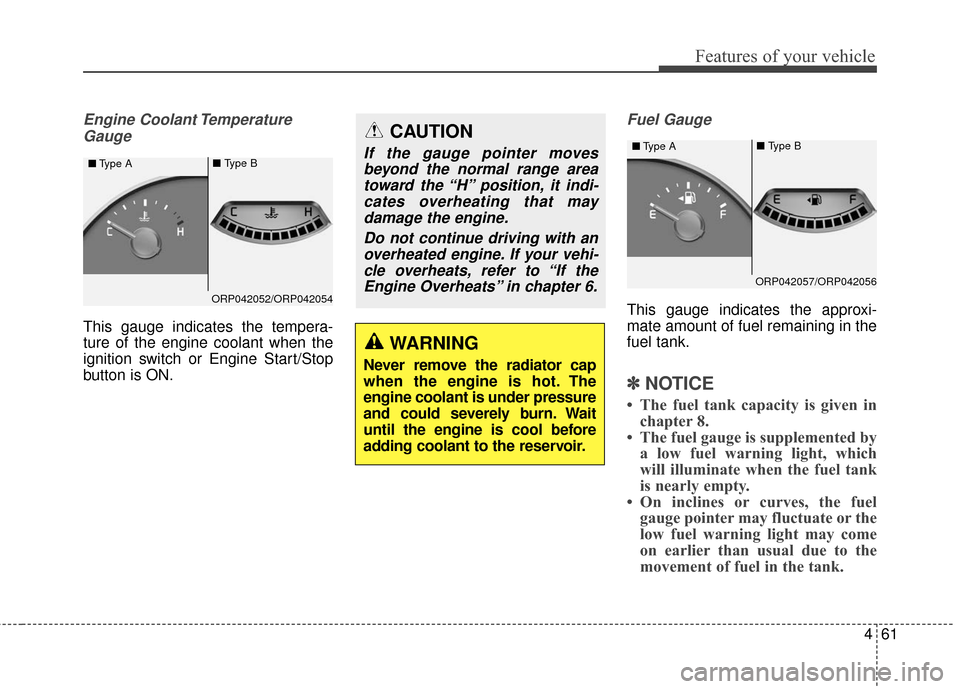
Engine Coolant TemperatureGauge
This gauge indicates the tempera-
ture of the engine coolant when the
ignition switch or Engine Start/Stop
button is ON.
Fuel Gauge
This gauge indicates the approxi-
mate amount of fuel remaining in the
fuel tank.
✽ ✽ NOTICE
• The fuel tank capacity is given in
chapter 8.
• The fuel gauge is supplemented by a low fuel warning light, which
will illuminate when the fuel tank
is nearly empty.
• On inclines or curves, the fuel gauge pointer may fluctuate or the
low fuel warning light may come
on earlier than usual due to the
movement of fuel in the tank.
WARNING
Never remove the radiator cap
when the engine is hot. The
engine coolant is under pressure
and could severely burn. Wait
until the engine is cool before
adding coolant to the reservoir.
CAUTION
If the gauge pointer moves
beyond the normal range areatoward the “H” position, it indi-cates overheating that maydamage the engine.
Do not continue driving with anoverheated engine. If your vehi-cle overheats, refer to “If theEngine Overheats” in chapter 6.■ Type A■ Type B
ORP042057/ORP042056
■Type A■ Type B
ORP042052/ORP042054
Page 176 of 586
Features of your vehicle
80
4
Parking Brake & Brake
Fluid Warning Light
This warning light illuminates:
Once you set the ignition switch or Engine Start/Stop Button to the ON
position.
- It illuminates for approximately 3seconds
- It remains on if the parking brake is applied.
When the parking brake is applied.
When the brake fluid level in the reservoir is low.
- If the warning light illuminateswith the parking brake released, it
indicates the brake fluid level in
reservoir is low. If the brake fluid level in the reservoir
is low:
1. Drive carefully to the nearest safe
location and stop your vehicle.
2. With the engine stopped, check the brake fluid level immediately and add
fluid as required (For more details,
refer to “Brake Fluid” in chapter 7).
Then check all brake components
for fluid leaks. If any leaks in the
brake system is still found, the
warning light remains on, or the
brakes do not operate properly, do
not drive the vehicle.
In this case, have your vehicle
towed to an authorized Kia dealer
and inspected. Dual-diagonal braking system
Your vehicle is equipped with dual-
diagonal braking systems. This
means you still have braking on two
wheels even if one of the dual sys-
tems should fail.
With only one of the dual systems
working, more than normal pedal
travel and greater pedal pressure are
required to stop the vehicle.
Also, the vehicle will not stop in as
short a distance with only a portion
of the brake system working.
If the brakes fail while you are driv-
ing, shift to a lower gear for addition-
al engine braking and stop the vehi-
cle as soon as it is safe to do so.
Page 189 of 586

493
Features of your vehicle
This system will activate whenbacking up with the ignition switch
ON.
If the vehicle is moving at a speed
over 5 km/h (3 mph), the system
may not be activated correctly.
The sensing distance while the rear parking assist system is in
operation is approximately 120 cm
(47 in.).
When more than two objects are sensed at the same time, the clos-
est one will be recognized first.
Types of warning sound
When an object is 120 cm to 61 cm(47 in. to 23.6 in.) from the rear
bumper: Buzzer beeps intermittently
When an object is 60 cm to 31 cm (23.6 in. to 12.2 in.) from the rear
bumper: Buzzer beeps more fre-
quently
When an object is within 30 cm (11.8 in.) of the rear bumper:
Buzzer sounds continuously.
Type of the warning indicator
(if equipped)
*1: It indicates the range of sensed object by each sensor. (Left,
Center, Right)
❈ In case the object is between or
close to the sensors, the indicator
could be different.
Non-operational conditions of
rear parking assist system
The rear parking assist system
may not operate properly when:
1. Moisture is frozen to the sensor. (It
will operate normally when the
moisture has been cleared.)
2. The sensor is covered with foreign matter, such as snow or water, or
the sensor cover is blocked. (It will
operate normally when the materi-
al is removed or the sensor is no
longer blocked.)
3. Driving on uneven road surfaces (unpaved roads, gravel, bumps,
gradient).
4. Objects generating excessive noise (vehicle horns, loud motor-
cycle engines, or truck air brakes)
are within range of the sensor.
5. Heavy rain or water spray exists.
6. Wireless transmitters or mobile phones are within range of the
sensor.
7. The sersor is covered with snow.
8. Trailer towing.
Distance from objectWarning indicator
Type AType B
61cm ~ 120 cm
(24 in. ~ 47 in.)
31cm ~ 60 cm
(12.2 in. ~ 23.6 in.)
Less than 30 cm
(11.8 in.)
*1
*1
*1
Page 204 of 586
Features of your vehicle
108
4
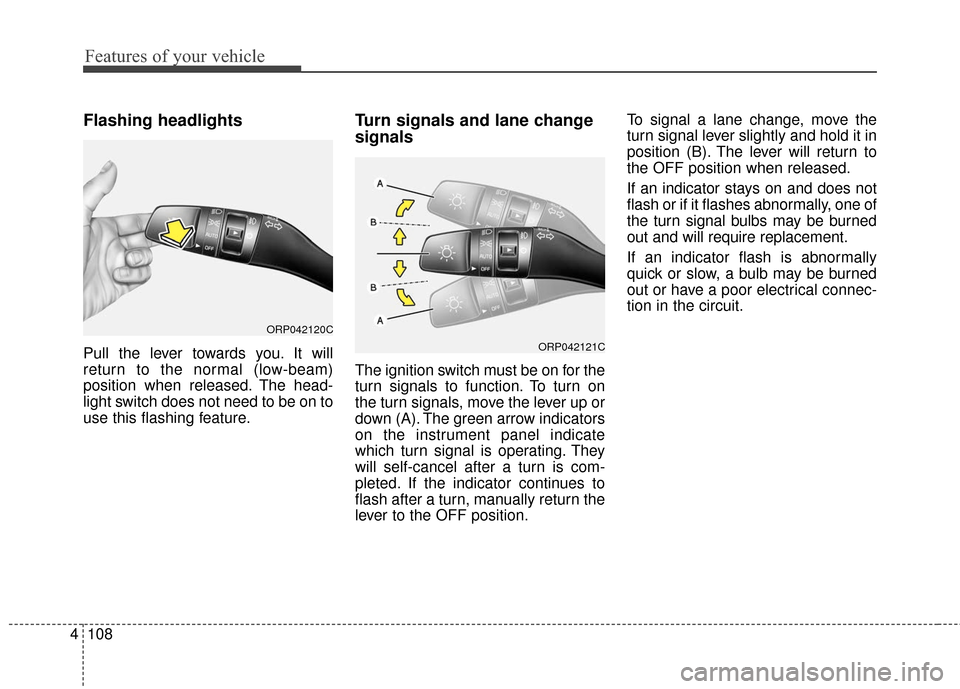
Flashing headlights
Pull the lever towards you. It will
return to the normal (low-beam)
position when released. The head-
light switch does not need to be on to
use this flashing feature.
Turn signals and lane change
signals
The ignition switch must be on for the
turn signals to function. To turn on
the turn signals, move the lever up or
down (A). The green arrow indicators
on the instrument panel indicate
which turn signal is operating. They
will self-cancel after a turn is com-
pleted. If the indicator continues to
flash after a turn, manually return the
lever to the OFF position. To signal a lane change, move the
turn signal lever slightly and hold it in
position (B). The lever will return to
the OFF position when released.
If an indicator stays on and does not
flash or if it flashes abnormally, one of
the turn signal bulbs may be burned
out and will require replacement.
If an indicator flash is abnormally
quick or slow, a bulb may be burned
out or have a poor electrical connec-
tion in the circuit.
ORP042120C
ORP042121C
Page 211 of 586
4115
Features of your vehicle
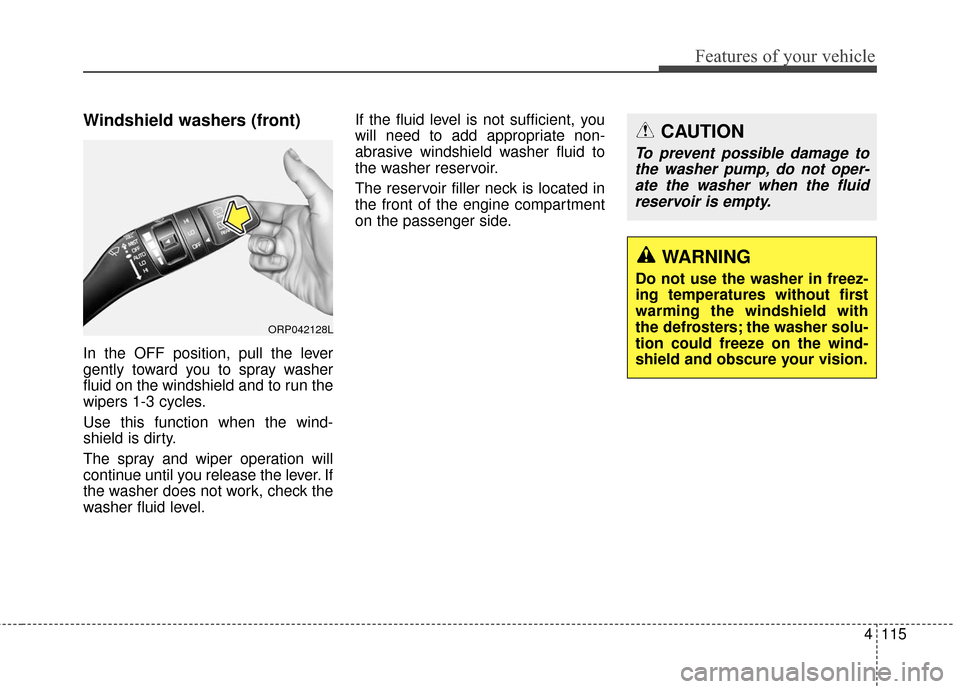
Windshield washers (front)
In the OFF position, pull the lever
gently toward you to spray washer
fluid on the windshield and to run the
wipers 1-3 cycles.
Use this function when the wind-
shield is dirty.
The spray and wiper operation will
continue until you release the lever. If
the washer does not work, check the
washer fluid level.If the fluid level is not sufficient, you
will need to add appropriate non-
abrasive windshield washer fluid to
the washer reservoir.
The reservoir filler neck is located in
the front of the engine compartment
on the passenger side.
ORP042128L
WARNING
Do not use the washer in freez-
ing temperatures without first
warming the windshield with
the defrosters; the washer solu-
tion could freeze on the wind-
shield and obscure your vision.
CAUTION
To prevent possible damage to
the washer pump, do not oper-ate the washer when the fluidreservoir is empty.
Page 222 of 586
Features of your vehicle
126
4
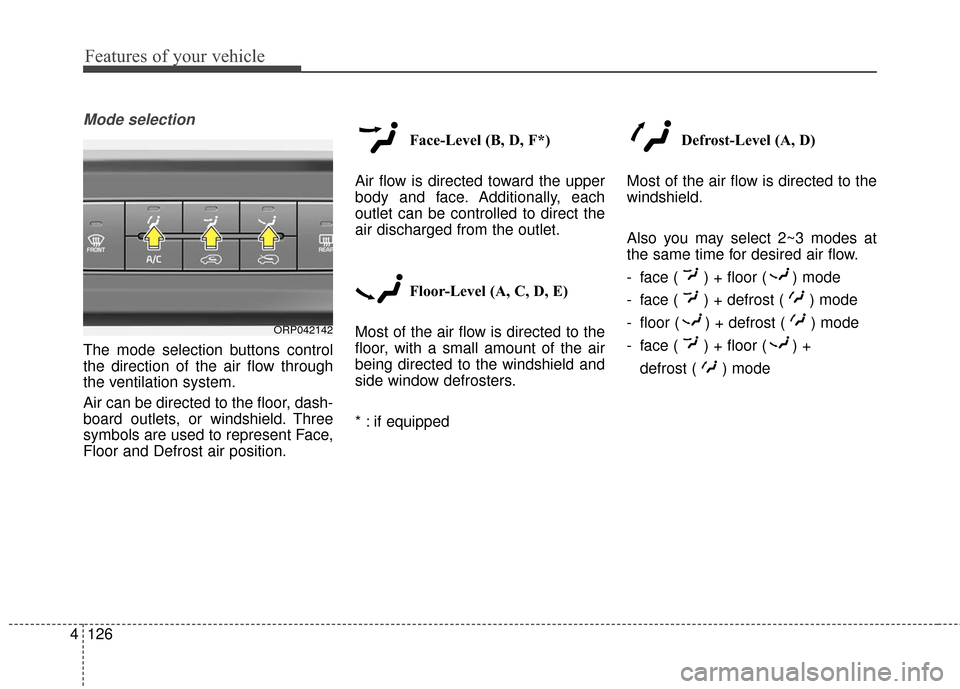
Mode selection
The mode selection buttons control
the direction of the air flow through
the ventilation system.
Air can be directed to the floor, dash-
board outlets, or windshield. Three
symbols are used to represent Face,
Floor and Defrost air position. Face-Level (B, D, F*)
Air flow is directed toward the upper
body and face. Additionally, each
outlet can be controlled to direct the
air discharged from the outlet.
Floor-Level (A, C, D, E)
Most of the air flow is directed to the
floor, with a small amount of the air
being directed to the windshield and
side window defrosters.
* : if equipped Defrost-Level (A, D)
Most of the air flow is directed to the
windshield.
Also you may select 2~3 modes at
the same time for desired air flow.
- face ( ) + floor ( ) mode
- face ( ) + defrost ( ) mode
- floor ( ) + defrost ( ) mode
- face ( ) + floor ( ) + defrost ( ) mode
ORP042142
Page 234 of 586
Features of your vehicle
138
4
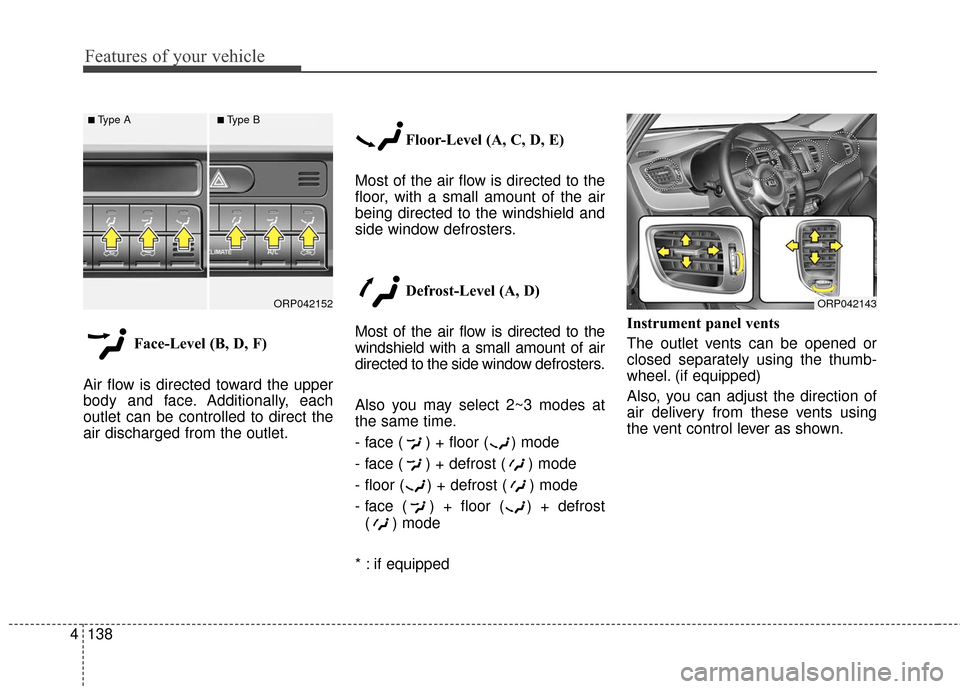
Face-Level (B, D, F)
Air flow is directed toward the upper
body and face. Additionally, each
outlet can be controlled to direct the
air discharged from the outlet. Floor-Level (A, C, D, E)
Most of the air flow is directed to the
floor, with a small amount of the air
being directed to the windshield and
side window defrosters.
Defrost-Level (A, D)
Most of the air flow is directed to the
windshield with a small amount of air
directed to the side window defrosters.
Also you may select 2~3 modes at
the same time.
- face ( ) + floor ( ) mode
- face ( ) + defrost ( ) mode
- floor ( ) + defrost ( ) mode
- face ( ) + floor ( ) + defrost ( ) mode
* : if equipped Instrument panel vents
The outlet vents can be opened or
closed separately using the thumb-
wheel. (if equipped)
Also, you can adjust the direction of
air delivery from these vents using
the vent control lever as shown.
ORP042143ORP042152
■Type A■Type B
Page 246 of 586

Features of your vehicle
150
4
This indicator illuminates
when the auto defogging
system senses the mois-
ture of inside the wind-
shield and operates.
If more moisture is in the vehicle,
higher steps operate as follow.
Step 1 : Outside air position
Step 2 : Blowing air flow toward the windshield
Step 3 : Operating the air conditioning
Step 4 : Increasing air flow toward the windshield If your vehicle is equipped with the
auto defogging system, it is automat-
ically activated when the conditions
are met. However, if you would like to
cancel the auto defogging system,
press the front defroster button 4
times within 2 seconds while press-
ing the AUTO button. The indicator
will blink 3 times to notify you that the
system is cancelled.
To use the auto defogging system
again, follow the procedures men-
tioned above.
If the battery has been disconnected
or discharged, it resets to the auto
defogging status.
✽ ✽
NOTICE
When above indicator is turned on,
the mode indicator will goes out.
If the mode button is manually
selected, the selected mode is dis-
played for 3 seconds and then goes
out. However, the mode will still
work with the selected mode.
✽ ✽NOTICE
If the A/C off is manually selected
while the auto defogging system is
on, the auto defogging indicator will
blink 3 times to give notice that the
A/C off can not be selected.
CAUTION
Do not remove the sensor cover
located on the upper end of thedriver side windshield glass.Damage to the system partscould occur and may not be cov-ered by your vehicle warranty.