reset KIA Sedona 2008 2.G Owner's Manual
[x] Cancel search | Manufacturer: KIA, Model Year: 2008, Model line: Sedona, Model: KIA Sedona 2008 2.GPages: 339, PDF Size: 6.71 MB
Page 28 of 339
319
Features of your vehicle
How to reset the power sliding door
and power tailgate
If the battery has been discharged or dis-
connected, the related fuse has been
replaced or disconnected, and the power
sliding door or power tailgate doesn't
work properly, the power sliding door and
power tailgate must be reset as follows:
1. Put the shift lever in the P (Park) for
automatic transaxle.
2. Close the sliding door's windows and
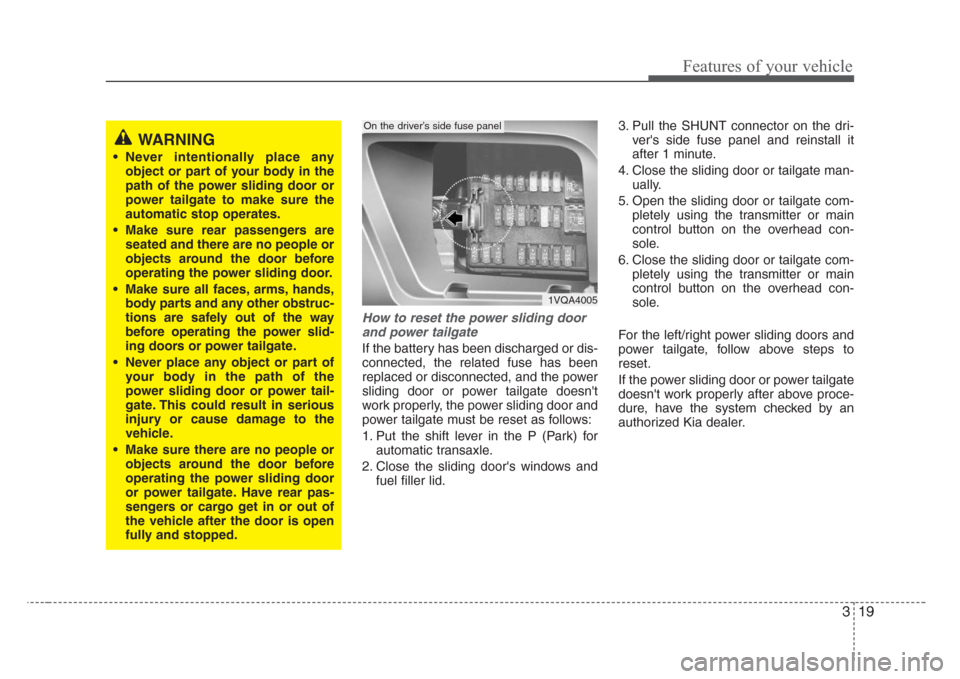
fuel filler lid.3. Pull the SHUNT connector on the dri-
ver's side fuse panel and reinstall it
after 1 minute.
4. Close the sliding door or tailgate man-
ually.
5. Open the sliding door or tailgate com-
pletely using the transmitter or main
control button on the overhead con-
sole.
6. Close the sliding door or tailgate com-
pletely using the transmitter or main
control button on the overhead con-
sole.
For the left/right power sliding doors and
power tailgate, follow above steps to
reset.
If the power sliding door or power tailgate
doesn't work properly after above proce-
dure, have the system checked by an
authorized Kia dealer.
WARNING
• Never intentionally place any
object or part of your body in the
path of the power sliding door or
power tailgate to make sure the
automatic stop operates.
• Make sure rear passengers are
seated and there are no people or
objects around the door before
operating the power sliding door.
• Make sure all faces, arms, hands,
body parts and any other obstruc-
tions are safely out of the way
before operating the power slid-
ing doors or power tailgate.
• Never place any object or part of
your body in the path of the
power sliding door or power tail-
gate. This could result in serious
injury or cause damage to the
vehicle.
• Make sure there are no people or
objects around the door before
operating the power sliding door
or power tailgate. Have rear pas-
sengers or cargo get in or out of
the vehicle after the door is open
fully and stopped.
1VQA4005
On the driver’s side fuse panel
Page 37 of 339
Features of your vehicle
28 3
Automatic power window down
(driver’s window)
Depressing the power window switch
momentarily to the second detent posi-
tion (9) completely lowers the driver’s
window even when the switch is
released. To stop the window at the
desired position while the window is in
operation, pull up the switch momentarily
to the opposite direction of the window
movement.
If the power window is not operated cor-
rectly, the automatic power window sys-
tem must be reset as follows:
1. Turn the ignition key to ON position.
2. Close driver’s window and continue
pulling up on driver’s power window
switch for at least 1 second after the
window is completely closed.Power window lock switch
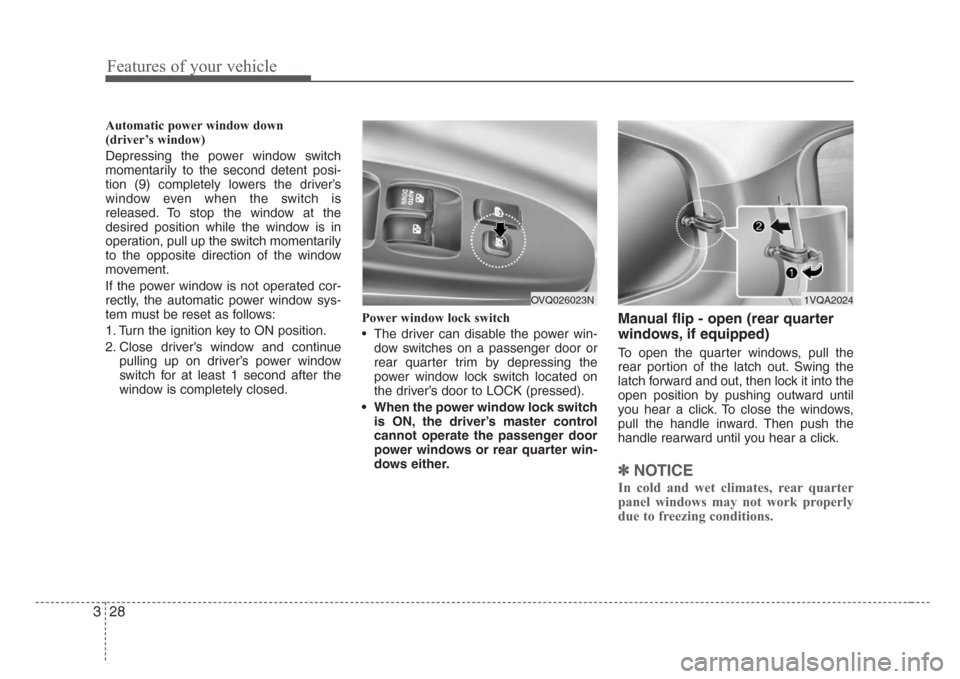
• The driver can disable the power win-
dow switches on a passenger door or
rear quarter trim by depressing the
power window lock switch located on
the driver’s door to LOCK (pressed).
• When the power window lock switch
is ON, the driver’s master control
cannot operate the passenger door
power windows or rear quarter win-
dows either.
Manual flip - open (rear quarter
windows, if equipped)
To open the quarter windows, pull the
rear portion of the latch out. Swing the
latch forward and out, then lock it into the
open position by pushing outward until
you hear a click. To close the windows,
pull the handle inward. Then push the
handle rearward until you hear a click.
✽
NOTICE
In cold and wet climates, rear quarter
panel windows may not work properly
due to freezing conditions.
1VQA2024OVQ026023N
Page 45 of 339
Features of your vehicle
36 3
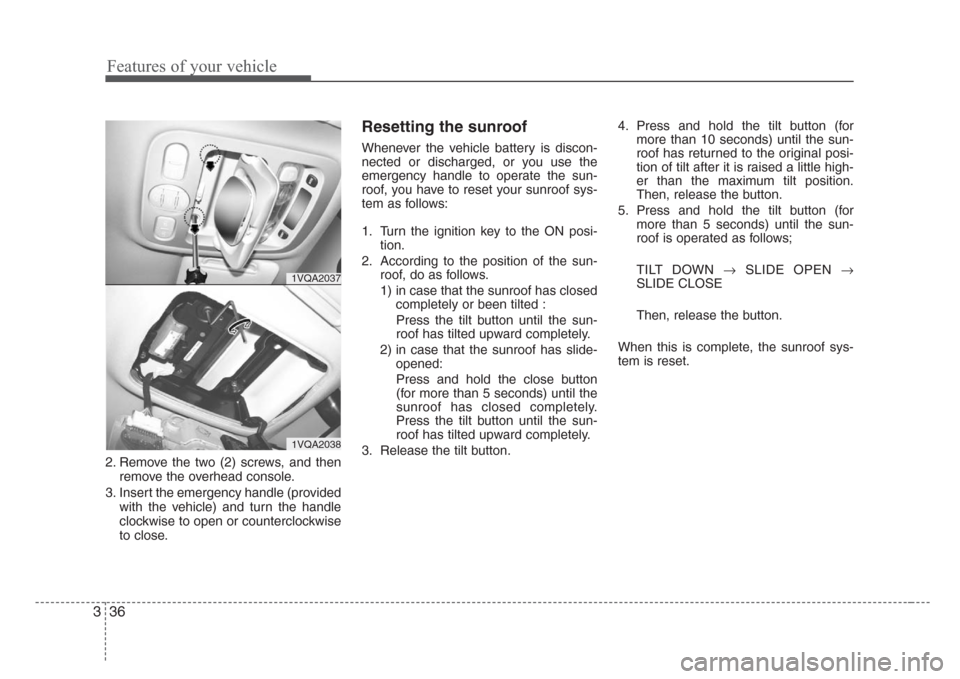
2. Remove the two (2) screws, and then
remove the overhead console.
3. Insert the emergency handle (provided
with the vehicle) and turn the handle
clockwise to open or counterclockwise
to close.
Resetting the sunroof
Whenever the vehicle battery is discon-
nected or discharged, or you use the
emergency handle to operate the sun-
roof, you have to reset your sunroof sys-
tem as follows:
1. Turn the ignition key to the ON posi-
tion.
2. According to the position of the sun-
roof, do as follows.
1) in case that the sunroof has closed
completely or been tilted :
Press the tilt button until the sun-
roof has tilted upward completely.
2) in case that the sunroof has slide-
opened:
Press and hold the close button
(for more than 5 seconds) until the
sunroof has closed completely.
Press the tilt button until the sun-
roof has tilted upward completely.
3. Release the tilt button.4. Press and hold the tilt button (for
more than 10 seconds) until the sun-
roof has returned to the original posi-
tion of tilt after it is raised a little high-
er than the maximum tilt position.
Then, release the button.
5. Press and hold the tilt button (for
more than 5 seconds) until the sun-
roof is operated as follows;
TILT DOWN →SLIDE OPEN →
SLIDE CLOSE
Then, release the button.
When this is complete, the sunroof sys-
tem is reset.
1VQA2037
1VQA2038
Page 119 of 339
Features of your vehicle
110 3
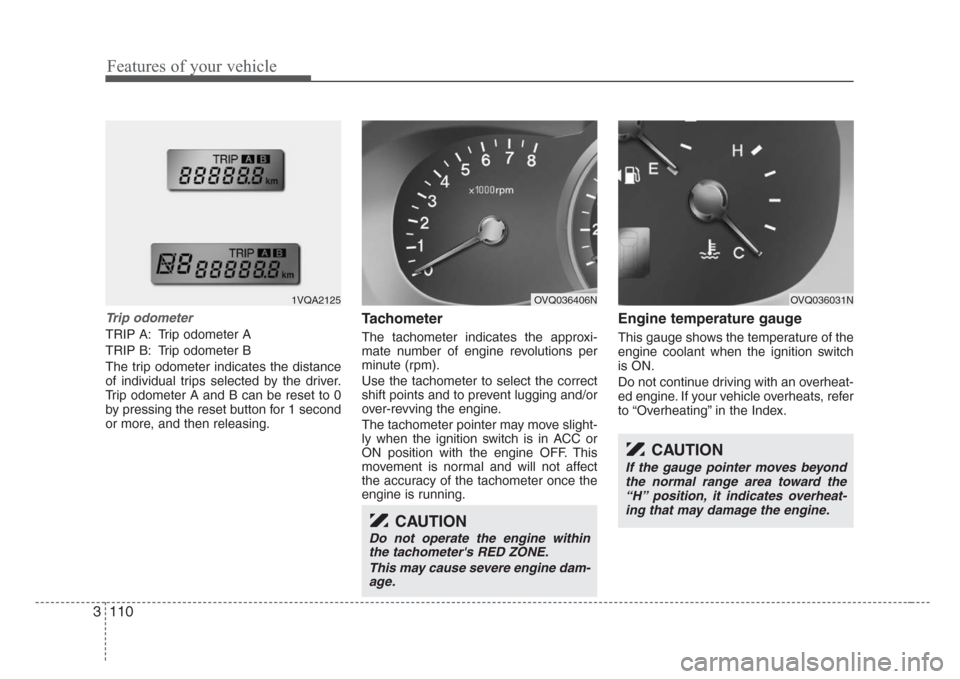
Trip odometer
TRIP A: Trip odometer A
TRIP B: Trip odometer B
The trip odometer indicates the distance
of individual trips selected by the driver.
Trip odometer A and B can be reset to 0
by pressing the reset button for 1 second
or more, and then releasing.
Tachometer
The tachometer indicates the approxi-
mate number of engine revolutions per
minute (rpm).
Use the tachometer to select the correct
shift points and to prevent lugging and/or
over-revving the engine.
The tachometer pointer may move slight-
ly when the ignition switch is in ACC or
ON position with the engine OFF. This
movement is normal and will not affect
the accuracy of the tachometer once the
engine is running.
Engine temperature gauge
This gauge shows the temperature of the
engine coolant when the ignition switch
is ON.
Do not continue driving with an overheat-
ed engine. If your vehicle overheats, refer
to “Overheating” in the Index.
CAUTION
Do not operate the engine within
the tachometer's RED ZONE.
This may cause severe engine dam-
age.
CAUTION
If the gauge pointer moves beyond
the normal range area toward the
“H” position, it indicates overheat-
ing that may damage the engine.
OVQ036031NOVQ036406N1VQA2125
Page 121 of 339
Features of your vehicle
112 3
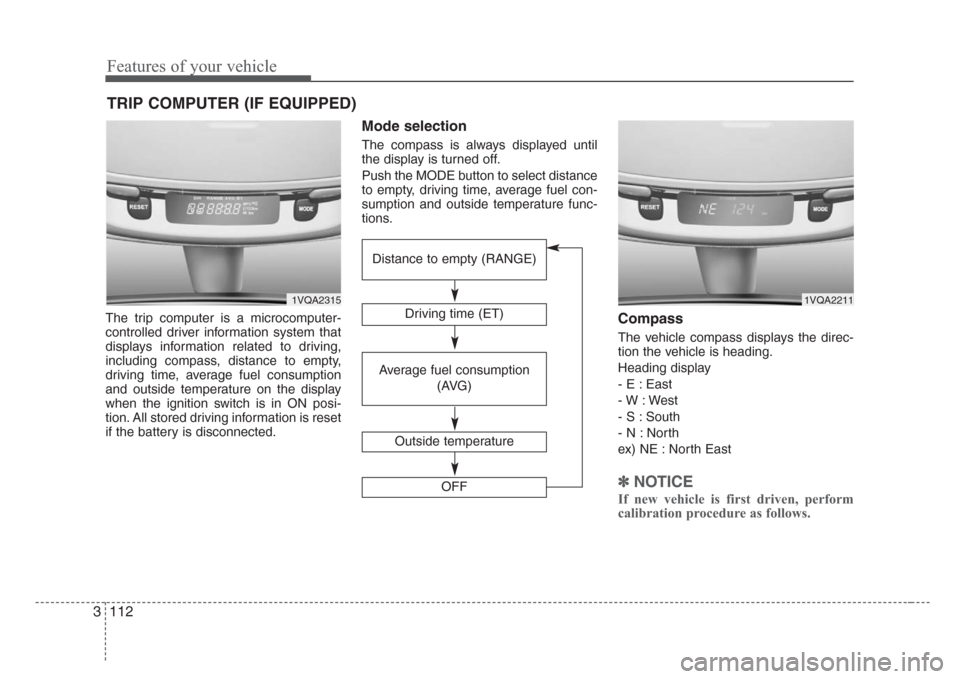
The trip computer is a microcomputer-
controlled driver information system that
displays information related to driving,
including compass, distance to empty,
driving time, average fuel consumption
and outside temperature on the display
when the ignition switch is in ON posi-
tion. All stored driving information is reset
if the battery is disconnected.
Mode selection
The compass is always displayed until
the display is turned off.
Push the MODE button to select distance
to empty, driving time, average fuel con-
sumption and outside temperature func-
tions.
Compass
The vehicle compass displays the direc-
tion the vehicle is heading.
Heading display
- E : East
- W : West
- S : South
- N : North
ex) NE : North East
✽
NOTICE
If new vehicle is first driven, perform
calibration procedure as follows.
TRIP COMPUTER (IF EQUIPPED)
1VQA2315
Driving time (ET)
Average fuel consumption
(AVG)
Outside temperature
OFF
Distance to empty (RANGE)
1VQA2211
Page 123 of 339
Features of your vehicle
114 3
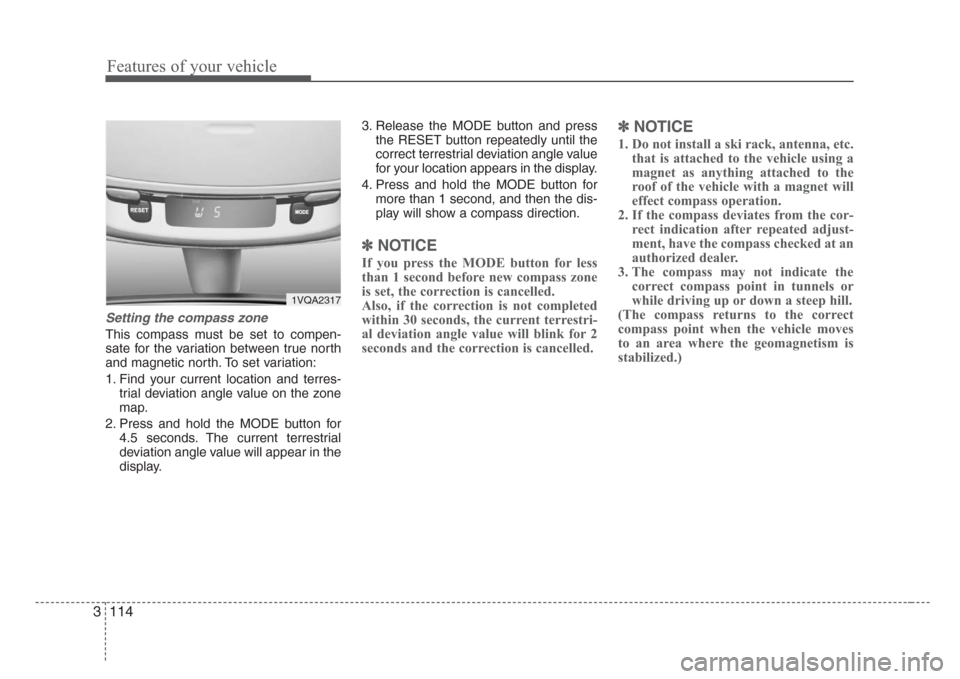
Setting the compass zone
This compass must be set to compen-
sate for the variation between true north
and magnetic north. To set variation:
1. Find your current location and terres-
trial deviation angle value on the zone
map.
2. Press and hold the MODE button for
4.5 seconds. The current terrestrial
deviation angle value will appear in the
display.3. Release the MODE button and press
the RESET button repeatedly until the
correct terrestrial deviation angle value
for your location appears in the display.
4. Press and hold the MODE button for
more than 1 second, and then the dis-
play will show a compass direction.
✽
NOTICE
If you press the MODE button for less
than 1 second before new compass zone
is set, the correction is cancelled.
Also, if the correction is not completed
within 30 seconds, the current terrestri-
al deviation angle value will blink for 2
seconds and the correction is cancelled.
✽
NOTICE
1. Do not install a ski rack, antenna, etc.
that is attached to the vehicle using a
magnet as anything attached to the
roof of the vehicle with a magnet will
effect compass operation.
2. If the compass deviates from the cor-
rect indication after repeated adjust-
ment, have the compass checked at an
authorized dealer.
3. The compass may not indicate the
correct compass point in tunnels or
while driving up or down a steep hill.
(The compass returns to the correct
compass point when the vehicle moves
to an area where the geomagnetism is
stabilized.)
1VQA2317
Page 125 of 339
Features of your vehicle
116 3
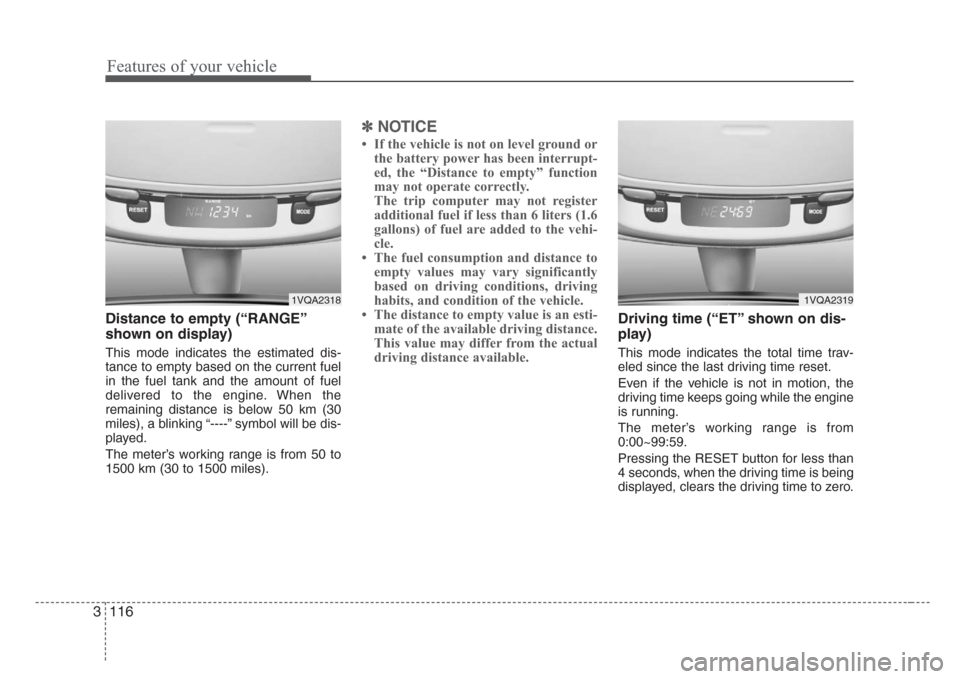
Distance to empty (“RANGE”
shown on display)
This mode indicates the estimated dis-
tance to empty based on the current fuel
in the fuel tank and the amount of fuel
delivered to the engine. When the
remaining distance is below 50 km (30
miles), a blinking “----” symbol will be dis-
played.
The meter’s working range is from 50 to
1500 km (30 to 1500 miles).
✽
NOTICE
• If the vehicle is not on level ground or
the battery power has been interrupt-
ed, the “Distance to empty” function
may not operate correctly.
The trip computer may not register
additional fuel if less than 6 liters (1.6
gallons) of fuel are added to the vehi-
cle.
• The fuel consumption and distance to
empty values may vary significantly
based on driving conditions, driving
habits, and condition of the vehicle.
• The distance to empty value is an esti-
mate of the available driving distance.
This value may differ from the actual
driving distance available.
Driving time (“ET” shown on dis-
play)
This mode indicates the total time trav-
eled since the last driving time reset.
Even if the vehicle is not in motion, the
driving time keeps going while the engine
is running.
The meter’s working range is from
0:00~99:59.
Pressing the RESET button for less than
4 seconds, when the driving time is being
displayed, clears the driving time to zero.
1VQA23191VQA2318
Page 126 of 339
3 117
Features of your vehicle
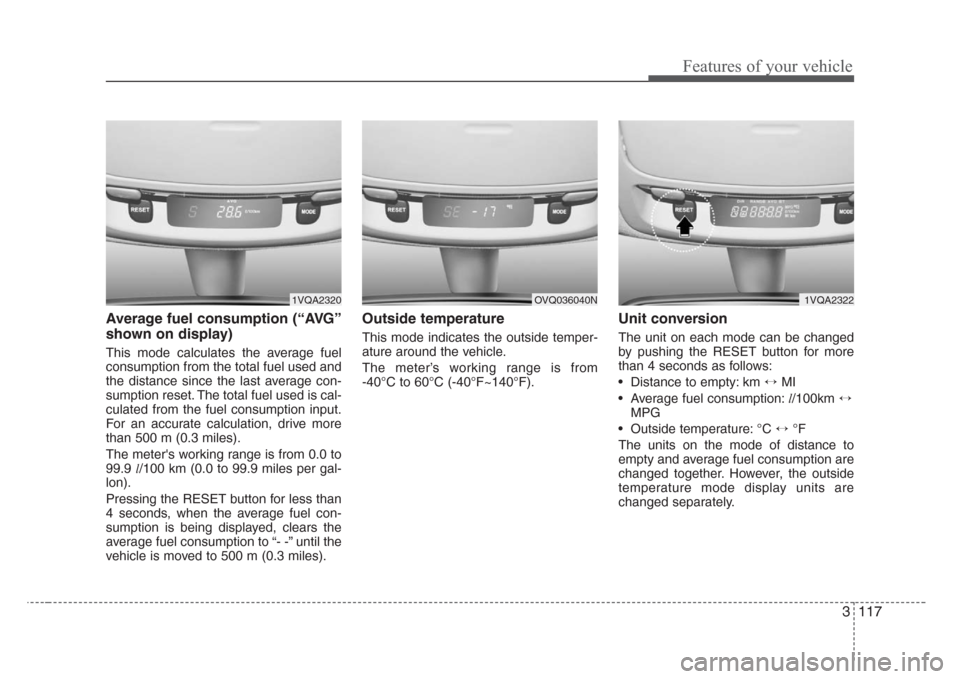
Average fuel consumption (“AVG”
shown on display)
This mode calculates the average fuel
consumption from the total fuel used and
the distance since the last average con-
sumption reset. The total fuel used is cal-
culated from the fuel consumption input.
For an accurate calculation, drive more
than 500 m (0.3 miles).
The meter's working range is from 0.0 to
99.9l/100 km (0.0 to 99.9 miles per gal-
lon).
Pressing the RESET button for less than
4 seconds, when the average fuel con-
sumption is being displayed, clears the
average fuel consumption to “- -” until the
vehicle is moved to 500 m (0.3 miles).
Outside temperature
This mode indicates the outside temper-
ature around the vehicle.
The meter’s working range is from
-40°C to 60°C (-40°F~140°F).
Unit conversion
The unit on each mode can be changed
by pushing the RESET button for more
than 4 seconds as follows:
• Distance to empty: km ↔ MI
• Average fuel consumption:l/100km↔
MPG
• Outside temperature: °C ↔ °F
The units on the mode of distance to
empty and average fuel consumption are
changed together. However, the outside
temperature mode display units are
changed separately.
1VQA23221VQA2320OVQ036040N
Page 159 of 339
Features of your vehicle
150 3
Adjusting the driver and passenger side
temperature equally
1. Press the DUAL button again to deac-
tivate DUAL mode. The passenger
side temperature will be set to the
same as the driver side temperature.
2. Press the left temperature control but-
ton. The driver and passenger side
temperature will be adjusted equally.
Temperature conversion
If the battery has been discharged or dis-
connected, the temperature mode dis-
play will reset to Fahrenheit.
This is normal condition. You can switch
the temperature mode between
Fahrenheit to Centigrade as follows;
While depressing the AUTO button,
depress the OFF button for 3 seconds or
more. The display will change from
Fahrenheit to Centigrade, or from
Centigrade to Fahrenheit.
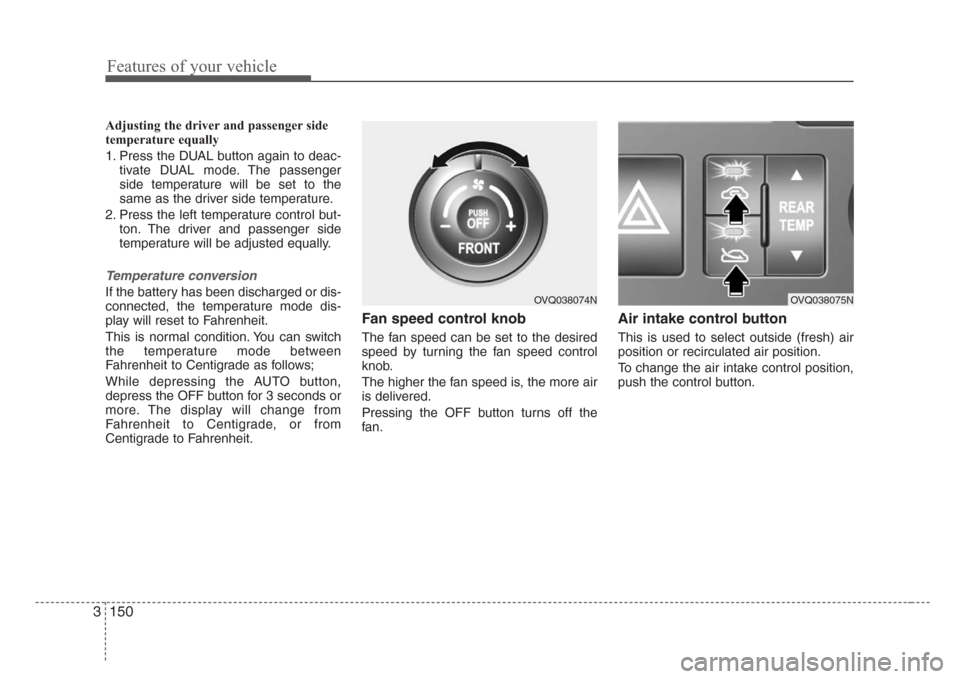
Fan speed control knob
The fan speed can be set to the desired
speed by turning the fan speed control
knob.
The higher the fan speed is, the more air
is delivered.
Pressing the OFF button turns off the
fan.
Air intake control button
This is used to select outside (fresh) air
position or recirculated air position.
To change the air intake control position,
push the control button.
OVQ038074NOVQ038075N
Page 171 of 339
Features of your vehicle
162 3
Defogging logic
Manual climate control system
To reduce the probability of fogging up
the inside of the windshield, the air intake
control is set to the outside (fresh) air
position automatically if any of following
occur.
• The mode is selected to the , or
while the system is activated.
• The ignition switch is turned on while
the mode is selected to the , or
.
• The ignition switch is turned off.
• The fan is off.
• The fan begins to be operated.
Press the air intake control button to
select the recirculated air position while
the ignition switch is on.How to cancel or return defogging logic
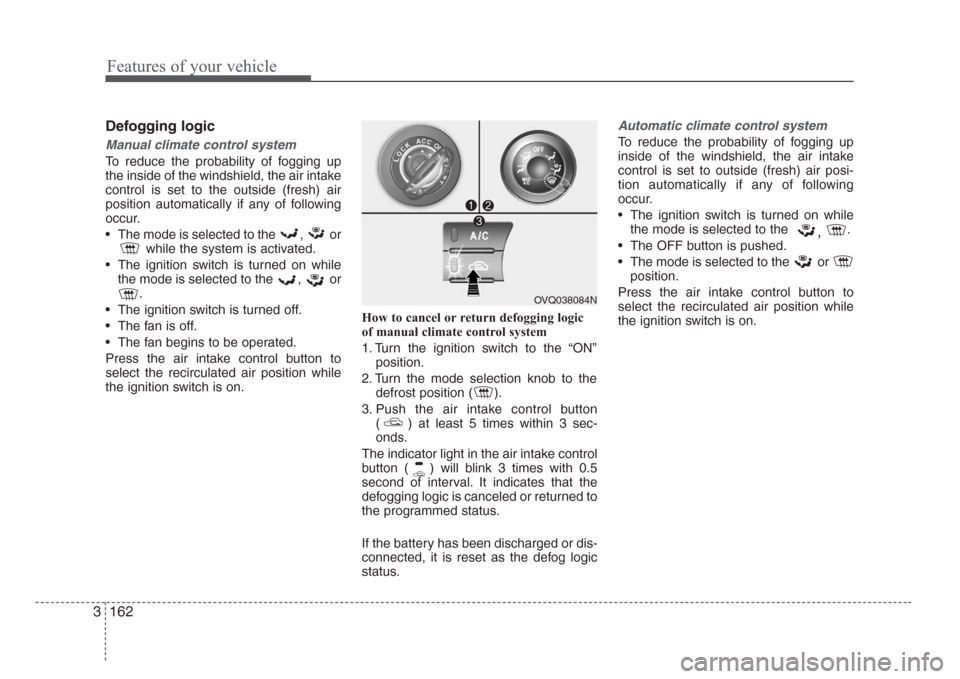
of manual climate control system
1. Turn the ignition switch to the “ON”
position.
2. Turn the mode selection knob to the
defrost position ( ).
3. Push the air intake control button
( ) at least 5 times within 3 sec-
onds.
The indicator light in the air intake control
button ( ) will blink 3 times with 0.5
second of interval. It indicates that the
defogging logic is canceled or returned to
the programmed status.
If the battery has been discharged or dis-
connected, it is reset as the defog logic
status.
Automatic climate control system
To reduce the probability of fogging up
inside of the windshield, the air intake
control is set to outside (fresh) air posi-
tion automatically if any of following
occur.
• The ignition switch is turned on while
the mode is selected to the
,.
• The OFF button is pushed.
• The mode is selected to the or
position.
Press the air intake control button to
select the recirculated air position while
the ignition switch is on.
OVQ038084N