KIA Sedona 2010 2.G Owner's Manual
Manufacturer: KIA, Model Year: 2010, Model line: Sedona, Model: KIA Sedona 2010 2.GPages: 360, PDF Size: 6.17 MB
Page 181 of 360
3171
Features of your vehicle
Rolling code programming
To train a garage door opener (or other
rolling code equipped devices) with the
rolling code feature, follow these instruc-
tions after completing the “Programming”
portion of this text. (A second person
may make the following training proce-
dures quicker & easier.)
4. Locate the “learn” or “smart” button onthe device’s motor head unit. Exact
location and color of the button may
vary by product brand. If there is diffi-
culty locating the “learn” or “smart” but-
ton, reference the device’s owner’s
manual or contact HomeLink at 1-800-
355-3515 or on the internet at
www.homelink.com.
5. Press and release the “learn” or “smart” button on the device’s motor
head unit. You have 30 seconds to
complete step number 6.
6. Return to the vehicle and firmly press and release the programmed
HomeLink button up to three times.
The rolling code equipped device
should now recognize the HomeLink
signal and activate when the
HomeLink button is pressed. The
remaining two buttons may now be
programmed if this has not previously
been done. Refer to the
“Programming” portion of this text.
Operating HomeLink
To operate, simply press the pro-
grammed HomeLink button. Activation
will now occur for the trained product
(garage door, security system, entry door
lock, estate gate, or home or office light-
ing). For convenience, the hand-held
transmitter of the device may also be
used at any time. The HomeLink
Wireless Controls System (once pro-
grammed) or the original hand-held
transmitter may be used to activate the
device (e.g. garage door, entry door lock,
etc.). In the event that there are still pro-
gramming difficulties, contact HomeLink
at 1-800-355-3515 or on the internet at
www.homelink.com.
Erasing programmed HomeLink
buttons
To erase the three programmed buttons
(individual buttons cannot be erased):
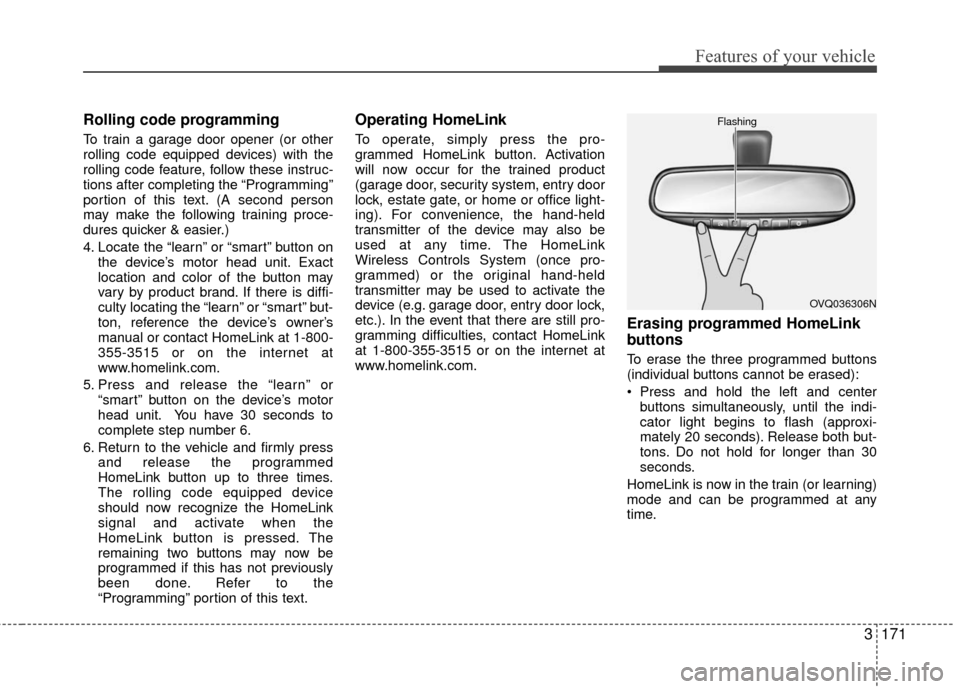
Press and hold the left and centerbuttons simultaneously, until the indi-
cator light begins to flash (approxi-
mately 20 seconds). Release both but-
tons. Do not hold for longer than 30
seconds.
HomeLink is now in the train (or learning)
mode and can be programmed at any
time.
OVQ036306N
Flashing
Page 182 of 360
Features of your vehicle
172
3
Reprogramming a single
HomeLink button
To program a device to HomeLink using
a HomeLink button previously trained,
follow these steps:
1. Press and hold the desired HomeLink
button. Do NOT release until step 4
has been completed.
2. When the indicator light begins to flash slowly (after 20 seconds), position the
hand-held transmitter 1 to 3 inches
away from the HomeLink surface.
3. Press and hold the hand-held trans- mitter button (or press and “cycle” - as
described in “Canadian Programming”
above).
4. The HomeLink indicator light will flash, first slowly and then rapidly. When the
indicator light begins to flash rapidly,
release both buttons.
The previous device has now been
erased and the new device can be acti-
vated by pushing the HomeLink button
that has just been programmed. This pro-
cedure will not affect any other pro-
grammed HomeLink buttons.
Gate operator programming &
canadian programming
During programming, your hand-held
transmitter may automatically stop trans-
mitting. Continue to press and hold the
HomeLink button (note steps 2 through 4
in the “Programming” portion of this text)
while you press and re-press (“cycle”)
your handheld transmitter every two sec-
onds until the frequency signal has been
learned. The indicator light will flash
slowly and then rapidly after several sec-
onds upon successful training.
Accessories
If you would like additional information on
the HomeLink Wireless Control System,
HomeLink compatible products, or to
purchase other accessories such as the
HomeLink® Lighting Package, please
contact HomeLink at 1-800-355-3515 or
on the internet at www.homelink.com.
This device complies with Part 15 of
the FCC rules. Operation is subject to
the following two conditions:
1. This device may not cause harmful interference, and
2. This device must accept any interfer- ence received, including interference
that may cause undesired operation.
CAUTION
If programming a garage dooropener or gate, it is advised to unplug the device during the“cycling” process to prevent possi-ble motor burn-up.
WARNING
The HomeLink transmitter has been
tested and complies with FCC and
DOC/MDC rules. Changes or modifi-
cations not expressly approved by
the party responsible for compli-
ance could void the user’s authority
to operate the equipment.
IC: 4112104541A Gentex
MODEL/FCC ID: NZLSTDHL3
Page 183 of 360
3173
Features of your vehicle
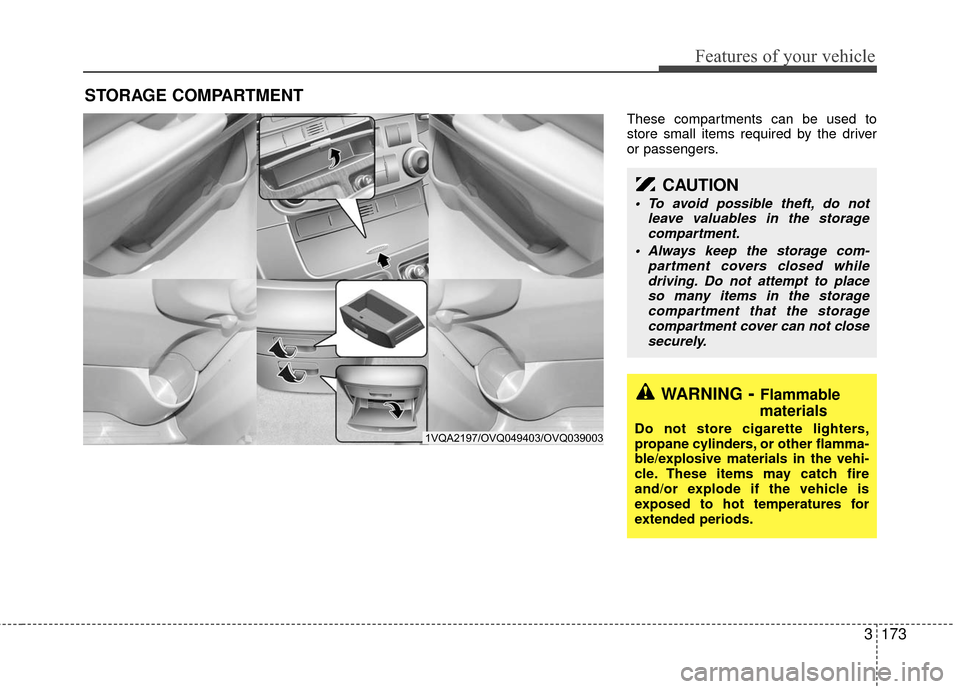
These compartments can be used to
store small items required by the driver
or passengers.
STORAGE COMPARTMENT
WARNING- Flammable
materials
Do not store cigarette lighters,
propane cylinders, or other flamma-
ble/explosive materials in the vehi-
cle. These items may catch fire
and/or explode if the vehicle is
exposed to hot temperatures for
extended periods.
CAUTION
To avoid possible theft, do not
leave valuables in the storagecompartment.
Always keep the storage com- partment covers closed whiledriving. Do not attempt to placeso many items in the storagecompartment that the storage compartment cover can not closesecurely.
1VQA2197/OVQ049403/OVQ039003
Page 184 of 360
Features of your vehicle
174
3
Glove box
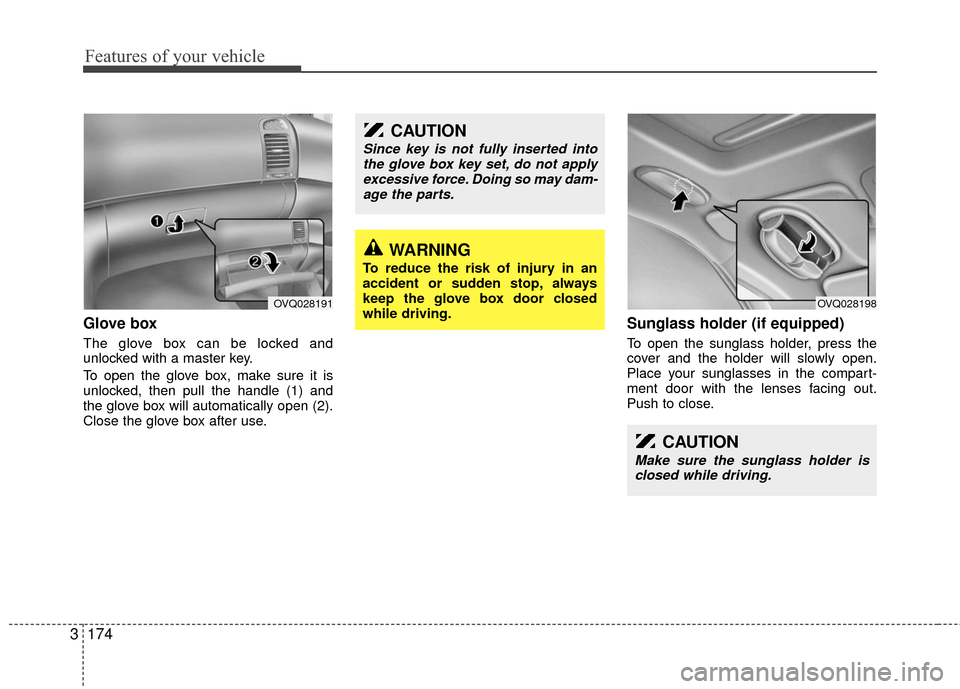
The glove box can be locked and
unlocked with a master key.
To open the glove box, make sure it is
unlocked, then pull the handle (1) and
the glove box will automatically open (2).
Close the glove box after use.
Sunglass holder (if equipped)
To open the sunglass holder, press the
cover and the holder will slowly open.
Place your sunglasses in the compart-
ment door with the lenses facing out.
Push to close.
CAUTION
Since key is not fully inserted into
the glove box key set, do not apply excessive force. Doing so may dam-age the parts.
WARNING
To reduce the risk of injury in an
accident or sudden stop, always
keep the glove box door closed
while driving.
CAUTION
Make sure the sunglass holder is closed while driving.
OVQ028191OVQ028198
Page 185 of 360
3175
Features of your vehicle
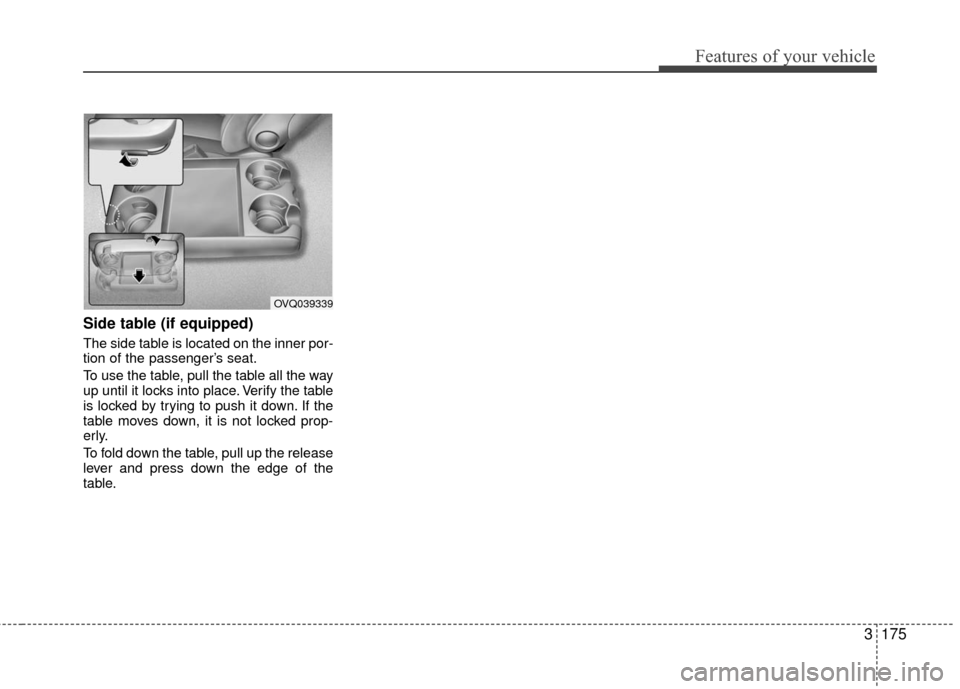
Side table (if equipped)
The side table is located on the inner por-
tion of the passenger’s seat.
To use the table, pull the table all the way
up until it locks into place. Verify the table
is locked by trying to push it down. If the
table moves down, it is not locked prop-
erly.
To fold down the table, pull up the release
lever and press down the edge of the
table.
OVQ039339
Page 186 of 360
Features of your vehicle
176
3
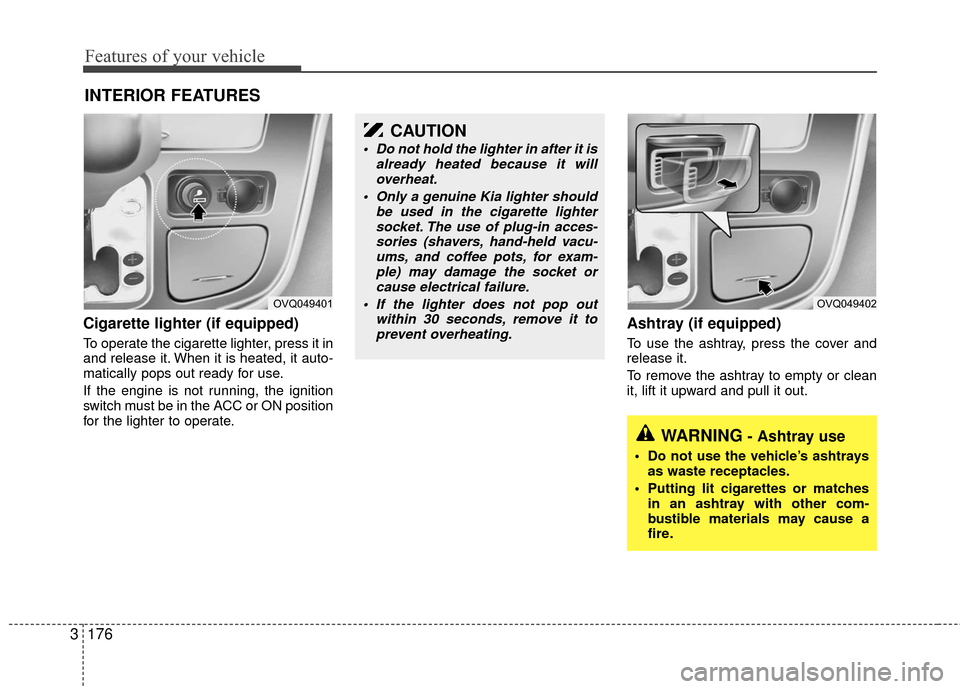
Cigarette lighter (if equipped)
To operate the cigarette lighter, press it in
and release it. When it is heated, it auto-
matically pops out ready for use.
If the engine is not running, the ignition
switch must be in the ACC or ON position
for the lighter to operate.
Ashtray (if equipped)
To use the ashtray, press the cover and
release it.
To remove the ashtray to empty or clean
it, lift it upward and pull it out.
INTERIOR FEATURES
OVQ049401OVQ049402
CAUTION
Do not hold the lighter in after it is
already heated because it willoverheat.
Only a genuine Kia lighter should be used in the cigarette lightersocket. The use of plug-in acces-sories (shavers, hand-held vacu-ums, and coffee pots, for exam-ple) may damage the socket orcause electrical failure.
If the lighter does not pop out within 30 seconds, remove it toprevent overheating.
WARNING- Ashtray use
Do not use the vehicle’s ashtrays as waste receptacles.
Putting lit cigarettes or matches in an ashtray with other com-
bustible materials may cause a
fire.
Page 187 of 360
3177
Features of your vehicle
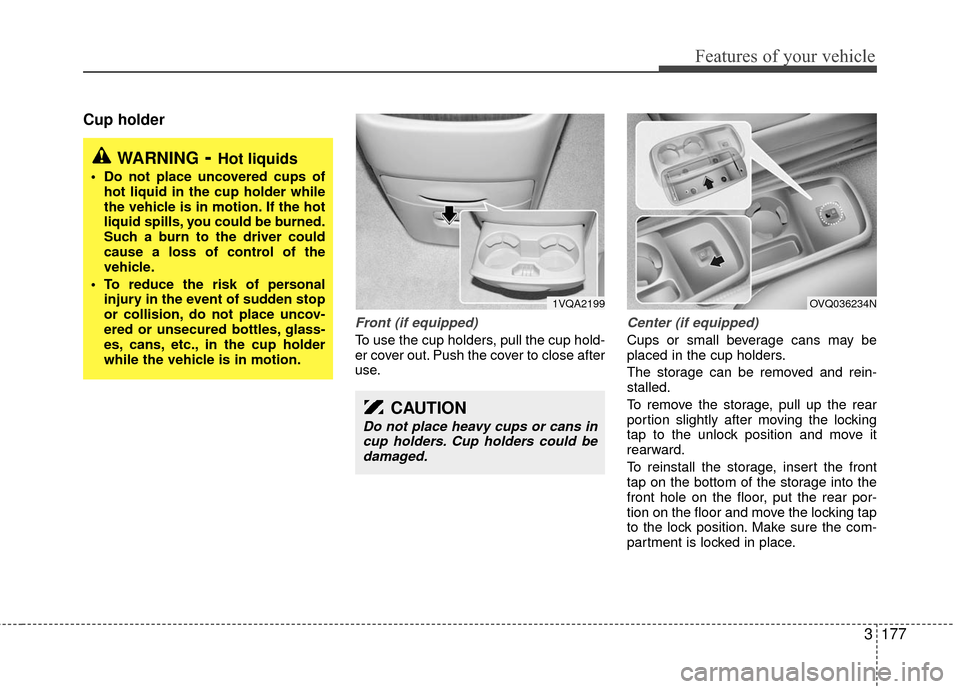
Cup holder
Front (if equipped)
To use the cup holders, pull the cup hold-
er cover out. Push the cover to close after
use.
Center (if equipped)
Cups or small beverage cans may be
placed in the cup holders.
The storage can be removed and rein-
stalled.
To remove the storage, pull up the rear
portion slightly after moving the locking
tap to the unlock position and move it
rearward.
To reinstall the storage, insert the front
tap on the bottom of the storage into the
front hole on the floor, put the rear por-
tion on the floor and move the locking tap
to the lock position. Make sure the com-
partment is locked in place.
WARNING- Hot liquids
Do not place uncovered cups ofhot liquid in the cup holder while
the vehicle is in motion. If the hot
liquid spills, you could be burned.
Such a burn to the driver could
cause a loss of control of the
vehicle.
To reduce the risk of personal injury in the event of sudden stop
or collision, do not place uncov-
ered or unsecured bottles, glass-
es, cans, etc., in the cup holder
while the vehicle is in motion.
1VQA2199
CAUTION
Do not place heavy cups or cans incup holders. Cup holders could be damaged.
OVQ036234N
Page 188 of 360
Features of your vehicle
178
3
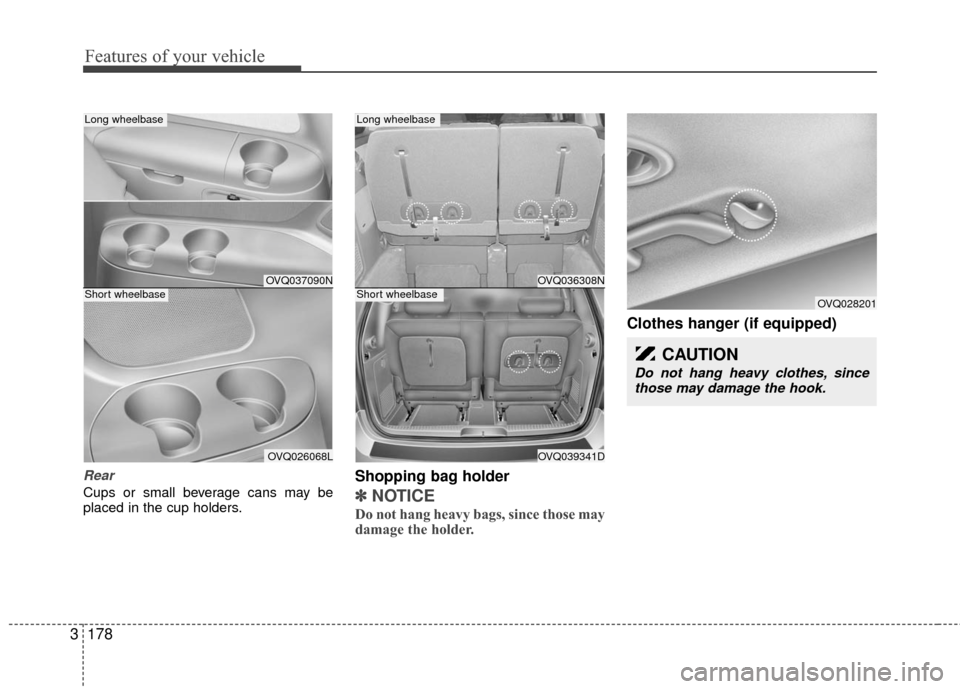
Rear
Cups or small beverage cans may be
placed in the cup holders.
Shopping bag holder
✽ ✽
NOTICE
Do not hang heavy bags, since those may
damage the holder.
Clothes hanger (if equipped)
OVQ037090N
OVQ026068L
Long wheelbase
Short wheelbaseOVQ036308N
OVQ039341D
Long wheelbase
Short wheelbaseOVQ028201
CAUTION
Do not hang heavy clothes, since
those may damage the hook.
Page 189 of 360
3179
Features of your vehicle
Sunvisor
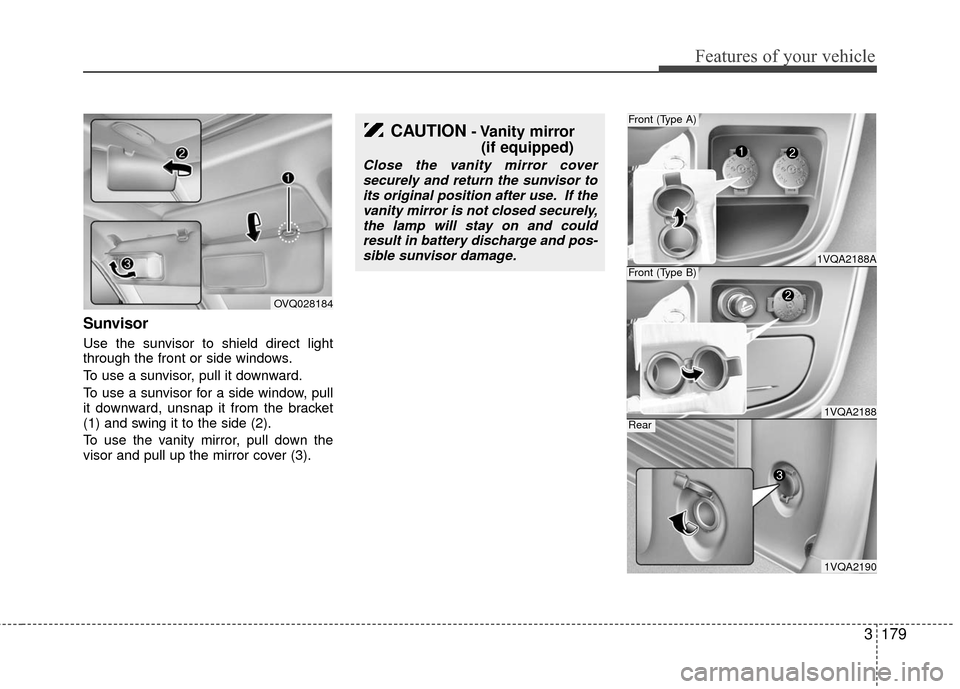
Use the sunvisor to shield direct light
through the front or side windows.
To use a sunvisor, pull it downward.
To use a sunvisor for a side window, pull
it downward, unsnap it from the bracket
(1) and swing it to the side (2).
To use the vanity mirror, pull down the
visor and pull up the mirror cover (3).
OVQ028184
CAUTION- Vanity mirror (if equipped)
Close the vanity mirror cover
securely and return the sunvisor toits original position after use. If thevanity mirror is not closed securely,the lamp will stay on and couldresult in battery discharge and pos-sible sunvisor damage.
1VQA2188A
Front (Type A)
1VQA2188
Front (Type B)
1VQA2190
Rear
Page 190 of 360
Features of your vehicle
180
3
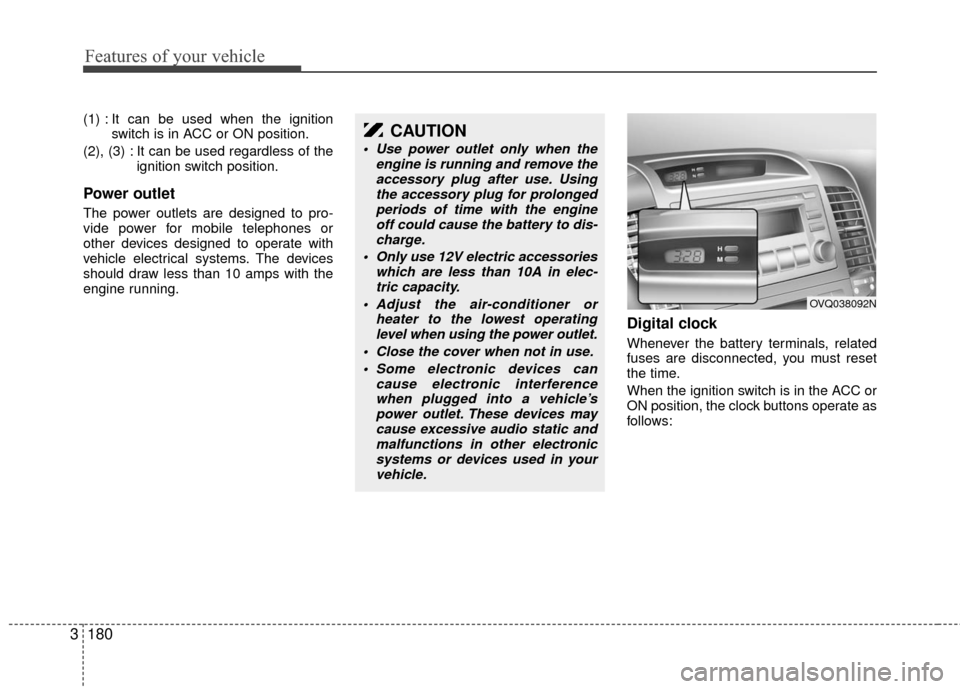
(1) : It can be used when the ignition
switch is in ACC or ON position.
(2), (3) : It can be used regardless of the ignition switch position.
Power outlet
The power outlets are designed to pro-
vide power for mobile telephones or
other devices designed to operate with
vehicle electrical systems. The devices
should draw less than 10 amps with the
engine running.
Digital clock
Whenever the battery terminals, related
fuses are disconnected, you must reset
the time.
When the ignition switch is in the ACC or
ON position, the clock buttons operate as
follows:
CAUTION
Use power outlet only when theengine is running and remove theaccessory plug after use. Usingthe accessory plug for prolonged periods of time with the engineoff could cause the battery to dis- charge.
Only use 12V electric accessories which are less than 10A in elec-tric capacity.
Adjust the air-conditioner or heater to the lowest operatinglevel when using the power outlet.
Close the cover when not in use. Some electronic devices can cause electronic interferencewhen plugged into a vehicle’spower outlet. These devices may cause excessive audio static andmalfunctions in other electronicsystems or devices used in your vehicle.
OVQ038092N