KIA Sedona 2010 2.G Service Manual
Manufacturer: KIA, Model Year: 2010, Model line: Sedona, Model: KIA Sedona 2010 2.GPages: 360, PDF Size: 6.17 MB
Page 41 of 360
Features of your vehicle
32
3
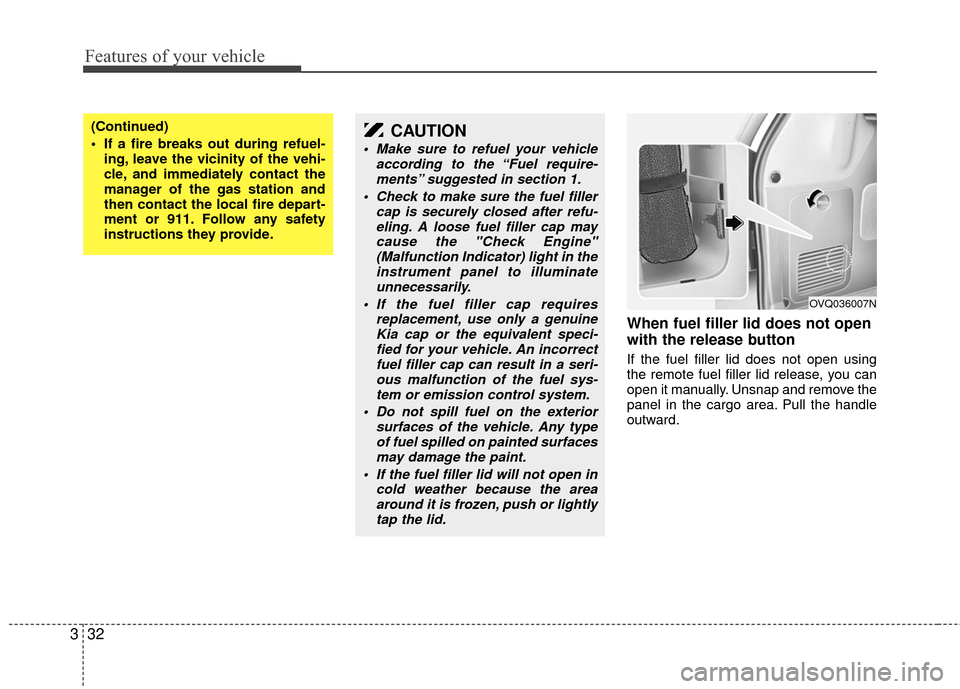
When fuel filler lid does not open
with the release button
If the fuel filler lid does not open using
the remote fuel filler lid release, you can
open it manually. Unsnap and remove the
panel in the cargo area. Pull the handle
outward.
(Continued)
If a fire breaks out during refuel-
ing, leave the vicinity of the vehi-
cle, and immediately contact the
manager of the gas station and
then contact the local fire depart-
ment or 911. Follow any safety
instructions they provide.CAUTION
Make sure to refuel your vehicle according to the “Fuel require-ments” suggested in section 1.
Check to make sure the fuel filler cap is securely closed after refu-eling. A loose fuel filler cap maycause the "Check Engine"(Malfunction Indicator) light in theinstrument panel to illuminateunnecessarily.
If the fuel filler cap requires replacement, use only a genuineKia cap or the equivalent speci-fied for your vehicle. An incorrect fuel filler cap can result in a seri-ous malfunction of the fuel sys-tem or emission control system.
Do not spill fuel on the exterior surfaces of the vehicle. Any typeof fuel spilled on painted surfacesmay damage the paint.
If the fuel filler lid will not open in cold weather because the areaaround it is frozen, push or lightlytap the lid.
OVQ036007N
Page 42 of 360
333
Features of your vehicle
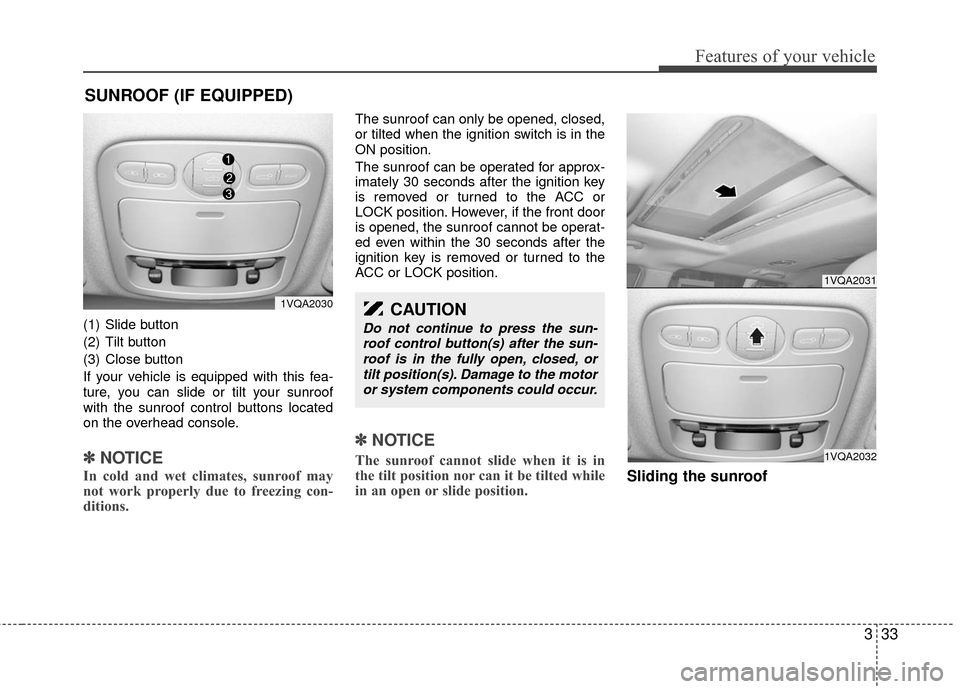
(1) Slide button
(2) Tilt button
(3) Close button
If your vehicle is equipped with this fea-
ture, you can slide or tilt your sunroof
with the sunroof control buttons located
on the overhead console.
✽ ✽NOTICE
In cold and wet climates, sunroof may
not work properly due to freezing con-
ditions.
The sunroof can only be opened, closed,
or tilted when the ignition switch is in the
ON position.
The sunroof can be operated for approx-
imately 30 seconds after the ignition key
is removed or turned to the ACC or
LOCK position. However, if the front door
is opened, the sunroof cannot be operat-
ed even within the 30 seconds after the
ignition key is removed or turned to the
ACC or LOCK position.
✽ ✽NOTICE
The sunroof cannot slide when it is in
the tilt position nor can it be tilted while
in an open or slide position.
Sliding the sunroof
SUNROOF (IF EQUIPPED)
1VQA2031
1VQA2032
CAUTION
Do not continue to press the sun-
roof control button(s) after the sun-roof is in the fully open, closed, ortilt position(s). Damage to the motoror system components could occur.
1VQA2030
Page 43 of 360
Features of your vehicle
34
3
Open
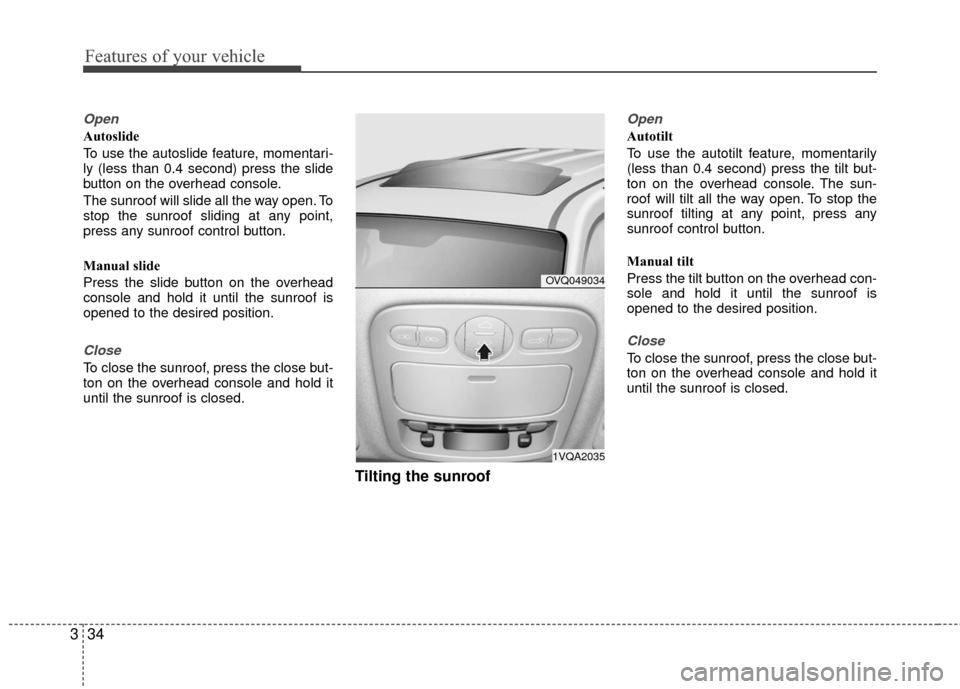
Autoslide
To use the autoslide feature, momentari-
ly (less than 0.4 second) press the slide
button on the overhead console.
The sunroof will slide all the way open. To
stop the sunroof sliding at any point,
press any sunroof control button.
Manual slide
Press the slide button on the overhead
console and hold it until the sunroof is
opened to the desired position.
Close
To close the sunroof, press the close but-
ton on the overhead console and hold it
until the sunroof is closed.
Tilting the sunroof
Open
Autotilt
To use the autotilt feature, momentarily
(less than 0.4 second) press the tilt but-
ton on the overhead console. The sun-
roof will tilt all the way open. To stop the
sunroof tilting at any point, press any
sunroof control button.
Manual tilt
Press the tilt button on the overhead con-
sole and hold it until the sunroof is
opened to the desired position.
Close
To close the sunroof, press the close but-
ton on the overhead console and hold it
until the sunroof is closed.
OVQ049034
1VQA2035
Page 44 of 360
335
Features of your vehicle
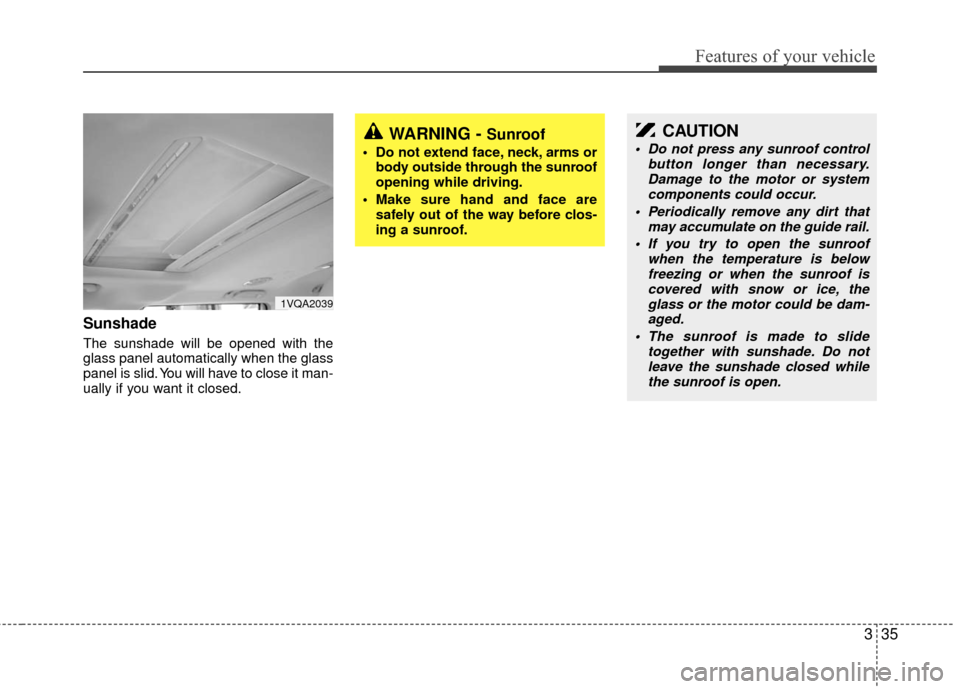
Sunshade
The sunshade will be opened with the
glass panel automatically when the glass
panel is slid. You will have to close it man-
ually if you want it closed.
1VQA2039
WARNING - Sunroof
Do not extend face, neck, arms orbody outside through the sunroof
opening while driving.
Make sure hand and face are safely out of the way before clos-
ing a sunroof.
CAUTION
Do not press any sunroof control button longer than necessary.Damage to the motor or system components could occur.
Periodically remove any dirt that may accumulate on the guide rail.
If you try to open the sunroof when the temperature is belowfreezing or when the sunroof iscovered with snow or ice, the glass or the motor could be dam-aged.
The sunroof is made to slide together with sunshade. Do notleave the sunshade closed whilethe sunroof is open.
Page 45 of 360
Features of your vehicle
36
3
Resetting the sunroof
Whenever the vehicle battery is discon-
nected or discharged, you have to reset
your sunroof system as follows:
1. Turn the ignition key to the ON posi-
tion.
2. According to the position of the sun- roof, do as follows.
1) in case that the sunroof has closedcompletely or been tilted :
Press the tilt button until the sun-
roof has tilted upward completely.
2) in case that the sunroof has slide- opened:
Press and hold the close button
(for more than 5 seconds) until the
sunroof has closed completely.
Press the tilt button until the sun-
roof has tilted upward completely.
3. Release the tilt button. 4. Press and hold the tilt button (for
more than 10 seconds) until the sun-
roof has returned to the original posi-
tion of tilt after it is raised a little high-
er than the maximum tilt position.
Then, release the button.
5. Press and hold the tilt button (for more than 5 seconds) until the sun-
roof is operated as follows;
TILT DOWN → SLIDE OPEN →
SLIDE CLOSE
Then, release the button.
When this is complete, the sunroof sys-
tem is reset.
Page 46 of 360
337
Features of your vehicle
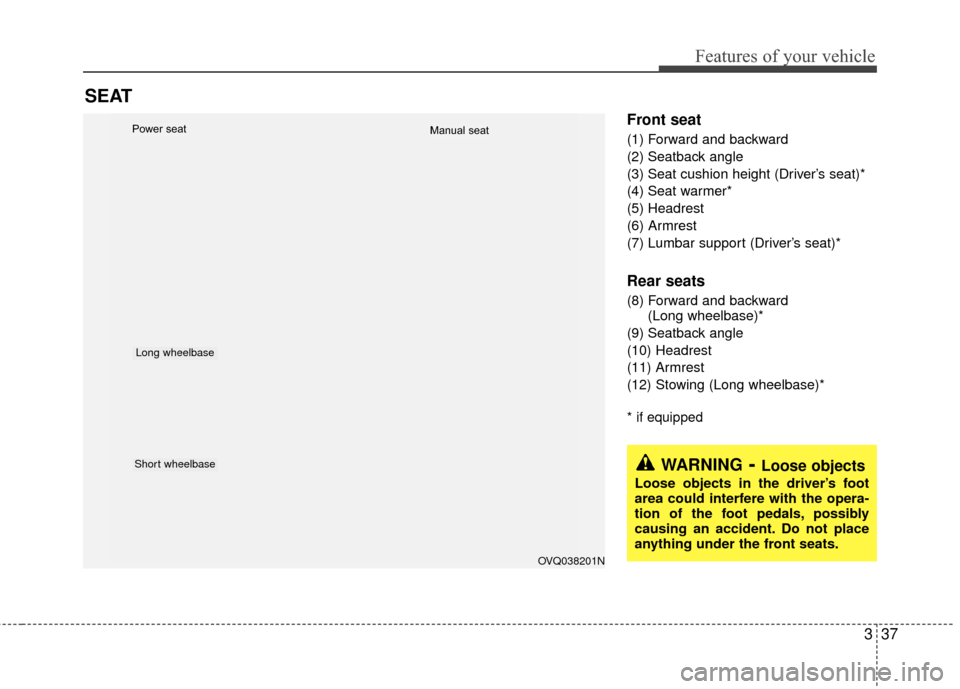
Front seat
(1) Forward and backward
(2) Seatback angle
(3) Seat cushion height (Driver’s seat)*
(4) Seat warmer*
(5) Headrest
(6) Armrest
(7) Lumbar support (Driver’s seat)*
Rear seats
(8) Forward and backward (Long wheelbase)*
(9) Seatback angle
(10) Headrest
(11) Armrest
(12) Stowing (Long wheelbase)*
* if equipped
SEAT
OVQ038201N
Long wheelbase
Short wheelbase
Power seatManual seat
WARNING- Loose objects
Loose objects in the driver’s foot
area could interfere with the opera-
tion of the foot pedals, possibly
causing an accident. Do not place
anything under the front seats.
Page 47 of 360
Features of your vehicle
38
3
(Continued)
seatback upright and the lap por-
tion of the safety belt snug and
low across the hips. This is the
best position to protect you in
case of an accident.
In order to avoid unnecessary and perhaps severe airbag
injuries, always sit as far back as
possible from the steering wheel
so that your chest is at least 250
mm (10 inches) away from the
steering wheel.
WARNING- Driver’s seat
Never attempt to adjust seat whilethe vehicle is moving. This could
result in loss of control, and an
accident causing death, serious
injury, or property damage.
Do not allow anything to interfere with the normal position of the
seatback. Storing items against a
seatback or in any other way
interfering with proper locking of
a seatback could result in serious
or fatal injury in a sudden stop or
collision.
(Continued)
WARNING - Uprighting
seat
When you return the seatback to its
upright position, hold the seatback
and return it slowly and be sure
there are no other occupants
around the seat. If the seatback is
returned without being held and
controlled, the back of the seat
could spring forward resulting in
accidental injury to a person struck
by the seatback.
WARNING- Rear Seatback
The rear seatback must besecurely latched. If not, passen-
gers and objects could be thrown
forward resulting in serious
injury or death in the event of a
sudden stop or collision.
(Continued)
(Continued)
Luggage and other cargo shouldbe laid flat in the cargo area. If
objects are large, heavy, or must
be piled, they must be secured.
Under no circumstances should
cargo be piled higher than the
seatbacks. Failure to follow these
warnings could result in serious
injury or death in the event of a
sudden stop, collision or rollover.
No passenger should ride in the cargo area or sit or lie on folded
seatbacks while the vehicle is
moving. All passengers must be
in seats and restrained properly
while riding.
When resetting the seatback to the upright position, make sure it
is securely latched by pushing it
forward and backwards.
To avoid the possibility of burns, do not remove the carpet in the
cargo area. Emission controls
beneath this floor generate high
exhaust temperatures.
Page 48 of 360
339
Features of your vehicle
Front seat adjustment - manual
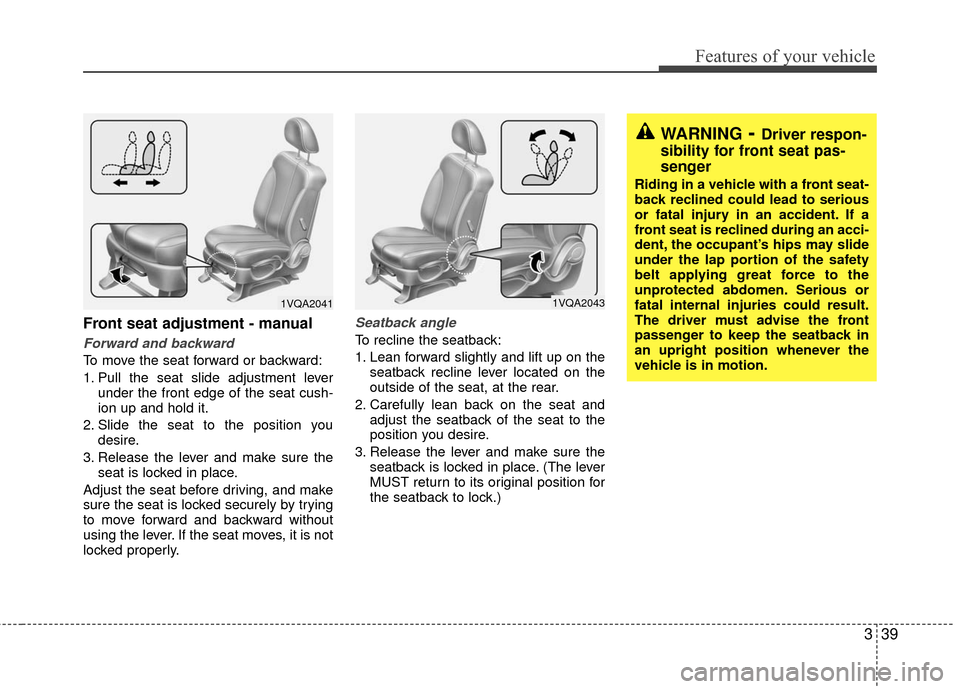
Forward and backward
To move the seat forward or backward:
1. Pull the seat slide adjustment leverunder the front edge of the seat cush-
ion up and hold it.
2. Slide the seat to the position you desire.
3. Release the lever and make sure the seat is locked in place.
Adjust the seat before driving, and make
sure the seat is locked securely by trying
to move forward and backward without
using the lever. If the seat moves, it is not
locked properly.
Seatback angle
To recline the seatback:
1. Lean forward slightly and lift up on the seatback recline lever located on the
outside of the seat, at the rear.
2. Carefully lean back on the seat and adjust the seatback of the seat to the
position you desire.
3. Release the lever and make sure the seatback is locked in place. (The lever
MUST return to its original position for
the seatback to lock.)
1VQA20411VQA2043
WARNING- Driver respon-
sibility for front seat pas-
senger
Riding in a vehicle with a front seat-
back reclined could lead to serious
or fatal injury in an accident. If a
front seat is reclined during an acci-
dent, the occupant’s hips may slide
under the lap portion of the safety
belt applying great force to the
unprotected abdomen. Serious or
fatal internal injuries could result.
The driver must advise the front
passenger to keep the seatback in
an upright position whenever the
vehicle is in motion.
Page 49 of 360
Features of your vehicle
40
3
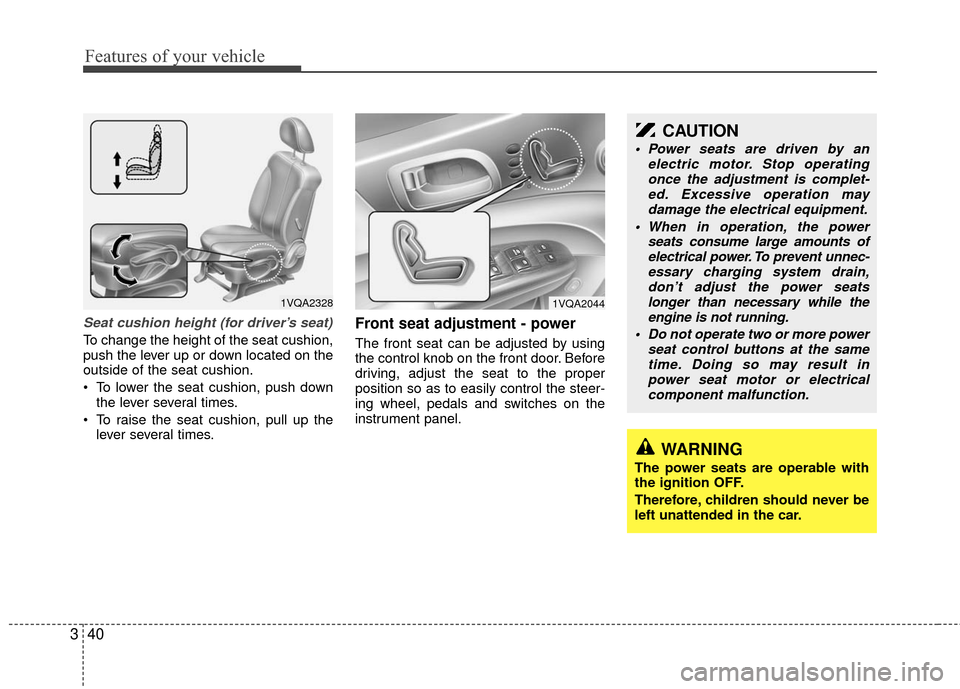
Seat cushion height (for driver’s seat)
To change the height of the seat cushion,
push the lever up or down located on the
outside of the seat cushion.
To lower the seat cushion, push down
the lever several times.
To raise the seat cushion, pull up the lever several times.
Front seat adjustment - power
The front seat can be adjusted by using
the control knob on the front door. Before
driving, adjust the seat to the proper
position so as to easily control the steer-
ing wheel, pedals and switches on the
instrument panel.
1VQA2328
WARNING
The power seats are operable with
the ignition OFF.
Therefore, children should never be
left unattended in the car.
CAUTION
Power seats are driven by an electric motor. Stop operatingonce the adjustment is complet- ed. Excessive operation maydamage the electrical equipment.
When in operation, the power seats consume large amounts ofelectrical power. To prevent unnec- essary charging system drain,don’t adjust the power seatslonger than necessary while the engine is not running.
Do not operate two or more power seat control buttons at the sametime. Doing so may result inpower seat motor or electrical component malfunction.
1VQA2044
Page 50 of 360
341
Features of your vehicle
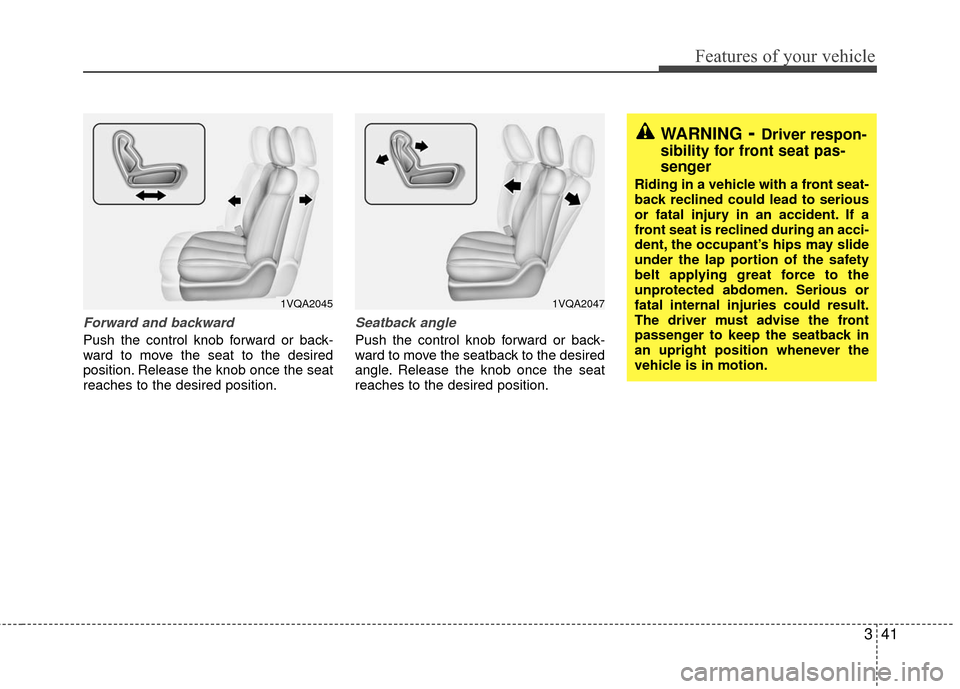
Forward and backward
Push the control knob forward or back-
ward to move the seat to the desired
position. Release the knob once the seat
reaches to the desired position.
Seatback angle
Push the control knob forward or back-
ward to move the seatback to the desired
angle. Release the knob once the seat
reaches to the desired position.
1VQA20451VQA2047
WARNING- Driver respon-
sibility for front seat pas-
senger
Riding in a vehicle with a front seat-
back reclined could lead to serious
or fatal injury in an accident. If a
front seat is reclined during an acci-
dent, the occupant’s hips may slide
under the lap portion of the safety
belt applying great force to the
unprotected abdomen. Serious or
fatal internal injuries could result.
The driver must advise the front
passenger to keep the seatback in
an upright position whenever the
vehicle is in motion.