KIA Sedona 2011 2.G Owner's Manual
Manufacturer: KIA, Model Year: 2011, Model line: Sedona, Model: KIA Sedona 2011 2.GPages: 370, PDF Size: 6.75 MB
Page 211 of 370
Features of your vehicle
194
3
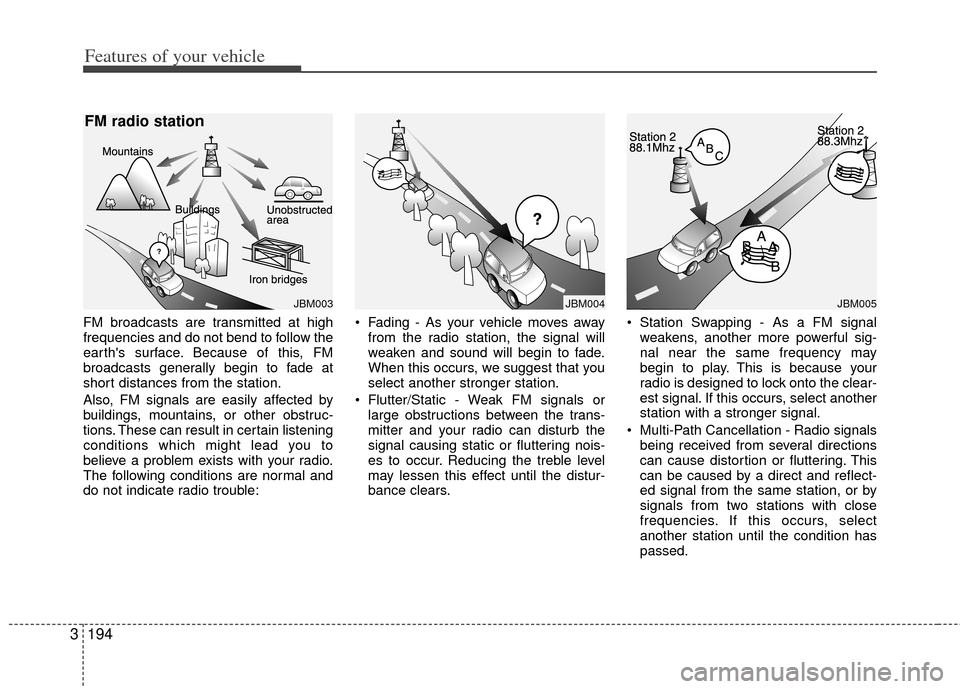
FM broadcasts are transmitted at high
frequencies and do not bend to follow the
earth's surface. Because of this, FM
broadcasts generally begin to fade at
short distances from the station.
Also, FM signals are easily affected by
buildings, mountains, or other obstruc-
tions. These can result in certain listening
conditions which might lead you to
believe a problem exists with your radio.
The following conditions are normal and
do not indicate radio trouble: • Fading - As your vehicle moves away
from the radio station, the signal will
weaken and sound will begin to fade.
When this occurs, we suggest that you
select another stronger station.
Flutter/Static - Weak FM signals or large obstructions between the trans-
mitter and your radio can disturb the
signal causing static or fluttering nois-
es to occur. Reducing the treble level
may lessen this effect until the distur-
bance clears. Station Swapping - As a FM signal
weakens, another more powerful sig-
nal near the same frequency may
begin to play. This is because your
radio is designed to lock onto the clear-
est signal. If this occurs, select another
station with a stronger signal.
Multi-Path Cancellation - Radio signals being received from several directions
can cause distortion or fluttering. This
can be caused by a direct and reflect-
ed signal from the same station, or by
signals from two stations with close
frequencies. If this occurs, select
another station until the condition has
passed.
JBM004JBM003
FM radio station
JBM005
Page 212 of 370
3195
Features of your vehicle
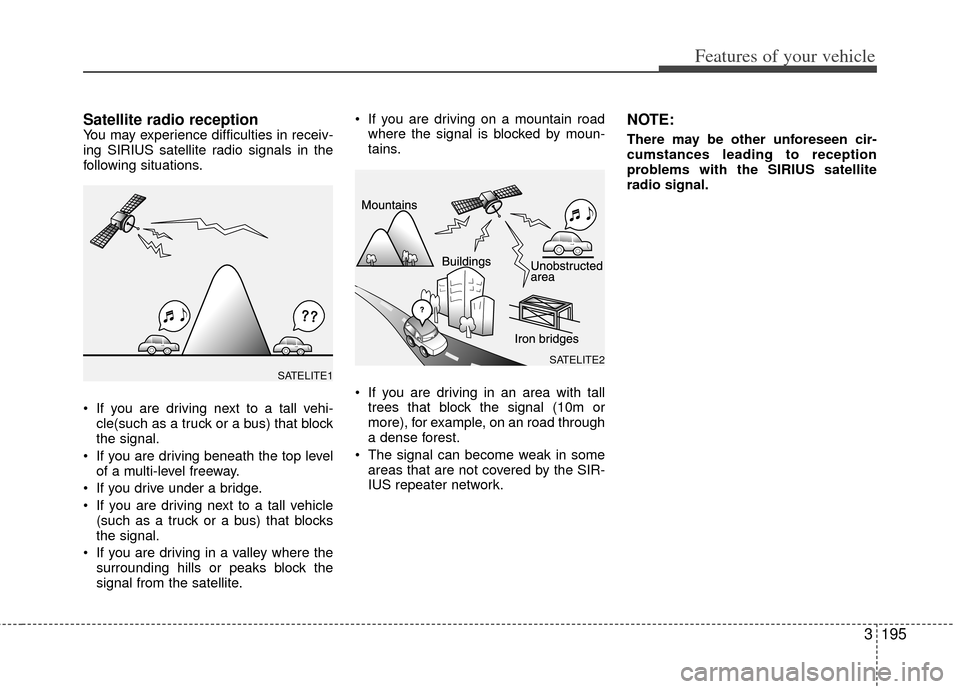
Satellite radio receptionYou may experience difficulties in receiv-
ing SIRIUS satellite radio signals in the
following situations.
If you are driving next to a tall vehi-cle(such as a truck or a bus) that block
the signal.
If you are driving beneath the top level of a multi-level freeway.
If you drive under a bridge.
If you are driving next to a tall vehicle (such as a truck or a bus) that blocks
the signal.
If you are driving in a valley where the surrounding hills or peaks block the
signal from the satellite. If you are driving on a mountain road
where the signal is blocked by moun-
tains.
If you are driving in an area with tall trees that block the signal (10m or
more), for example, on an road through
a dense forest.
The signal can become weak in some areas that are not covered by the SIR-
IUS repeater network.NOTE:
There may be other unforeseen cir-
cumstances leading to reception
problems with the SIRIUS satellite
radio signal.
SATELITE2
SATELITE1
Page 213 of 370
Features of your vehicle
196
3
Using a cellular phone or a two-way
radio
When a cellular phone is used inside the
vehicle, noise may be produced from the
audio equipment. This does not mean
that something is wrong with the audio
equipment. In such a case, use the cellu-
lar phone at a place as far as possible
from the audio equipment.
Care of discs
If the temperature inside the vehicle is too high, open the vehicle windows for
ventilation before using your vehicle
audio.
It is illegal to copy and use MP3/WMA files without permission. Use CDs that
are created only by lawful means.
Do not apply volatile agents such as benzene and thinner, normal cleaners
and magnetic sprays made for ana-
logue disc onto CDs.
To prevent the disc surface from get- ting damaged. Hold and carry CDs by
the edges or the edges of the center
hole only.
Clean the disc surface with a piece of soft cloth before playback (wipe it from
the center to the outside edge).
Do not damage the disc surface or attach pieces of sticky tape or paper
onto it.
Make sure objects other than CDs are not inserted into the CD player (Do not
insert more than one CD at a time). Keep CDs in their cases after use to
protect them from scratches or dirt.
Depending on the type of CD-R/CD- RW CDs, certain CDs may not operate
normally according to manufacturing
companies or making and recording
methods. In such circumstances, if you
still continue to use those CDs, they
may cause the malfunction of your
vehicle audio system.
✽ ✽ NOTICE- Playing an
Incompatible Copy
Protected Audio CD
Some copy protected CDs, which do not
comply with the international audio CD
standards (Red Book), may not play on
your vehicle audio. Please note that if
you try to play copy protected CDs and
the CD player does not perform correct-
ly the CDs maybe defective, not the CD
player.
WARNING
Do not use a cellular phone while
driving. Stop at a safe location to
use a cellular phone.
Page 214 of 370
3197
Features of your vehicle
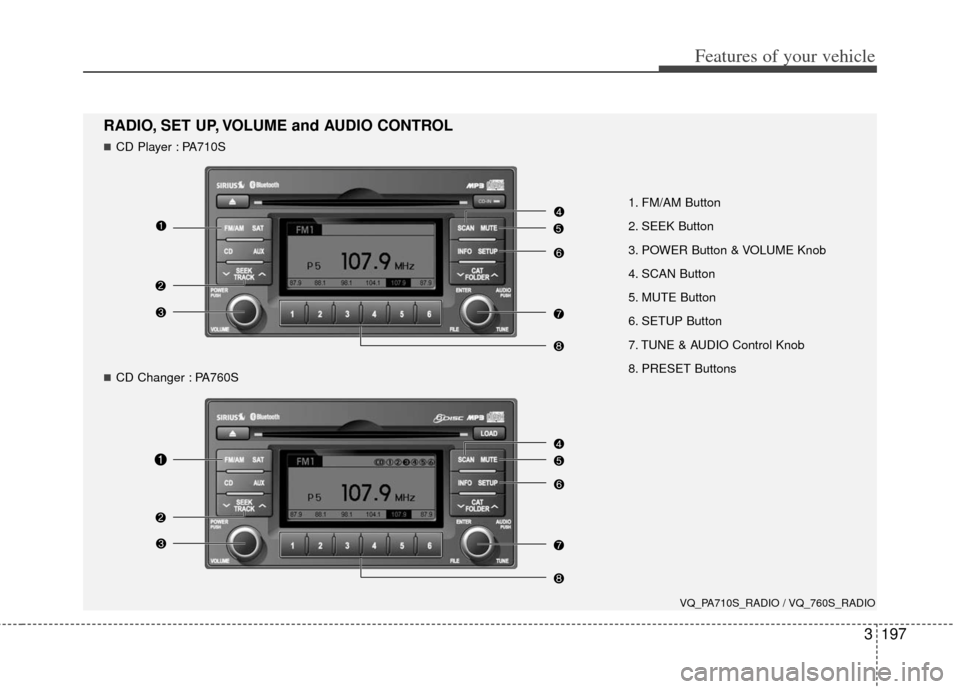
1. FM/AM Button
2. SEEK Button
3. POWER Button & VOLUME Knob
4. SCAN Button
5. MUTE Button
6. SETUP Button
7. TUNE & AUDIO Control Knob
8. PRESET Buttons
RADIO, SET UP, VOLUME and AUDIO CONTROL
CD Player : PA710S
VQ_PA710S_RADIO / VQ_760S_RADIO
CD Changer : PA760S
Page 215 of 370
Features of your vehicle
198
3
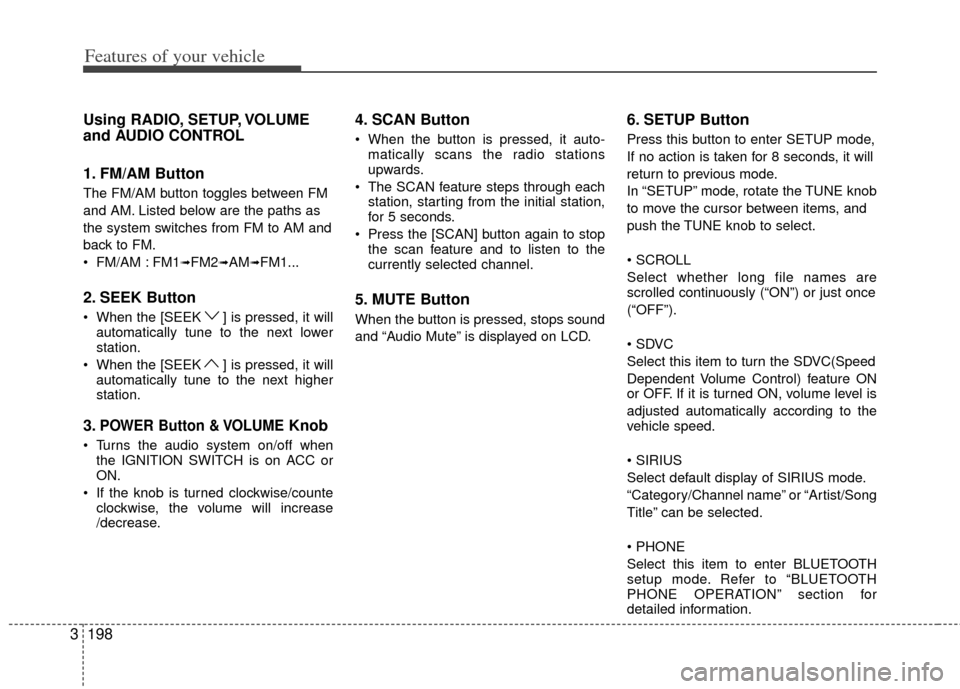
Using RADIO, SETUP, VOLUME
and AUDIO CONTROL
1. FM/AM Button
The FM/AM button toggles between FM
and AM. Listed below are the paths as
the system switches from FM to AM and
back to FM.
FM/AM : FM1
➟FM2➟AM➟FM1...
2. SEEK Button
When the [SEEK ] is pressed, it will
automatically tune to the next lower
station.
When the [SEEK ] is pressed, it will automatically tune to the next higher
station.
3.POWER Button & VOLUMEKnob
Turns the audio system on/off whenthe IGNITION SWITCH is on ACC or
ON.
If the knob is turned clockwise/counte clockwise, the volume will increase
/decrease.
4. SCAN Button
When the button is pressed, it auto-matically scans the radio stations
upwards.
The SCAN feature steps through each station, starting from the initial station,
for 5 seconds.
Press the [SCAN] button again to stop the scan feature and to listen to the
currently selected channel.
5. MUTE Button
When the button is pressed, stops sound
and “Audio Mute” is displayed on LCD.
6. SETUP Button
Press this button to enter SETUP mode,
If no action is taken for 8 seconds, it will
return to previous mode.
In “SETUP” mode, rotate the TUNE knob
to move the cursor between items, and
push the TUNE knob to select.
Select whether long file names are
scrolled continuously (“ON”) or just once
(“OFF”).
Select this item to turn the SDVC(Speed
Dependent Volume Control) feature ON
or OFF. If it is turned ON, volume level is
adjusted automatically according to the
vehicle speed.
Select default display of SIRIUS mode.
“Category/Channel name” or “Artist/Song
Title” can be selected.
Select this item to enter BLUETOOTH
setup mode. Refer to “BLUETOOTH
PHONE OPERATION” section for
detailed information.
Page 216 of 370
3199
Features of your vehicle
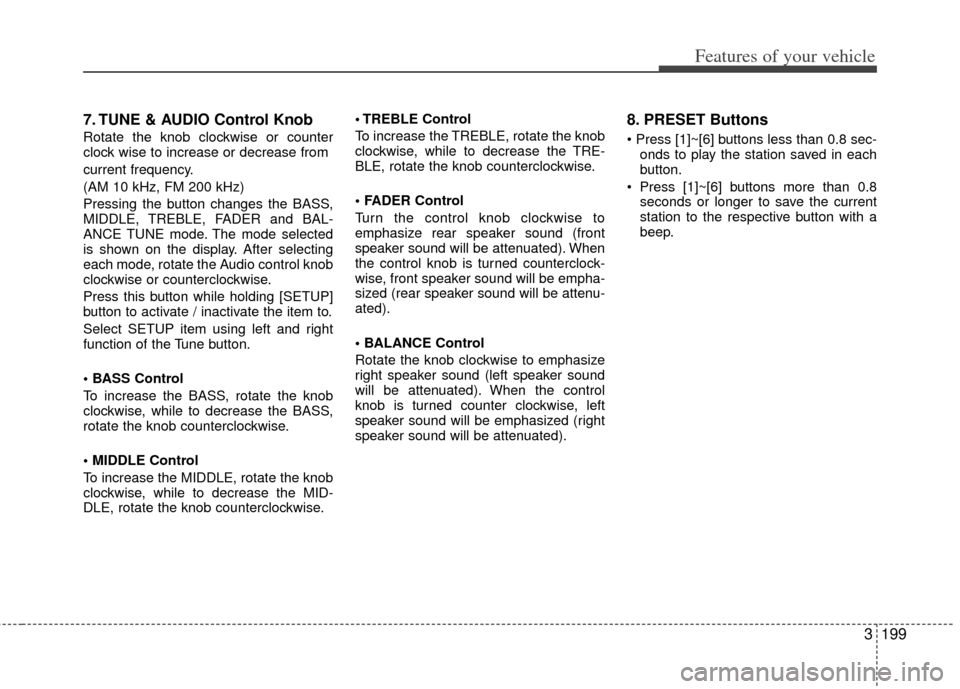
7. TUNE & AUDIO Control Knob
Rotate the knob clockwise or counter
clock wise to increase or decrease from
current frequency.
(AM 10 kHz, FM 200 kHz)
Pressing the button changes the BASS,
MIDDLE, TREBLE, FADER and BAL-
ANCE TUNE mode. The mode selected
is shown on the display. After selecting
each mode, rotate the Audio control knob
clockwise or counterclockwise.
Press this button while holding [SETUP]
button to activate / inactivate the item to.
Select SETUP item using left and right
function of the Tune button.
• BASS Control
To increase the BASS, rotate the knob
clockwise, while to decrease the BASS,
rotate the knob counterclockwise.
To increase the MIDDLE, rotate the knob
clockwise, while to decrease the MID-
DLE, rotate the knob counterclockwise. Control
To increase the TREBLE, rotate the knob
clockwise, while to decrease the TRE-
BLE, rotate the knob counterclockwise.
Turn the control knob clockwise to
emphasize rear speaker sound (front
speaker sound will be attenuated). When
the control knob is turned counterclock-
wise, front speaker sound will be empha-
sized (rear speaker sound will be attenu-
ated).
Rotate the knob clockwise to emphasize
right speaker sound (left speaker sound
will be attenuated). When the control
knob is turned counter clockwise, left
speaker sound will be emphasized (right
speaker sound will be attenuated).
8. PRESET Buttons
onds to play the station saved in each
button.
seconds or longer to save the current
station to the respective button with a
beep.
Page 217 of 370
Features of your vehicle
200
3
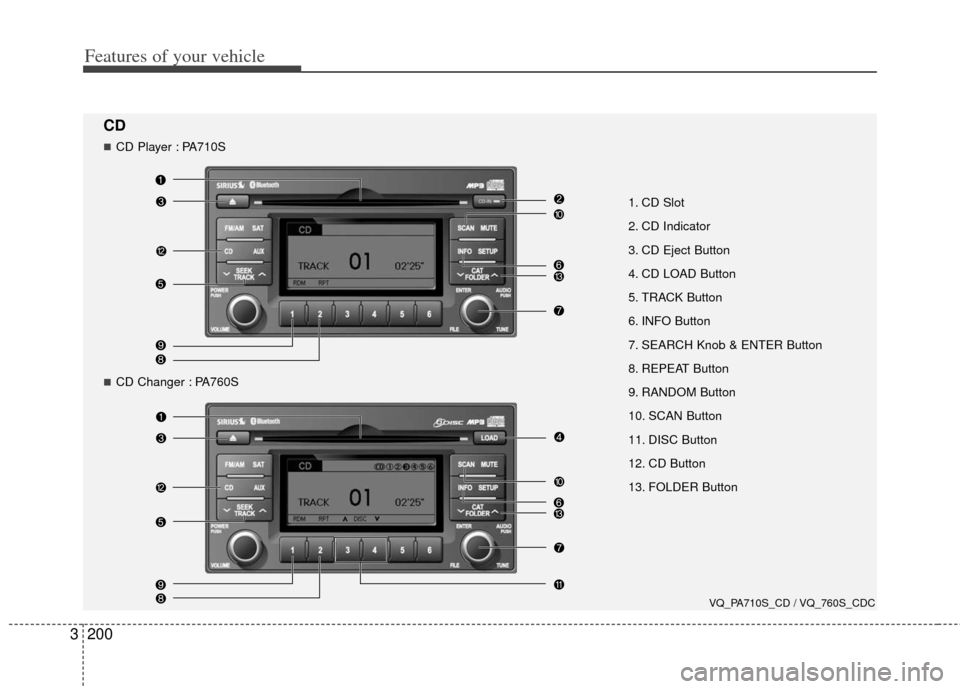
1. CD Slot
2. CD Indicator
3. CD Eject Button
4. CD LOAD Button
5. TRACK Button
6. INFO Button
7. SEARCH Knob & ENTER Button
8. REPEAT Button
9. RANDOM Button
10. SCAN Button
11. DISC Button
12. CD Button
13. FOLDER Button
VQ_PA710S_CD / VQ_760S_CDC
CD
CD Player : PA710S
CD Changer : PA760S
Page 218 of 370
3201
Features of your vehicle
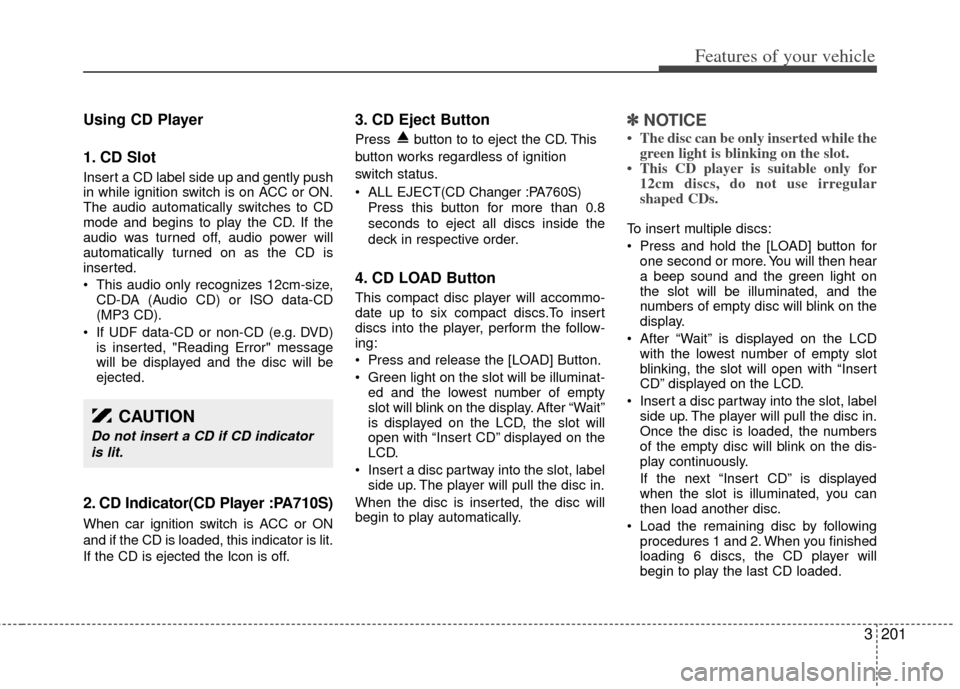
Using CD Player
1. CD Slot
Insert a CD label side up and gently push
in while ignition switch is on ACC or ON.
The audio automatically switches to CD
mode and begins to play the CD. If the
audio was turned off, audio power will
automatically turned on as the CD is
inserted.
This audio only recognizes 12cm-size,CD-DA (Audio CD) or ISO data-CD
(MP3 CD).
If UDF data-CD or non-CD (e.g. DVD) is inserted, "Reading Error" message
will be displayed and the disc will be
ejected.
2. CD Indicator(CD Player :PA710S)
When car ignition switch is ACC or ON
and if the CD is loaded, this indicator is lit.
If the CD is ejected the Icon is off.
3. CD Eject Button
Press button to to eject the CD. This
button works regardless of ignition
switch status.
ALL EJECT(CD Changer :PA760S)
Press this button for more than 0.8
seconds to eject all discs inside the
deck in respective order.
4. CD LOAD Button
This compact disc player will accommo-
date up to six compact discs.To insert
discs into the player, perform the follow-
ing:
Press and release the [LOAD] Button.
Green light on the slot will be illuminat-ed and the lowest number of empty
slot will blink on the display. After “Wait”
is displayed on the LCD, the slot will
open with “Insert CD” displayed on the
LCD.
Insert a disc partway into the slot, label side up. The player will pull the disc in.
When the disc is inserted, the disc will
begin to play automatically.
✽ ✽ NOTICE
• The disc can be only inserted while the
green light is blinking on the slot.
• This CD player is suitable only for 12cm discs, do not use irregular
shaped CDs.
To insert multiple discs:
Press and hold the [LOAD] button for
one second or more. You will then hear
a beep sound and the green light on
the slot will be illuminated, and the
numbers of empty disc will blink on the
display.
After “Wait” is displayed on the LCD with the lowest number of empty slot
blinking, the slot will open with “Insert
CD” displayed on the LCD.
Insert a disc partway into the slot, label side up. The player will pull the disc in.
Once the disc is loaded, the numbers
of the empty disc will blink on the dis-
play continuously.
If the next “Insert CD” is displayed
when the slot is illuminated, you can
then load another disc.
Load the remaining disc by following procedures 1 and 2. When you finished
loading 6 discs, the CD player will
begin to play the last CD loaded.
CAUTION
Do not insert a CD if CD indicator
is lit.
Page 219 of 370
Features of your vehicle
202
3
To load more than one disc but less
than six, complete Steps 1 and 2.
When you have finished loading discs,
press LOAD button to cancel the loading
function or wait for 10 seconds. The CD
player will begin to play the last CD
loaded. As each CD starts to play, the
DISC number will appear on the display.
✽ ✽ NOTICE
The disc player takes up to six discs. Do
not try to load more than six.
5. TRACK Button
] button for less than
0.8 seconds to play from the beginning
of current song.
] button for less than 0.8 seconds and press again within 1
second to play the previous song.
] button for 0.8 sec- onds or longer to initiate reverse direc-
tion high speed sound search of cur-
rent song.
] button for less than 0.8 seconds to play the next song.
] button for 0.8 sec- onds or longer to initiate forward direc-
tion high speed sound search of cur-
rent song.
6. INFO Button
Displays the information of the current
song.
CDDA : DISC TITLE
➟ DISC ARTIST ➟TRACK TITLE ➟ TRACK ARTIST ➟TOTAL TRACK ➟ DISC TITLE...
MP3/WMA : FILE NAME
➟TITLE➟ARTIST➟ALBUM➟FOLDER➟TOTAL FILE...
(Not displayed if the information is
unavailable on the CD or file.)
7. SEARCH Knob & ENTER Button
songs after current song, or counter-
clockwise to browse songs before cur-
rent song. To play the displayed song,
press the knob.
enters to AUDIO CONTROL mode.
8. REPEAT Button
Press this button for less than 0.8 sec-
onds to activate ‘RPT’ mode and more
than 0.8 seconds to activate ‘FLD RPT’
mode.
Only a track (file) is repeatedlyplayed back.
Only files are repeatedly played back.
9. RANDOM Button
Press this button for less than 0.8 sec-
onds to activate ‘RDM’ mode and more
than 0.8 seconds to activate ‘ALL RDM’
mode.
Only files/tracks in a folder/disc are played back in a random sequence.
All files in a disc are played back in the random
sequence.
10. SCAN Button
Play each song in the CD for 10 seconds.
To cancel SCAN Play, press this button
again.
11. DISC Buttons
] Change Button Changesdisc to the previous disc.
] Change Button Changes disc to the next disc.
12. CD Button
If there is a CD in the CD DECK it switch-
es to CD mode.
If there is no CD, then the message “NO
CD” will become displayed on the LCD
for 3 seconds and returns to the previous
mode.
Page 220 of 370
![KIA Sedona 2011 2.G Owners Manual 3203
Features of your vehicle
13. FOLDER Button
Press [FOLDER ] button to move tochild folder of the current folder and
display the first song in the folder.
Press TUNE/ ENTER knob to move to
the fol KIA Sedona 2011 2.G Owners Manual 3203
Features of your vehicle
13. FOLDER Button
Press [FOLDER ] button to move tochild folder of the current folder and
display the first song in the folder.
Press TUNE/ ENTER knob to move to
the fol](/img/2/2928/w960_2928-219.png)
3203
Features of your vehicle
13. FOLDER Button
Press [FOLDER ] button to move tochild folder of the current folder and
display the first song in the folder.
Press TUNE/ ENTER knob to move to
the folder displayed. It will play the first
song in the folder.
Press [FOLDER ] button to move to parent folder of the current folder and
display the first song in the folder.
Press TUNE/ENTER knob to move to
the folder displayed.
NOTE:
Order of playing files(folders):
1. Song playing order : to sequentially. 2. Folder playing order:
✽If no song file is contained in the
folder, that folder is not displayed.