lock KIA Sedona 2011 2.G Repair Manual
[x] Cancel search | Manufacturer: KIA, Model Year: 2011, Model line: Sedona, Model: KIA Sedona 2011 2.GPages: 370, PDF Size: 6.75 MB
Page 148 of 370

3131
Features of your vehicle
INTERIOR LIGHTS
1VQA2141
1VQA2140
Main control switch
Map light
OFFAny ON OFF
Close ON OFF*
2)
ON ( )Any
Map lights operating logic
Main control
switch status Door open/
close status
DOOR Open or
Close ➜Open ON Lamp turns ON,
then turns OFF after about 20 minutes*
1)
Open ➜Close
ON
ON
Lamp dims gradually over
a 5-second period*3)
Map light switch
ON (depressed) DOOR (not depressed)
*1) If other door is opened while the light stays off after about 20 minutes, the light stays on
again for about 20 minutes.
*2) When a door is unlocked by the transmitter, the light stays on for about 30 seconds as long
as any door is not opened.
When the ignition switch is turned to the ACC or LOCK position,
the light stays on for about 15 seconds.
*3) If the ignition switch is turned to the ON position, the light turns off immediately.
Map light
The lights are turned ON or OFF based on the status of the doors, main control switch
and corresponding light switch.WARNING
Do not use the interior lights when
driving in the dark. Accidents could
happen because the view may be
obscured by interior lights.
Page 149 of 370

Features of your vehicle
132
3
1VQA2141
1VQA2333
Main control switch
OFF Any
Close ONOFF*
2)OFF
ON ( ) Any
Dome lights operating logic
Main control
switch status Door open/
close status
DOOR Open or
Close ➜Open ON
ON OFF
OFF
Lamp turns ON,
then turns OFF after about 20 minutes*
1)
Lamp dims
gradually over a 5-second period*
3)
Open ➜Close OFF
ON
Dome light switch
ON DOOR OFF
*1) If other door is opened while the light stays off after about 20 minutes, the light stays on
again for about 20 minutes.
*2) When a door is unlocked by the transmitter, the light stays on for about 30 seconds as long
as any door is not opened. When the ignition switch is turned to the ACC or LOCK position,
the light stays on for about 15 seconds.
*3) If the ignition switch is turned to the ON position, the light turns off immediately.
Dome light
The lights are turned ON or OFF based on the status of the doors, main control switch
and corresponding light switch.
1VQA2142/OUN026245Dome light - center (if equipped)
Dome light - center/rear (if equipped)
Page 194 of 370
3177
Features of your vehicle
Rolling code programming
To train a garage door opener (or other
rolling code equipped devices) with the
rolling code feature, follow these instruc-
tions after completing the “Programming”
portion of this text. (A second person
may make the following training proce-
dures quicker & easier.)
4. Locate the “learn” or “smart” button onthe device’s motor head unit. Exact
location and color of the button may
vary by product brand. If there is diffi-
culty locating the “learn” or “smart” but-
ton, reference the device’s owner’s
manual or contact HomeLink at 1-800-
355-3515 or on the internet at
www.homelink.com.
5. Press and release the “learn” or “smart” button on the device’s motor
head unit. You have 30 seconds to
complete step number 6.
6. Return to the vehicle and firmly press and release the programmed
HomeLink button up to three times.
The rolling code equipped device
should now recognize the HomeLink
signal and activate when the
HomeLink button is pressed. The
remaining two buttons may now be
programmed if this has not previously
been done. Refer to the
“Programming” portion of this text.
Operating HomeLink
To operate, simply press the pro-
grammed HomeLink button. Activation
will now occur for the trained product
(garage door, security system, entry door
lock, estate gate, or home or office light-
ing). For convenience, the hand-held
transmitter of the device may also be
used at any time. The HomeLink
Wireless Controls System (once pro-
grammed) or the original hand-held
transmitter may be used to activate the
device (e.g. garage door, entry door lock,
etc.). In the event that there are still pro-
gramming difficulties, contact HomeLink
at 1-800-355-3515 or on the internet at
www.homelink.com.
Erasing programmed HomeLink
buttons
To erase the three programmed buttons
(individual buttons cannot be erased):
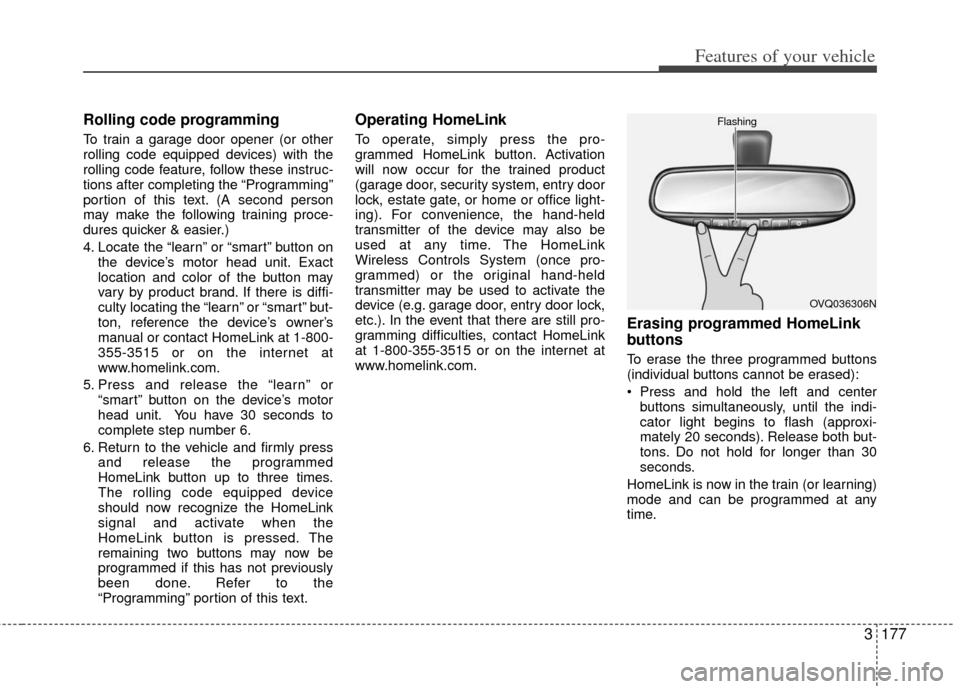
Press and hold the left and centerbuttons simultaneously, until the indi-
cator light begins to flash (approxi-
mately 20 seconds). Release both but-
tons. Do not hold for longer than 30
seconds.
HomeLink is now in the train (or learning)
mode and can be programmed at any
time.
OVQ036306N
Flashing
Page 198 of 370
3181
Features of your vehicle
Rolling code programming
To train a garage door opener (or other
rolling code equipped devices) with the
rolling code feature, follow these instruc-
tions after completing the “Programming”
portion of this text. (A second person
may make the following training proce-
dures quicker & easier.)
4. Locate the “learn” or “smart” button onthe device’s motor head unit. Exact
location and color of the button may
vary by product brand. If there is diffi-
culty locating the “learn” or “smart” but-
ton, reference the device’s owner’s
manual or contact HomeLink at 1-800-
355-3515 or on the internet at
www.homelink.com.
5. Press and release the “learn” or “smart” button on the device’s motor
head unit. You have 30 seconds to
complete step number 6.
6. Return to the vehicle and firmly press and release the programmed
HomeLink button up to three times.
The rolling code equipped device
should now recognize the HomeLink
signal and activate when the
HomeLink button is pressed. The
remaining two buttons may now be
programmed if this has not previously
been done. Refer to the
“Programming” portion of this text.
Operating HomeLink
To operate, simply press the pro-
grammed HomeLink button. Activation
will now occur for the trained product
(garage door, security system, entry door
lock, estate gate, or home or office light-
ing). For convenience, the hand-held
transmitter of the device may also be
used at any time. The HomeLink
Wireless Controls System (once pro-
grammed) or the original hand-held
transmitter may be used to activate the
device (e.g. garage door, entry door lock,
etc.). In the event that there are still pro-
gramming difficulties, contact HomeLink
at 1-800-355-3515 or on the internet at
www.homelink.com.
Erasing programmed HomeLink
buttons
To erase the three programmed buttons
(individual buttons cannot be erased):
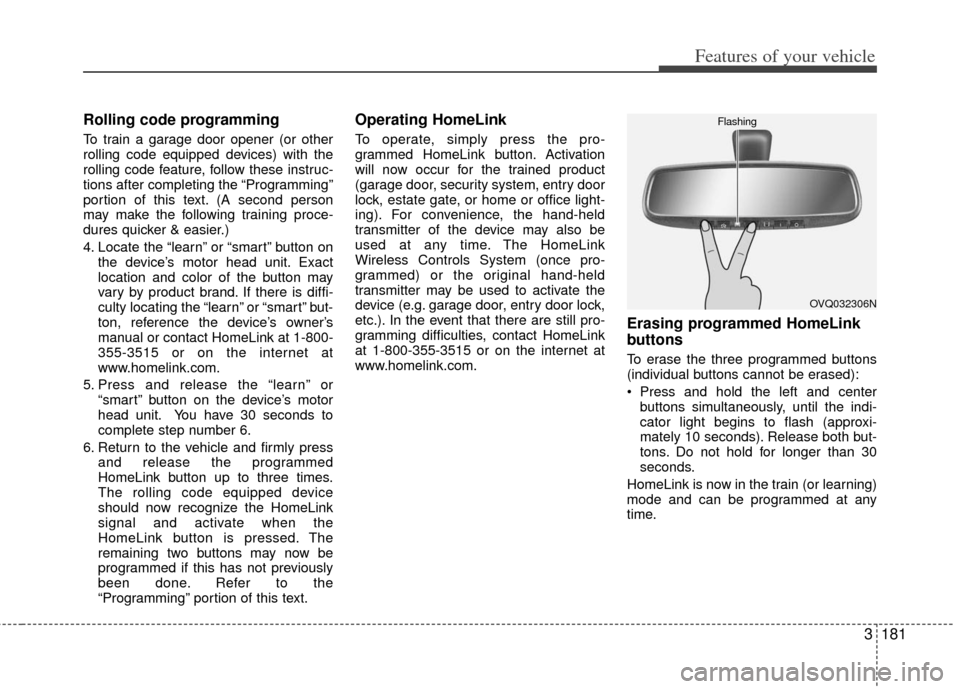
Press and hold the left and centerbuttons simultaneously, until the indi-
cator light begins to flash (approxi-
mately 10 seconds). Release both but-
tons. Do not hold for longer than 30
seconds.
HomeLink is now in the train (or learning)
mode and can be programmed at any
time.
OVQ032306N
Flashing
Page 201 of 370
Features of your vehicle
184
3
Glove box
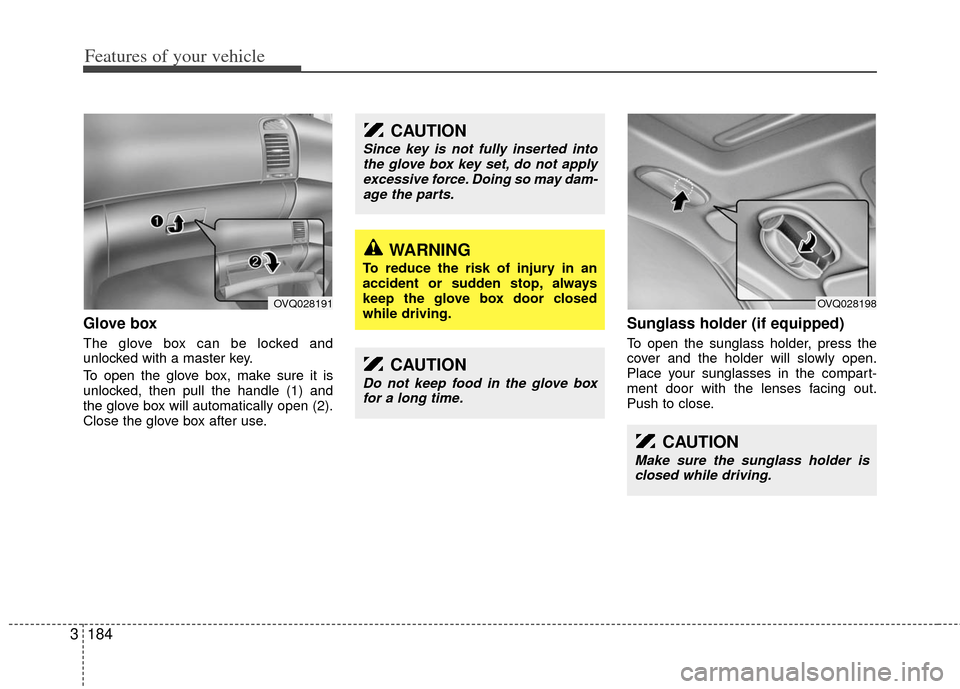
The glove box can be locked and
unlocked with a master key.
To open the glove box, make sure it is
unlocked, then pull the handle (1) and
the glove box will automatically open (2).
Close the glove box after use.
Sunglass holder (if equipped)
To open the sunglass holder, press the
cover and the holder will slowly open.
Place your sunglasses in the compart-
ment door with the lenses facing out.
Push to close.
CAUTION
Since key is not fully inserted into
the glove box key set, do not apply excessive force. Doing so may dam-age the parts.
WARNING
To reduce the risk of injury in an
accident or sudden stop, always
keep the glove box door closed
while driving.
CAUTION
Make sure the sunglass holder is closed while driving.
OVQ028191OVQ028198
CAUTION
Do not keep food in the glove boxfor a long time.
Page 202 of 370
3185
Features of your vehicle
Side table (if equipped)
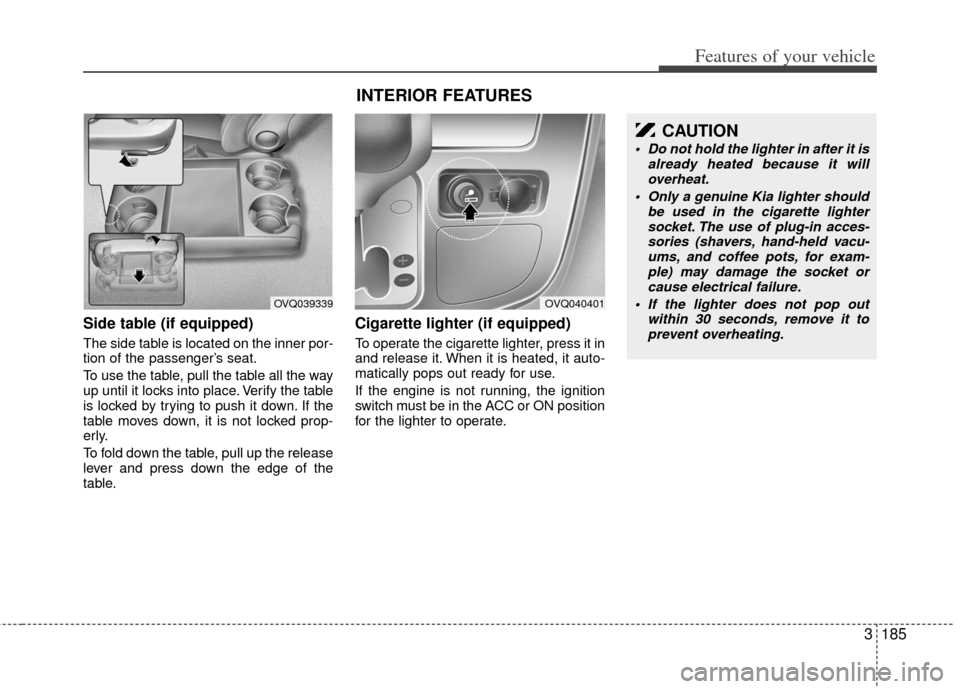
The side table is located on the inner por-
tion of the passenger’s seat.
To use the table, pull the table all the way
up until it locks into place. Verify the table
is locked by trying to push it down. If the
table moves down, it is not locked prop-
erly.
To fold down the table, pull up the release
lever and press down the edge of the
table.
Cigarette lighter (if equipped)
To operate the cigarette lighter, press it in
and release it. When it is heated, it auto-
matically pops out ready for use.
If the engine is not running, the ignition
switch must be in the ACC or ON position
for the lighter to operate.
OVQ039339
INTERIOR FEATURES
OVQ040401
CAUTION
Do not hold the lighter in after it isalready heated because it willoverheat.
Only a genuine Kia lighter should be used in the cigarette lightersocket. The use of plug-in acces- sories (shavers, hand-held vacu-ums, and coffee pots, for exam- ple) may damage the socket orcause electrical failure.
If the lighter does not pop out within 30 seconds, remove it toprevent overheating.
Page 204 of 370
3187
Features of your vehicle
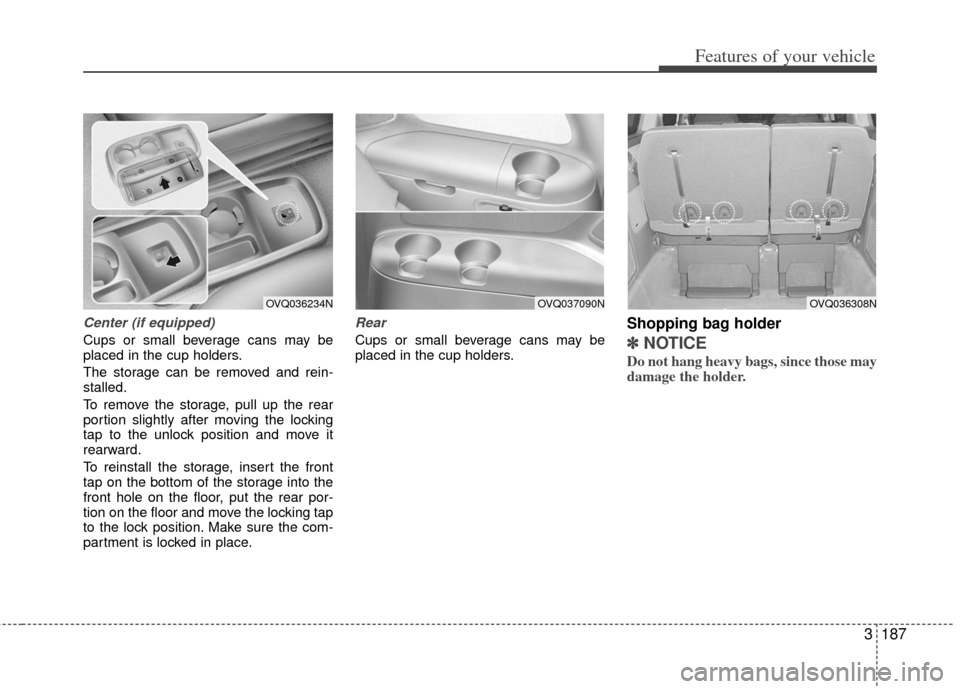
Center (if equipped)
Cups or small beverage cans may be
placed in the cup holders.
The storage can be removed and rein-
stalled.
To remove the storage, pull up the rear
portion slightly after moving the locking
tap to the unlock position and move it
rearward.
To reinstall the storage, insert the front
tap on the bottom of the storage into the
front hole on the floor, put the rear por-
tion on the floor and move the locking tap
to the lock position. Make sure the com-
partment is locked in place.
Rear
Cups or small beverage cans may be
placed in the cup holders.
Shopping bag holder
✽ ✽NOTICE
Do not hang heavy bags, since those may
damage the holder.
OVQ036234NOVQ037090NOVQ036308N
Page 207 of 370
Features of your vehicle
190
3
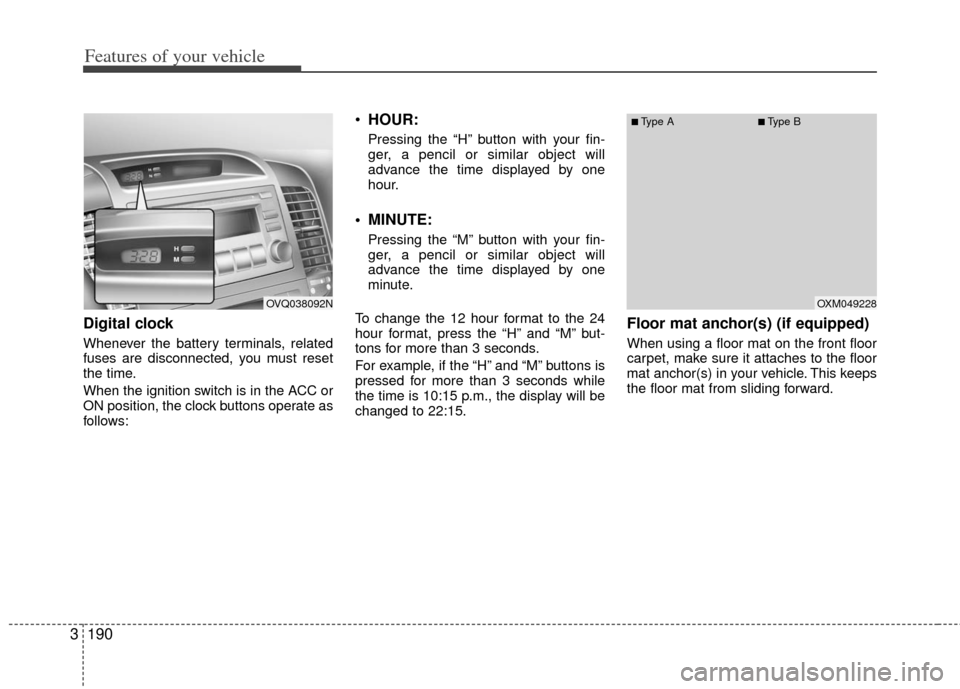
Digital clock
Whenever the battery terminals, related
fuses are disconnected, you must reset
the time.
When the ignition switch is in the ACC or
ON position, the clock buttons operate as
follows:
HOUR:
Pressing the “H” button with your fin-
ger, a pencil or similar object will
advance the time displayed by one
hour.
MINUTE:
Pressing the “M” button with your fin-
ger, a pencil or similar object will
advance the time displayed by one
minute.
To change the 12 hour format to the 24
hour format, press the “H” and “M” but-
tons for more than 3 seconds.
For example, if the “H” and “M” buttons is
pressed for more than 3 seconds while
the time is 10:15 p.m., the display will be
changed to 22:15.
Floor mat anchor(s) (if equipped)
When using a floor mat on the front floor
carpet, make sure it attaches to the floor
mat anchor(s) in your vehicle. This keeps
the floor mat from sliding forward.
OVQ038092NOXM049228
■Type A■Type B
Page 208 of 370
3191
Features of your vehicle
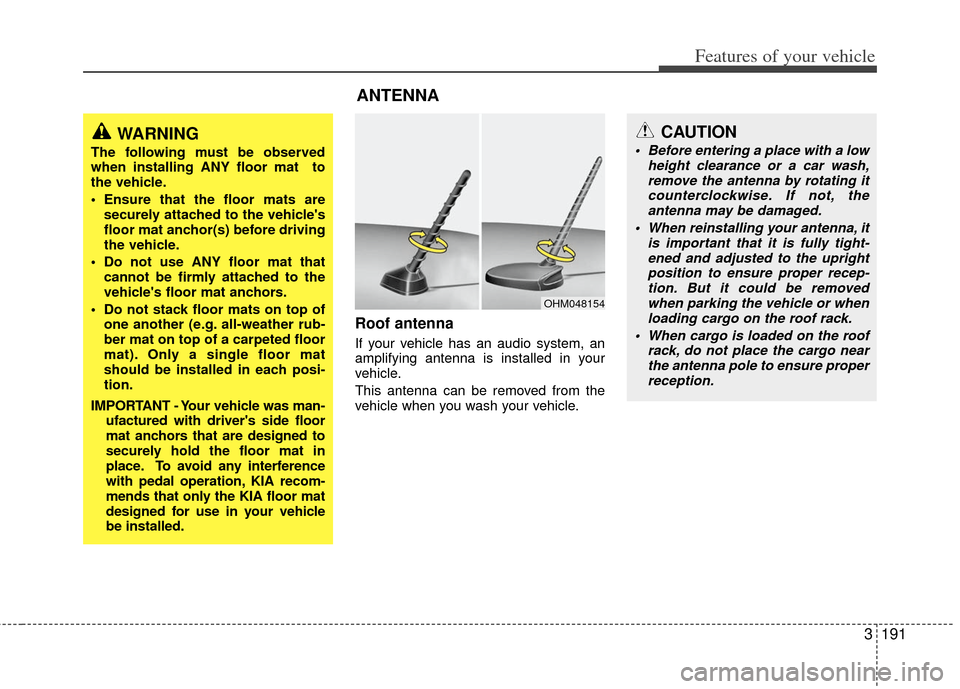
Roof antenna
If your vehicle has an audio system, an
amplifying antenna is installed in your
vehicle.
This antenna can be removed from the
vehicle when you wash your vehicle.
ANTENNA
OHM048154
WARNING
The following must be observed
when installing ANY floor mat to
the vehicle.
Ensure that the floor mats aresecurely attached to the vehicle's
floor mat anchor(s) before driving
the vehicle.
Do not use ANY floor mat that cannot be firmly attached to the
vehicle's floor mat anchors.
Do not stack floor mats on top of one another (e.g. all-weather rub-
ber mat on top of a carpeted floor
mat). Only a single floor mat
should be installed in each posi-
tion.
IMPORTANT - Your vehicle was man- ufactured with driver's side floor
mat anchors that are designed to
securely hold the floor mat in
place. To avoid any interference
with pedal operation, KIA recom-
mends that only the KIA floor mat
designed for use in your vehicle
be installed.
CAUTION
Before entering a place with a low height clearance or a car wash,remove the antenna by rotating it counterclockwise. If not, theantenna may be damaged.
When reinstalling your antenna, it is important that it is fully tight-ened and adjusted to the uprightposition to ensure proper recep- tion. But it could be removedwhen parking the vehicle or when loading cargo on the roof rack.
When cargo is loaded on the roof rack, do not place the cargo nearthe antenna pole to ensure properreception.
Page 211 of 370
Features of your vehicle
194
3
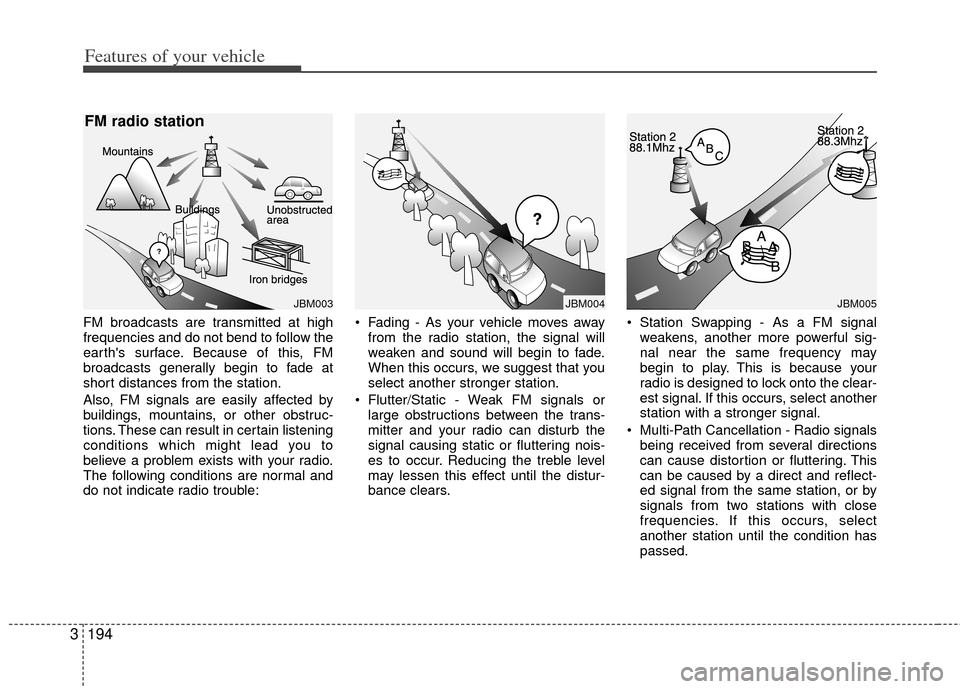
FM broadcasts are transmitted at high
frequencies and do not bend to follow the
earth's surface. Because of this, FM
broadcasts generally begin to fade at
short distances from the station.
Also, FM signals are easily affected by
buildings, mountains, or other obstruc-
tions. These can result in certain listening
conditions which might lead you to
believe a problem exists with your radio.
The following conditions are normal and
do not indicate radio trouble: • Fading - As your vehicle moves away
from the radio station, the signal will
weaken and sound will begin to fade.
When this occurs, we suggest that you
select another stronger station.
Flutter/Static - Weak FM signals or large obstructions between the trans-
mitter and your radio can disturb the
signal causing static or fluttering nois-
es to occur. Reducing the treble level
may lessen this effect until the distur-
bance clears. Station Swapping - As a FM signal
weakens, another more powerful sig-
nal near the same frequency may
begin to play. This is because your
radio is designed to lock onto the clear-
est signal. If this occurs, select another
station with a stronger signal.
Multi-Path Cancellation - Radio signals being received from several directions
can cause distortion or fluttering. This
can be caused by a direct and reflect-
ed signal from the same station, or by
signals from two stations with close
frequencies. If this occurs, select
another station until the condition has
passed.
JBM004JBM003
FM radio station
JBM005