ECU KIA SEDONA 2017 User Guide
[x] Cancel search | Manufacturer: KIA, Model Year: 2017, Model line: SEDONA, Model: KIA SEDONA 2017Pages: 586, PDF Size: 14.12 MB
Page 69 of 586
353
Safety features of your vehicle
For safety reasons, we recommend
that the child restraint system be
used in the rear seats.
Never place a rear-facing child
restraint in the front passenger seat,
because of the danger an inflating
passenger-side air bag could impact
the rear-facing child restraint and kill
the child.
Since all passenger seat belts move
freely under normal conditions and
only lock under extreme or emer-
gency conditions (emergency lock
mode), you must manually change
these seat belts to the auto lock
mode to secure a child restraint.
If the seat belt does not operate as
described in this section, have the
system checked immediately by your
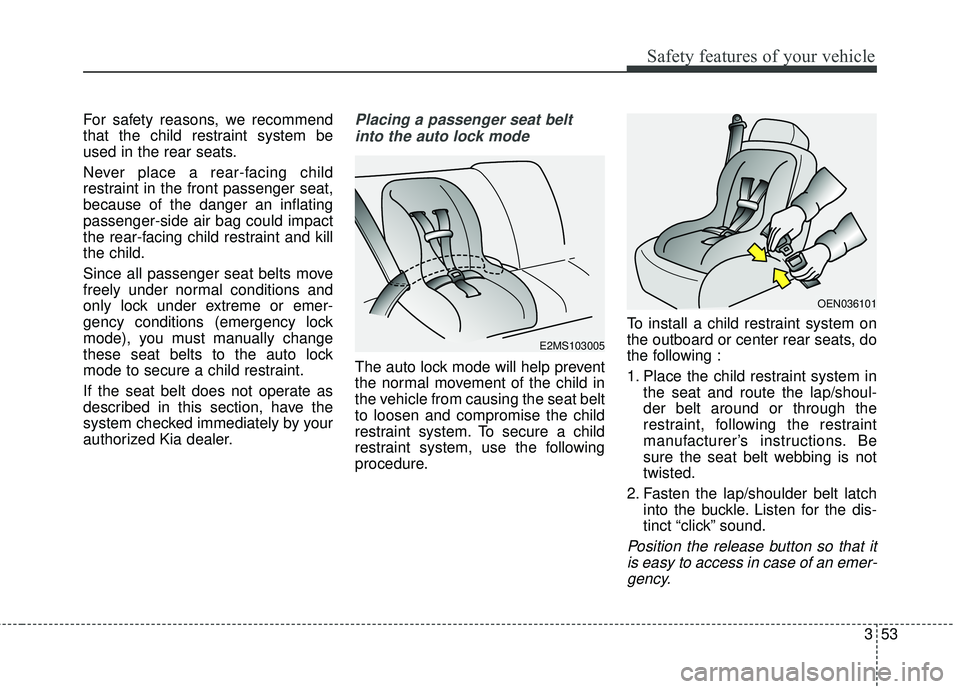
authorized Kia dealer.Placing a passenger seat beltinto the auto lock mode
The auto lock mode will help prevent
the normal movement of the child in
the vehicle from causing the seat belt
to loosen and compromise the child
restraint system. To secure a child
restraint system, use the following
procedure. To install a child restraint system on
the outboard or center rear seats, do
the following :
1. Place the child restraint system in
the seat and route the lap/shoul-
der belt around or through the
restraint, following the restraint
manufacturer’s instructions. Be
sure the seat belt webbing is not
twisted.
2. Fasten the lap/shoulder belt latch into the buckle. Listen for the dis-
tinct “click” sound.
Position the release button so that itis easy to access in case of an emer-gency.
E2MS103005
OEN036101
Page 72 of 586
Safety features of your vehicle
56
3
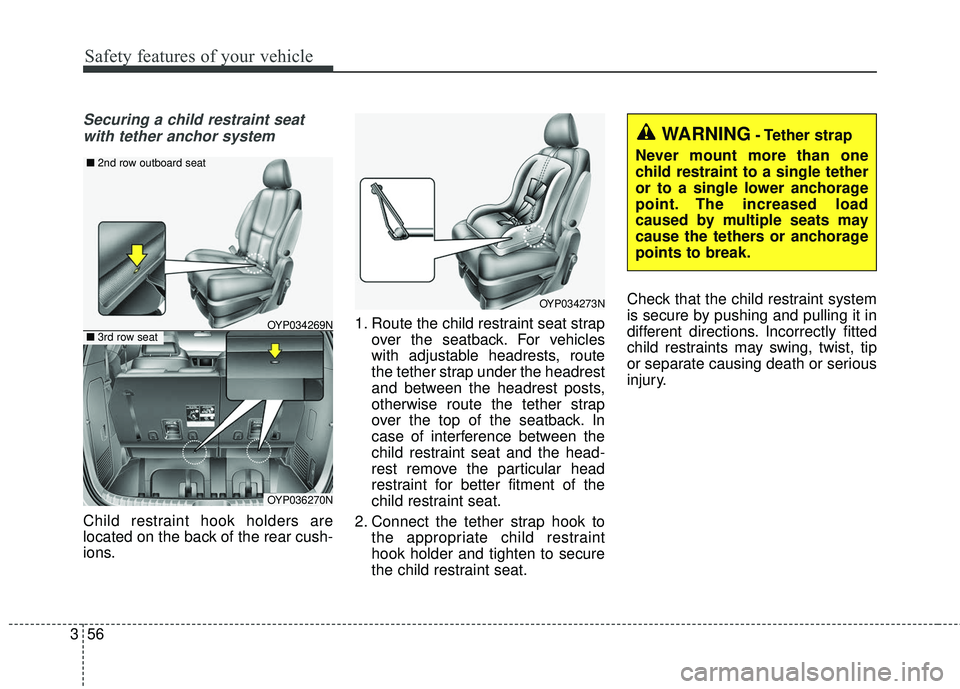
Securing a child restraint seat
with tether anchor system
Child restraint hook holders are
located on the back of the rear cush-
ions. 1. Route the child restraint seat strap
over the seatback. For vehicles
with adjustable headrests, route
the tether strap under the headrest
and between the headrest posts,
otherwise route the tether strap
over the top of the seatback. In
case of interference between the
child restraint seat and the head-
rest remove the particular head
restraint for better fitment of the
child restraint seat.
2. Connect the tether strap hook to the appropriate child restraint
hook holder and tighten to secure
the child restraint seat. Check that the child restraint system
is secure by pushing and pulling it in
different directions. Incorrectly fitted
child restraints may swing, twist, tip
or separate causing death or serious
injury.
OYP034273N
WARNING- Tether strap
Never mount more than one
child restraint to a single tether
or to a single lower anchorage
point. The increased load
caused by multiple seats may
cause the tethers or anchorage
points to break.
OYP036270N
OYP034269N
■ 2nd row outboard seat
■3rd row seat
Page 73 of 586
357
Safety features of your vehicle
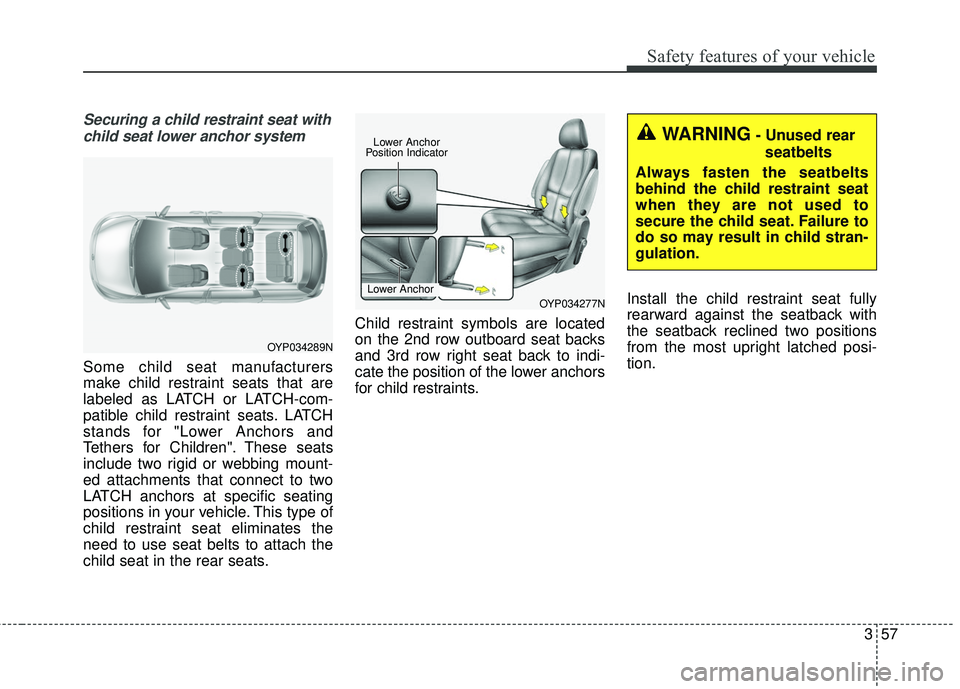
Securing a child restraint seat withchild seat lower anchor system
Some child seat manufacturers
make child restraint seats that are
labeled as LATCH or LATCH-com-
patible child restraint seats. LATCH
stands for "Lower Anchors and
Tethers for Children". These seats
include two rigid or webbing mount-
ed attachments that connect to two
LATCH anchors at specific seating
positions in your vehicle. This type of
child restraint seat eliminates the
need to use seat belts to attach the
child seat in the rear seats. Child restraint symbols are located
on the 2nd row outboard seat backs
and 3rd row right seat back to indi-
cate the position of the lower anchors
for child restraints.
Install the child restraint seat fully
rearward against the seatback with
the seatback reclined two positions
from the most upright latched posi-
tion.
OYP034277NLower Anchor
WARNING- Unused rear
seatbelts
Always fasten the seatbelts
behind the child restraint seat
when they are not used to
secure the child seat. Failure to
do so may result in child stran-
gulation.
OYP034289N
Lower Anchor
Position Indicator
Page 109 of 586
47
Features of your vehicle
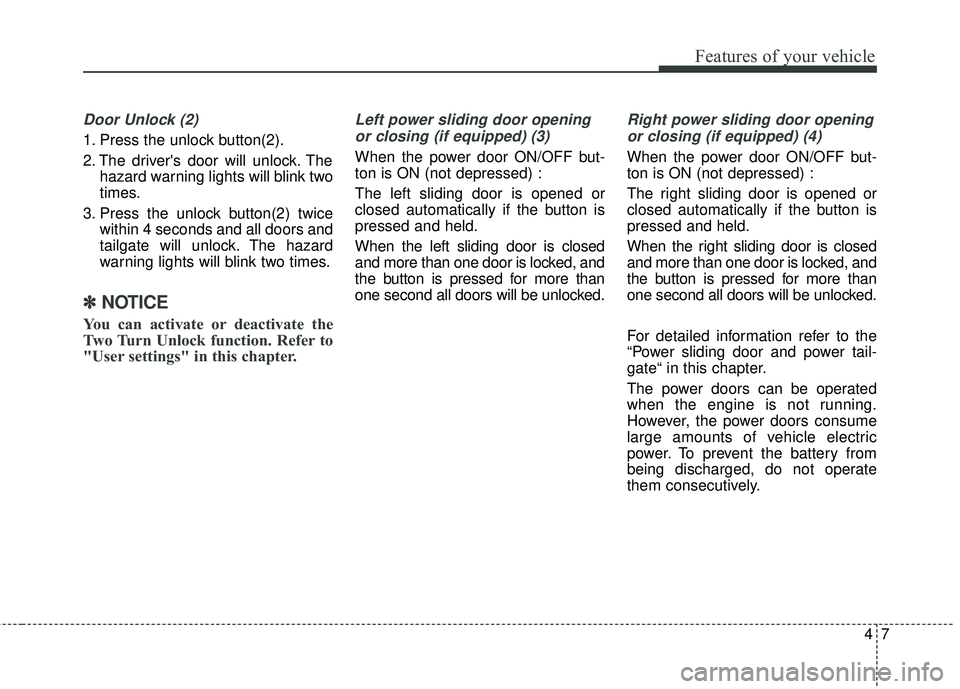
Door Unlock (2)
1. Press the unlock button(2).
2. The driver's door will unlock. Thehazard warning lights will blink two
times.
3. Press the unlock button(2) twice within 4 seconds and all doors and
tailgate will unlock. The hazard
warning lights will blink two times.
✽ ✽NOTICE
You can activate or deactivate the
Two Turn Unlock function. Refer to
"User settings" in this chapter.
Left power sliding door opening
or closing (if equipped) (3)
When the power door ON/OFF but-
ton is ON (not depressed) :
The left sliding door is opened or
closed automatically if the button is
pressed and held.
When the left sliding door is closed
and more than one door is locked, and
the button is pressed for more than
one second all doors will be unlocked.
Right power sliding door openingor closing (if equipped) (4)
When the power door ON/OFF but-
ton is ON (not depressed) :
The right sliding door is opened or
closed automatically if the button is
pressed and held.
When the right sliding door is closed
and more than one door is locked, and
the button is pressed for more than
one second all doors will be unlocked.
For detailed information refer to the
“Power sliding door and power tail-
gate“ in this chapter.
The power doors can be operated
when the engine is not running.
However, the power doors consume
large amounts of vehicle electric
power. To prevent the battery from
being discharged, do not operate
them consecutively.
Page 127 of 586
425
Features of your vehicle
DOOR LOCKS
Operating door locks from
outside the vehicle
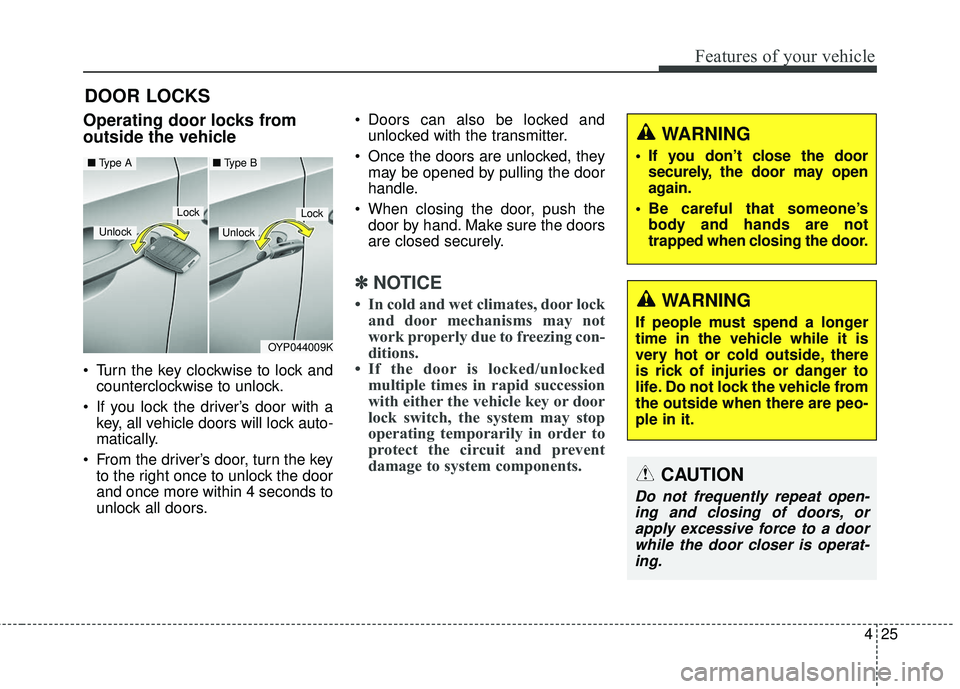
• Turn the key clockwise to lock andcounterclockwise to unlock.
If you lock the driver’s door with a key, all vehicle doors will lock auto-
matically.
From the driver’s door, turn the key to the right once to unlock the door
and once more within 4 seconds to
unlock all doors. Doors can also be locked and
unlocked with the transmitter.
Once the doors are unlocked, they may be opened by pulling the door
handle.
When closing the door, push the door by hand. Make sure the doors
are closed securely.
✽ ✽ NOTICE
• In cold and wet climates, door lock
and door mechanisms may not
work properly due to freezing con-
ditions.
• If the door is locked/unlocked multiple times in rapid succession
with either the vehicle key or door
lock switch, the system may stop
operating temporarily in order to
protect the circuit and prevent
damage to system components.
OYP044009K
Lock
Unlock
Lock
■ Type A■ Type B
Unlock
WARNING
If people must spend a longer
time in the vehicle while it is
very hot or cold outside, there
is rick of injuries or danger to
life. Do not lock the vehicle from
the outside when there are peo-
ple in it.
WARNING
• If you don’t close the door
securely, the door may open
again.
Be careful that someone’s body and hands are not
trapped when closing the door.
CAUTION
Do not frequently repeat open-ing and closing of doors, orapply excessive force to a doorwhile the door closer is operat-ing.
Page 134 of 586
Features of your vehicle
32
4
Closing the tailgate
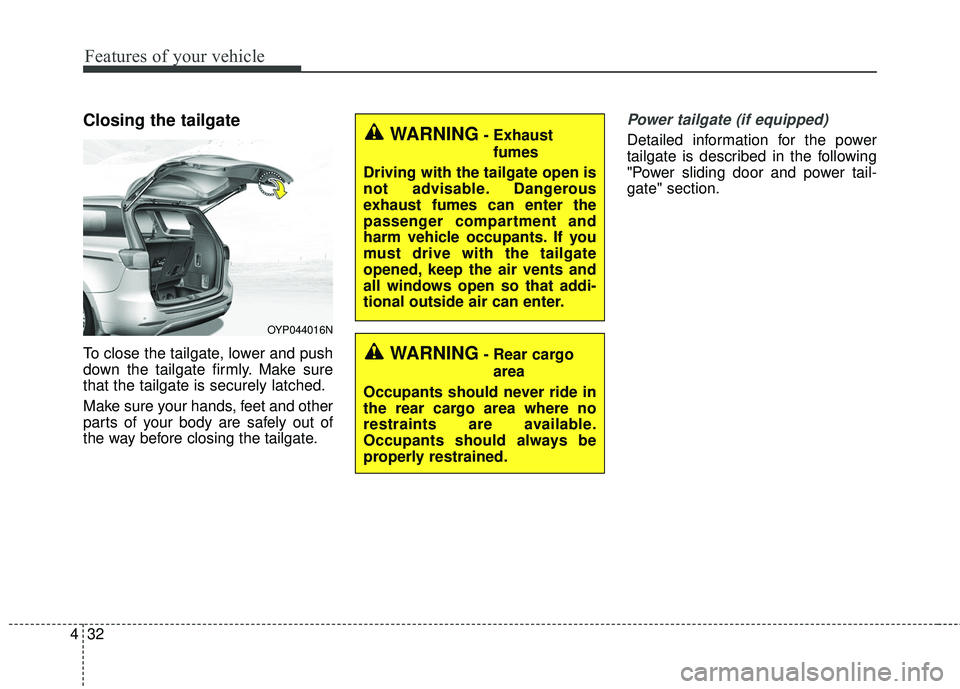
To close the tailgate, lower and push
down the tailgate firmly. Make sure
that the tailgate is securely latched.
Make sure your hands, feet and other
parts of your body are safely out of
the way before closing the tailgate.
Power tailgate (if equipped)
Detailed information for the power
tailgate is described in the following
"Power sliding door and power tail-
gate" section.
OYP044016N
WARNING- Exhaust
fumes
Driving with the tailgate open is
not advisable. Dangerous
exhaust fumes can enter the
passenger compartment and
harm vehicle occupants. If you
must drive with the tailgate
opened, keep the air vents and
all windows open so that addi-
tional outside air can enter.
WARNING- Rear cargo area
Occupants should never ride in
the rear cargo area where no
restraints are available.
Occupants should always be
properly restrained.
Page 136 of 586
Features of your vehicle
34
4
POWER SLIDING DOOR AND POWER TAILGATE (IF EQUIPPED)
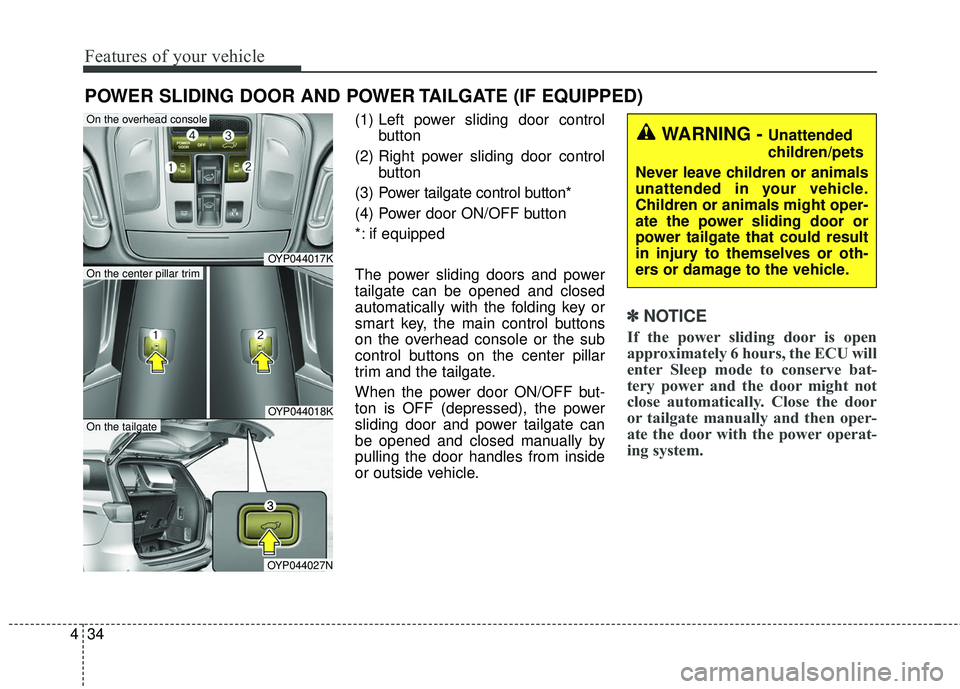
(1) Left power sliding door control
button
(2) Right power sliding door control button
(3) Power tailgate control button*
(4) Power door ON/OFF button
*: if equipped
The power sliding doors and power
tailgate can be opened and closed
automatically with the folding key or
smart key, the main control buttons
on the overhead console or the sub
control buttons on the center pillar
trim and the tailgate.
When the power door ON/OFF but-
ton is OFF (depressed), the power
sliding door and power tailgate can
be opened and closed manually by
pulling the door handles from inside
or outside vehicle.
✽ ✽ NOTICE
If the power sliding door is open
approximately 6 hours, the ECU will
enter Sleep mode to conserve bat-
tery power and the door might not
close automatically. Close the door
or tailgate manually and then oper-
ate the door with the power operat-
ing system.
OYP044017K
OYP044018K
OYP044027N
On the center pillar trim
On the tailgate
On the overhead console
WARNING - Unattended
children/pets
Never leave children or animals
unattended in your vehicle.
Children or animals might oper-
ate the power sliding door or
power tailgate that could result
in injury to themselves or oth-
ers or damage to the vehicle.
Page 145 of 586
443
Features of your vehicle
✽ ✽NOTICE
If the power tailgate does not oper-
ate normally, first check the follow-
ing condition before using the power
tailgate.
• Make sure the shift lever is in
Park
• Make sure the Power Tailgate Off switch is not pressed.
If any of the power tailgate buttons
are pressed while the power tailgate
is in operation, the power tailgate
will stop. If any button is pressed
again the power tailgate will reverse
direction.
Even though the Power door ON/OFF button is in the OFF
(depressed) position, if the tailgate
is manually closed to the secondary
latch position, the tailgate will be
electrically moved to the fully
latched position. Make sure that
face, arms, hands, and other
obstructions are safely out of the
way before operating the tailgate.
The chime will sound and the haz- ard warning flasher will blink 10
times if you drive with the tailgate
closed but not fully secured. Stop
your vehicle immediately at a safe
place to check if your tailgate is
securely locked.
Make sure there are no people or objects around the tailgate before
operating the power tailgate. Wait
until the tailgate is open fully and
stopped before loading or unload-
ing cargo or passengers from the
vehicle. Make sure the tailgate is closed
firmly before driving. If the tailgate
is open, you will draw dangerous
exhaust fumes into your vehicle
which can cause serious injury or
death to vehicle occupants.
If the power tailgate is not closed and latched completely after power
closing operation, the chime will
sound and hazard warning lights
will blink 10 times. Stop the driving
immediately and close the tailgate
securely at the safe place.
If the power tailgate is operated while the tailgate is in the partially opened
position (more than 9degrees), the
tailgate will stop the operation. If you
operate the power tailgate again, the
power tailgate will be operate in the
opposite direction.
Page 159 of 586
457
Features of your vehicle
Hood open warning
(if equipped)
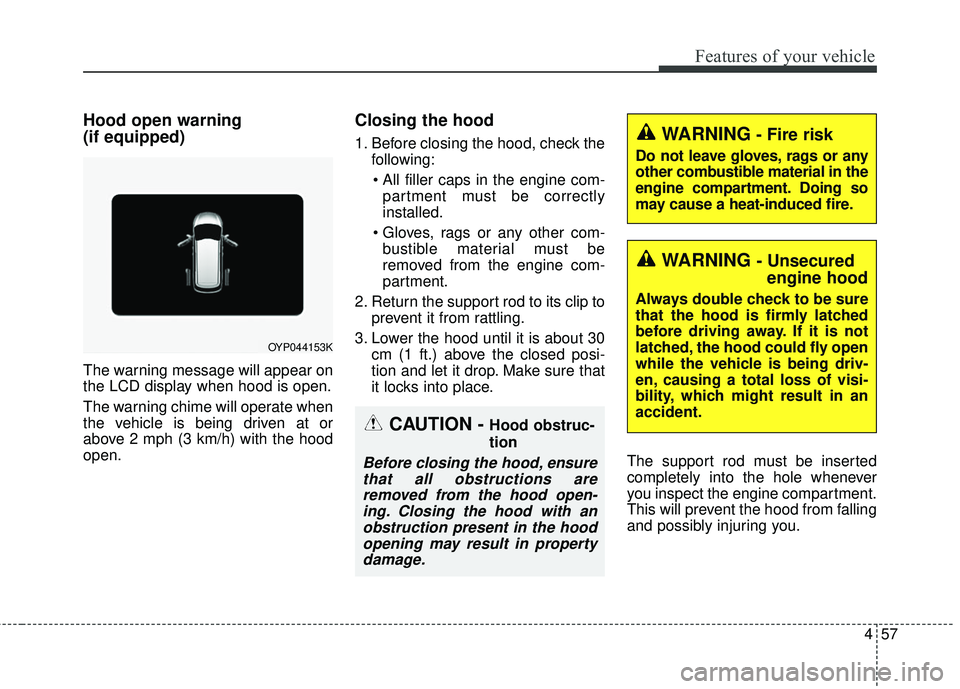
The warning message will appear on
the LCD display when hood is open.
The warning chime will operate when
the vehicle is being driven at or
above 2 mph (3 km/h) with the hood
open.
Closing the hood
1. Before closing the hood, check thefollowing:
partment must be correctly
installed.
bustible material must be
removed from the engine com-
partment.
2. Return the support rod to its clip to prevent it from rattling.
3. Lower the hood until it is about 30 cm (1 ft.) above the closed posi-
tion and let it drop. Make sure that
it locks into place.
The support rod must be inserted
completely into the hole whenever
you inspect the engine compartment.
This will prevent the hood from falling
and possibly injuring you.WARNING- Fire risk
Do not leave gloves, rags or any
other combustible material in the
engine compartment. Doing so
may cause a heat-induced fire.
WARNING - Unsecuredengine hood
Always double check to be sure
that the hood is firmly latched
before driving away. If it is not
latched, the hood could fly open
while the vehicle is being driv-
en, causing a total loss of visi-
bility, which might result in an
accident.
OYP044153K
CAUTION - Hood obstruc-
tion
Before closing the hood, ensure
that all obstructions areremoved from the hood open-ing. Closing the hood with anobstruction present in the hoodopening may result in propertydamage.
Page 160 of 586
Features of your vehicle
58
4
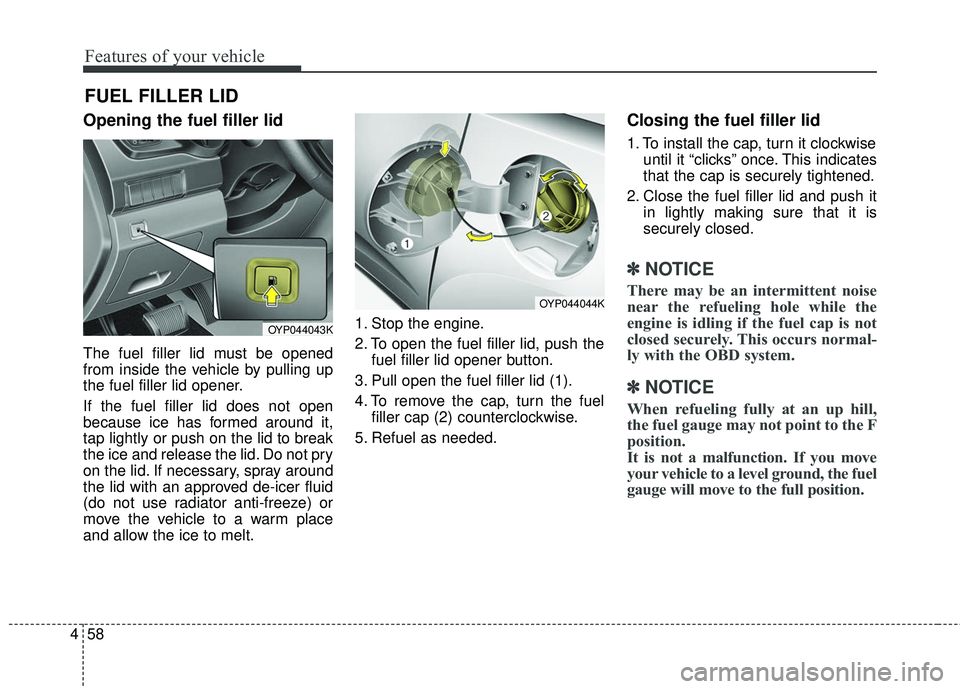
Opening the fuel filler lid
The fuel filler lid must be opened
from inside the vehicle by pulling up
the fuel filler lid opener.
If the fuel filler lid does not open
because ice has formed around it,
tap lightly or push on the lid to break
the ice and release the lid. Do not pry
on the lid. If necessary, spray around
the lid with an approved de-icer fluid
(do not use radiator anti-freeze) or
move the vehicle to a warm place
and allow the ice to melt. 1. Stop the engine.
2. To open the fuel filler lid, push the
fuel filler lid opener button.
3. Pull open the fuel filler lid (1).
4. To remove the cap, turn the fuel filler cap (2) counterclockwise.
5. Refuel as needed.
Closing the fuel filler lid
1. To install the cap, turn it clockwise until it “clicks” once. This indicates
that the cap is securely tightened.
2. Close the fuel filler lid and push it in lightly making sure that it is
securely closed.
✽ ✽NOTICE
There may be an intermittent noise
near the refueling hole while the
engine is idling if the fuel cap is not
closed securely. This occurs normal-
ly with the OBD system.
✽ ✽NOTICE
When refueling fully at an up hill,
the fuel gauge may not point to the F
position.
It is not a malfunction. If you move
your vehicle to a level ground, the fuel
gauge will move to the full position.
FUEL FILLER LID
OYP044044K
OYP044043K