reset KIA SEDONA 2019 Owners Manual
[x] Cancel search | Manufacturer: KIA, Model Year: 2019, Model line: SEDONA, Model: KIA SEDONA 2019Pages: 593, PDF Size: 15.93 MB
Page 105 of 593
Features of your vehicle
Folding key . . . . . . . . . . . . . . . . . . . . . . . . . . . . . . . . 4-5
• Record your key number . . . . . . . . . . . . . . . . . . . . . . . 4-5
• Key operations . . . . . . . . . . . . . . . . . . . . . . . . . . . . . . . . 4-5
• Transmitter precautions . . . . . . . . . . . . . . . . . . . . . . . . 4-9
• Battery replacement . . . . . . . . . . . . . . . . . . . . . . . . . . 4-10
• Immobilizer system . . . . . . . . . . . . . . . . . . . . . . . . . . . 4-11
• Limp home (override) procedure. . . . . . . . . . . . . . . . 4-13
Smart key . . . . . . . . . . . . . . . . . . . . . . . . . . . . . . . . 4-14
• Record your key number . . . . . . . . . . . . . . . . . . . . . . 4-14
• Smart key function . . . . . . . . . . . . . . . . . . . . . . . . . . . 4-14
• Loss of the smart key . . . . . . . . . . . . . . . . . . . . . . . . . 4-18
• Smart key precautions . . . . . . . . . . . . . . . . . . . . . . . . 4-19
• Battery replacement . . . . . . . . . . . . . . . . . . . . . . . . . . 4-20
• Smart key immobilizer system . . . . . . . . . . . . . . . . . . 4-21
Theft-alarm system . . . . . . . . . . . . . . . . . . . . . . . . 4-22
• Armed stage . . . . . . . . . . . . . . . . . . . . . . . . . . . . . . . . . 4-22
• Theft-alarm stage . . . . . . . . . . . . . . . . . . . . . . . . . . . . 4-23
• Disarmed stage. . . . . . . . . . . . . . . . . . . . . . . . . . . . . . . 4-23
Door locks . . . . . . . . . . . . . . . . . . . . . . . . . . . . . . . . 4-25
• Operating door locks from outside the vehicle. . . . . 4-25
• Operating door locks from inside the vehicle . . . . . . 4-27
• Impact sensing door unlock system . . . . . . . . . . . . . . 4-30
• Automatic door lock system . . . . . . . . . . . . . . . . . . . . 4-30
• Child-protector rear door lock. . . . . . . . . . . . . . . . . . 4-30
Liftgate (for manual liftgate) . . . . . . . . . . . . . . . . 4-31
• Opening the liftgate . . . . . . . . . . . . . . . . . . . . . . . . . . . 4-31
• Closing the liftgate. . . . . . . . . . . . . . . . . . . . . . . . . . . . 4-32
• Emergency liftgate safety release. . . . . . . . . . . . . . . . 4-33
Power sliding door and power liftgate . . . . . . . . . 4-34
• Automatic stop and reversal . . . . . . . . . . . . . . . . . . . 4-36
• How to reset the power sliding door and power liftgate . . . . . . . . . . . . . . . . . . . . . . . . . . . . . . . 4-37
• Power door ON/OFF button. . . . . . . . . . . . . . . . . . . . 4-38
• Power sliding door operation . . . . . . . . . . . . . . . . . . . 4-39
• Power liftgate operation . . . . . . . . . . . . . . . . . . . . . . . 4-42
• Power liftgate non-opening conditions . . . . . . . . . . . 4-45
• Power liftgate opening height user setting . . . . . . . . 4-45
• Emergency liftgate safety release. . . . . . . . . . . . . . . . 4-46
• Smart liftgate . . . . . . . . . . . . . . . . . . . . . . . . . . . . . . . . 4-46
Windows . . . . . . . . . . . . . . . . . . . . . . . . . . . . . . . . . 4-52
• Power windows . . . . . . . . . . . . . . . . . . . . . . . . . . . . . . 4-53
Hood. . . . . . . . . . . . . . . . . . . . . . . . . . . . . . . . . . . . \
. 4-57
• Opening the hood . . . . . . . . . . . . . . . . . . . . . . . . . . . . 4-57
• Hood open warning . . . . . . . . . . . . . . . . . . . . . . . . . . . 4-58
• Closing the hood . . . . . . . . . . . . . . . . . . . . . . . . . . . . . 4-58
4
Page 106 of 593
Fuel filler lid . . . . . . . . . . . . . . . . . . . . . . . . . . . . . . 4-60
• Opening the fuel filler lid . . . . . . . . . . . . . . . . . . . . . . 4-60
• Closing the fuel filler lid . . . . . . . . . . . . . . . . . . . . . . . 4-60
• Emergency fuel filler lid release . . . . . . . . . . . . . . . . 4-63
Sunroof . . . . . . . . . . . . . . . . . . . . . . . . . . . . . . . . . . 4-64\
• Sliding the sunroof . . . . . . . . . . . . . . . . . . . . . . . . . . . 4-65
• Tilting the sunroof (for front sunroof) . . . . . . . . . . . 4-67
• Sunshade. . . . . . . . . . . . . . . . . . . . . . . . . . . . . . . . \
. . . . 4-67
• Resetting the sunroof . . . . . . . . . . . . . . . . . . . . . . . . . 4-68
• Rear sunroof lock . . . . . . . . . . . . . . . . . . . . . . . . . . . . 4-68
• Sunroof open warning. . . . . . . . . . . . . . . . . . . . . . . . . 4-69
Steering wheel . . . . . . . . . . . . . . . . . . . . . . . . . . . . . 4-70
• Power steering . . . . . . . . . . . . . . . . . . . . . . . . . . . . . . . 4-70
• Electric power steering . . . . . . . . . . . . . . . . . . . . . . . . 4-70
• Tilt and telescopic steering . . . . . . . . . . . . . . . . . . . . . 4-71
• Heated steering wheel . . . . . . . . . . . . . . . . . . . . . . . . . 4-72
• Horn . . . . . . . . . . . . . . . . . . . . . . . . . . . . . . . . . . . . \
. . . 4-73
Mirrors . . . . . . . . . . . . . . . . . . . . . . . . . . . . . . . . . . 4-74\
• Inside rearview mirror . . . . . . . . . . . . . . . . . . . . . . . . 4-74
• Outside rearview mirror. . . . . . . . . . . . . . . . . . . . . . . 4-84
Instrument cluster . . . . . . . . . . . . . . . . . . . . . . . . . 4-89
• Instrument cluster control . . . . . . . . . . . . . . . . . . . . . 4-90
• LCD display control . . . . . . . . . . . . . . . . . . . . . . . . . . 4-90
• Gauges . . . . . . . . . . . . . . . . . . . . . . . . . . . . . . . . . . . . \
. 4-91
• Transaxle Shift Indicator . . . . . . . . . . . . . . . . . . . . . . 4-94
LCD display . . . . . . . . . . . . . . . . . . . . . . . . . . . . . . 4-95
• LCD modes. . . . . . . . . . . . . . . . . . . . . . . . . . . . . . . . . . 4-95\
Trip modes (Trip computer) . . . . . . . . . . . . . . . . . 4-96
• Trip modes . . . . . . . . . . . . . . . . . . . . . . . . . . . . . . . . . . 4-96\
• Fuel economy . . . . . . . . . . . . . . . . . . . . . . . . . . . . . . . . 4-96
• Accumulated driving information mode . . . . . . . . . . 4-98
• One time driving information mode . . . . . . . . . . . . . 4-98
• Digital speedometer . . . . . . . . . . . . . . . . . . . . . . . . . . . 4-99
• Smart shift . . . . . . . . . . . . . . . . . . . . . . . . . . . . . . . . . . 4-99\
• Turn by turn mode . . . . . . . . . . . . . . . . . . . . . . . . . . . 4-99
• Assist mode. . . . . . . . . . . . . . . . . . . . . . . . . . . . . . . . . 4-100
• Distance to empty . . . . . . . . . . . . . . . . . . . . . . . . . . . 4-102
• User settings mode. . . . . . . . . . . . . . . . . . . . . . . . . . . 4-103
• Warning messages . . . . . . . . . . . . . . . . . . . . . . . . . . . 4-107
Warning and indicator lights . . . . . . . . . . . . . . . 4-113
• Warning lights . . . . . . . . . . . . . . . . . . . . . . . . . . . . . . 4-113
• Indicator lights. . . . . . . . . . . . . . . . . . . . . . . . . . . . . . 4-120
Parking distance warning-reverse . . . . . . . . . . . 4-125
• Operation of the parking distance warning-reverse . 4-125
• Non-operational conditions of the parking distance
warning-reverse . . . . . . . . . . . . . . . . . . . . . . . . . . . . 4-126
• Parking distance warning-reverse precautions . . . 4-127
• Self-diagnosis . . . . . . . . . . . . . . . . . . . . . . . . . . . . . . . 4-128
4
Page 141 of 593
437
Features of your vehicle
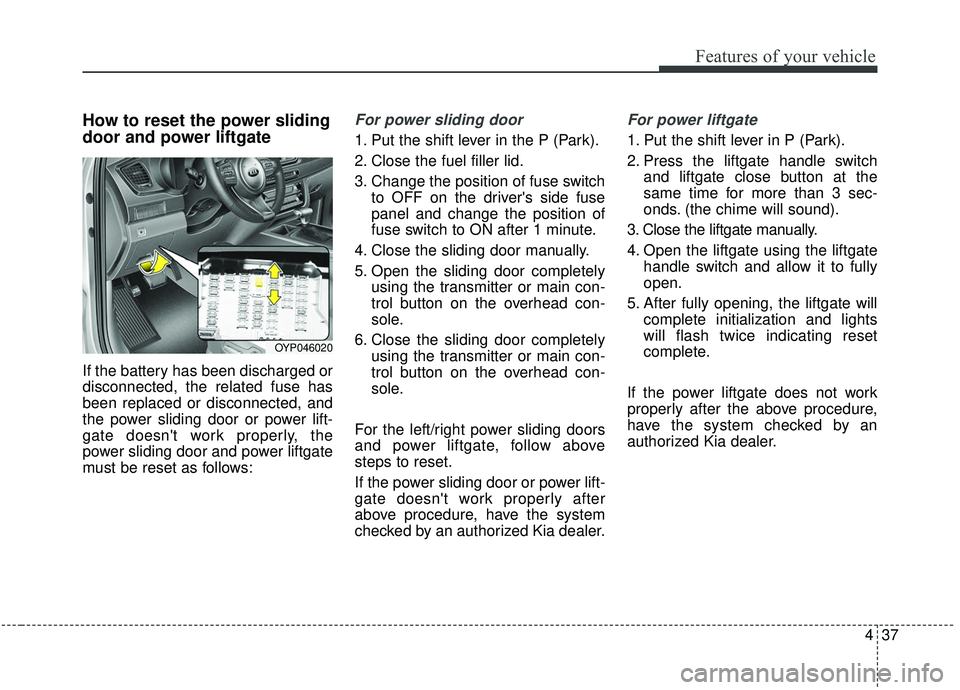
How to reset the power sliding
door and power liftgate
If the battery has been discharged or
disconnected, the related fuse has
been replaced or disconnected, and
the power sliding door or power lift-
gate doesn't work properly, the
power sliding door and power liftgate
must be reset as follows:
For power sliding door
1. Put the shift lever in the P (Park).
2. Close the fuel filler lid.
3. Change the position of fuse switchto OFF on the driver's side fuse
panel and change the position of
fuse switch to ON after 1 minute.
4. Close the sliding door manually.
5. Open the sliding door completely using the transmitter or main con-
trol button on the overhead con-
sole.
6. Close the sliding door completely using the transmitter or main con-
trol button on the overhead con-
sole.
For the left/right power sliding doors
and power liftgate, follow above
steps to reset.
If the power sliding door or power lift-
gate doesn't work properly after
above procedure, have the system
checked by an authorized Kia dealer.
For power liftgate
1. Put the shift lever in P (Park).
2. Press the liftgate handle switch and liftgate close button at the
same time for more than 3 sec-
onds. (the chime will sound).
3. Close the liftgate manually.
4. Open the liftgate using the liftgate handle switch and allow it to fully
open.
5. After fully opening, the liftgate will complete initialization and lights
will flash twice indicating reset
complete.
If the power liftgate does not work
properly after the above procedure,
have the system checked by an
authorized Kia dealer.
OYP046020
Page 158 of 593

Features of your vehicle
54
4
Auto up/down window (if equipped)
Pressing or pulling up the power win-
dow switch momentarily to the second
detent position (6) completely lowers
or raises the window even when the
switch is released. To stop the window
at the desired position while the win-
dow is in operation, pull up or press
down and release the switch.
If the power window does not operate
normally, the automatic power win-
dow system must be reset as follows: 1. Turn the ignition switch to the ON
position.
2. Close the driver's and passenger's window and continue pulling up
the driver’s power window switch
for at least 1 second after the win-
dow is completely closed.
Automatic reversal
(for Auto up/down window)
If the upward movement of the win-
dow is blocked by an object or part of
the body, the window will detect the
resistance and will stop upward
movement. The window will then
lower approximately 30 cm (11.8 in.)
to allow the object to be cleared.
The distance may vary based on the
size or position of the window. If the
window detects the resistance while
the power window switch is pulled up
continuously, the window will stop
upward movement then lower
approximately 2.5 cm (1 in.) .
OYP044033K
OUN026013
Page 159 of 593
455
Features of your vehicle
And if the power window switch is
pulled up continuously again within 5
seconds after the window is lowered
by the automatic window reversal
feature, the automatic window rever-
sal will not operate.
The automatic reverse feature for the
driver’s window is only active when
the “auto up” feature is used by fully
pulling up the switch. The automatic
reverse feature will not operate if the
window is raised using the halfway
position on the power window switch.Power window and rear sunroof*lock button
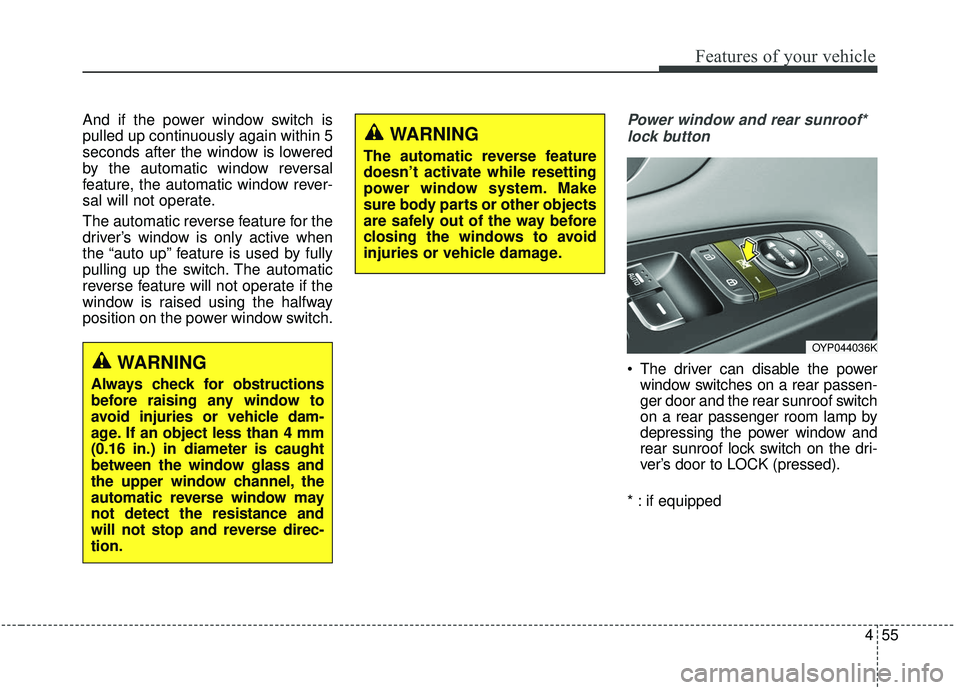
The driver can disable the power window switches on a rear passen-
ger door and the rear sunroof switch
on a rear passenger room lamp by
depressing the power window and
rear sunroof lock switch on the dri-
ver’s door to LOCK (pressed).
* : if equipped
WARNING
The automatic reverse feature
doesn’t activate while resetting
power window system. Make
sure body parts or other objects
are safely out of the way before
closing the windows to avoid
injuries or vehicle damage.
WARNING
Always check for obstructions
before raising any window to
avoid injuries or vehicle dam-
age. If an object less than 4 mm
(0.16 in.) in diameter is caught
between the window glass and
the upper window channel, the
automatic reverse window may
not detect the resistance and
will not stop and reverse direc-
tion.
OYP044036K
Page 172 of 593
Features of your vehicle
68
4
Resetting the sunroof
Whenever the vehicle battery is dis-
connected or discharged, you must
reset your sunroof system as follows:
1.Turn the ignition switch to the ON
position.
2.Close the sunshade and sunroof completely if opened.
3.Release the sunroof control lever.
4.Push the sunroof control lever for- ward in the direction of close (about
10~15 seconds) until the sunroof
moves a little. Then, release the
lever. 5.Push the sunroof control lever for-
ward in the direction of close, until
the sunroof operates as follows
again:
The sunroof glass slide open →
The sunroof glass slide close
Then, release the lever.
When this is complete, the sunroof
system has been reset.
Rear sunroof lock
When the power window lock switch
is pressed, the rear sunroof control
cannot operate the rear sunroof. But
The front master sunroof control can
operate both front and rear sunroofs
(if equipped).
CAUTION
If the sunroof is not reset when the vehicle battery is discon-nected or discharged, or relatedfuse is blown, the sunroof mayoperate improperly.
Page 195 of 593
491
Features of your vehicle
(1) : MODE button for changingmodes
(2) ▲ /▼ / OK : SELECT scroll
switch for setting the
selected item and
RESET scroll switch
for resetting items
(3) : RETURN button for move the previous mode or item (if
equipped)
❈ For the LCD modes, refer to “LCD
Display” in this chapter.Gauges
Speedometer
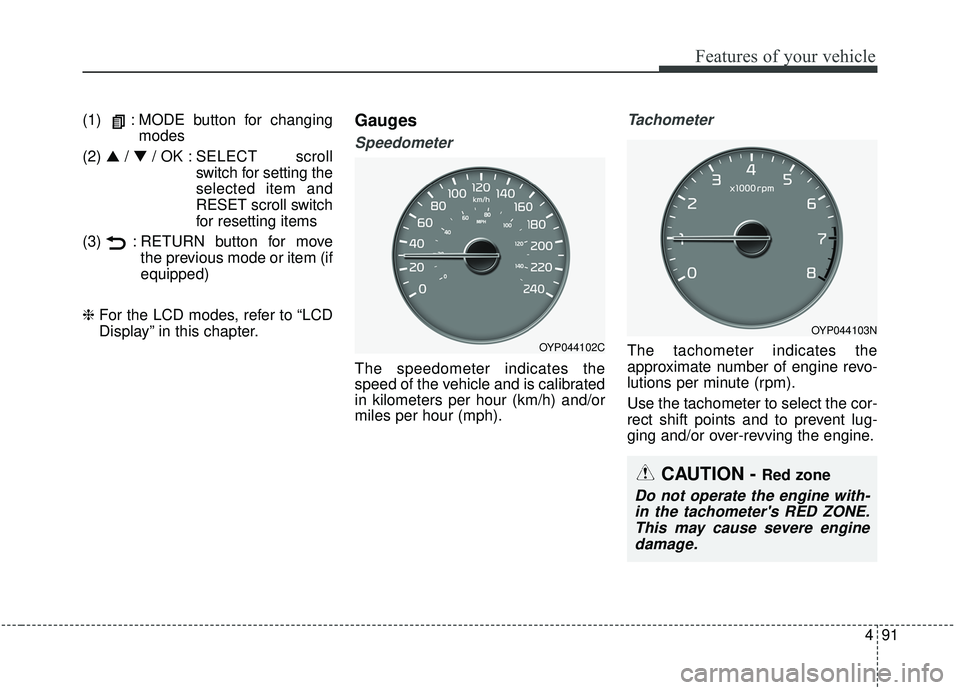
The speedometer indicates the
speed of the vehicle and is calibrated
in kilometers per hour (km/h) and/or
miles per hour (mph).
Tachometer
The tachometer indicates the
approximate number of engine revo-
lutions per minute (rpm).
Use the tachometer to select the cor-
rect shift points and to prevent lug-
ging and/or over-revving the engine.OYP044102C
OYP044103N
CAUTION - Red zone
Do not operate the engine with-
in the tachometer's RED ZONE.This may cause severe enginedamage.
Page 200 of 593
Features of your vehicle
96
4
The trip computer is a microcomput-
er-controlled driver information sys-
tem that displays information related
to driving.
✽ ✽
NOTICE
Some driving information stored in
the trip computer (for example
Average Vehicle Speed) resets if the
battery is disconnected.
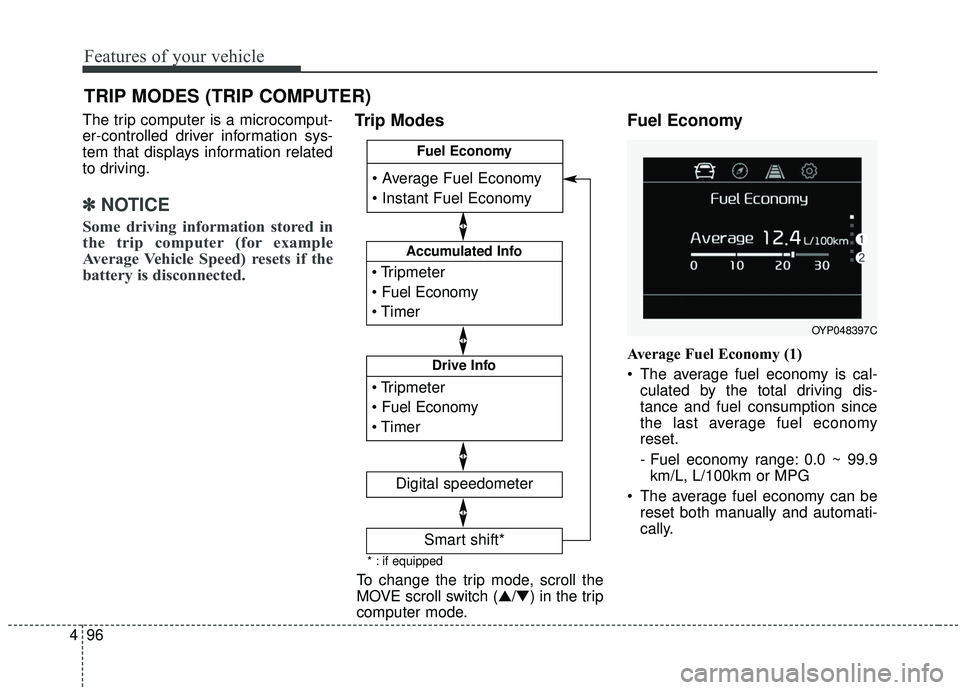
Trip Modes Fuel Economy
Average Fuel Economy (1)
The average fuel economy is cal-
culated by the total driving dis-
tance and fuel consumption since
the last average fuel economy
reset.
- Fuel economy range: 0.0 ~ 99.9km/L, L/100km or MPG
The average fuel economy can be reset both manually and automati-
cally.
TRIP MODES (TRIP COMPUTER)
To change the trip mode, scroll the
MOVE scroll switch (▲/▼) in the trip
computer mode.
OYP048397C
* : if equipped
Accumulated Info
Digital speedometer
Drive Info
Fuel Economy
Smart shift*
Page 201 of 593
497
Features of your vehicle
Manual reset
To reset average fuel economy man-
ually, press the OK button (reset) on
the steering wheel for more than 1
second when the average fuel econ-
omy is displayed.
Automatic reset
To make the average fuel economy
be reset automatically whenever
refueling, select the “Auto Reset”
mode in User Setting menu of the
LCD display (Refer to “LCD
Display”). OFF - You may set to default man-
ually by using the trip switch reset
button.
When driving - The vehicle will automatically set to default once 4
hours pass after the Engine
Start/Stop Button or ignition switch
is in the ACC or OFF position.
When refueling - After refueling more than 6 liters (1.6 gallons) and
driving over 1 km/h (1 mph), the
vehicle will reset to default auto-
matically.
✽ ✽ NOTICE
The average fuel economy is not dis-
played for more accurate calculation
if the vehicle does not drive more
than 300 meters (0.2 miles) since the
ignition switch or Engine Start/Stop
button is turned to ON.
Instant Fuel Economy (2)
This mode displays the instant fuel
economy during the last few sec-
onds when the vehicle speed is
more than 8 km/h (5 mph).
- Fuel economy range: 0 ~ 30km/L, L/100km or 0 ~ 50 MPG
Page 202 of 593
Features of your vehicle
98
4
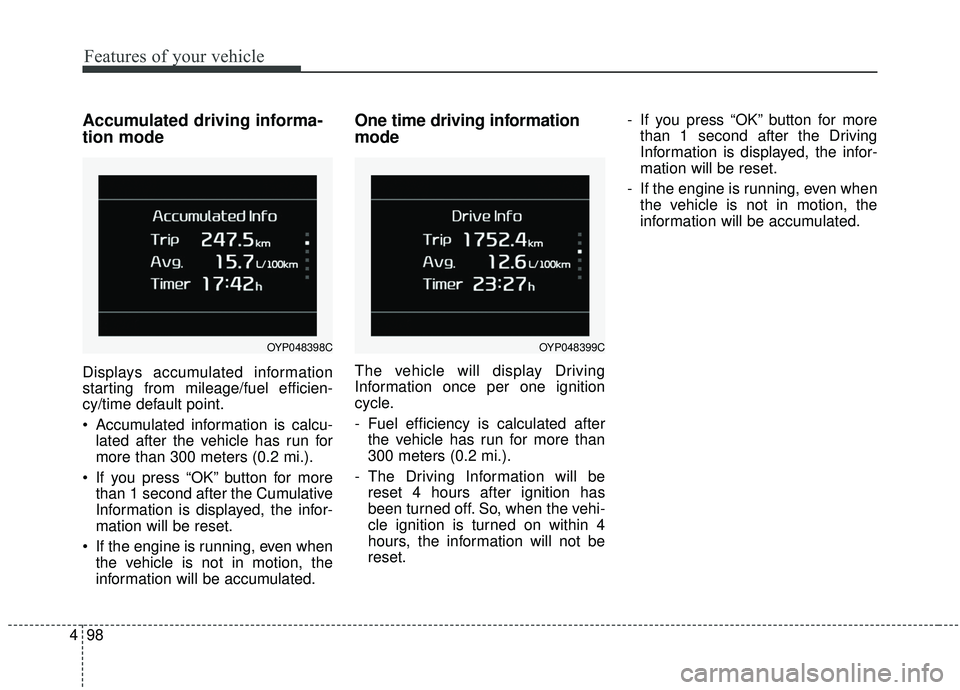
Accumulated driving informa-
tion mode
Displays accumulated information
starting from mileage/fuel efficien-
cy/time default point.
Accumulated information is calcu-
lated after the vehicle has run for
more than 300 meters (0.2 mi.).
If you press “OK” button for more than 1 second after the Cumulative
Information is displayed, the infor-
mation will be reset.
If the engine is running, even when the vehicle is not in motion, the
information will be accumulated.
One time driving information
mode
The vehicle will display Driving
Information once per one ignition
cycle.
- Fuel efficiency is calculated afterthe vehicle has run for more than
300 meters (0.2 mi.).
- The Driving Information will be reset 4 hours after ignition has
been turned off. So, when the vehi-
cle ignition is turned on within 4
hours, the information will not be
reset. - If you press “OK” button for more
than 1 second after the Driving
Information is displayed, the infor-
mation will be reset.
- If the engine is running, even when the vehicle is not in motion, the
information will be accumulated.
OYP048399COYP048398C