display KIA Sorento 2006 1.G Owner's Manual
[x] Cancel search | Manufacturer: KIA, Model Year: 2006, Model line: Sorento, Model: KIA Sorento 2006 1.GPages: 312, PDF Size: 5.21 MB
Page 151 of 312
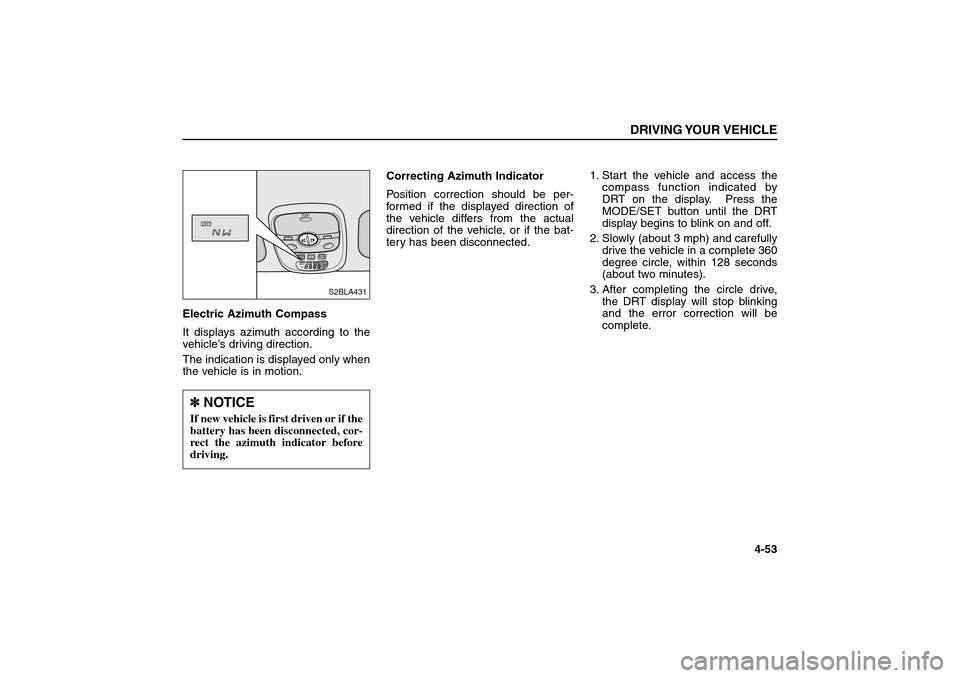
Electric Azimuth Compass
It displays azimuth according to the
vehicle’s driving direction.
The indication is displayed only when
the vehicle is in motion.Correcting Azimuth Indicator
Position correction should be per-
formed if the displayed direction of
the vehicle differs from the actual
direction of the vehicle, or if the bat-
tery has been disconnected.1. Start the vehicle and access the
compass function indicated by
DRT on the display. Press the
MODE/SET button until the DRT
display begins to blink on and off.
2. Slowly (about 3 mph) and carefully
drive the vehicle in a complete 360
degree circle, within 128 seconds
(about two minutes).
3. After completing the circle drive,
the DRT display will stop blinking
and the error correction will be
complete.
DRIVING YOUR VEHICLE
4-53
DRT ALTI BARO
E
hpa
m
ft
PUSHMODE
/SETUPDOWN
DRT
S2BLA431
✽ ✽
NOTICEIf new vehicle is first driven or if the
battery has been disconnected, cor-
rect the azimuth indicator before
driving.
BL-ENG (CAN)-4.qxd 7/28/05 5:55 PM Page 53
Page 152 of 312
The azimuth compass indicator
correction will be cancelled:
1. If you press MODE/SET switch for
more than 1 second while the DRT
display blinks.
2. When the vehicle is not rotated
within 128 seconds after the blink-
ing of the DRT display.Magnetic Declination Correction
The compass function provides bear-
ing (direction of travel) information to
the driver. It is known that a magnet-
ic compass does not point to true
(geographic) north. Magnetic north is
the direction in which a compass will
point. Over most of the earth surface,
a magnetic compass will point either
east or west of true north. In order to
compensate for this, magnetic decli-
nation must be taken into considera-
tion. Magnetic declination is the
angle between magnetic north and
true north.
Correcting declination
1. Turn the ignition key ON and
access the compass function indi-
cated by DRT on the display.
2. Press and hold the MODE/SET
button for four seconds. The dis-
play will change from a direction to
a number followed by an E or W.3. Press the UP or DOWN button to
select the degree of correction for
your location from the contour line
map. (example: Los Angeles,
California would be 15E.)
4. Press the MODE/SET button until
the display changes back to its
normal view.
The terrestrial deviation angle
correction will be cancelled:
1. If you press MODE/SET switch for
less than 1 second.
2. If you don't correct the terrestrial
deviation angle within 30 seconds.DRIVING YOUR VEHICLE4-54✽ ✽
NOTICEThe azimuth may display abnor-
mally in specific places (tunnel,
parking lot in building, under-
ground parking lot, near trans-
former substation, etc.).
✽ ✽
NOTICEThe terrestrial deviation setting
will be remembered even if the bat-
tery has been disconnected.
BL-ENG (CAN)-4.qxd 7/28/05 5:55 PM Page 54
Page 154 of 312
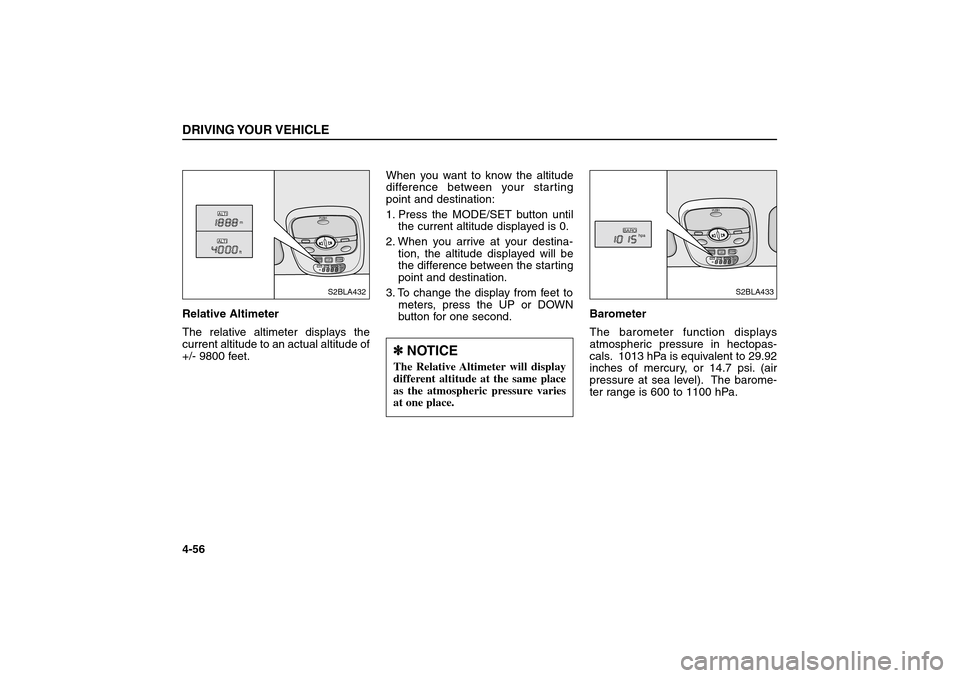
Relative Altimeter
The relative altimeter displays the
current altitude to an actual altitude of
+/- 9800 feet.When you want to know the altitude
difference between your starting
point and destination:
1. Press the MODE/SET button until
the current altitude displayed is 0.
2. When you arrive at your destina-
tion, the altitude displayed will be
the difference between the starting
point and destination.
3. To change the display from feet to
meters, press the UP or DOWN
button for one second.Barometer
The barometer function displays
atmospheric pressure in hectopas-
cals. 1013 hPa is equivalent to 29.92
inches of mercury, or 14.7 psi. (air
pressure at sea level). The barome-
ter range is 600 to 1100 hPa.DRIVING YOUR VEHICLE4-56
DRT ALTI BARO
E
hpa
m
ft
PUSHMODE
/SETUPDOWN
m
ft
ALTIALTI
S2BLA432
DRT ALTI BARO
E
hpa
m
ft
PUSHMODE
/SETUPDOWN
hpa
BARO
S2BLA433
✽ ✽
NOTICEThe Relative Altimeter will display
different altitude at the same place
as the atmospheric pressure varies
at one place.
BL-ENG (CAN)-4.qxd 7/28/05 5:55 PM Page 56
Page 165 of 312
INTERIOR FEATURESDigital Clock
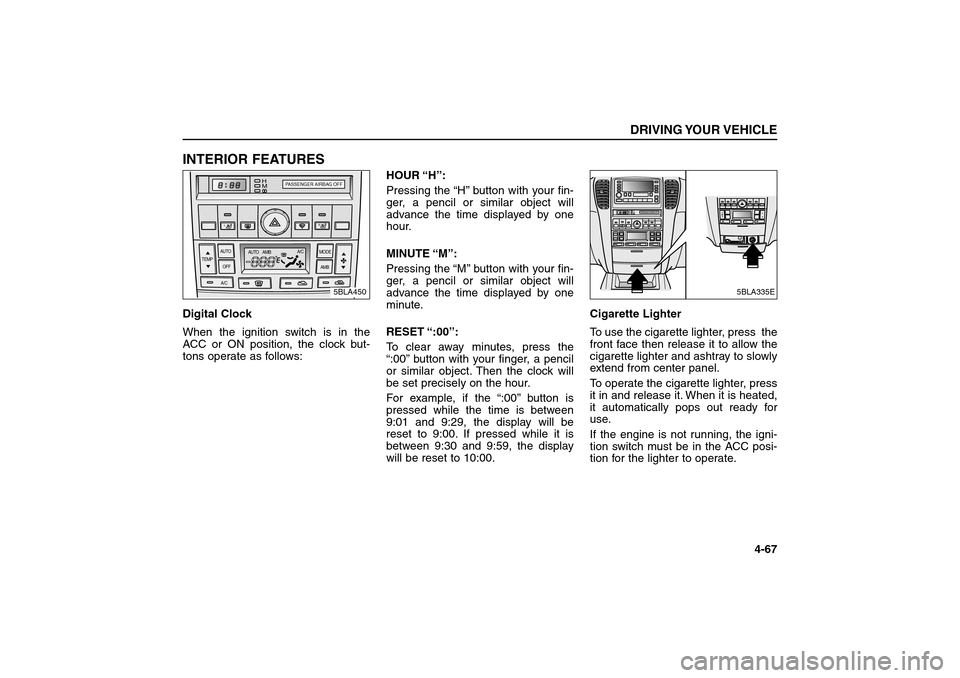
When the ignition switch is in the
ACC or ON position, the clock but-
tons operate as follows:HOUR “H’’:
Pressing the “H’’button with your fin-
ger, a pencil or similar object will
advance the time displayed by one
hour.
MINUTE “M’’:
Pressing the “M’’button with your fin-
ger, a pencil or similar object will
advance the time displayed by one
minute.
RESET “:00’’:
To clear away minutes, press the
“:00’’button with your finger, a pencil
or similar object. Then the clock will
be set precisely on the hour.
For example, if the “:00’’button is
pressed while the time is between
9:01 and 9:29, the display will be
reset to 9:00. If pressed while it is
between 9:30 and 9:59, the display
will be reset to 10:00.Cigarette Lighter
To use the cigarette lighter, press the
front face then release it to allow the
cigarette lighter and ashtray to slowly
extend from center panel.
To operate the cigarette lighter, press
it in and release it. When it is heated,
it automatically pops out ready for
use.
If the engine is not running, the igni-
tion switch must be in the ACC posi-
tion for the lighter to operate.
DRIVING YOUR VEHICLE
4-67
AUTO
AUTO AMB
OFF TEMPMODE
AMB
A/C
A/C
H
M
L
R
PASSENGER AIRBAG OFF
5BLA450
H
M
5BLA335E
BL-ENG (CAN)-4.qxd 7/28/05 5:55 PM Page 67
Page 178 of 312
Automatic Operation
The Full Automatic Temperature
Control (FATC) system automatically
controls the heating and cooling sys-
tem as follows;
1. Push the AUTO button. The indica-
tor light will come on and the
modes, fan speeds, air intake and
air-conditioning will be controlled
automatically by temperature set-
ting.
2. Push the TEMP button to set the
desired temperature.
If the temperature setting is
LO (17°C/62°F), the air condition-
ing system will operate continu-
ously.3. To turn the automatic operation off,
press any button except tempera-
ture control button and AMB but-
ton. If you press the mode selec-
tion button, air-conditioning button,
defrost button, air intake control
button, fan speed button, the
selected function will be controlled
manually while other functions
operate automatically.DRIVING YOUR VEHICLE4-80
AUTO
✽ ✽
NOTICENever place anything over the sen-
sor located on the instrument panel
to ensure better control of the heat-
ing and cooling system.
✽ ✽
NOTICEIf the battery has been discharged
or disconnected, the temperature
mode will reset as Centigrade
degree.
This is normal condition and you
can adjust the temperature mode
from Centigrade to Fahrenheit as
follows;
Press the temperature down button
3 seconds or more with the AMB
button held down. The display
shows that the unit of temperature
is adjusted to Centigrade or
Fahrenheit.
BL-ENG (CAN)-4.qxd 7/28/05 5:55 PM Page 80
Page 179 of 312
Manual Operation
The heating and cooling system can
be controlled manually as well by
pushing buttons other than the AUTO
button. In this case, the system
sequentially works according the
order of buttons selected.
The functions of the buttons which
are not selected will be controlled
automatically.
Press the AUTO button in order to
convert to automatic control of the
system.Temperature Control
Button
The temperature will increase to the
maximum HI (32°C/90°F) by pushing
the up button. Each push of the but-
ton will cause the temperature to
increase by 0.5 °C (1°F).
The temperature will decrease to the
minimum LO (17°C/62°F) by pushing
the down button. Each push of the
button will cause the temperature to
decrease by 0.5°C (1°F).Ambient Button
The ambient temperature will be dis-
played for 5 seconds. before return-
ing to the previous indication.
If you press AMB button again, the
previous indication will be displayed.
DRIVING YOUR VEHICLE
4-81
TEMP
AMB
BL-ENG (CAN)-4.qxd 7/28/05 5:55 PM Page 81