stop start KIA Sorento 2007 1.G Owner's Manual
[x] Cancel search | Manufacturer: KIA, Model Year: 2007, Model line: Sorento, Model: KIA Sorento 2007 1.GPages: 325, PDF Size: 5.01 MB
Page 6 of 325
13
Introduction
VEHICLE HANDLING
INSTRUCTIONSAs with other vehicles of this type, failure
to operate this vehicle correctly may
result in loss of control, an accident or
vehicle rollover. Specific design charac-
teristics (higher ground clearance, track,
etc.) give this vehicle a higher center of
gravity than ordinary cars. They are not
designed for cornering at the same
speeds as conventional 2-wheel drive
vehicles. Avoid sharp turns or abrupt
maneuvers. Again, failure to operate this
vehicle correctly may result in loss of
control, an accident or vehicle rollover.
Be sure to read the “on-pavement’’
and “off-road’’ driving guidelines,
Section 5 in this manual.
VEHICLE BREAK-IN PROCESSNo special break-in period is needed. By
following a few simple precautions for the
first 1,000 km (600 miles) you may add to
the performance, economy and life of
your vehicle.
Do not race the engine.
Do not maintain a single speed for longperiods of time, either fast or slow.
Varying engine speed is needed to
properly break-in the engine.
Avoid hard stops, except in emergen- cies, to allow the brakes to seat prop-
erly.
Avoid full-throttle starts.
Page 14 of 325
35
Knowing your vehicle
Your vehicle is equipped with an elec-
tronic engine immobilizer system to
reduce the risk of unauthorized vehicle
use.
Your immobilizer system is comprised of
a small transponder in the ignition key,
and antenna coil in the key cylinder and
Immobilizer Control Unit (or Smartra
Unit).
With this system, whenever you insert
your ignition key into the ignition switch
and turn it to ON, the antenna coil in the
ignition switch receives a signal from the
transponder in the ignition key and then
sends the signal to the ECU (Engine
Control Unit).
The ECU checks the signal whether the
ignition key is valid.
If the key is determined to be valid, the
engine will start.
If the key is determined to be invalid, the
engine will not start.To deactivate the immobilizer system:
Insert the ignition key into the key cylin-
der and turn it to the ON position.
To activate the immobilizer system:
Turn the ignition key to the OFF position.
The immobilizer system activates auto-
matically. Without a valid ignition key for
your vehicle, the engine will not start.
✽ ✽
NOTICEWhen starting the engine, do not use the
key with other immobilizer keys around.
Otherwise the engine may not start or
may stop soon after it starts. Keep each
key separately not to have any malfunc-
tion after you receive your new vehicle.
Limp home (override) procedureWhen you turn the ignition key to the ON
position, if the IMMO indicator goes off
after blinking 5 times, your transponder
equipped in the ignition key is out of order.
You cannot start the engine without the
lime home procedure. To start the engine,
you have to input your password by using
the ignition switch.
The following procedure is how to input
your password of “2345” as an example.
1. Turn the ignition key to the ON position.
The IMMO indicator ( ) will blink 5
times and go off indicating the begin-
ning of the limp home procedure.
2. Turn the ignition key to the ACC posi- tion.
3. To enter the first digit (in this example “2”), turn the ignition key to the ON and
ACC position twice. Perform the same
procedure for the next digits between 3
seconds and 10 seconds (for example,
for “3”, turn the ignition ON and ACC 3
times).
IMMOBILIZER SYSTEM (IF EQUIPPED)
Page 139 of 325
49
Driving your vehicle
Moving up a steep grade from a
standing startTo move up a steep grade from a stand-
ing start, depress the brake pedal, shift
the shift lever to D (Drive). Select the
appropriate gear depending on load
weight and steepness of the grade, and
release the parking brake. Depress the
accelerator gradually while releasing the
service brakes.
When accelerating from a stop on a
steep hill, the vehicle may have a ten-
dency to roll backwards. Shifting the
shift lever into 2 (Second Gear) while
in Sport mode will help prevent the
vehicle from rolling backwards.
Shift lock systemFor your safety, the Automatic
Transmission has a shift lock system
which prevents shifting the transmission
out of P (Park) unless the brake pedal is
depressed.
To shift the transmission out of P (Park):
1. Depress and hold the brake pedal.
2. Start the engine or turn the ignition tothe ACC or ON position.
3. Depress the lock release button and move the shift lever.
When the ignition switch is in the LOCK
position, the transmission cannot be
shifted from P (Park).
If the brake pedal is repeatedly
depressed and released with the shift
lever in the P (Park) position, a chattering
noise near the shift lever may be heard.
This is a normal condition.
Ignition key interlock systemThe ignition key cannot be removed
unless the shift lever is in the P (Park)
position. If the ignition switch is in any
other position, the key cannot be
removed.
Page 140 of 325
Driving your vehicle10
4For safe four-wheel drive opera-
tion Your vehicle allows you to drive in on-
road and off-road conditions.
However, do not try to drive in deep standing water, mud, or over steep
hills.
When you are driving up or down hills drive as close to straight up and down
the hill as possible. Use extreme cau-
tion in going up or down steep hills,
since you may flip your vehicle over
depending on the grade, terrain and
water/mud conditions.
You must learn how to corner in a 4WDvehicle as soon as possible. Do not
rely on your experience in convention-
al 2WD vehicles in choosing safe cor-
nering speed. You must drive more
slowly.
Drive off-road carefully because your vehicle may be damaged by rocks or
roots of trees. Become familiar with the
off-road conditions you are going to
drive before you start.FOUR WHEEL DRIVE (4WD) (IF EQUIPPED)
WARNING -
Four wheel
drive
Driving across the contour of steep
hills can be extremely dangerous.
This danger can come from slight
changes in the wheel angle which
can destabilize the vehicle or, even
if the vehicle is maintaining stabili-
ty under power, it can lose that sta-
bility if the vehicle stops its forward
motion. Your vehicle may roll over
without warning and without time
for you to correct a mistake that
could cause serious injury or death.
WARNING
Reduce speed when you turn cor-
ners. The center of gravity of 4WD
vehicles is higher than that of con-
ventional 2WD vehicles, making
them more likely to roll over when
you turn corners too fast.
WARNING
Do not grab inside of the steering
wheel when you are driving off-
road. Your arm may be hurt by a
sudden steering maneuver or from
steering wheel rebound due to
impact with objects on the ground.
This may cause you to lose steering
wheel control.
Page 145 of 325
415
Driving your vehicle
4HI ↔
↔
4LO
1. Stop the vehicle.
2. Depress the clutch pedal for the man- ual transmission or put the shift lever
into N (Neutral) for the automatic
transmission.
3. 4HI ➝ ➝
4LO
: Select the 4LO mode.
4LO ➝ ➝
4HI
: Select the 4HI mode.
4. Before releasing the clutch pedal (Manual transmission) or shifting to
other ranges from N range (Automatic
transmission), wait for corresponding
indicator light turns on or off in the
cluster.
For safe four-wheel drive opera-
tion Your vehicle allows you to drive in on-road and off-road conditions.
However, do not try to drive in deep standing water, mud, or over steep
hills.
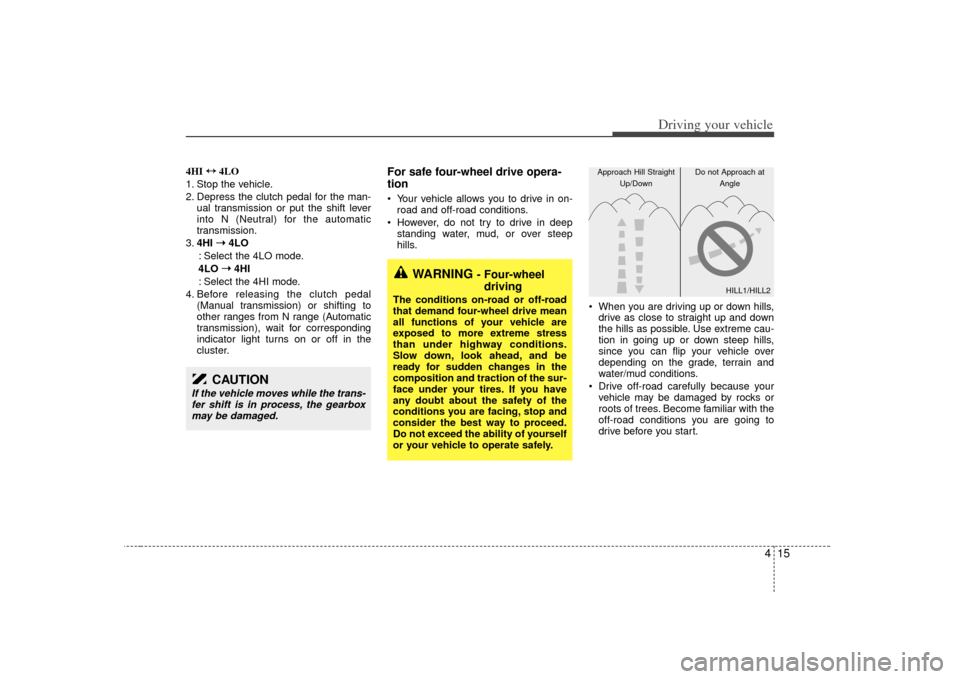
When you are driving up or down hills,drive as close to straight up and down
the hills as possible. Use extreme cau-
tion in going up or down steep hills,
since you can flip your vehicle over
depending on the grade, terrain and
water/mud conditions.
Drive off-road carefully because your vehicle may be damaged by rocks or
roots of trees. Become familiar with the
off-road conditions you are going to
drive before you start.
CAUTION
If the vehicle moves while the trans-fer shift is in process, the gearboxmay be damaged.
WARNING
- Four-wheel driving
The conditions on-road or off-road
that demand four-wheel drive mean
all functions of your vehicle are
exposed to more extreme stress
than under highway conditions.
Slow down, look ahead, and be
ready for sudden changes in the
composition and traction of the sur-
face under your tires. If you have
any doubt about the safety of the
conditions you are facing, stop and
consider the best way to proceed.
Do not exceed the ability of yourself
or your vehicle to operate safely.
HILL1/HILL2
Approach Hill Straight
Up/Down Do not Approach at
Angle
Page 152 of 325
Driving your vehicle22
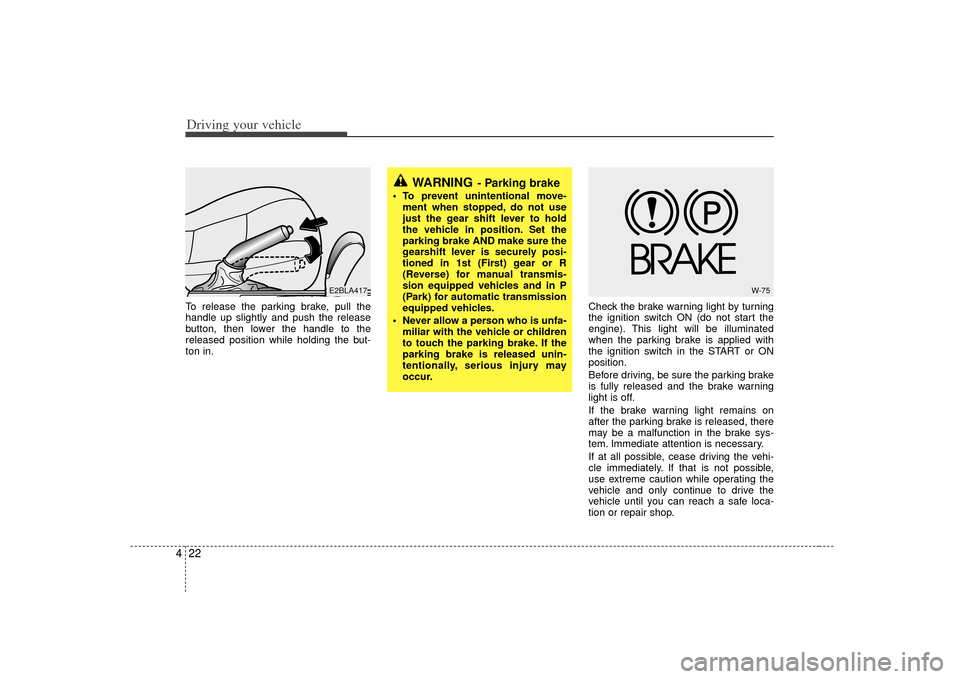
4To release the parking brake, pull the
handle up slightly and push the release
button, then lower the handle to the
released position while holding the but-
ton in. Check the brake warning light by turning
the ignition switch ON (do not start the
engine). This light will be illuminated
when the parking brake is applied with
the ignition switch in the START or ON
position.
Before driving, be sure the parking brake
is fully released and the brake warning
light is off.
If the brake warning light remains on
after the parking brake is released, there
may be a malfunction in the brake sys-
tem. Immediate attention is necessary.
If at all possible, cease driving the vehi-
cle immediately. If that is not possible,
use extreme caution while operating the
vehicle and only continue to drive the
vehicle until you can reach a safe loca-
tion or repair shop.
WARNING
- Parking brake
To prevent unintentional move-
ment when stopped, do not use
just the gear shift lever to hold
the vehicle in position. Set the
parking brake AND make sure the
gearshift lever is securely posi-
tioned in 1st (First) gear or R
(Reverse) for manual transmis-
sion equipped vehicles and in P
(Park) for automatic transmission
equipped vehicles.
Never allow a person who is unfa- miliar with the vehicle or children
to touch the parking brake. If the
parking brake is released unin-
tentionally, serious injury may
occur.
E2BLA417
W-75
Page 154 of 325
Driving your vehicle24
4 Even with the anti-lock brake system,
your vehicle still requires sufficient
stopping distance. Always maintain a
safe distance from the vehicle in front
of you.
Always slow down when cornering. The anti-lock brake system cannot pre-
vent accidents resulting from exces-
sive speeds.
On loose or uneven road surfaces, operation of the anti-lock brake system
may result in a longer stopping dis-
tance than for vehicles equipped with a
conventional brake system.
✽ ✽ NOTICEWhen you jump start your vehicle
because of a drained battery, the engine
may not run as smoothly and the ABS
warning light may turn on at the same
time. This happens because of the low
battery voltage. It does not mean your
ABS is malfunctioning.
• Do not pump your brakes!
• Have the battery recharged before
driving the vehicle.
ABS
W-78
CAUTION
If the ABS warning light is on and
stays on, you may have a problemwith the ABS system. In this case,however, your regular brakes will work normally.
The ABS warning light will stay on for approximately 3 secondsafter the ignition switch is ON. During that time, the ABS will gothrough self-diagnosis and the light will go off if everything isnormal. If the light stays on, you may have a problem with yourABS system. Contact an author-ized Kia dealer as soon as possi-ble.
CAUTION
When you drive on a road having poor traction, such as an icy road,and operate your brakes continu-ously, the ABS will be active con-tinuously and the ABS warning light may illuminate. Pull your carover to a safe place and stop theengine.
Restart the engine. If the ABS warning light is off, then yourABS system is normal. Otherwise, you may have a prob-lem with the ABS. Contact anauthorized Kia dealer as soon as possible.
Page 155 of 325
425
Driving your vehicle
Power steeringPower Steering uses energy from the
engine to assist you in steering the vehi-
cle. If the engine is off or if the power
steering system becomes inoperative,
the vehicle may still be steered, but it will
require increased steering effort.
Should you notice any change in the
effort required to steer during normal
vehicle operation, have the power steer-
ing checked by an Authorized Kia Dealer.
✽ ✽
NOTICEIf the power steering drive belt breaks
or if the power steering pump malfunc-
tions, the steering effort will greatly
increase.
✽ ✽
NOTICEIf the vehicle is parked for extended
periods outside in cold weather (below -
10°C/14°F), the power steering may
require increased effort when the engine
is first started. This is caused by
increased fluid viscosity due to the cold
weather and does not indicate a mal-
function.
When this happens, increase the engine
RPM by depressing accelerator until the
RPM reaches 1,500 rpm then release or
let the engine idle for two or three min-
utes to warm up the fluid.
STEERING WHEEL
CAUTION
Never hold the steering wheel
against a stop (extreme right or leftturn) for more than 5 seconds with the engine running. Holding thesteering wheel for more than 5 sec-onds in either position may causedamage to the power steering pump.
Page 171 of 325
441
Driving your vehicle
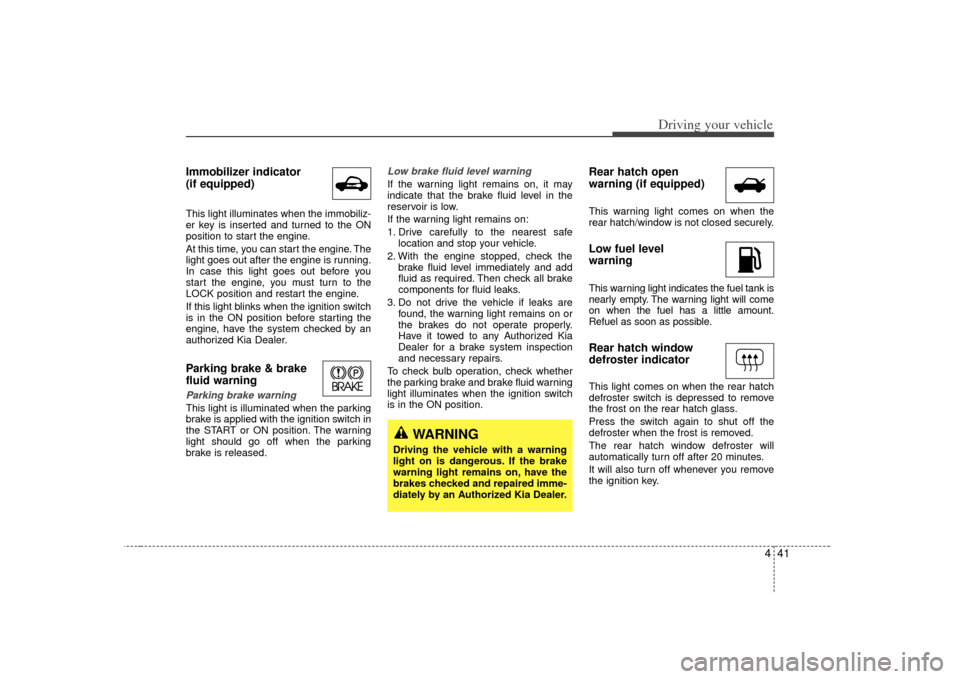
Immobilizer indicator
(if equipped)This light illuminates when the immobiliz-
er key is inserted and turned to the ON
position to start the engine.
At this time, you can start the engine. The
light goes out after the engine is running.
In case this light goes out before you
start the engine, you must turn to the
LOCK position and restart the engine.
If this light blinks when the ignition switch
is in the ON position before starting the
engine, have the system checked by an
authorized Kia Dealer.Parking brake & brake
fluid warning Parking brake warning This light is illuminated when the parking
brake is applied with the ignition switch in
the START or ON position. The warning
light should go off when the parking
brake is released.
Low brake fluid level warningIf the warning light remains on, it may
indicate that the brake fluid level in the
reservoir is low.
If the warning light remains on:
1. Drive carefully to the nearest safelocation and stop your vehicle.
2. With the engine stopped, check the brake fluid level immediately and add
fluid as required. Then check all brake
components for fluid leaks.
3. Do not drive the vehicle if leaks are found, the warning light remains on or
the brakes do not operate properly.
Have it towed to any Authorized Kia
Dealer for a brake system inspection
and necessary repairs.
To check bulb operation, check whether
the parking brake and brake fluid warning
light illuminates when the ignition switch
is in the ON position.
Rear hatch open
warning (if equipped)This warning light comes on when the
rear hatch/window is not closed securely.Low fuel level
warningThis warning light indicates the fuel tank is
nearly empty. The warning light will come
on when the fuel has a little amount.
Refuel as soon as possible.Rear hatch window
defroster indicatorThis light comes on when the rear hatch
defroster switch is depressed to remove
the frost on the rear hatch glass.
Press the switch again to shut off the
defroster when the frost is removed.
The rear hatch window defroster will
automatically turn off after 20 minutes.
It will also turn off whenever you remove
the ignition key.
WARNING
Driving the vehicle with a warning
light on is dangerous. If the brake
warning light remains on, have the
brakes checked and repaired imme-
diately by an Authorized Kia Dealer.
Page 176 of 325
Driving your vehicle46
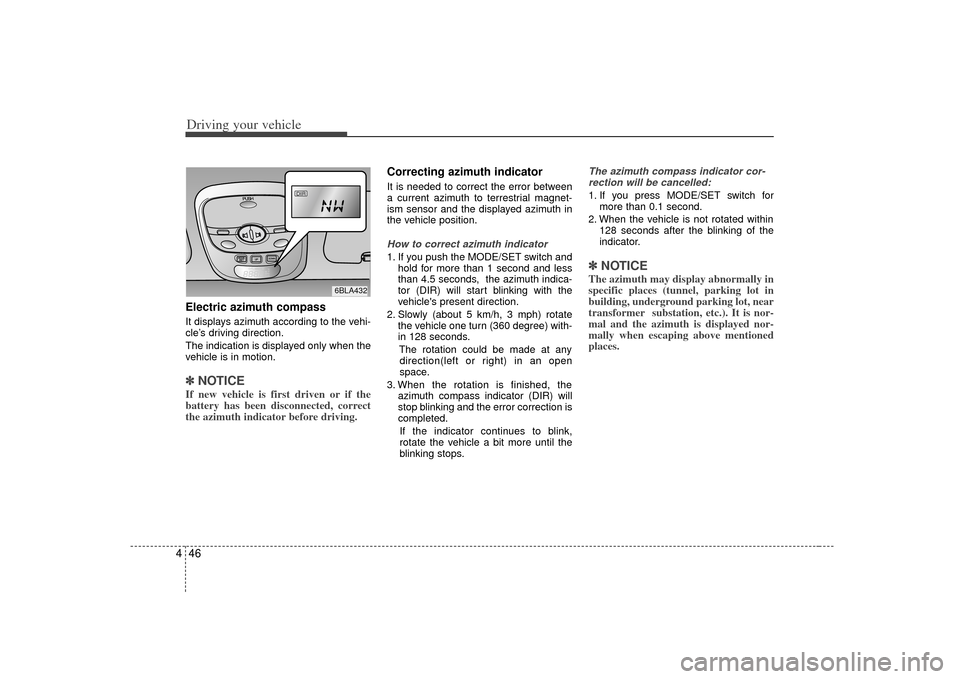
4Electric azimuth compassIt displays azimuth according to the vehi-
cle’s driving direction.
The indication is displayed only when the
vehicle is in motion.✽ ✽
NOTICEIf new vehicle is first driven or if the
battery has been disconnected, correct
the azimuth indicator before driving.
Correcting azimuth indicator It is needed to correct the error between
a current azimuth to terrestrial magnet-
ism sensor and the displayed azimuth in
the vehicle position.How to correct azimuth indicator1. If you push the MODE/SET switch and
hold for more than 1 second and less
than 4.5 seconds, the azimuth indica-
tor (DIR) will start blinking with the
vehicle's present direction.
2. Slowly (about 5 km/h, 3 mph) rotate the vehicle one turn (360 degree) with-
in 128 seconds.
The rotation could be made at anydirection(left or right) in an open
space.
3. When the rotation is finished, the azimuth compass indicator (DIR) will
stop blinking and the error correction is
completed.
If the indicator continues to blink,
rotate the vehicle a bit more until the
blinking stops.
The azimuth compass indicator cor- rection will be cancelled:1. If you press MODE/SET switch for more than 0.1 second.
2. When the vehicle is not rotated within 128 seconds after the blinking of the
indicator.✽ ✽NOTICEThe azimuth may display abnormally in
specific places (tunnel, parking lot in
building, underground parking lot, near
transformer substation, etc.). It is nor-
mal and the azimuth is displayed nor-
mally when escaping above mentioned
places.
DIR
6BLA432