4WD KIA Sorento 2012 2.G Owner's Manual
[x] Cancel search | Manufacturer: KIA, Model Year: 2012, Model line: Sorento, Model: KIA Sorento 2012 2.GPages: 388, PDF Size: 7.56 MB
Page 7 of 388
Index4I
Emergency starting ··················\
··················\
··················\
····6-4Jump starting ··················\
··················\
··················\
·········6-4
Push starting ··················\
··················\
··················\
··········6-5
Emergency tailgate safety release ··················\
···············4-20
Emergency towing ··················\
··················\
··················\
···6-17
Emergency while driving··················\
··················\
·············6-2
Emission control system ··················\
··················\
············7-64 Crankcase emission control system ··················\
········7-64
Evaporative emission control (including ORVR) System ··················\
··················\
··················\
··············7-64
Exhaust emission control system ··················\
············7-65
Engine compartment ··················\
··················\
············2-4, 7-2
Engine coolant ··················\
··················\
··················\
·········7-19
Engine number ··················\
··················\
··················\
···········8-8
Engine oil ··················\
··················\
··················\
·················7-18\
Engine overheats··················\
··················\
··················\
········6-6
Engine start/stop button ··················\
··················\
···············5-7
Engine temperature gauge ··················\
··················\
·········4-50
Engine will not start··················\
··················\
··················\
···6-3
Evaporative emission control (including ORVR) System ··················\
··················\
··················\
·················7-64\
Exhaust emission control system··················\
·················7-65\
Explanation of scheduled maintenance items ···············7-15
Exterior care··················\
··················\
··················\
·············7-58
Exterior features··················\
··················\
··················\
·····4-105 Roof rack ··················\
··················\
··················\
···········4-105 Flat tire ··················\
··················\
··················\
··················\
·····6-7
Changing tires ··················\
··················\
··················\
·······6-9
Compact spare tire ··················\
··················\
················6-14
Jack and tools ··················\
··················\
··················\
········6-7
Removing and storing the spare tire ··················\
·········6-8
Floor mat anchor(s) ··················\
··················\
·················4-10\
3
Fluid Brake/clutch fluid ··················\
··················\
··················\
7-22
Power steering fluid ··················\
··················\
··············7-23
Washer fluid ··················\
··················\
··················\
········7-24
Folding the rear seat ··················\
··················\
··················\
3-13
Four wheel drive (4WD) ··················\
··················\
···········5-21
Front seat adjustment - manual ··················\
··················\
···3-4
Front seat adjustment - power ··················\
··················\
·····3-5
Fuel filler lid ··················\
··················\
··················\
············4-27
Fuel gauge··················\
··················\
··················\
················4-51
Fuel requirements ··················\
··················\
··················\
······1-3
Fuses ··················\
··················\
··················\
··················\
······7-49 Fuse/relay panel description··················\
··················\
··7-53
Memory fuse ··················\
··················\
··················\
·······7-51
Multi fuse ··················\
··················\
··················\
············7-52
F
XM CAN (ENG) INDEX.QXP 4/19/2011 10:59 AM Page 4
Page 19 of 388
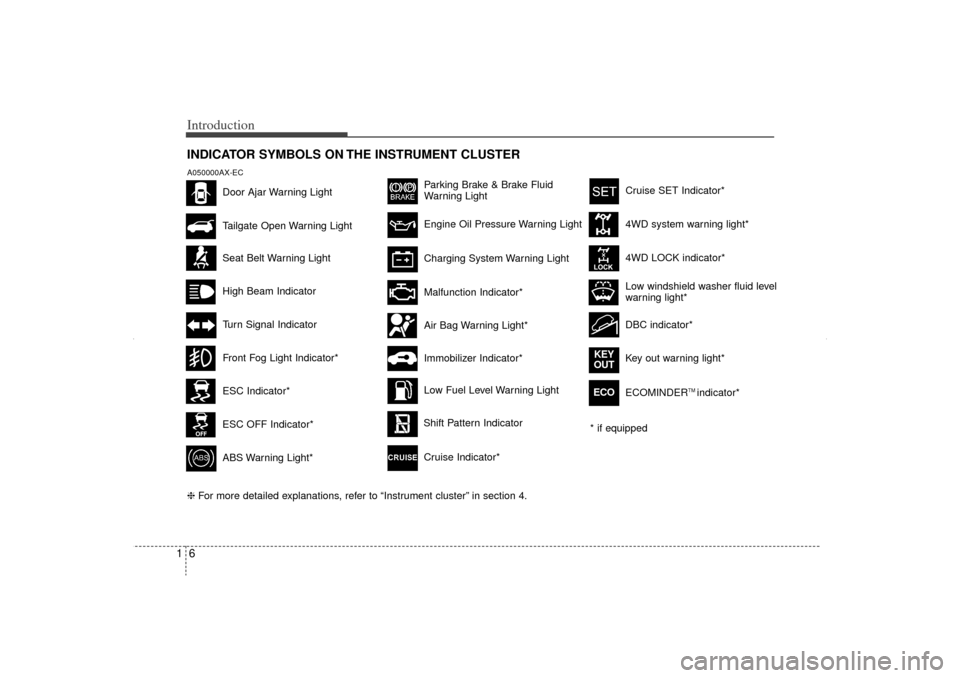
Introduction61INDICATOR SYMBOLS ON THE INSTRUMENT CLUSTER
Seat Belt Warning LightTurn Signal IndicatorABS Warning Light*
Parking Brake & Brake Fluid
Warning LightMalfunction Indicator*Immobilizer Indicator* Low Fuel Level Warning Light* if equipped
Tailgate Open Warning Light
❈ For more detailed explanations, refer to “Instrument cluster” in section 4.Charging System Warning Light
Door Ajar Warning Light
A050000AX-EC
Front Fog Light Indicator*
Engine Oil Pressure Warning LightAir Bag Warning Light*Shift Pattern Indicator
ESC Indicator*ESC OFF Indicator*
Cruise Indicator*
4WD system warning light*
4WD LOCK indicator*
DBC indicator*Low windshield washer fluid level
warning light*
Key out warning light*
KEY
OUTECO
ECOMINDER
TM indicator*
Cruise SET Indicator*
High Beam Indicator
XM CAN (ENG) 1.QXP 4/19/2011 10:21 AM Page 6
Page 21 of 388
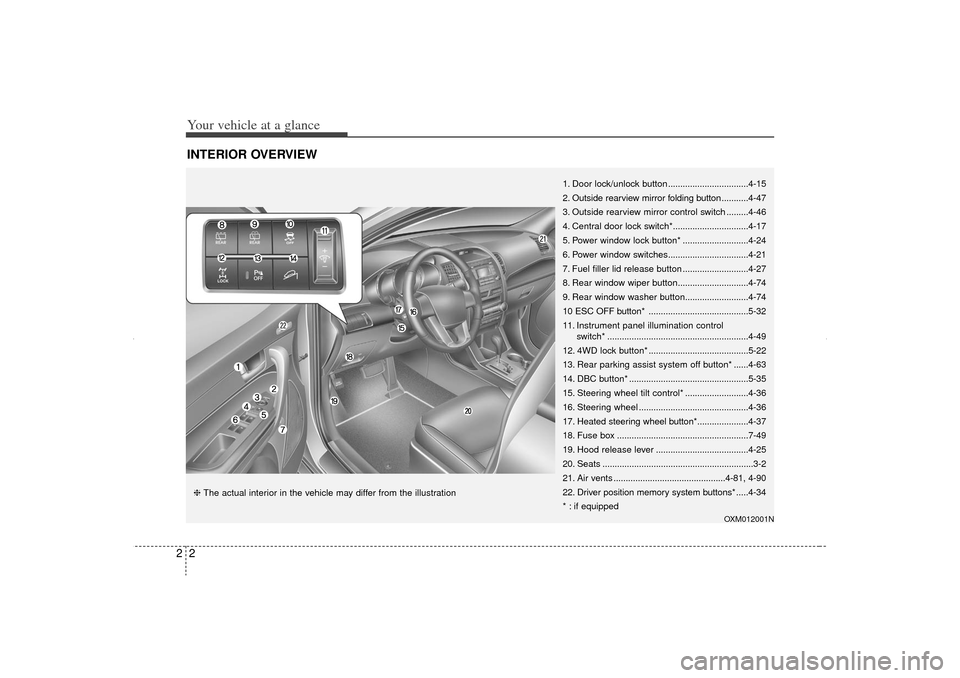
Your vehicle at a glance22INTERIOR OVERVIEW
OXM012001N
1. Door lock/unlock button.................................4-15
2. Outside rearview mirror folding button ...........4-47
3. Outside rearview mirror control switch .........4-46
4. Central door lock switch* ...............................4-17
5. Power window lock button* ...........................4-24
6. Power window switches .................................4-21
7. Fuel filler lid release button ...........................4-27
8. Rear window wiper button .............................4-74
9. Rear window washer button ..........................4-74
10 ESC OFF button* .........................................5-32
11. Instrument panel illumination control switch* ..........................................................4-49
12. 4WD lock button* .........................................5-22
13. Rear parking assist system off button* ......4-63
14. DBC button* .................................................5-35
15. Steering wheel tilt control* ..........................4-36
16. Steering wheel .............................................4-36
17. Heated steering wheel button*.....................4-37
18. Fuse box ......................................................7-49
19. Hood release lever ......................................4-25
20. Seats ..............................................................3-2
21. Air vents ..............................................4-81, 4-90
22. Driver position memory system buttons* .....4-34
* : if equipped
❈ The actual interior in the vehicle may differ from the illustration
XM CAN (ENG) 2.QXP 4/19/2011 10:24 AM Page 2
Page 152 of 388
Features of your vehicle62
4D150327AUNKey reminder warning chime
(if equipped)If the driver’s door is opened while the
ignition key is left in the ignition switch
(ACC or LOCK position), the key
reminder warning chime will sound. This
is to prevent you from locking your keys
in the vehicle. The chime sounds until the
key is removed from the ignition switch or
the driver’s door is closed.KEY OUT indicator (if equipped)When the ENGINE START/STOP button
is in the ACC or ON position, if any door
is open, the system checks for the smart
key. If the smart key is not in the vehicle,
the indicator will blink, and if all doors are
closed, the chime will also sound for
about 5 seconds. The indicator will go off
while the vehicle is moving. Keep the
smart key in the vehicle or insert it in the
smart key holder.
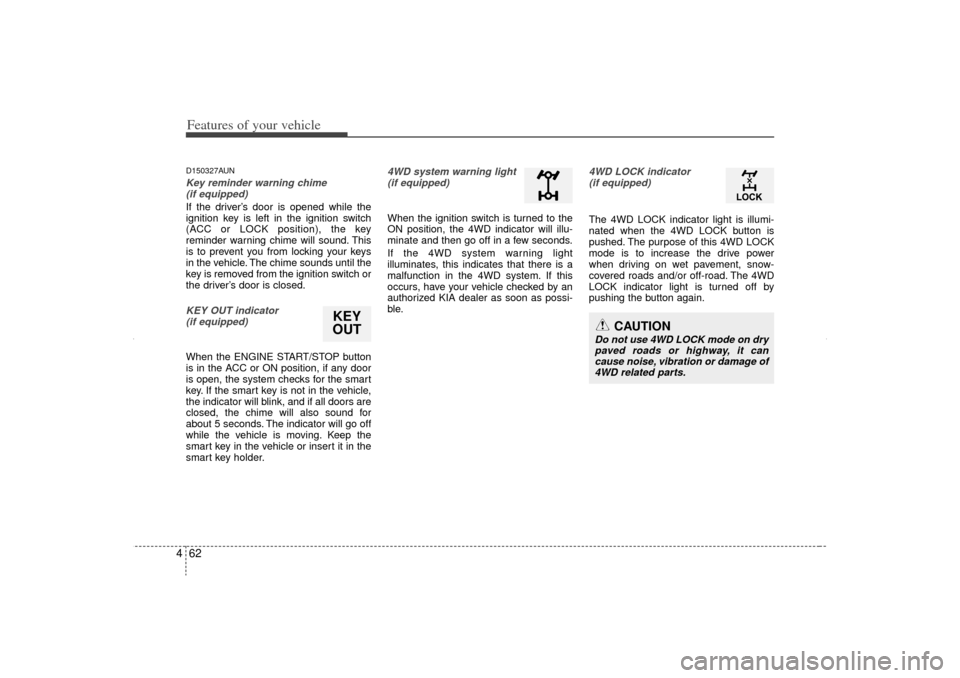
4WD system warning light(if equipped) When the ignition switch is turned to the
ON position, the 4WD indicator will illu-
minate and then go off in a few seconds.
If the 4WD system warning light
illuminates, this indicates that there is a
malfunction in the 4WD system. If this
occurs, have your vehicle checked by an
authorized KIA dealer as soon as possi-
ble.
4WD LOCK indicator (if equipped)The 4WD LOCK indicator light is illumi-
nated when the 4WD LOCK button is
pushed. The purpose of this 4WD LOCK
mode is to increase the drive power
when driving on wet pavement, snow-
covered roads and/or off-road. The 4WD
LOCK indicator light is turned off by
pushing the button again.
KEY
OUT
CAUTION
Do not use 4WD LOCK mode on dry
paved roads or highway, it cancause noise, vibration or damage of4WD related parts.
XM CAN (ENG) 4(~105).QXP 4/19/2011 10:38 AM Page 62
Page 229 of 388
5
Before driving / 5-3
Key positions / 5-4
Engine start/stop button / 5-7
Manual Transaxle / 5-12
Automatic transaxle / 5-15
Four wheel drive (4WD) / 5-21
Brake system / 5-27
Cruise control system / 5-39
Economical operation / 5-43
Special driving conditions / 5-45
Winter driving / 5-50
Trailer towing / 5-53
Vehicle load limit / 5-62
Vehicle weight glossary/ 5-67
Driving your vehicle
XM CAN (ENG) 5.QXP 11/5/2010 11:38 AM Page 1
Page 249 of 388
521
Driving your vehicle
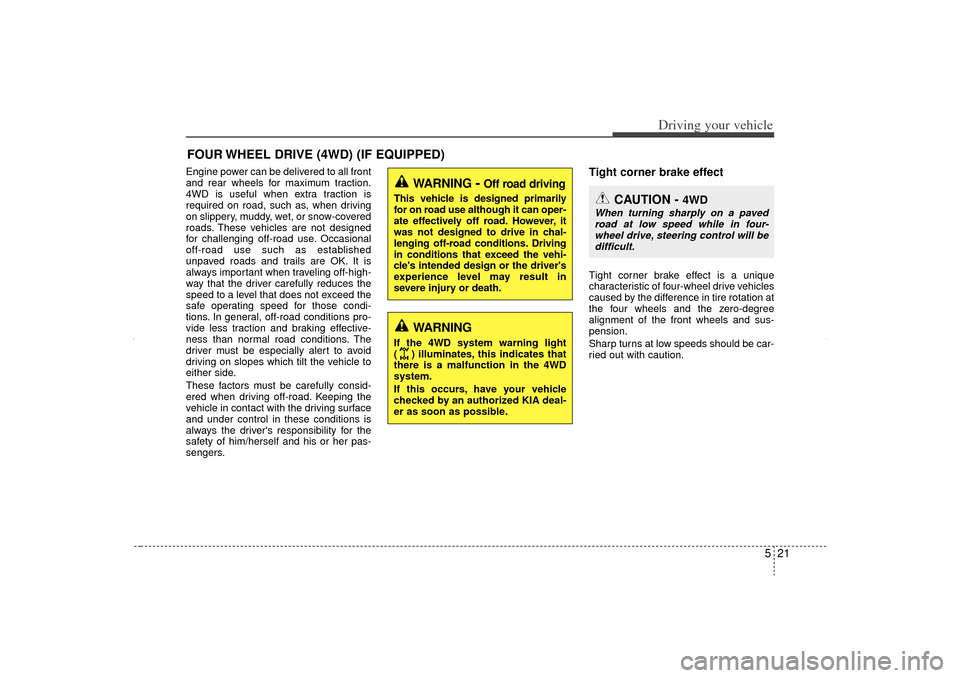
Engine power can be delivered to all front
and rear wheels for maximum traction.
4WD is useful when extra traction is
required on road, such as, when driving
on slippery, muddy, wet, or snow-covered
roads. These vehicles are not designed
for challenging off-road use. Occasional
off-road use such as established
unpaved roads and trails are OK. It is
always important when traveling off-high-
way that the driver carefully reduces the
speed to a level that does not exceed the
safe operating speed for those condi-
tions. In general, off-road conditions pro-
vide less traction and braking effective-
ness than normal road conditions. The
driver must be especially alert to avoid
driving on slopes which tilt the vehicle to
either side.
These factors must be carefully consid-
ered when driving off-road. Keeping the
vehicle in contact with the driving surface
and under control in these conditions is
always the driver's responsibility for the
safety of him/herself and his or her pas-
sengers.
Tight corner brake effectTight corner brake effect is a unique
characteristic of four-wheel drive vehicles
caused by the difference in tire rotation at
the four wheels and the zero-degree
alignment of the front wheels and sus-
pension.
Sharp turns at low speeds should be car-
ried out with caution.
FOUR WHEEL DRIVE (4WD) (IF EQUIPPED)
WARNING
- Off road driving
This vehicle is designed primarily
for on road use although it can oper-
ate effectively off road. However, it
was not designed to drive in chal-
lenging off-road conditions. Driving
in conditions that exceed the vehi-
cle's intended design or the driver's
experience level may result in
severe injury or death.
WARNING
If the 4WD system warning light
( ) illuminates, this indicates that
there is a malfunction in the 4WD
system.
If this occurs, have your vehicle
checked by an authorized KIA deal-
er as soon as possible.
CAUTION -
4WD
When turning sharply on a pavedroad at low speed while in four- wheel drive, steering control will bedifficult.
XM CAN (ENG) 5.QXP 11/5/2010 11:39 AM Page 21
Page 250 of 388
Driving your vehicle22
5
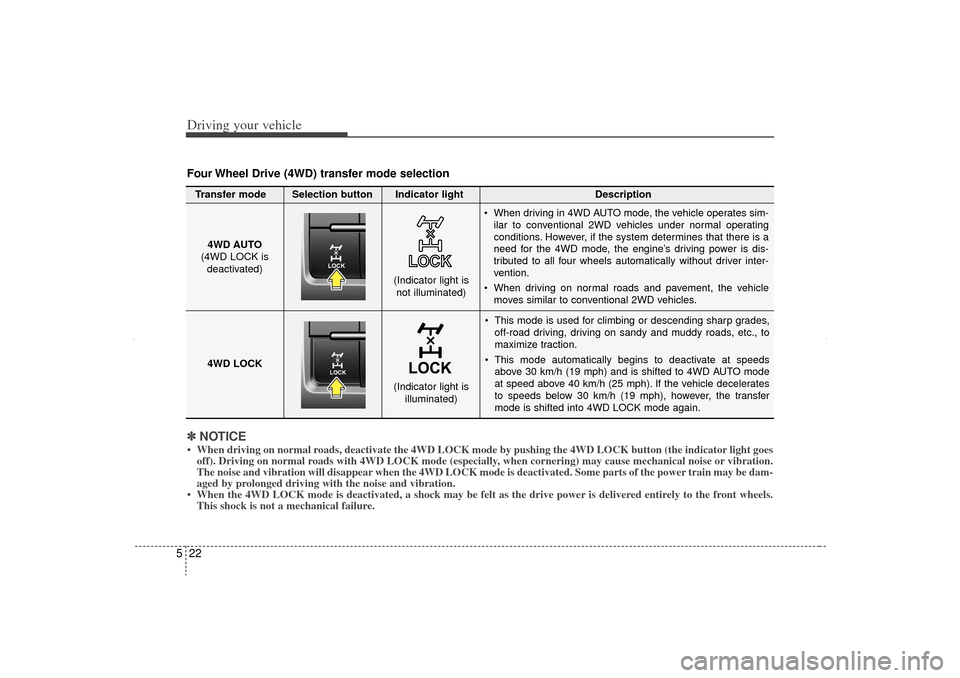
This mode is used for climbing or descending sharp grades,
off-road driving, driving on sandy and muddy roads, etc., to
maximize traction.
This mode automatically begins to deactivate at speeds above 30 km/h (19 mph) and is shifted to 4WD AUTO mode
at speed above 40 km/h (25 mph). If the vehicle decelerates
to speeds below 30 km/h (19 mph), however, the transfer
mode is shifted into 4WD LOCK mode again.
4WD AUTO
(4WD LOCK is
deactivated)
(Indicator light isnot illuminated)
✽ ✽ NOTICE• When driving on normal roads, deactivate the 4WD LOCK mode by pushing the 4WD LOCK button (the \
indicator light goes
off). Driving on normal roads with 4WD LOCK mode (especially, when cornering) may cause mechanical noise or vibration.
The noise and vibration will disappear when the 4WD LOCK mode is deactivated. Some parts of the power train may be dam-
aged by prolonged driving with the noise and vibration.
• When the 4WD LOCK mode is deactivated, a shock may be felt as the drive \
power is delivered entirely to the front wheels. This shock is not a mechanical failure.Four Wheel Drive (4WD) transfer mode selectionTransfer mode Selection button Indicator light Description
When driving in 4WD AUTO mode, the vehicle operates sim-
ilar to conventional 2WD vehicles under normal operating
conditions. However, if the system determines that there is a
need for the 4WD mode, the engine’s driving power is dis-
tributed to all four wheels automatically without driver inter-
vention.
When driving on normal roads and pavement, the vehicle moves similar to conventional 2WD vehicles.
4WD LOCK
(Indicator light is illuminated)
XM CAN (ENG) 5.QXP 11/5/2010 11:39 AM Page 22
Page 252 of 388
Driving your vehicle24
5 You must consciously take the effort to
learn how to corner in a 4WD vehicle.
Do not rely on your experience in con-
ventional 2WD vehicles in choosing
safe cornering speed in 4WD mode.
For starters, you must drive more slow-
ly in 4WD.
Drive carefully off-road because your vehicle may be damaged by rocks or
roots of trees. Become familiar with the
off-road conditions where you are
going to drive before you begin driving.
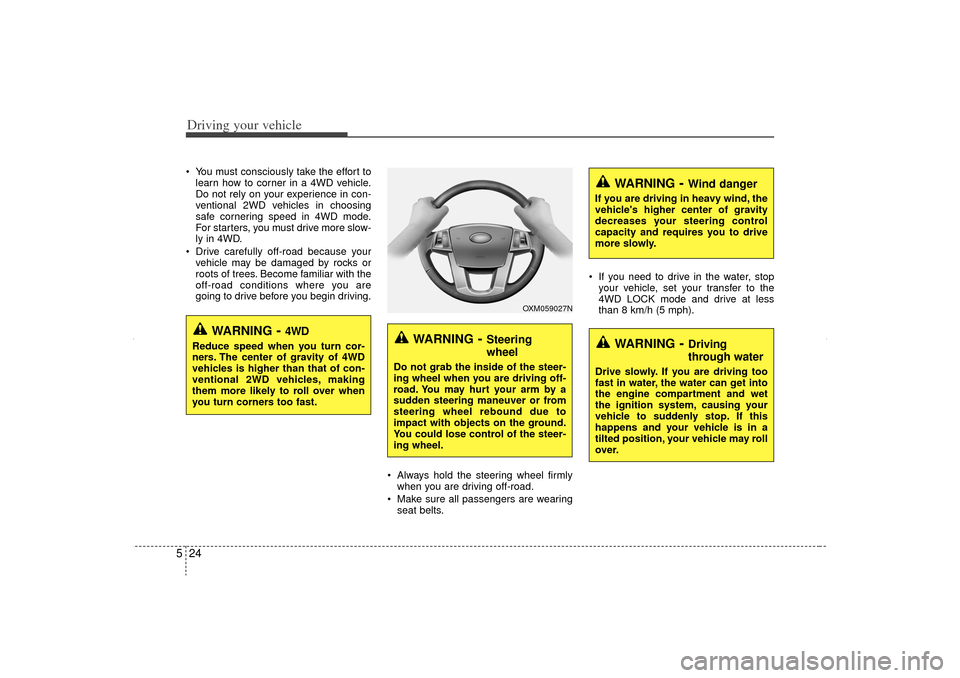
Always hold the steering wheel firmlywhen you are driving off-road.
Make sure all passengers are wearing seat belts. If you need to drive in the water, stop
your vehicle, set your transfer to the
4WD LOCK mode and drive at less
than 8 km/h (5 mph).
WARNING
- Steering
wheel
Do not grab the inside of the steer-
ing wheel when you are driving off-
road. You may hurt your arm by a
sudden steering maneuver or from
steering wheel rebound due to
impact with objects on the ground.
You could lose control of the steer-
ing wheel.
WARNING
- Wind danger
If you are driving in heavy wind, the
vehicle's higher center of gravity
decreases your steering control
capacity and requires you to drive
more slowly.
WARNING
- Driving
through water
Drive slowly. If you are driving too
fast in water, the water can get into
the engine compartment and wet
the ignition system, causing your
vehicle to suddenly stop. If this
happens and your vehicle is in a
tilted position, your vehicle may roll
over.
WARNING
- 4WD
Reduce speed when you turn cor-
ners. The center of gravity of 4WD
vehicles is higher than that of con-
ventional 2WD vehicles, making
them more likely to roll over when
you turn corners too fast.
OXM059027N
XM CAN (ENG) 5.QXP 11/5/2010 11:39 AM Page 24
Page 253 of 388
525
Driving your vehicle
✽
✽NOTICE• Do not drive in water if the level is
higher than the bottom of the vehicle.
• Check your brake condition once you are out of mud or water. Press the
brake pedal several times as you move
slowly until you feel normal braking
forces return.
• Shorten your scheduled maintenance interval if you drive in off-road condi-
tions such as sand, mud or water.
Always wash your vehicle thoroughly
after off-road use, especially cleaning
the bottom of the vehicle.
• Since the driving torque is always applied to the 4 wheels the perform-
ance of the 4WD vehicle is greatly
affected by the condition of the tires.
Be sure to equip the vehicle with four
tires of the same size and type.
• A full time four wheel drive vehicle cannot be towed by an ordinary tow
truck. Make sure that the vehicle is
placed on a flat bed truck for moving.
CAUTION -
Mud or snow
If one of the front or rear wheels
begins to spin in mud, snow, etc.the vehicle can sometimes be driv-en out by depressing the accelera-tor pedal further; however avoidrunning the engine continuously athigh rpm because doing so coulddamage the 4WD system.
WARNING -
4WD driving
Avoid high cornering speed.
Do not make quick steering wheel movements, such as sharp
lane changes or fast, sharp turns.
The risk of rollover is greatly increased if you lose control of
your vehicle at high speed.
In a collision, an unbelted person is significantly more likely to die
compared to a person wearing a
seat belt.
Loss of control often occurs if two or more wheels drop off the
roadway and the driver over-
steers to re-enter the roadway. In
the event your vehicle leaves the
roadway, do not steer sharply.
Instead, slow down before pulling
back into the travel lanes.
WARNING -
Jacked vehicle
While the full-time 4WD vehicle is
being raised on a jack, never start
the engine or cause the tires to
rotate.
There is the danger that rotating
tires touching the ground could
cause the vehicle to go off the jack
and to jump forward.
XM CAN (ENG) 5.QXP 11/5/2010 11:39 AM Page 25
Page 254 of 388
Driving your vehicle26
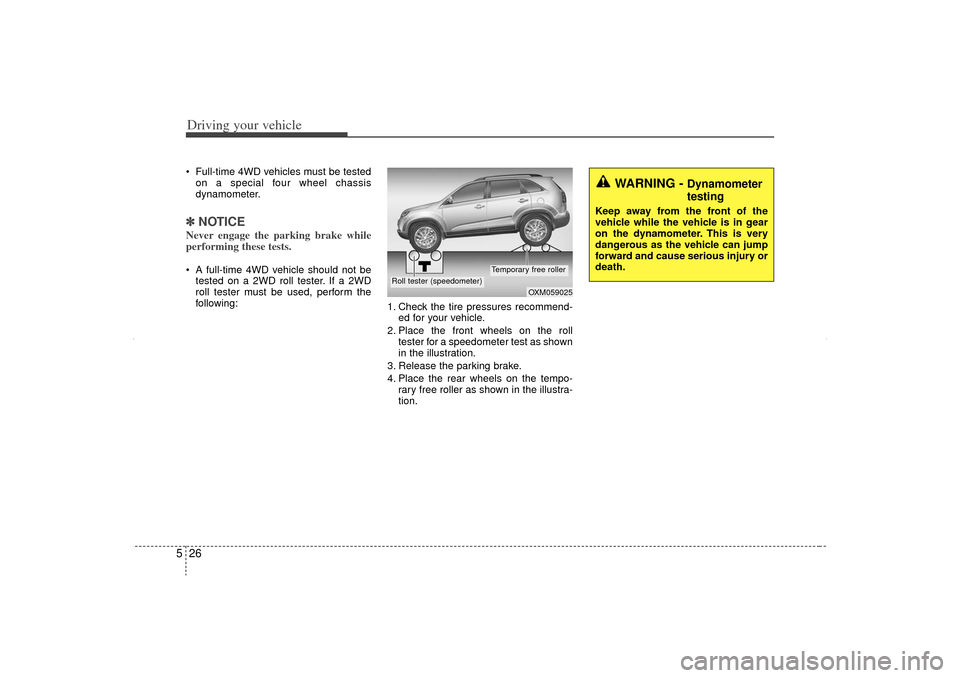
5 Full-time 4WD vehicles must be tested
on a special four wheel chassis
dynamometer.✽ ✽ NOTICENever engage the parking brake while
performing these tests. A full-time 4WD vehicle should not be
tested on a 2WD roll tester. If a 2WD
roll tester must be used, perform the
following: 1. Check the tire pressures recommend-
ed for your vehicle.
2. Place the front wheels on the roll tester for a speedometer test as shown
in the illustration.
3. Release the parking brake.
4. Place the rear wheels on the tempo- rary free roller as shown in the illustra-
tion.
WARNING -
Dynamometer
testing
Keep away from the front of the
vehicle while the vehicle is in gear
on the dynamometer. This is very
dangerous as the vehicle can jump
forward and cause serious injury or
death.
OXM059025
Roll tester (speedometer)
Temporary free roller
XM CAN (ENG) 5.QXP 11/5/2010 11:39 AM Page 26