sensor KIA Sorento 2013 2.G User Guide
[x] Cancel search | Manufacturer: KIA, Model Year: 2013, Model line: Sorento, Model: KIA Sorento 2013 2.GPages: 388, PDF Size: 7.56 MB
Page 86 of 388
363
Safety features of your vehicle
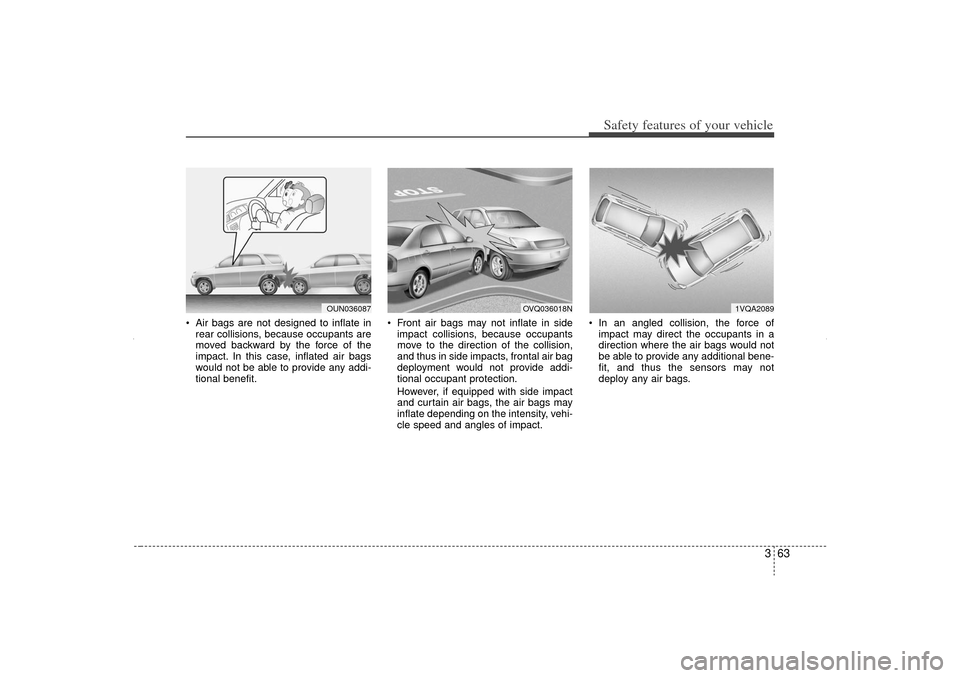
Air bags are not designed to inflate inrear collisions, because occupants are
moved backward by the force of the
impact. In this case, inflated air bags
would not be able to provide any addi-
tional benefit. Front air bags may not inflate in side
impact collisions, because occupants
move to the direction of the collision,
and thus in side impacts, frontal air bag
deployment would not provide addi-
tional occupant protection.
However, if equipped with side impact
and curtain air bags, the air bags may
inflate depending on the intensity, vehi-
cle speed and angles of impact. In an angled collision, the force of
impact may direct the occupants in a
direction where the air bags would not
be able to provide any additional bene-
fit, and thus the sensors may not
deploy any air bags.
OUN036087
1VQA2089
OVQ036018N
XM CAN (ENG) 3.QXP 4/19/2011 10:30 AM Page 63
Page 87 of 388
Safety features of your vehicle64
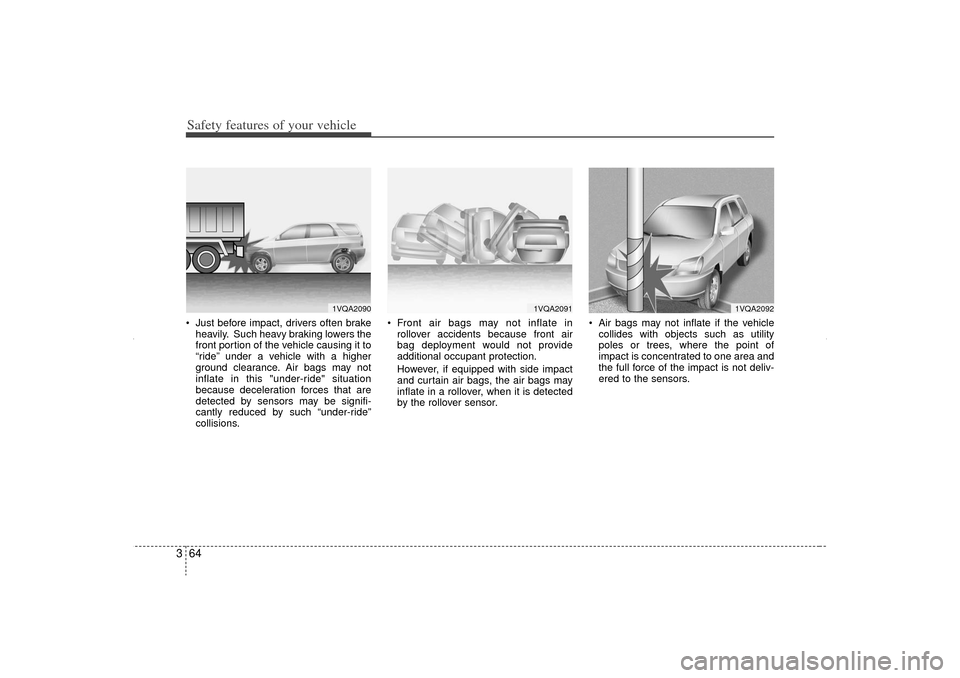
3 Just before impact, drivers often brake
heavily. Such heavy braking lowers the
front portion of the vehicle causing it to
“ride” under a vehicle with a higher
ground clearance. Air bags may not
inflate in this "under-ride" situation
because deceleration forces that are
detected by sensors may be signifi-
cantly reduced by such “under-ride”
collisions. Front air bags may not inflate in
rollover accidents because front air
bag deployment would not provide
additional occupant protection.
However, if equipped with side impact
and curtain air bags, the air bags may
inflate in a rollover, when it is detected
by the rollover sensor. Air bags may not inflate if the vehicle
collides with objects such as utility
poles or trees, where the point of
impact is concentrated to one area and
the full force of the impact is not deliv-
ered to the sensors.
1VQA2090
1VQA2091
1VQA2092
XM CAN (ENG) 3.QXP 4/19/2011 10:30 AM Page 64
Page 129 of 388
439
Features of your vehicle
D140100AHMInside rearview mirrorAdjust the rearview mirror so that the
center view through the rear window is
seen. Make this adjustment before you
start driving.
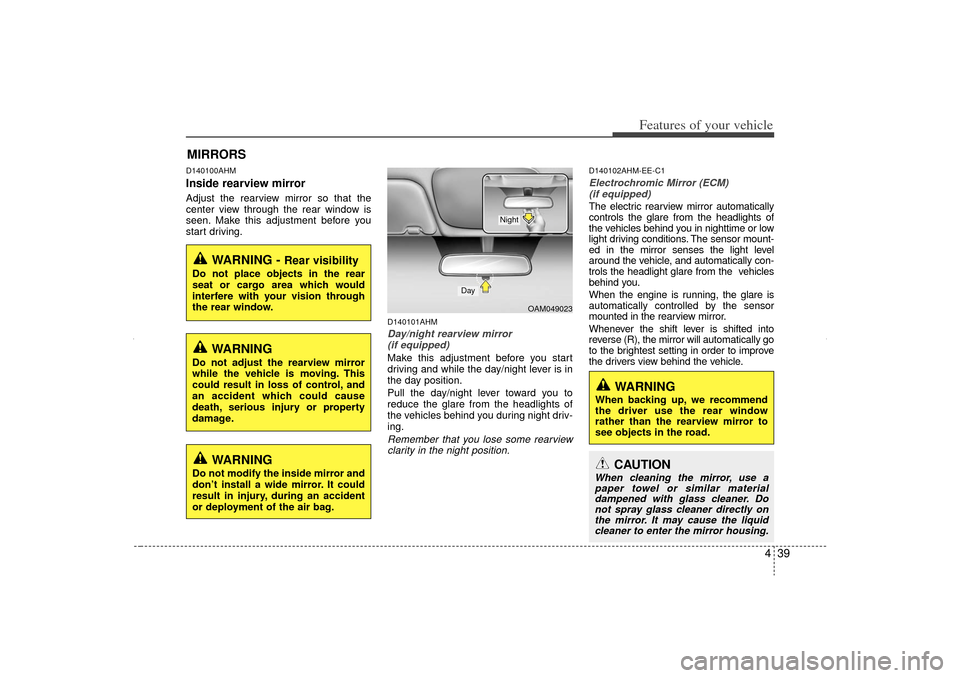
D140101AHMDay/night rearview mirror (if equipped)Make this adjustment before you start
driving and while the day/night lever is in
the day position.
Pull the day/night lever toward you to
reduce the glare from the headlights of
the vehicles behind you during night driv-
ing.Remember that you lose some rearviewclarity in the night position.
D140102AHM-EE-C1Electrochromic Mirror (ECM)(if equipped)The electric rearview mirror automatically
controls the glare from the headlights of
the vehicles behind you in nighttime or low
light driving conditions. The sensor mount-
ed in the mirror senses the light level
around the vehicle, and automatically con-
trols the headlight glare from the vehicles
behind you.
When the engine is running, the glare is
automatically controlled by the sensor
mounted in the rearview mirror.
Whenever the shift lever is shifted into
reverse (R), the mirror will automatically go
to the brightest setting in order to improve
the drivers view behind the vehicle.
MIRRORS
WARNING -
Rear visibility
Do not place objects in the rear
seat or cargo area which would
interfere with your vision through
the rear window.
WARNING
Do not adjust the rearview mirror
while the vehicle is moving. This
could result in loss of control, and
an accident which could cause
death, serious injury or property
damage.
OAM049023
Day
Night
CAUTION
When cleaning the mirror, use apaper towel or similar materialdampened with glass cleaner. Donot spray glass cleaner directly onthe mirror. It may cause the liquidcleaner to enter the mirror housing.
WARNING
When backing up, we recommend
the driver use the rear window
rather than the rearview mirror to
see objects in the road.
WARNING
Do not modify the inside mirror and
don’t install a wide mirror. It could
result in injury, during an accident
or deployment of the air bag.
XM CAN (ENG) 4(~105).QXP 4/19/2011 10:37 AM Page 39
Page 130 of 388
Features of your vehicle40
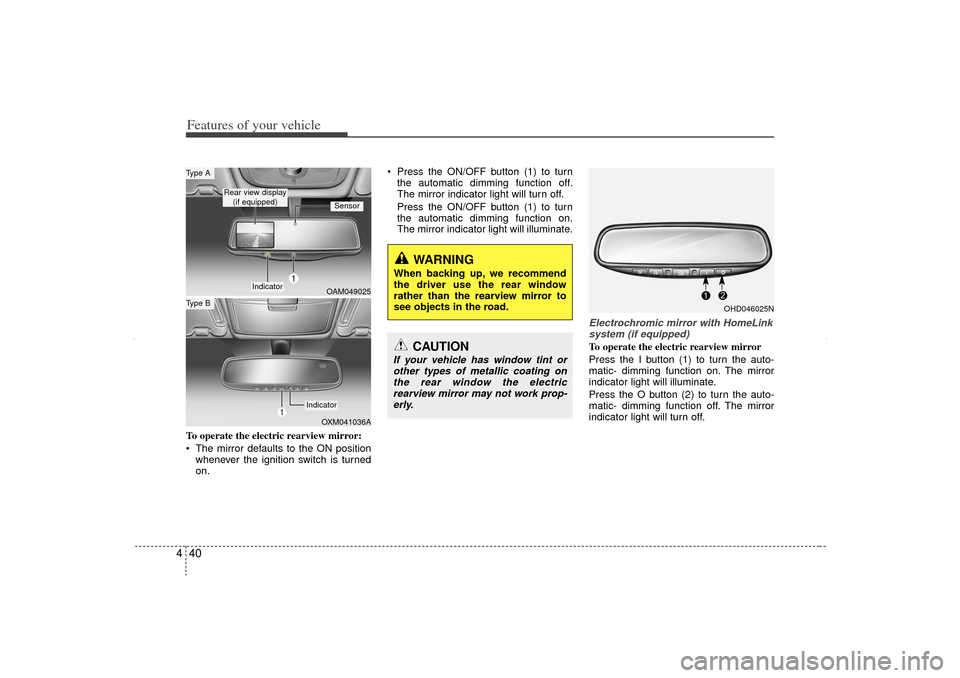
4To operate the electric rearview mirror:
The mirror defaults to the ON position
whenever the ignition switch is turned
on. Press the ON/OFF button (1) to turn
the automatic dimming function off.
The mirror indicator light will turn off.
Press the ON/OFF button (1) to turn
the automatic dimming function on.
The mirror indicator light will illuminate.
Electrochromic mirror with HomeLinksystem (if equipped)To operate the electric rearview mirror
Press the I button (1) to turn the auto-
matic- dimming function on. The mirror
indicator light will illuminate.
Press the O button (2) to turn the auto-
matic- dimming function off. The mirror
indicator light will turn off.
CAUTION
If your vehicle has window tint orother types of metallic coating onthe rear window the electricrearview mirror may not work prop- erly.
OHD046025N
OAM049025OXM041036A
Type AType B
Rear view display
(if equipped)
Sensor
Indicator
Indicator
WARNING
When backing up, we recommend
the driver use the rear window
rather than the rearview mirror to
see objects in the road.
XM CAN (ENG) 4(~105).QXP 4/19/2011 10:37 AM Page 40
Page 131 of 388
441
Features of your vehicle
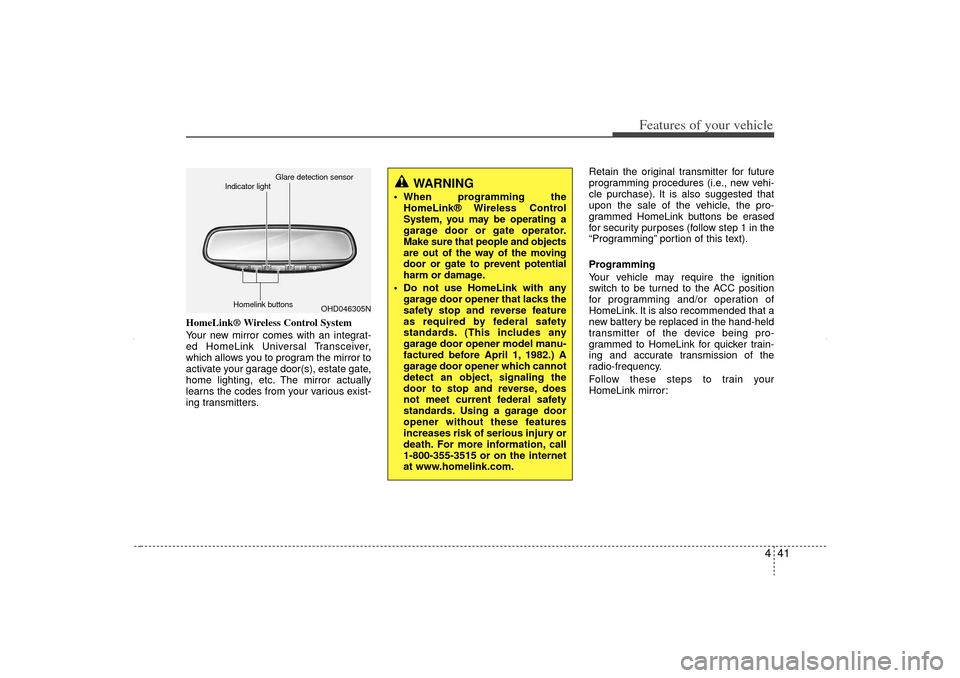
HomeLink® Wireless Control System
Your new mirror comes with an integrat-
ed HomeLink Universal Transceiver,
which allows you to program the mirror to
activate your garage door(s), estate gate,
home lighting, etc. The mirror actually
learns the codes from your various exist-
ing transmitters.Retain the original transmitter for future
programming procedures (i.e., new vehi-
cle purchase). It is also suggested that
upon the sale of the vehicle, the pro-
grammed HomeLink buttons be erased
for security purposes (follow step 1 in the
“Programming” portion of this text).
Programming
Your vehicle may require the ignition
switch to be turned to the ACC position
for programming and/or operation of
HomeLink. It is also recommended that a
new battery be replaced in the hand-held
transmitter of the device being pro-
grammed to HomeLink for quicker train-
ing and accurate transmission of the
radio-frequency.
Follow these steps to train your
HomeLink mirror:
WARNING
When programming the
HomeLink® Wireless Control
System, you may be operating a
garage door or gate operator.
Make sure that people and objects
are out of the way of the moving
door or gate to prevent potential
harm or damage.
Do not use HomeLink with any garage door opener that lacks the
safety stop and reverse feature
as required by federal safety
standards. (This includes any
garage door opener model manu-
factured before April 1, 1982.) A
garage door opener which cannot
detect an object, signaling the
door to stop and reverse, does
not meet current federal safety
standards. Using a garage door
opener without these features
increases risk of serious injury or
death. For more information, call
1-800-355-3515 or on the internet
at www.homelink.com.
OHD046305N
Glare detection sensor
Indicator light
Homelink buttons
XM CAN (ENG) 4(~105).QXP 4/19/2011 10:37 AM Page 41
Page 153 of 388
463
Features of your vehicle
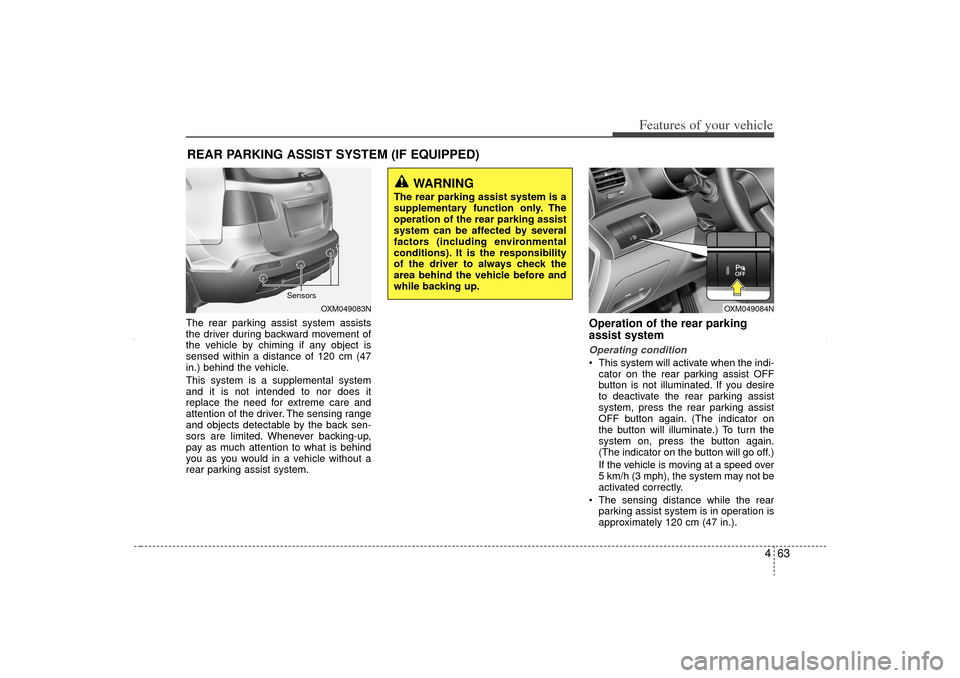
The rear parking assist system assists
the driver during backward movement of
the vehicle by chiming if any object is
sensed within a distance of 120 cm (47
in.) behind the vehicle.
This system is a supplemental system
and it is not intended to nor does it
replace the need for extreme care and
attention of the driver. The sensing range
and objects detectable by the back sen-
sors are limited. Whenever backing-up,
pay as much attention to what is behind
you as you would in a vehicle without a
rear parking assist system.
Operation of the rear parking
assist systemOperating condition This system will activate when the indi-cator on the rear parking assist OFF
button is not illuminated. If you desire
to deactivate the rear parking assist
system, press the rear parking assist
OFF button again. (The indicator on
the button will illuminate.) To turn the
system on, press the button again.
(The indicator on the button will go off.)
If the vehicle is moving at a speed over
5 km/h (3 mph), the system may not be
activated correctly.
The sensing distance while the rear parking assist system is in operation is
approximately 120 cm (47 in.).
REAR PARKING ASSIST SYSTEM (IF EQUIPPED)
WARNING
The rear parking assist system is a
supplementary function only. The
operation of the rear parking assist
system can be affected by several
factors (including environmental
conditions). It is the responsibility
of the driver to always check the
area behind the vehicle before and
while backing up.
OXM049083N
Sensors
OXM049084N
XM CAN (ENG) 4(~105).QXP 4/19/2011 10:38 AM Page 63
Page 154 of 388
Features of your vehicle64
4 When more than two objects are
sensed at the same time, the closest
one will be recognized first.Types of warning sound When an object is 120 cm to 81 cm (47in. to 32 in.) from the rear bumper:
Buzzer beeps intermittently.
When an object is 80 cm to 41 cm (31 in. to 16 in.) from the rear bumper:
Buzzer beeps more frequently.
When an object is within 40 cm (15 in.) of the rear bumper:
Buzzer sounds continuously.
Non-operational conditions of
rear parking assist systemThe rear parking assist system may
not operate properly when:
1. Moisture is frozen to the sensor. (It will operate normally when the moisture
has been cleared.)
2. The sensor is covered with foreign matter, such as snow or water, or the
sensor cover is blocked. (It will operate
normally when the material is removed
or the sensor is no longer blocked.)
3. Driving on uneven road surfaces (unpaved roads, gravel, bumps, gradi-
ent).
4. Objects generating excessive noise (vehicle horns, loud motorcycle
engines, or truck air brakes) are within
range of the sensor.
5. Heavy rain or water spray exists.
6. Wireless transmitters or mobile phones are within range of the sensor.
7. The sensor is covered with snow.
8. Trailer towing The detecting range may decrease
when:
1. The sensor is stained with foreign mat-
ter such as snow or water. (The sens-
ing range will return to normal when
removed.)
2. Outside air temperature is extremely hot or cold.
The following objects may not be rec-
ognized by the sensor:
1. Sharp or slim objects such as ropes, chains or small poles.
2. Objects which tend to absorb the sen- sor frequency such as clothes, spongy
material or snow.
3. Undetectable objects smaller than 1 m (40 in.) in height and narrower than 14
cm (6 in.) in diameter.
XM CAN (ENG) 4(~105).QXP 4/19/2011 10:38 AM Page 64
Page 155 of 388
465
Features of your vehicle
Rear parking assist system pre-
cautions The rear parking assist system maynot sound consistently depending on
the speed and shapes of the objects
detected.
The rear parking assist system may malfunction if the vehicle bumper
height or sensor installation has been
modified or damaged. Any non-factory
installed equipment or accessories
may also interfere with the sensor per-
formance.
The sensor may not recognize objects less than 40 cm (15 in.) from the sen-
sor, or it may sense an incorrect dis-
tance. Use caution.
When the sensor is frozen or stained with snow, dirt, or water, the sensor
may be inoperative until the stains are
removed using a soft cloth.
Do not push, scratch or strike the sen- sor. Sensor damage could occur.
✽ ✽ NOTICEThis system can only sense objects with-
in the range and location of the sensors;
It can not detect objects in other areas
where sensors are not installed. Also,
small or slim objects, such as poles or
objects located between sensors may not
be detected by the sensors.
Always visually check behind the vehi-
cle when backing up.
Be sure to inform any drivers of the
vehicle that may be unfamiliar with the
system regarding the systems capabili-
ties and limitations.
Self-diagnosisIf you don’t hear an audible warning
sound or if the buzzer sounds intermit-
tently when shifting the gear to the R
(Reverse) position, this may indicate a
malfunction in the rear parking assist sys-
tem. If this occurs, have your vehicle
checked by an authorized KIA dealer as
soon as possible.
WARNING
Pay close attention when the vehi-
cle is driven close to objects on the
road, particularly pedestrians, and
especially children. Be aware that
some objects may not be detected
by the sensors, due to the object’s
distance, size or material, all of
which can limit the effectiveness of
the sensor. Always perform a visu-
al inspection to make sure the vehi-
cle is clear of all obstructions
before moving the vehicle in any
direction.
WARNING
Your new vehicle warranty does not
cover any accidents or damage to
the vehicle or injuries to its occu-
pants due to a rear parking assist
system malfunction. Always drive
safely and cautiously.
XM CAN (ENG) 4(~105).QXP 4/19/2011 10:38 AM Page 65
Page 159 of 388
469
Features of your vehicle
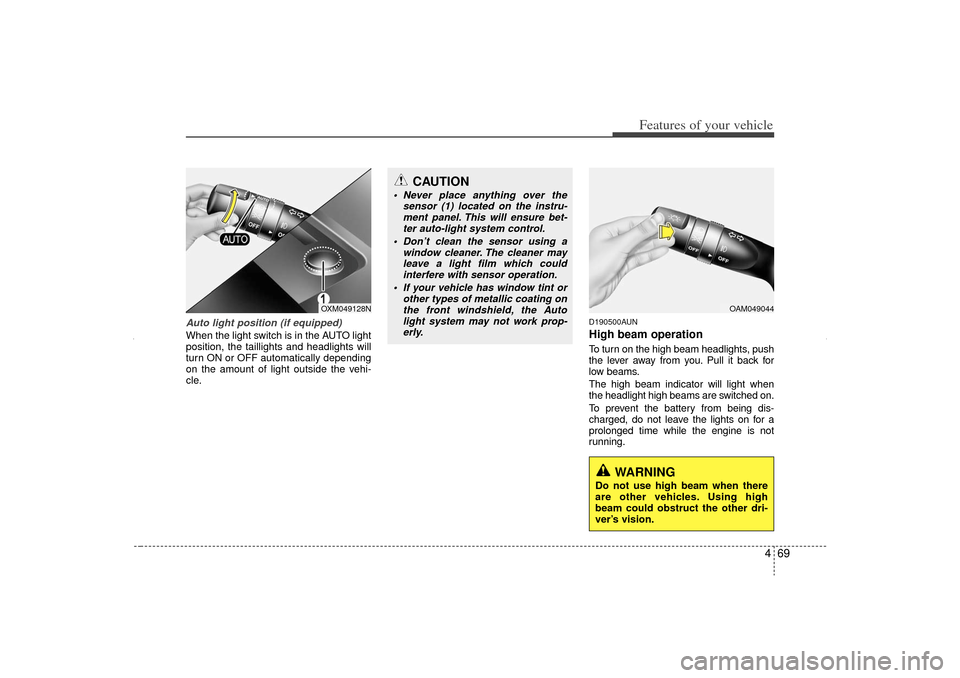
Auto light position (if equipped)When the light switch is in the AUTO light
position, the taillights and headlights will
turn ON or OFF automatically depending
on the amount of light outside the vehi-
cle.
D190500AUNHigh beam operation To turn on the high beam headlights, push
the lever away from you. Pull it back for
low beams.
The high beam indicator will light when
the headlight high beams are switched on.
To prevent the battery from being dis-
charged, do not leave the lights on for a
prolonged time while the engine is not
running.
CAUTION
Never place anything over thesensor (1) located on the instru-ment panel. This will ensure bet- ter auto-light system control.
Don’t clean the sensor using a window cleaner. The cleaner mayleave a light film which could interfere with sensor operation.
If your vehicle has window tint or other types of metallic coating onthe front windshield, the Autolight system may not work prop- erly.
OAM049044
WARNING
Do not use high beam when there
are other vehicles. Using high
beam could obstruct the other dri-
ver’s vision.
OXM049128N
XM CAN (ENG) 4(~105).QXP 4/19/2011 10:38 AM Page 69
Page 178 of 388
Features of your vehicle88
4Automatic heating and air condi-
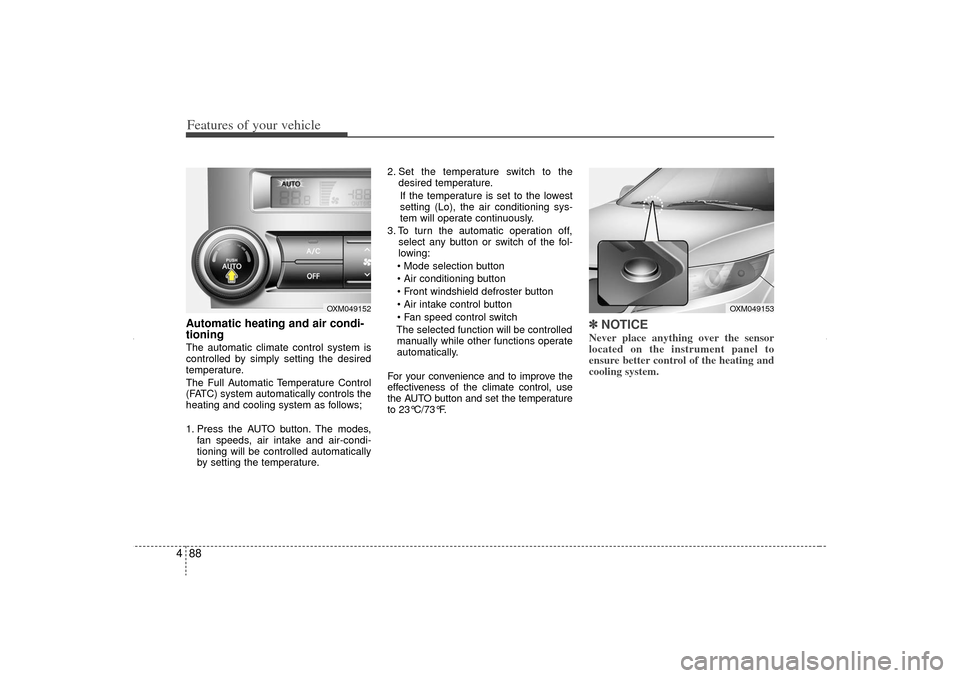
tioningThe automatic climate control system is
controlled by simply setting the desired
temperature.
The Full Automatic Temperature Control
(FATC) system automatically controls the
heating and cooling system as follows;
1. Press the AUTO button. The modes,
fan speeds, air intake and air-condi-
tioning will be controlled automatically
by setting the temperature. 2. Set the temperature switch to the
desired temperature.
If the temperature is set to the lowest
setting (Lo), the air conditioning sys-
tem will operate continuously.
3. To turn the automatic operation off, select any button or switch of the fol-
lowing:
Mode selection button
Air conditioning button
Front windshield defroster button
Air intake control button
Fan speed control switch
The selected function will be controlled manually while other functions operate
automatically.
For your convenience and to improve the
effectiveness of the climate control, use
the AUTO button and set the temperature
to 23°C/73°F.
✽ ✽ NOTICENever place anything over the sensor
located on the instrument panel to
ensure better control of the heating and
cooling system.
OXM049153
OXM049152
XM CAN (ENG) 4(~105).QXP 4/19/2011 10:41 AM Page 88