oil pressure KIA Sorento 2013 2.G Owner's Manual
[x] Cancel search | Manufacturer: KIA, Model Year: 2013, Model line: Sorento, Model: KIA Sorento 2013 2.GPages: 388, PDF Size: 7.56 MB
Page 10 of 388
I7
Index
Occupant detection system ··················\
··················\
········3-47
Odometer/Tripmeter/Trip computer ··················\
············4-51
Oil (Engine) ··················\
··················\
··················\
·············7-18
Outside rearview mirror··················\
··················\
·············4-45
Overheats ··················\
··················\
··················\
··················\
·6-6
Owner maintenance ··················\
··················\
··················\
···7-6
Panoramic sunroof ··················\
··················\
··················\
···4-30
Parking brake··················\
··················\
··················\
··5-28, 7-24
Passenger's front air bag ··················\
··················\
············3-53
Power brakes··················\
··················\
··················\
············5-27
Power outlet ··················\
··················\
··················\
···········4-101
Power steering ··················\
··················\
··················\
·········4-36
Power steering fluid ··················\
··················\
··················\
·7-23
Power window lock button ··················\
··················\
········4-24
Pre-tensioner seat belt··················\
··················\
················3-26
Push starting··················\
··················\
··················\
···············6-5
Rear parking assist system··················\
··················\
·········4-63
Rear seat adjustment ··················\
··················\
··················\
3-12
Rearview camera ··················\
··················\
··················\
·····4-66
Recommended cold tire inflation pressures ··················\
7-36Recommended lubricants and capacities ··················\
·······8-4
Recommended SAE viscosity number··················\
······8-6
Remote keyless entry ··················\
··················\
··················\
·4-6
Road warning ··················\
··················\
··················\
·············6-2
Rocking the vehicle ··················\
··················\
··················\
·5-46
Roof rack ··················\
··················\
··················\
···············4-105
Safety chains ··················\
··················\
··················\
············5-54
Seat belts ··················\
··················\
··················\
··················\
3-20 Pre-tensioner seat belt ··················\
··················\
···········3-26
Seat belt - Driver's··················\
··················\
·················3-22\
Seat belt warning··················\
··················\
··················\
·3-21
Seat belts - Front passenger and rear seat ·················3-24\
Seat heater··················\
··················\
··················\
··················\
3-9
Seat heater with air ventilation ··················\
··················\
··3-10
Seatback pocket ··················\
··················\
··················\
·······3-12
Seating capacity ··················\
··················\
··················\
·······5-62
Seats ··················\
··················\
··················\
··················\
·········3-2 Armrest ··················\
··················\
··················\
················3-19
Folding the rear seat ··················\
··················\
··············3-13
Front seat adjustment - manual ··················\
·················3-4
Front seat adjustment - power ··················\
··················\
·3-5
Headrest ··················\
··················\
··················\
·······3-7, 3-17
Lumbar support ··················\
··················\
··················\
·····3-7
Rear seat adjustment ··················\
··················\
·············3-12
Seat heater ··················\
··················\
··················\
·············3-9OP
S
R
XM CAN (ENG) INDEX.QXP 4/19/2011 10:59 AM Page 7
Page 19 of 388
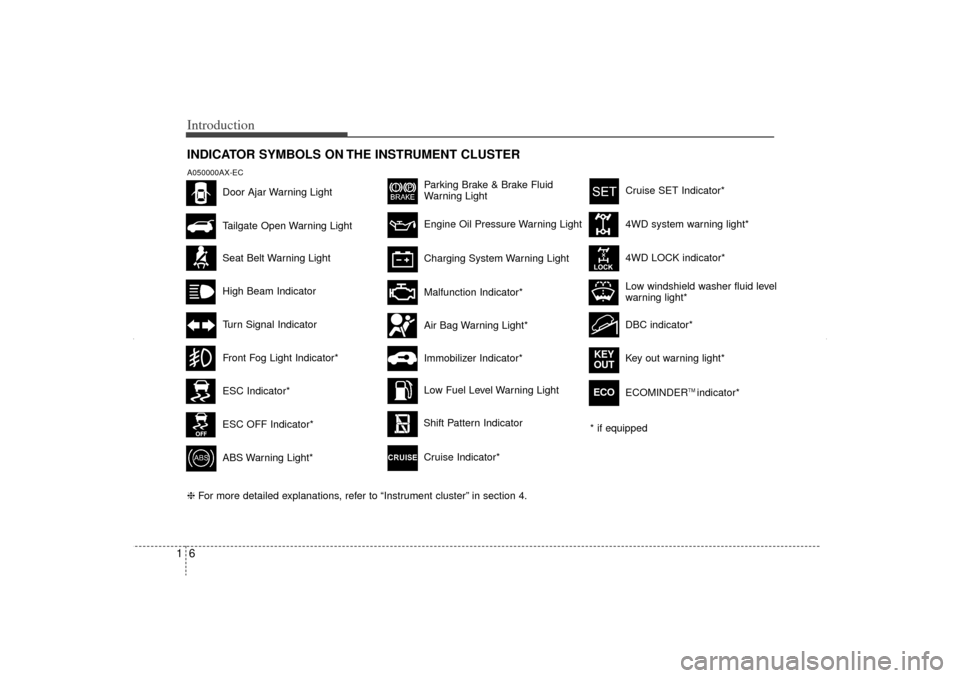
Introduction61INDICATOR SYMBOLS ON THE INSTRUMENT CLUSTER
Seat Belt Warning LightTurn Signal IndicatorABS Warning Light*
Parking Brake & Brake Fluid
Warning LightMalfunction Indicator*Immobilizer Indicator* Low Fuel Level Warning Light* if equipped
Tailgate Open Warning Light
❈ For more detailed explanations, refer to “Instrument cluster” in section 4.Charging System Warning Light
Door Ajar Warning Light
A050000AX-EC
Front Fog Light Indicator*
Engine Oil Pressure Warning LightAir Bag Warning Light*Shift Pattern Indicator
ESC Indicator*ESC OFF Indicator*
Cruise Indicator*
4WD system warning light*
4WD LOCK indicator*
DBC indicator*Low windshield washer fluid level
warning light*
Key out warning light*
KEY
OUTECO
ECOMINDER
TM indicator*
Cruise SET Indicator*
High Beam Indicator
XM CAN (ENG) 1.QXP 4/19/2011 10:21 AM Page 6
Page 147 of 388
457
Features of your vehicle
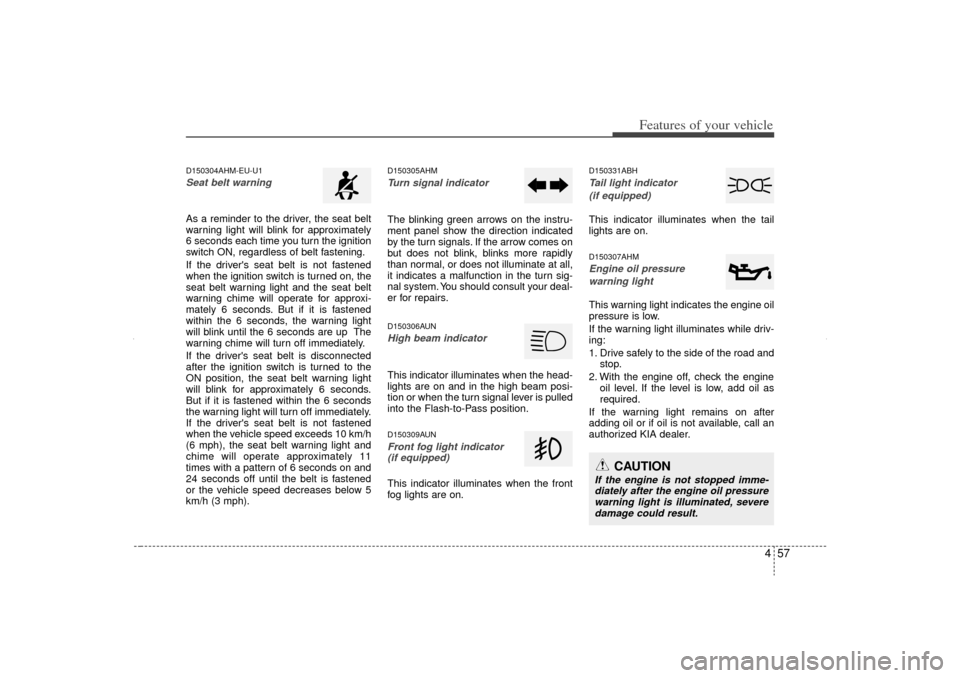
D150304AHM-EU-U1Seat belt warning As a reminder to the driver, the seat belt
warning light will blink for approximately
6 seconds each time you turn the ignition
switch ON, regardless of belt fastening.
If the driver's seat belt is not fastened
when the ignition switch is turned on, the
seat belt warning light and the seat belt
warning chime will operate for approxi-
mately 6 seconds. But if it is fastened
within the 6 seconds, the warning light
will blink until the 6 seconds are up The
warning chime will turn off immediately.
If the driver's seat belt is disconnected
after the ignition switch is turned to the
ON position, the seat belt warning light
will blink for approximately 6 seconds.
But if it is fastened within the 6 seconds
the warning light will turn off immediately.
If the driver's seat belt is not fastened
when the vehicle speed exceeds 10 km/h
(6 mph), the seat belt warning light and
chime will operate approximately 11
times with a pattern of 6 seconds on and
24 seconds off until the belt is fastened
or the vehicle speed decreases below 5
km/h (3 mph).
D150305AHMTurn signal indicatorThe blinking green arrows on the instru-
ment panel show the direction indicated
by the turn signals. If the arrow comes on
but does not blink, blinks more rapidly
than normal, or does not illuminate at all,
it indicates a malfunction in the turn sig-
nal system. You should consult your deal-
er for repairs.D150306AUNHigh beam indicator This indicator illuminates when the head-
lights are on and in the high beam posi-
tion or when the turn signal lever is pulled
into the Flash-to-Pass position.D150309AUNFront fog light indicator (if equipped)This indicator illuminates when the front
fog lights are on.
D150331ABHTail light indicator
(if equipped)This indicator illuminates when the tail
lights are on.D150307AHMEngine oil pressure warning lightThis warning light indicates the engine oil
pressure is low.
If the warning light illuminates while driv-
ing:
1. Drive safely to the side of the road and stop.
2. With the engine off, check the engine oil level. If the level is low, add oil as
required.
If the warning light remains on after
adding oil or if oil is not available, call an
authorized KIA dealer.
CAUTION
If the engine is not stopped imme- diately after the engine oil pressurewarning light is illuminated, severe damage could result.
XM CAN (ENG) 4(~105).QXP 4/19/2011 10:38 AM Page 57
Page 148 of 388
Features of your vehicle58
4
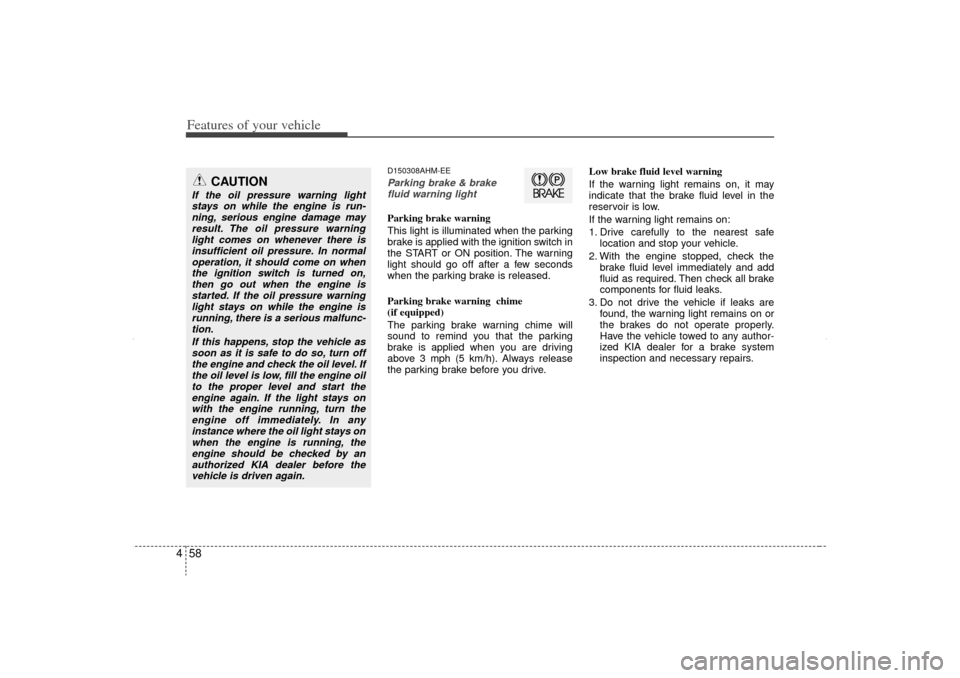
D150308AHM-EEParking brake & brake
fluid warning lightParking brake warning
This light is illuminated when the parking
brake is applied with the ignition switch in
the START or ON position. The warning
light should go off after a few seconds
when the parking brake is released.
Parking brake warning chime
(if equipped)
The parking brake warning chime will
sound to remind you that the parking
brake is applied when you are driving
above 3 mph (5 km/h). Always release
the parking brake before you drive. Low brake fluid level warning
If the warning light remains on, it may
indicate that the brake fluid level in the
reservoir is low.
If the warning light remains on:
1. Drive carefully to the nearest safe
location and stop your vehicle.
2. With the engine stopped, check the brake fluid level immediately and add
fluid as required. Then check all brake
components for fluid leaks.
3. Do not drive the vehicle if leaks are found, the warning light remains on or
the brakes do not operate properly.
Have the vehicle towed to any author-
ized KIA dealer for a brake system
inspection and necessary repairs.
CAUTION
If the oil pressure warning lightstays on while the engine is run- ning, serious engine damage mayresult. The oil pressure warninglight comes on whenever there is insufficient oil pressure. In normaloperation, it should come on whenthe ignition switch is turned on,then go out when the engine is started. If the oil pressure warninglight stays on while the engine isrunning, there is a serious malfunc-tion.
If this happens, stop the vehicle assoon as it is safe to do so, turn offthe engine and check the oil level. Ifthe oil level is low, fill the engine oil to the proper level and start theengine again. If the light stays onwith the engine running, turn theengine off immediately. In any instance where the oil light stays onwhen the engine is running, theengine should be checked by an authorized KIA dealer before thevehicle is driven again.
XM CAN (ENG) 4(~105).QXP 4/19/2011 10:38 AM Page 58
Page 277 of 388
549
Driving your vehicle
E110700AHMHighway drivingTiresAdjust the tire inflation pressures to
specification. Low tire inflation pressures
will result in overheating and possible
failure of the tires.
Avoid using worn or damaged tires which
may result in reduced traction or tire fail-
ure.✽ ✽NOTICENever exceed the maximum tire inflation
pressure shown on the tires.
Fuel, engine coolant and engine oilHigh speed travel consumes more fuel
than urban motoring. Do not forget to
check both the engine coolant and
engine oil.Drive beltA loose or damaged drive belt may result
in overheating of the engine.
WARNING
Underinflated or overinflated
tires can cause poor handling,
loss of vehicle control, and sud-
den tire failure leading to acci-
dents, injuries, and even death.
Always check tires for proper
inflation before driving. For prop-
er tire pressures, refer to “Tires
and wheels” in section 8.
Driving on tires with no or insuffi- cient tread is dangerous. Worn-
out tires can result in loss of
vehicle control, collisions, injury,
and even death. Worn-out tires
should be replaced as soon as
possible and should never be
used for driving. Always check
the tire tread before driving your
car. For further information and
tread limits, refer to “Tires and
wheels” in section 7.
XM CAN (ENG) 5.QXP 11/5/2010 11:40 AM Page 49
Page 320 of 388
Maintenance67
G030000AUNThe following lists are vehicle checks and
inspections that should be performed by
the owner or an authorized KIA dealer at
the frequencies indicated to help ensure
safe, dependable operation of your vehi-
cle.
Any adverse conditions should be
brought to the attention of your dealer as
soon as possible.
These Owner Maintenance Checks are
generally not covered by warranties and
you may be charged for labor, parts and
lubricants used.
Owner maintenance schedule G030101AHMWhen you stop for fuel: Check the engine oil level.
Check the coolant level in the coolantreservoir.
Check the windshield washer fluid level.
Look for low or under-inflated tires.
WARNING
- Maintenance work
Performing maintenance work on
a vehicle can be dangerous. You
can be seriously injured while
performing some maintenance
procedures. If you lack sufficient
knowledge and experience or the
proper tools and equipment to do
the work, have it done by an
authorized KIA dealer.
Working under the hood with the engine running is dangerous. It
becomes even more dangerous
when you wear jewelry or loose
clothing. These can become
entangled in moving parts and
result in injury. Therefore, if you
must run the engine while work-
ing under the hood, make certain
that you remove all jewelry (espe-
cially rings, bracelets, watches,
and necklaces) and all neckties,
scarves, and similar loose cloth-
ing before getting near the
engine or cooling fans.
OWNER MAINTENANCE
WARNING
Be careful when checking your
engine coolant level when the
engine is hot. Scalding hot coolant
and steam may blow out under
pressure. This could cause burns
or other serious injury.
XM CAN (ENG) 7.QXP 4/19/2011 10:52 AM Page 6
Page 326 of 388
Maintenance12
7
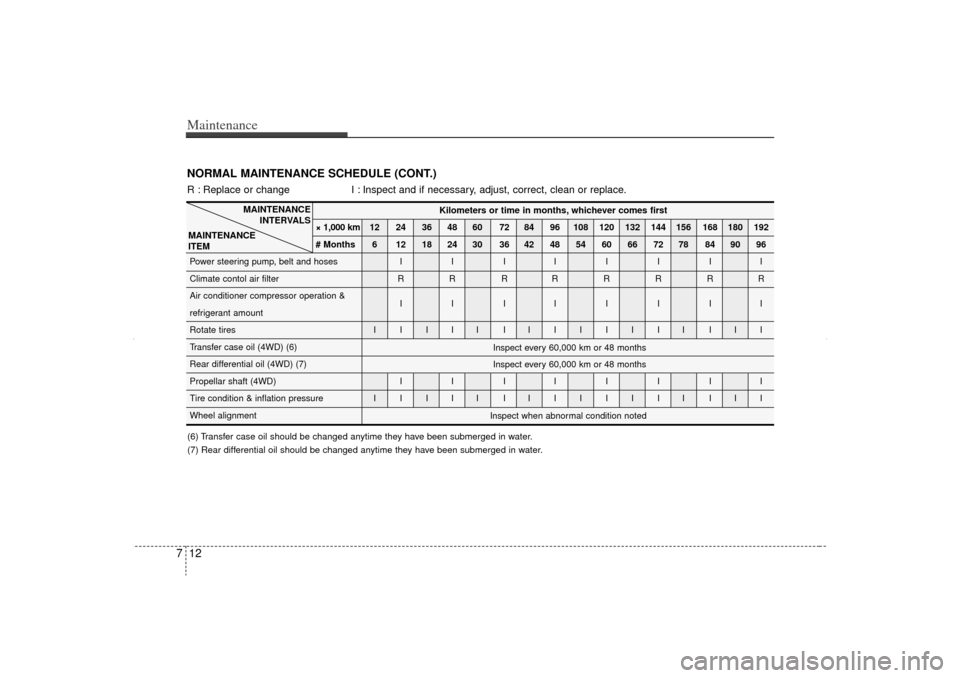
Kilometers or time in months, whichever comes first
× 1,000 km 12 24 36 48 60 72 84 96 108 120 132 144 156 168 180 192
# Months 6 12 18 24 30 36 42 48 54 60 66 72 78 84 90 96
Power steering pump, belt and hoses I I I IIIII
Climate contol air filter R R R RRRRR
Air conditioner compressor operation & IIIIIIII
refrigerant amount
Rotate tires I I I I I I IIIIIII III
Transfer case oil (4WD) (6)
Rear differential oil (4WD) (7)
Propellar shaft (4WD) I I I IIIII
Tire condition & inflation pressure I I I I I I IIIIIII III
Wheel alignment
MAINTENANCE INTERVALS
MAINTENANCE
ITEM
Inspect every 60,000 km or 48 months
Inspect every 60,000 km or 48 months
NORMAL MAINTENANCE SCHEDULE (CONT.)R : Replace or change I : Inspect and if necessary, adjust, correct, clean or replace.
Inspect when abnormal condition noted
(6) Transfer case oil should be changed anytime they have been submerged in water.
(7) Rear differential oil should be changed anytime they have been submerged in water.
XM CAN (ENG) 7.QXP 4/19/2011 10:52 AM Page 12
Page 333 of 388
719
Maintenance
G060200BHMChanging the engine oil and filterHave engine oil and filter changed by an
authorized KIA dealer according to the
Maintenance Schedule at the beginning
of this section.
G070000AHMThe high-pressure cooling system has a
reservoir filled with year round antifreeze
coolant. The reservoir is filled at the fac-
tory.
Check the antifreeze protection and
coolant level at least once a year, at the
beginning of the winter season, and
before traveling to a colder climate.G070100AHMChecking the coolant levelENGINE COOLANT
WARNING
- Removingradiator cap
Never attempt to remove the radi-
ator cap while the engine is oper-
ating or hot. Doing so might lead
to cooling system and engine
damage. Also, hot coolant or
steam could cause serious per-
sonal injury.
Turn the engine off and wait until it cools down. Use extreme care
when removing the radiator cap.
Wrap a thick towel around it, and
turn it counterclockwise slowly to
the first stop. Step back while the
pressure is released from the
cooling system.
(Continued)
(Continued)When you are sure all the pres-
sure has been released, press
down on the cap, using a thick
towel, and continue turning coun-
terclockwise to remove it.
Even if the engine is not operat- ing, do not remove the radiator
cap or the drain plug while the
engine and radiator are hot. Hot
coolant and steam may still blow
out under pressure, causing seri-
ous injury.
WARNING
Used engine oil may cause skin irri-
tation or cancer if left in contact
with the skin for prolonged periods
of time. Used engine oil contains
chemicals that have caused cancer
in laboratory animals. Always pro-
tect your skin by washing your
hands thoroughly with soap and
warm water as soon as possible
after handling used oil.
WARNING
The electric motor (cooling fan) is
controlled by engine coolant tem-
perature, refrigerant pressure and
vehicle speed. It may sometimes
operate even when the engine is
not running. Use extreme caution
when working near the blades of
the cooling fan so that you are not
injured by a rotating fan blades. As
the engine coolant temperature
decreases, the electric motor will
automatically shut off. This is a nor-
mal condition.
XM CAN (ENG) 7.QXP 4/19/2011 10:52 AM Page 19
Page 360 of 388
Maintenance46
7G201100AAM-ECTire terminology and definitions
Air Pressure: The amount of air
inside the tire pressing outward on
the tire. Air pressure is expressed in
kilopascal (kPa) or pounds per
square inch (psi).
Accessory Weight : This means the
combined weight of optional acces-
sories. Some examples of optional
accessories are, automatic
transaxle, power seats, and air con-
ditioning.
Aspect Ratio: The relationship of a
tire's height to its width.
Belt: A rubber coated layer of cords
that is located between the plies and
the tread. Cords may be made from
steel or other reinforcing materials.
Bead: The tire bead contains steel
wires wrapped by steel cords that
hold the tire onto the rim.
Bias Ply Tire : A pneumatic tire in
which the plies are laid at alternate
angles less than 90 degrees to the
centerline of the tread. Cold Tire Pressure: The amount of
air pressure in a tire, measured in
kilopascals (kPa) or pounds per
square inch (psi) before a tire has
built up heat from driving.
Curb Weight: This means the weight
of a motor vehicle with standard and
optional equipment including the
maximum capacity of fuel, oil and
coolant, but without passengers and
cargo.
DOT Markings: The DOT code
includes the Tire Identification
Number (TIN), an alphanumeric des-
ignator which can also identify the
tire manufacturer, production plant,
brand and date of production.
GVWR: Gross Vehicle Weight Rating
GAWR FRT: Gross Axle Weight
Rating for the Front Axle.
GAWR RR: Gross Axle Weight
Rating for the Rear axle.
Intended Outboard Sidewall
: The
side of an asymmetrical tire, that
must always face outward when
mounted on a vehicle. Kilopascal (kPa): The metric unit for
air pressure.
Load Index: An assigned number
ranging from 1 to 279 that corre-
sponds to the load carrying capacity
of a tire.
Maximum Inflation Pressure
: The
maximum air pressure to which a
cold tire may be inflated. The maxi-
mum air pressure is molded onto the
sidewall.
Maximum Load Rating : The load
rating for a tire at the maximum per-
missible inflation pressure for that
tire.
Maximum Loaded Vehicle Weight :
The sum of curb weight; accessory
weight; vehicle capacity weight; and
production options weight.
Normal Occupant Weight: The
number of occupants a vehicle is
designed to seat multiplied by 68 kg
(150 pounds).
XM CAN (ENG) 7.QXP 4/19/2011 10:53 AM Page 46
Page 373 of 388
759
Maintenance
Waxing
Wax the vehicle when water will no
longer bead on the paint.
Always wash and dry the vehicle before
waxing. Use a good quality liquid or
paste wax, and follow the manufacturer’s
instructions. Wax all metal trim to protect
it and to maintain its luster.
Removing oil, tar, and similar materials
with a spot remover will usually strip the
wax from the finish. Be sure to re-wax
these areas even if the rest of the vehicle
does not yet need waxing.
G230103AUNFinish damage repair Deep scratches or stone chips in the
painted surface must be repaired
promptly. Exposed metal will quickly rust
and may develop into a major repair
expense.✽ ✽NOTICEIf your vehicle is damaged and requires
any metal repair or replacement, be sure
the body shop applies anti-corrosion
materials to the parts repaired or
replaced. G230104AUNBright-metal maintenance To remove road tar and insects, use a
tar remover, not a scraper or other
sharp object.
To protect the surfaces of bright-metal parts from corrosion, apply a coating of
wax or chrome preservative and rub to
a high luster.
During winter weather or in coastal areas, cover the bright metal parts with
a heavier coating of wax or preserva-
tive. If necessary, coat the parts with
non-corrosive petroleum jelly or other
protective compound.
CAUTION
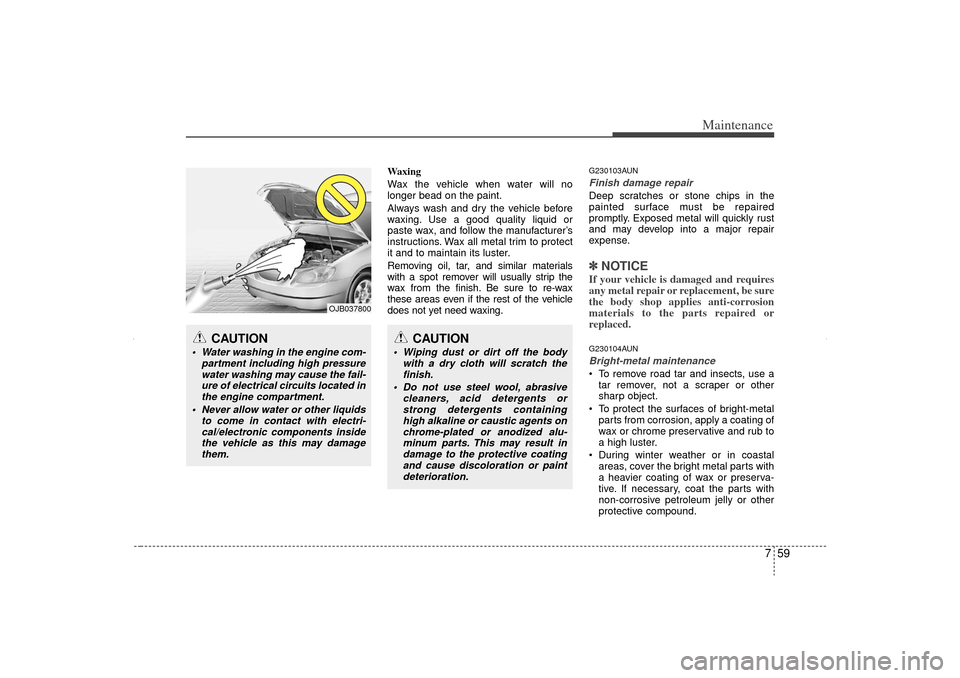
Water washing in the engine com- partment including high pressurewater washing may cause the fail- ure of electrical circuits located inthe engine compartment.
Never allow water or other liquids to come in contact with electri-cal/electronic components inside the vehicle as this may damagethem.
CAUTION
Wiping dust or dirt off the body with a dry cloth will scratch thefinish.
Do not use steel wool, abrasive cleaners, acid detergents orstrong detergents containing high alkaline or caustic agents onchrome-plated or anodized alu- minum parts. This may result indamage to the protective coating and cause discoloration or paintdeterioration.
OJB037800
XM CAN (ENG) 7.QXP 4/19/2011 10:55 AM Page 59