display KIA SORENTO 2018 Owner's Manual
[x] Cancel search | Manufacturer: KIA, Model Year: 2018, Model line: SORENTO, Model: KIA SORENTO 2018Pages: 536, PDF Size: 13.42 MB
Page 198 of 536
4113
Features of your vehicle
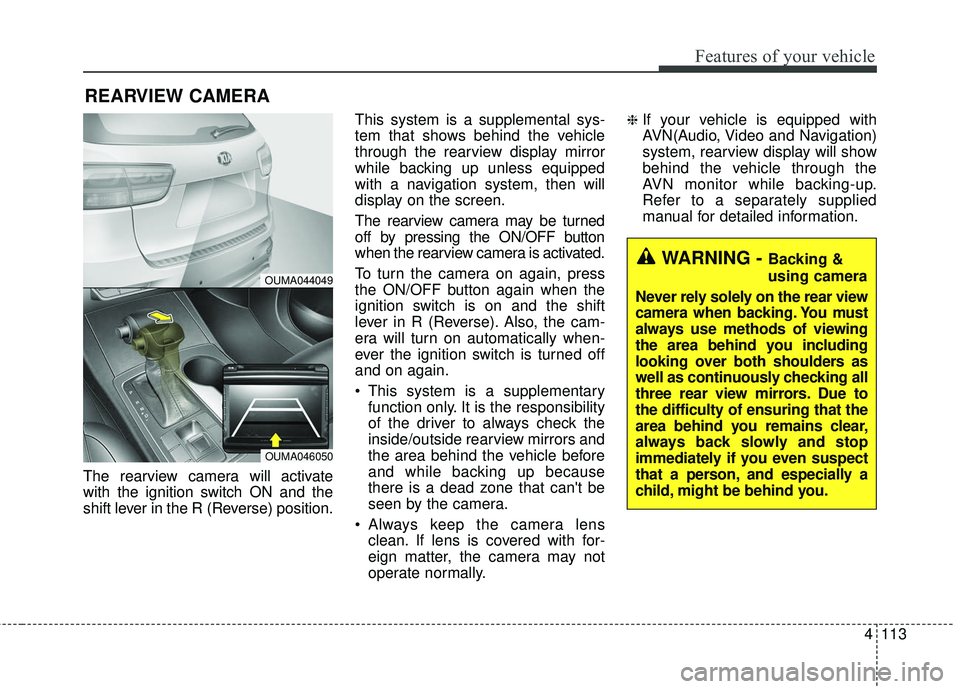
The rearview camera will activate
with the ignition switch ON and the
shift lever in the R (Reverse) position.This system is a supplemental sys-
tem that shows behind the vehicle
through the rearview display mirror
while backing up unless equipped
with a navigation system, then will
display on the screen.
The rearview camera may be turned
off by pressing the ON/OFF button
when the rearview camera is activated.
To turn the camera on again, press
the ON/OFF button again when the
ignition switch is on and the shift
lever in R (Reverse). Also, the cam-
era will turn on automatically when-
ever the ignition switch is turned off
and on again.
This system is a supplementary
function only. It is the responsibility
of the driver to always check the
inside/outside rearview mirrors and
the area behind the vehicle before
and while backing up because
there is a dead zone that can't be
seen by the camera.
Always keep the camera lens clean. If lens is covered with for-
eign matter, the camera may not
operate normally.
❈If your vehicle is equipped with
AVN(Audio, Video and Navigation)
system, rearview display will show
behind the vehicle through the
AVN monitor while backing-up.
Refer to a separately supplied
manual for detailed information.
REARVIEW CAMERA
WARNING - Backing &
using camera
Never rely solely on the rear view
camera when backing. You must
always use methods of viewing
the area behind you including
looking over both shoulders as
well as continuously checking all
three rear view mirrors. Due to
the difficulty of ensuring that the
area behind you remains clear,
always back slowly and stop
immediately if you even suspect
that a person, and especially a
child, might be behind you.
OUMA044049
OUMA046050
Page 226 of 536
4141
Features of your vehicle
AUTOMATIC CLIMATE CONTROL SYSTEM (IF EQUIPPED)
OUMA044157/OUMA044158
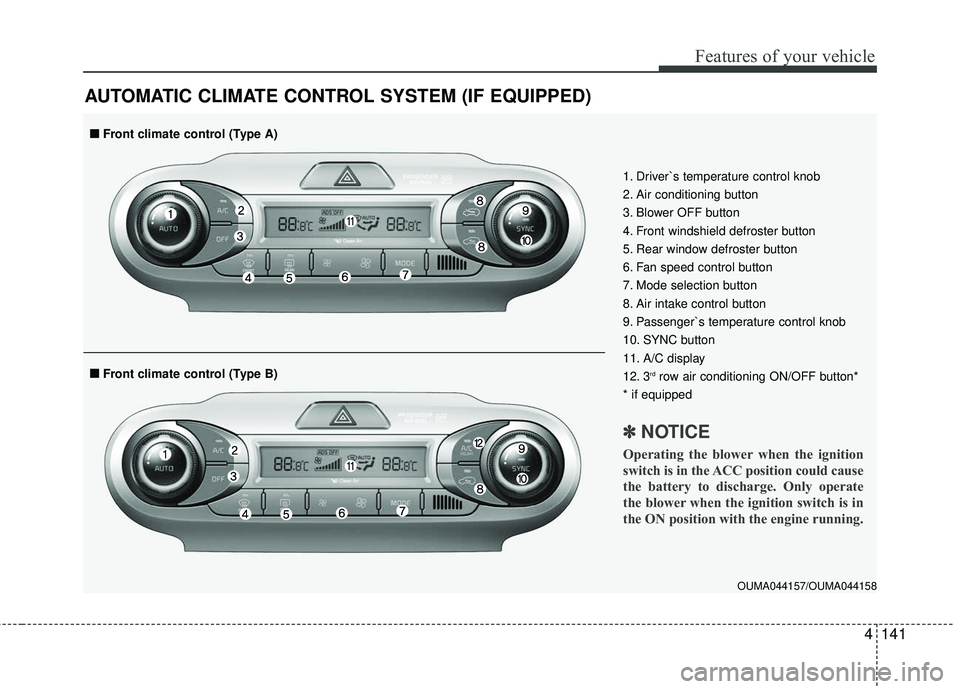
1. Driver`s temperature control knob
2. Air conditioning button
3. Blower OFF button
4. Front windshield defroster button
5. Rear window defroster button
6. Fan speed control button
7. Mode selection button
8. Air intake control button
9. Passenger`s temperature control knob
10. SYNC button
11. A/C display
12. 3
rdrow air conditioning ON/OFF button*
* if equipped
✽ ✽ NOTICE
Operating the blower when the ignition
switch is in the ACC position could cause
the battery to discharge. Only operate
the blower when the ignition switch is in
the ON position with the engine running.
■ ■ Front climate control (Type B)
■ ■Front climate control (Type A)
Page 228 of 536
4143
Features of your vehicle
Automatic heating and air con-
ditioning
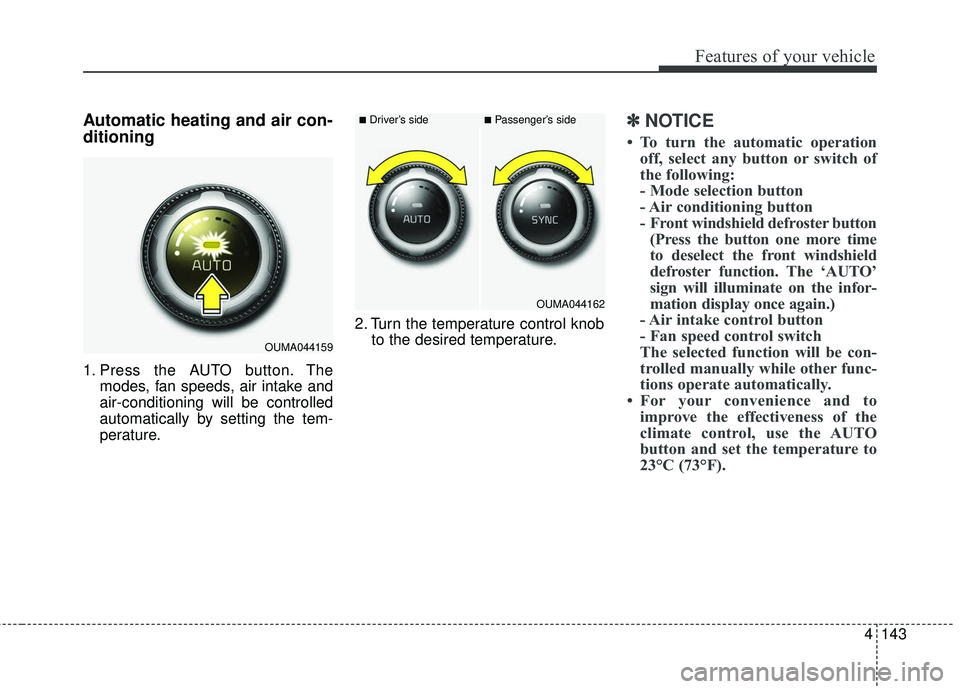
1. Press the AUTO button. Themodes, fan speeds, air intake and
air-conditioning will be controlled
automatically by setting the tem-
perature. 2. Turn the temperature control knob
to the desired temperature.
✽ ✽NOTICE
• To turn the automatic operation
off, select any button or switch of
the following:
- Mode selection button
- Air conditioning button
- Front windshield defroster button(Press the button one more time
to deselect the front windshield
defroster function. The ‘AUTO’
sign will illuminate on the infor-
mation display once again.)
- Air intake control button
- Fan speed control switch
The selected function will be con-
trolled manually while other func-
tions operate automatically.
• For your convenience and to improve the effectiveness of the
climate control, use the AUTO
button and set the temperature to
23°C (73°F).
OUMA044159
■Driver’s side■Passenger’s side
OUMA044162
Page 232 of 536
4147
Features of your vehicle
Adjusting the driver and passenger
side temperature equally
Press the “SYNC” button to adjustthe driver and passenger side tem-
perature equally.
The passenger side temperature
will be set to the same temperature
as the driver side temperature.
Turn the driver side temperature control knob. The driver and pas-
senger side temperature will be
adjusted equally.
When the third row’s seat heater button is turned ON, the third row’s
climate and fan speed setting will
automatically follow the first row
settings. Adjusting the driver and passenger
side temperature individually
Press the “SYNC” button again to
adjust the driver and passenger
side temperature individually. The
illumination of button turns off.
Operate the driver side tempera- ture control knob to adjust the driv-
er side temperature.
Operate the passenger side tem- perature control knob to adjust the
passenger side temperature.
Temperature conversion
You can switch the temperature
mode from Centigrade to Fahrenheit
as follows:
While pressing the OFF button,
press the AUTO button for 3 seconds
or more.
The display will change from
Centigrade to Fahrenheit, or from
Fahrenheit to Centigrade.
If the battery has been discharged or
disconnected, the temperature mode
display will reset to Fahrenheit.
Air intake control
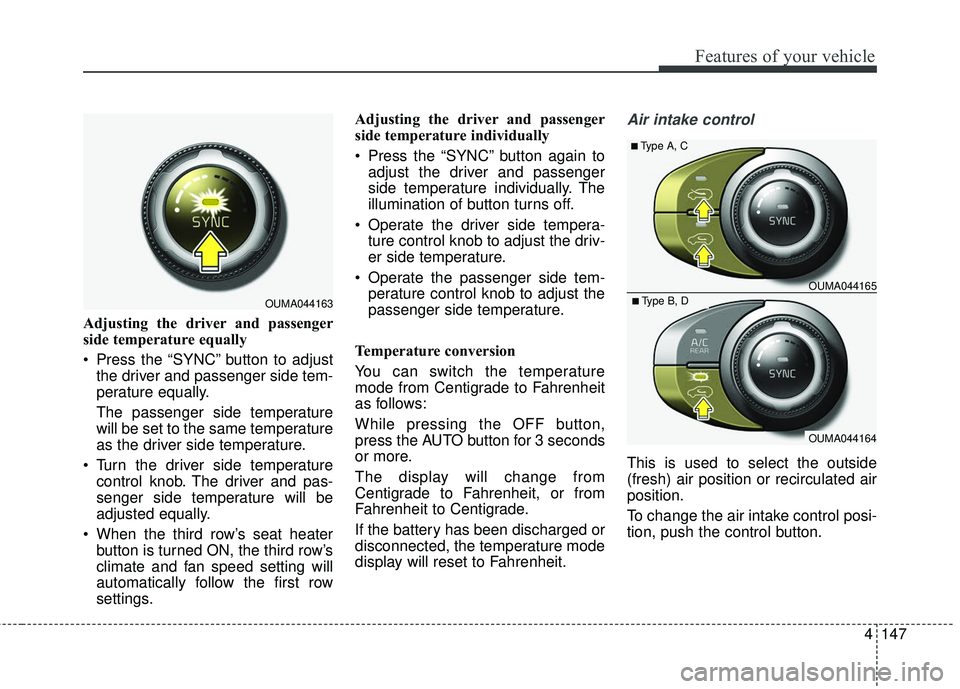
This is used to select the outside
(fresh) air position or recirculated air
position.
To change the air intake control posi-
tion, push the control button.
OUMA044163
OUMA044164
OUMA044165
■Type A, C
■Type B, D
Page 235 of 536
Features of your vehicle
150
4
Climate information screen
selection (if equipped)
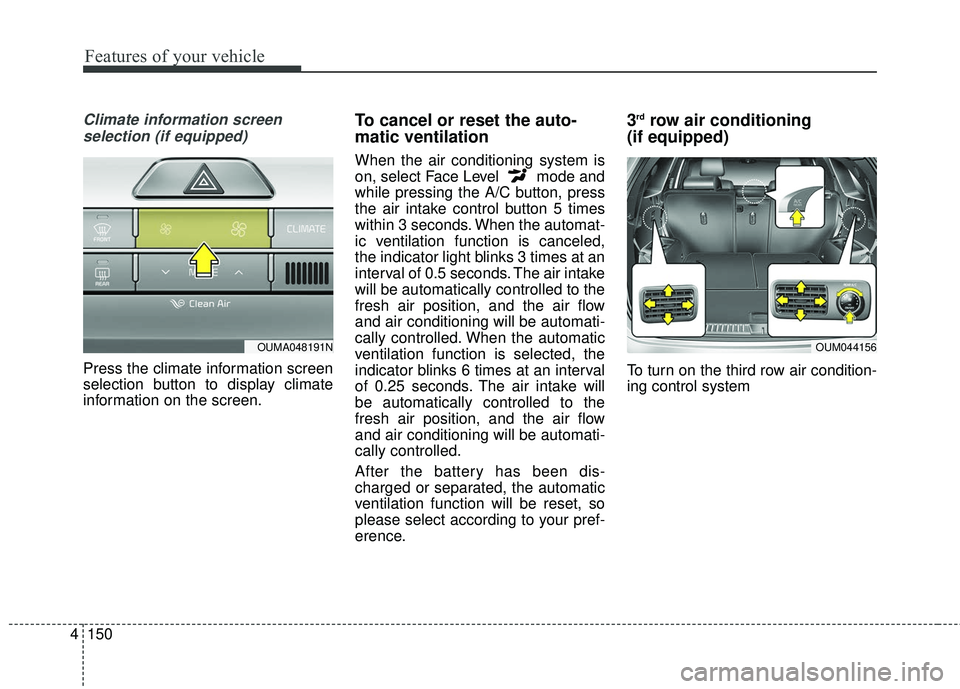
Press the climate information screen
selection button to display climate
information on the screen.
To cancel or reset the auto-
matic ventilation
When the air conditioning system is
on, select Face Level mode and
while pressing the A/C button, press
the air intake control button 5 times
within 3 seconds. When the automat-
ic ventilation function is canceled,
the indicator light blinks 3 times at an
interval of 0.5 seconds. The air intake
will be automatically controlled to the
fresh air position, and the air flow
and air conditioning will be automati-
cally controlled. When the automatic
ventilation function is selected, the
indicator blinks 6 times at an interval
of 0.25 seconds. The air intake will
be automatically controlled to the
fresh air position, and the air flow
and air conditioning will be automati-
cally controlled.
After the battery has been dis-
charged or separated, the automatic
ventilation function will be reset, so
please select according to your pref-
erence.
3rdrow air conditioning
(if equipped)
To turn on the third row air condition-
ing control system
OUM044156OUMA048191N
Page 244 of 536
4159
Features of your vehicle
Auto defogging system (if equipped)
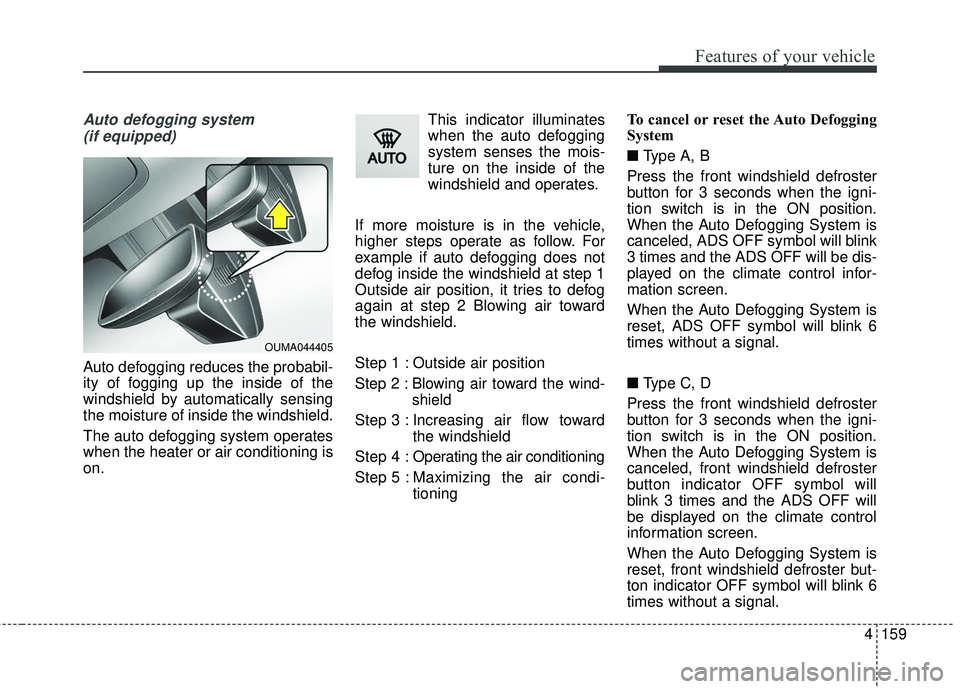
Auto defogging reduces the probabil-
ity of fogging up the inside of the
windshield by automatically sensing
the moisture of inside the windshield.
The auto defogging system operates
when the heater or air conditioning is
on. This indicator illuminates
when the auto defogging
system senses the mois-
ture on the inside of the
windshield and operates.
If more moisture is in the vehicle,
higher steps operate as follow. For
example if auto defogging does not
defog inside the windshield at step 1
Outside air position, it tries to defog
again at step 2 Blowing air toward
the windshield.
Step 1 : Outside air position
Step 2 :Blowing air toward the wind-
shield
Step 3 : Increasing air flow toward the windshield
Step 4 : Operating the air conditioning
Step 5 : Maxim izing the air condi-
tioning To cancel or reset the Auto Defogging
System
■
Type A, B
Press the front windshield defroster
button for 3 seconds when the igni-
tion switch is in the ON position.
When the Auto Defogging System is
canceled, ADS OFF symbol will blink
3 times and the ADS OFF will be dis-
played on the climate control infor-
mation screen.
When the Auto Defogging System is
reset, ADS OFF symbol will blink 6
times without a signal.
■ Type C, D
Press the front windshield defroster
button for 3 seconds when the igni-
tion switch is in the ON position.
When the Auto Defogging System is
canceled, front windshield defroster
button indicator OFF symbol will
blink 3 times and the ADS OFF will
be displayed on the climate control
information screen.
When the Auto Defogging System is
reset, front windshield defroster but-
ton indicator OFF symbol will blink 6
times without a signal.
OUMA044405
Page 260 of 536
4175
Features of your vehicle
Steering wheel remote
controller
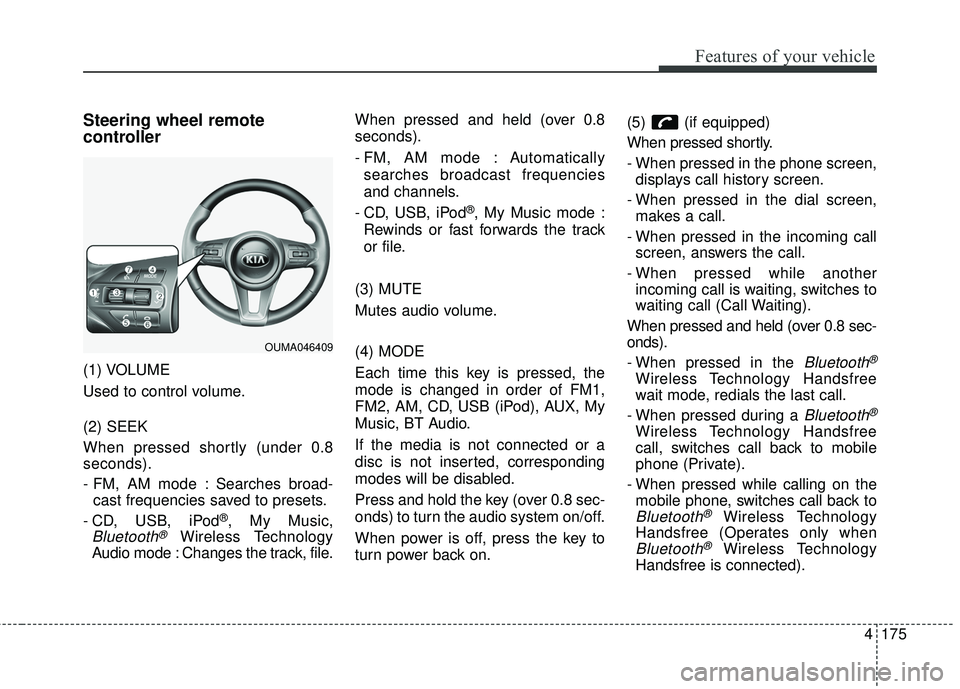
(1) VOLUME
Used to control volume.
(2) SEEK
When pressed shortly (under 0.8
seconds).
- FM, AM mode : Searches broad-cast frequencies saved to presets.
- CD, USB, iPod
®, My Music,
Bluetooth®Wireless Technology
Audio mode : Changes the track, file. When pressed and held (over 0.8
seconds).
- FM, AM mode : Automatically
searches broadcast frequencies
and channels.
- CD, USB, iPod
®, My Music mode :
Rewinds or fast forwards the track
or file.
(3) MUTE
Mutes audio volume.
(4) MODE
Each time this key is pressed, the
mode is changed in order of FM1,
FM2, AM, CD, USB (iPod), AUX, My
Music, BT Audio.
If the media is not connected or a
disc is not inserted, corresponding
modes will be disabled.
Press and hold the key (over 0.8 sec-
onds) to turn the audio system on/off.
When power is off, press the key to
turn power back on. (5) (if equipped)
When pressed shortly.
- When pressed in the phone screen,
displays call history screen.
- When pressed in the dial screen, makes a call.
- When pressed in the incoming call screen, answers the call.
- When pressed while another incoming call is waiting, switches to
waiting call (Call Waiting).
When pressed and held (over 0.8 sec-
onds).
- When pressed in the
Bluetooth®
Wireless Technology Handsfree
wait mode, redials the last call.
- When pressed during a
Bluetooth®
Wireless Technology Handsfree
call, switches call back to mobile
phone (Private).
- When pressed while calling on the mobile phone, switches call back to
Bluetooth®Wireless Technology
Handsfree (Operates only when
Bluetooth®Wireless Technology
Handsfree is connected).
OUMA046409
Page 281 of 536
511
Driving your vehicle
✽ ✽
NOTICE
If you leave the ENGINE START/
STOP button in the ACC or ON
position for a long time, the battery
will discharge.
Starting the engine with a
smart key
1.Carry the smart key or leave it
inside the vehicle.
2.Make sure the parking brake is firmly applied
3.Place the transaxle shift lever in P (Park). Depress the brake pedal
fully.
You can also start the engine whenthe shift lever is in the N (Neutral)position.
4.Press the ENGINE START/STOP button while depressing the brake
pedal.
It should be started withoutdepressing the accelerator.
5.Do not wait for the engine to warm up while the vehicle remains sta-
tionary.
Start driving at moderate engine
speeds. (Steep accelerating and
decelerating should be avoided.) Even if the smart key is in the vehi-
cle, if it is far away from you, the
engine may not start.
When the ENGINE START/STOP button is in the ACC position or
above, if any door is opened, the
system checks for the smart key. If
the smart key is not in the vehicle,
a message "key is not in the vehi-
cle" will appear on the LCD display.
And if all doors are closed, the
chime will sound for 5 seconds.
The indicator or warning will turn
off while the vehicle is moving.
Always have the smart key with
you.
WARNING- Starting
vehicle
Never press the ENGINE
START/STOP button while the
vehicle is in motion except in an
emergency. This would result in
loss of directional control and
braking function, which could
cause an accident.
Page 284 of 536
Driving your vehicle
14
5
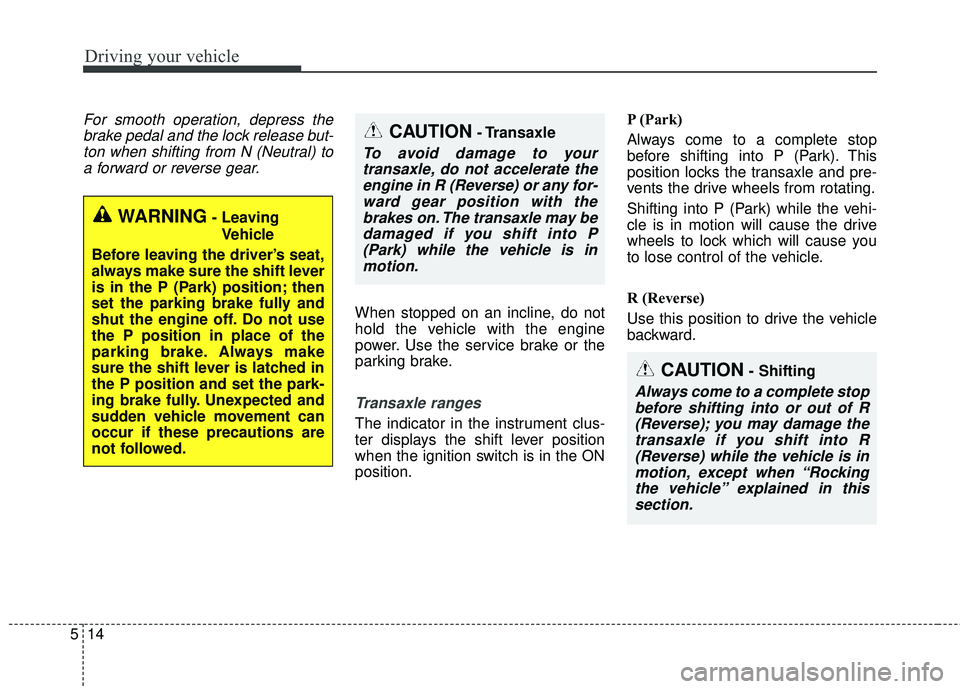
CAUTION- Shifting
Always come to a complete stop
before shifting into or out of R(Reverse); you may damage thetransaxle if you shift into R(Reverse) while the vehicle is inmotion, except when “Rockingthe vehicle” explained in thissection.
For smooth operation, depress thebrake pedal and the lock release but-ton when shifting from N (Neutral) toa forward or reverse gear.
When stopped on an incline, do not
hold the vehicle with the engine
power. Use the service brake or the
parking brake.
Transaxle ranges
The indicator in the instrument clus-
ter displays the shift lever position
when the ignition switch is in the ON
position. P (Park)
Always come to a complete stop
before shifting into P (Park). This
position locks the transaxle and pre-
vents the drive wheels from rotating.
Shifting into P (Park) while the vehi-
cle is in motion will cause the drive
wheels to lock which will cause you
to lose control of the vehicle.
R (Reverse)
Use this position to drive the vehicle
backward.
WARNING- Leaving
Vehicle
Before leaving the driver’s seat,
always make sure the shift lever
is in the P (Park) position; then
set the parking brake fully and
shut the engine off. Do not use
the P position in place of the
parking brake. Always make
sure the shift lever is latched in
the P position and set the park-
ing brake fully. Unexpected and
sudden vehicle movement can
occur if these precautions are
not followed.
CAUTION- Transaxle
To avoid damage to your transaxle, do not accelerate theengine in R (Reverse) or any for-ward gear position with thebrakes on. The transaxle may bedamaged if you shift into P(Park) while the vehicle is inmotion.
Page 321 of 536
551
Driving your vehicle
The warning light illumi-
nates on the LCD display,
when you cancel the AEB
system. The driver can
monitor the AEB ON/OFF status on
the LCD display. When the warning
light remains ON with the AEB acti-
vated, we recommend you to have
the system checked by an authorized
Kia dealer.
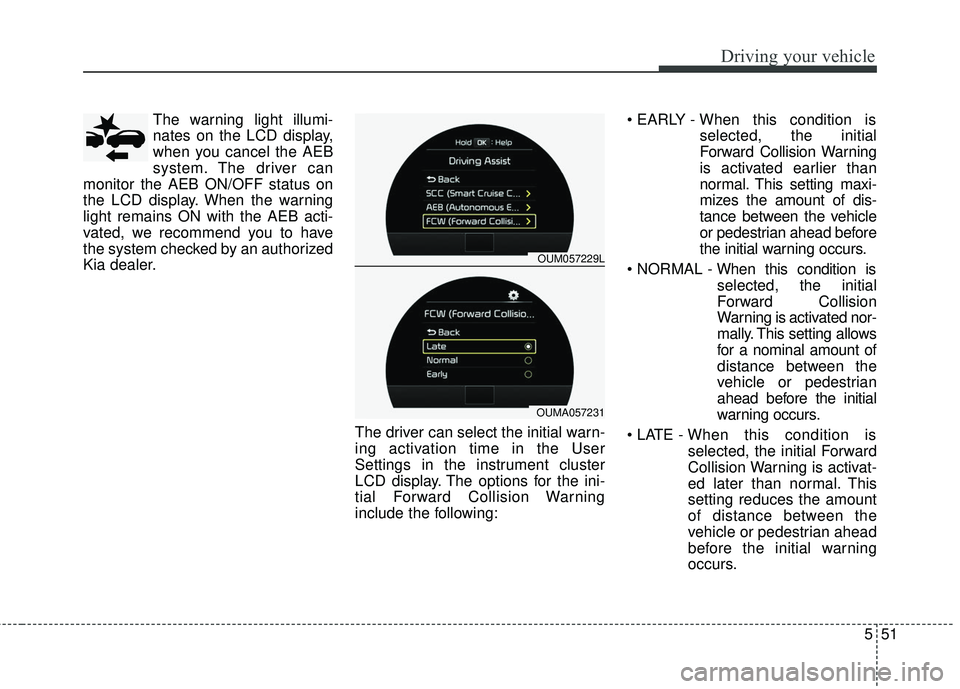
The driver can select the initial warn-
ing activation time in the User
Settings in the instrument cluster
LCD display. The options for the ini-
tial Forward Collision Warning
include the following:
selected, the initial
Forward Collision Warning
is activated earlier than
normal. This setting maxi-
mizes the amount of dis-
tance between the vehicle
or pedestrian ahead before
the initial warning occurs.
selected, the initial
Forward Collision
Warning is activated nor-
mally. This setting allows
for a nominal amount of
distance between the
vehicle or pedestrian
ahead before the initial
warning occurs.
selected, the initial Forward
Collision Warning is activat-
ed later than normal. This
setting reduces the amount
of distance between the
vehicle or pedestrian ahead
before the initial warning
occurs.
OUM057229L
OUMA057231