warning lights KIA Soul 2012 1.G User Guide
[x] Cancel search | Manufacturer: KIA, Model Year: 2012, Model line: Soul, Model: KIA Soul 2012 1.GPages: 393, PDF Size: 8.76 MB
Page 131 of 393
Features of your vehicle
52
4
Seat belt warning
As a reminder to the driver, the seat
belt warning light will blink for
approximately 6 seconds each time
you turn the ignition switch ON,
regardless of belt fastening.
If the driver's seat belt is not fastened
when the ignition switch is turned on,
the seat belt warning light and the
seat belt warning chime will operate
for approximately 6 seconds. But if
the belt is refastened within the 6
seconds, the warning chime will turn
off and the warning light will blink for
the remainder of the 6 second peri-
od.
If the driver's seat belt is disconnect-
ed after the ignition switch is turned
to the ON position, the seat belt
warning light will blink for approxi-
mately 6 seconds. But if it is fastened
within the 6 seconds the warning
light will turn off immediately. If the driver's seat belt is not fastened
when the vehicle speed exceeds 10
km/h (6 mph), the seat belt warning
light and chime will operate approxi-
mately 11 times with a pattern of 6
seconds on and 24 seconds off until
the belt is fastened or the vehicle
speed decreases below 5 km/h (3
mph).
Turn signal indicator
The blinking green arrows on the
instrument panel show the direction
indicated by the turn signals. If the
arrow comes on but does not blink,
blinks more rapidly than normal, or
does not illuminate at all, it indicates
a malfunction in the turn signal sys-
tem. You should consult your dealer
for repairs.
WARNING - ABS/brake
lights
If both ABS and brake warning
lights are on and stay on, your
vehicle’s brake system will not
work normally during sudden
braking. In this case, avoid high
speed driving and abrupt brak-
ing. Have your vehicle checked
by an authorized Kia dealer as
soon as possible.
Page 132 of 393

453
Features of your vehicle
High beam indicator
This indicator illuminates when the
headlights are on and in the high
beam position or when the turn sig-
nal lever is pulled into the Flash-to-
Pass position.
Front fog light indicator (if equipped)
The indicator illuminates when the
front fog lights ON.
Tail light indicator
(if equipped)
This indicator illuminates when the
tail lights are on.
Engine oil pressurewarning light
This warning light indicates the
engine oil pressure is low.
If the warning light illuminates while
driving:
1. Drive safely to the side of the road and stop.
2. With the engine off, check the engine oil level. If the level is low,
add oil as required.
If the warning light remains on after
adding oil or if oil is not available, call
an authorized Kia dealer. The oil pressure warning light comes
on whenever there is insufficient oil
pressure. In normal operation, it
should come on when the ignition
switch is turned on, then go out when
the engine is started. If the oil pres-
sure warning light stays on while the
engine is running, there is a serious
malfunction.
CAUTION - Engine
damage
If the engine is not stopped
immediately after the engine oilpressure warning light is illumi-nated and stays on while theengine is running, seriousengine damage may result.
Page 136 of 393
457
Features of your vehicle
Auto stop indicator (ifequipped)
This indicator will illuminate when the
engine enters the Idle Stop mode of
the ISG (Idle Stop and Go) system.
When the automatic starting occurs,
the auto stop indicator on the cluster
will blink for 5 seconds.
For more details, refer to the ISG
(Idle Stop and Go) system in section
5.
✽ ✽ NOTICE
When the engine automatically
starts by the ISG system, some
warning lights (ABS, ESP, ESP OFF,
EPS or Parking brake warning
light) may turn on for a few seconds.
This happens because of low battery
voltage. It does not mean the system
is malfunctioning.
Low washer fluid level
warning indicator
This warning light indicates the
washer fluid reservoir is nearly
empty. Refill the washer fluid as soon
as possible.
Low fuel level warninglight
This warning light indicates the fuel
tank is nearly empty. When it comes
on, you should add fuel as soon as
possible. Driving with the fuel level
warning light on or with the fuel level
below “E” can cause the engine to
misfire and damage the catalytic
converter (if equipped).
Fuel cap open warningindicator
This warning light indicates the fuel
filler cap is not tighten securely.
Always make sure that the fuel filler
cap is tight.
Page 143 of 393
Features of your vehicle
64
4
The hazard warning flasher should
be used whenever you find it neces-
sary to stop the vehicle in a haz-
ardous location. When you must
make such an emergency stop,
always pull off the road as far as pos-
sible.
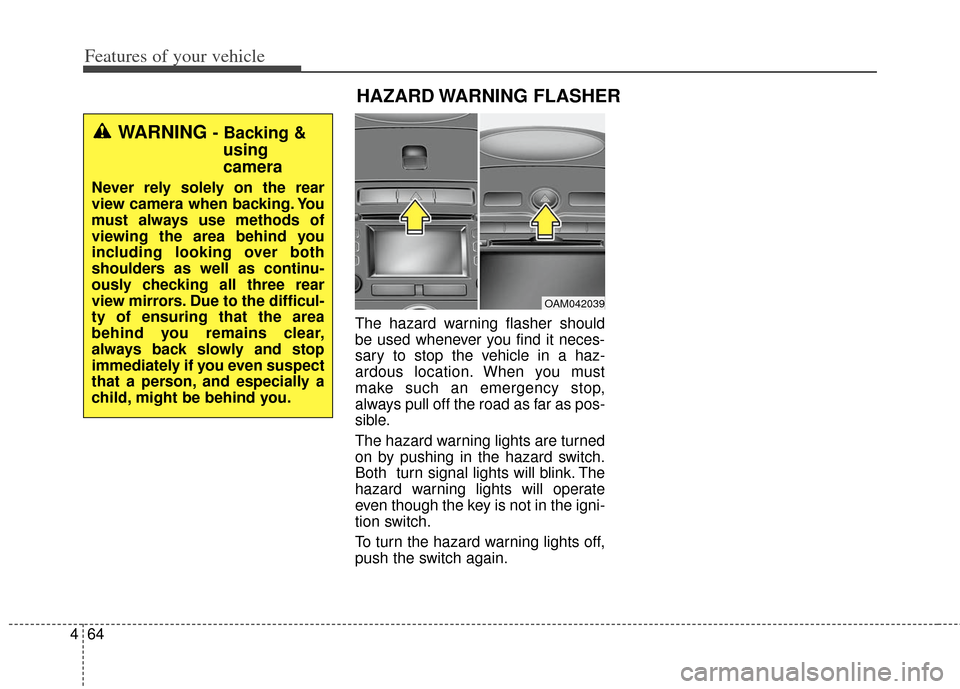
The hazard warning lights are turned
on by pushing in the hazard switch.
Both turn signal lights will blink. The
hazard warning lights will operate
even though the key is not in the igni-
tion switch.
To turn the hazard warning lights off,
push the switch again.
OAM042039
HAZARD WARNING FLASHER
WARNING - Backing &
using
camera
Never rely solely on the rear
view camera when backing. You
must always use methods of
viewing the area behind you
including looking over both
shoulders as well as continu-
ously checking all three rear
view mirrors. Due to the difficul-
ty of ensuring that the area
behind you remains clear,
always back slowly and stop
immediately if you even suspect
that a person, and especially a
child, might be behind you.
Page 146 of 393

467
Features of your vehicle
Auto light position (if equipped)
When the light switch is in the AUTO
light position, the taillights and head-
lights will be turned ON or OFF auto-
matically depending on the amount
of light outside the vehicle.
Never place anything over sensor(1) located on the instrument
panel. This will ensure better auto-
light system control.
Don’t clean the sensor using a win- dow cleaner. The cleaner may
leave a light film which could inter-
fere with sensor operation.
If your vehicle has window tint or other types of metallic coating on
the front windshield, the Auto light
system may not work properly.
High beam operation
To turn on the high beam headlights,
push the lever away from you. Pull it
back for low beams.
The high beam indicator will light
when the headlight high beams are
switched on.
To prevent the battery from being
discharged, do not leave the lights
on for a prolonged time while the
engine is not running. To flash the headlights, pull the lever
towards you. It will return to the nor-
mal (low beam) position when
released. The headlight switch does
not need to be on to use this flashing
feature.
OMD040095OAM049044OAM049043
WARNING - High beams
Do not use high beam when
there are other vehicles. Using
high beam could obstruct the
other driver's vision.
Page 151 of 393
Features of your vehicle
72
4
Do not use the interior lights for
extended periods when the engine is
not running.
It may cause battery discharge.
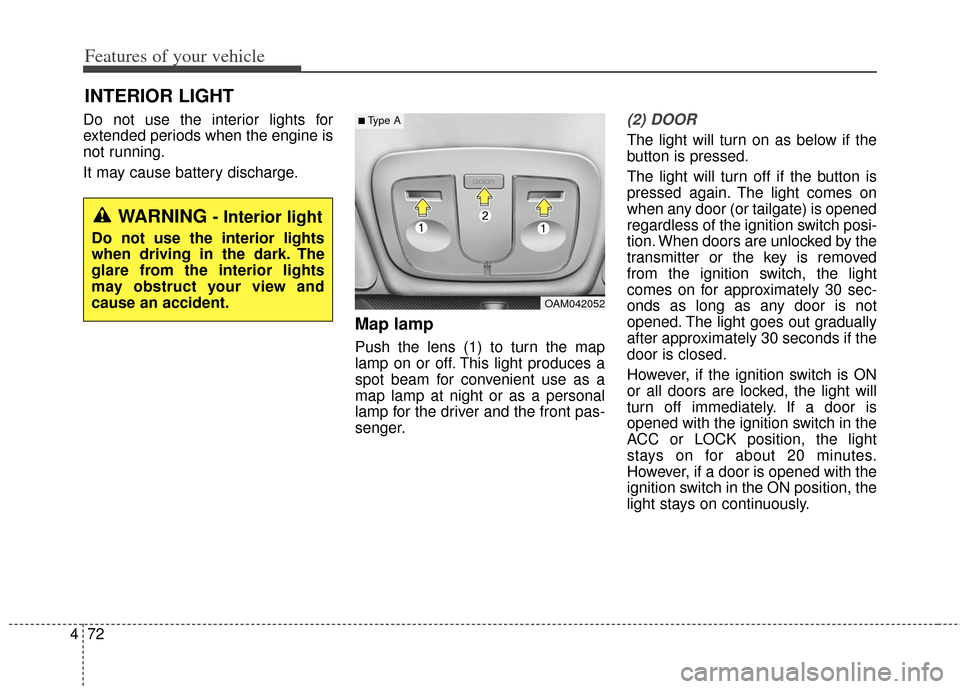
Map lamp
Push the lens (1) to turn the map
lamp on or off. This light produces a
spot beam for convenient use as a
map lamp at night or as a personal
lamp for the driver and the front pas-
senger.
(2) DOOR
The light will turn on as below if the
button is pressed.
The light will turn off if the button is
pressed again. The light comes on
when any door (or tailgate) is opened
regardless of the ignition switch posi-
tion. When doors are unlocked by the
transmitter or the key is removed
from the ignition switch, the light
comes on for approximately 30 sec-
onds as long as any door is not
opened. The light goes out gradually
after approximately 30 seconds if the
door is closed.
However, if the ignition switch is ON
or all doors are locked, the light will
turn off immediately. If a door is
opened with the ignition switch in the
ACC or LOCK position, the light
stays on for about 20 minutes.
However, if a door is opened with the
ignition switch in the ON position, the
light stays on continuously.
INTERIOR LIGHT
OAM042052
■Type A
WARNING - Interior light
Do not use the interior lights
when driving in the dark. The
glare from the interior lights
may obstruct your view and
cause an accident.
Page 225 of 393
53
Driving your vehicle
Before entering vehicle
• Be sure that all windows, outsidemirror(s), and outside lights are
clean.
Check the condition of the tires.
Check under the vehicle for any sign of leaks.
Be sure there are no obstacles behind you if you intend to back up.
Necessary inspections
Fluid levels, such as engine oil,
engine coolant, brake fluid, and
washer fluid should be checked on a
regular basis, with the exact interval
depending on the fluid. Further
details are provided in section 7,
“Maintenance”.
Before starting
Close and lock all doors.
Position the seat so that all con-trols are easily reached.
Buckle your seat belt.
Adjust the inside and outside rearview mirrors.
Be sure that all lights work.
Check all gauges.
Check the operation of warning lights when the ignition switch is
turned to the ON position.
Release the parking brake and make sure the brake warning light
goes out.
For safe operation, be sure you are
familiar with your vehicle and its
equipment.
BEFORE DRIVING
WARNING - Distracted driving
Focus on the road while driving.
The driver's primary responsi-
bility is in the safe and legal
operation of the vehicle. Use of
any handled devices, other
equipment or vehicle systems
that distract the drive should
not be used during vehicle
operation.
WARNING - Check sur-rounding
Always check the surrounding
areas near your vehicle for peo-
ple, especially children, before
putting a car into D (Drive) or R
(Reverse).
Page 227 of 393
55
Driving your vehicle
KEY POSITIONS
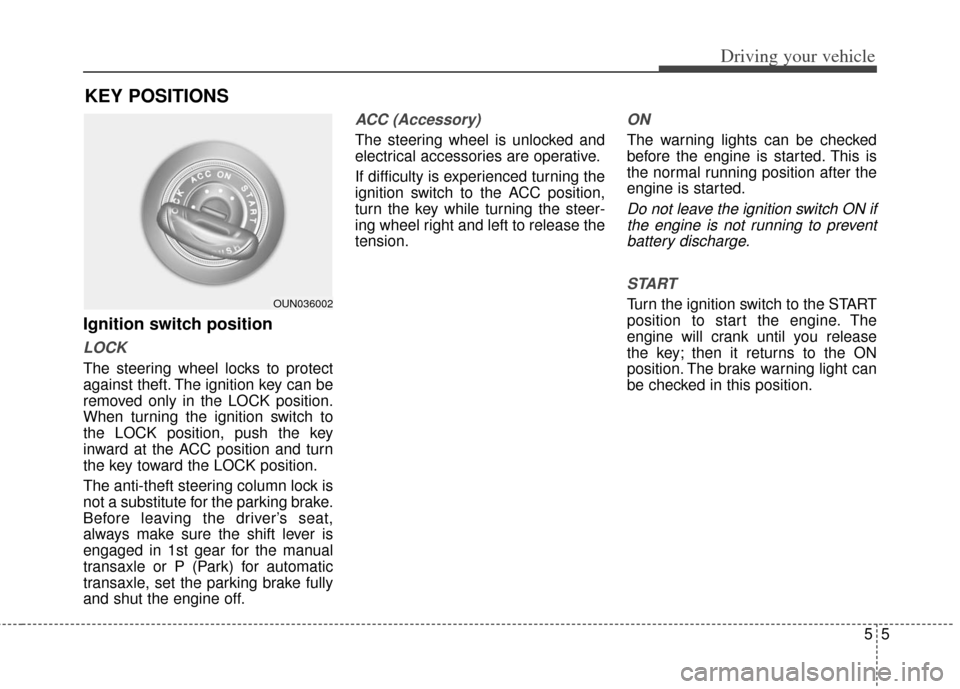
Ignition switch position
LOCK
The steering wheel locks to protect
against theft. The ignition key can be
removed only in the LOCK position.
When turning the ignition switch to
the LOCK position, push the key
inward at the ACC position and turn
the key toward the LOCK position.
The anti-theft steering column lock is
not a substitute for the parking brake.
Before leaving the driver’s seat,
always make sure the shift lever is
engaged in 1st gear for the manual
transaxle or P (Park) for automatic
transaxle, set the parking brake fully
and shut the engine off.
ACC (Accessory)
The steering wheel is unlocked and
electrical accessories are operative.
If difficulty is experienced turning the
ignition switch to the ACC position,
turn the key while turning the steer-
ing wheel right and left to release the
tension.
ON
The warning lights can be checked
before the engine is started. This is
the normal running position after the
engine is started.
Do not leave the ignition switch ON ifthe engine is not running to preventbattery discharge.
START
Turn the ignition switch to the START
position to start the engine. The
engine will crank until you release
the key; then it returns to the ON
position. The brake warning light can
be checked in this position.OUN036002
Page 231 of 393
59
Driving your vehicle
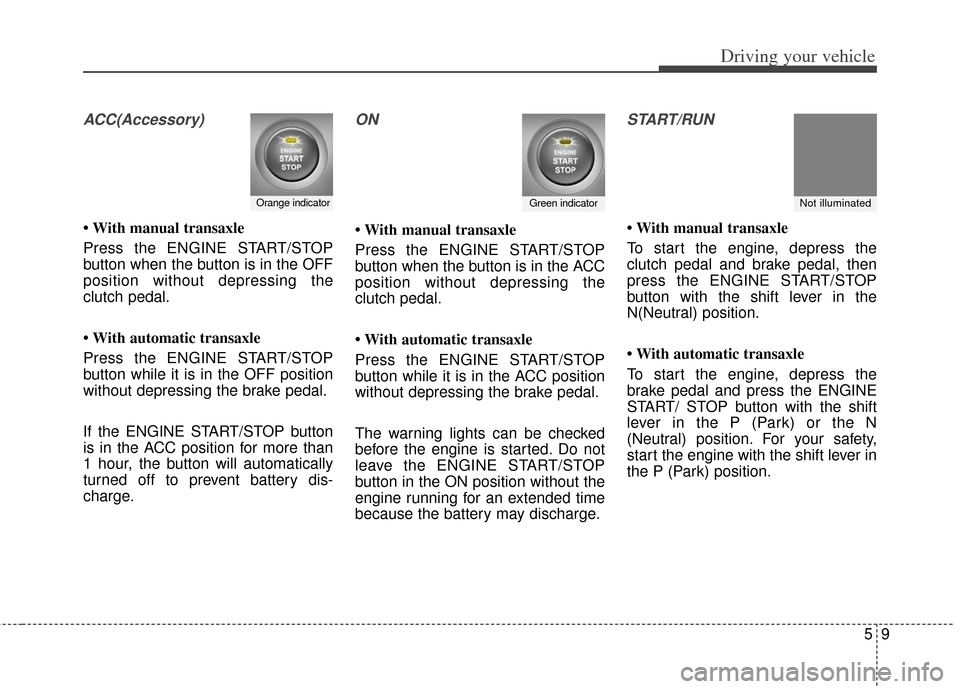
ACC(Accessory)
• With manual transaxle
Press the ENGINE START/STOP
button when the button is in the OFF
position without depressing the
clutch pedal.
• With automatic transaxle
Press the ENGINE START/STOP
button while it is in the OFF position
without depressing the brake pedal.
If the ENGINE START/STOP button
is in the ACC position for more than
1 hour, the button will automatically
turned off to prevent battery dis-
charge.
ON
• With manual transaxle
Press the ENGINE START/STOP
button when the button is in the ACC
position without depressing the
clutch pedal.
• With automatic transaxle
Press the ENGINE START/STOP
button while it is in the ACC position
without depressing the brake pedal.
The warning lights can be checked
before the engine is started. Do not
leave the ENGINE START/STOP
button in the ON position without the
engine running for an extended time
because the battery may discharge.
START/RUN
• With manual transaxle
To start the engine, depress the
clutch pedal and brake pedal, then
press the ENGINE START/STOP
button with the shift lever in the
N(Neutral) position.
• With automatic transaxle
To start the engine, depress the
brake pedal and press the ENGINE
START/ STOP button with the shift
lever in the P (Park) or the N
(Neutral) position. For your safety,
start the engine with the shift lever in
the P (Park) position.
Orange indicatorGreen indicatorNot illuminated
Page 235 of 393
513
Driving your vehicle
Your vehicle may be equipped with
the ISG system, which reduces fuel
consumption by automatically shut-
ting down the engine, when the vehi-
cle is at a standstill. (For example :
red light, stop sign and traffic jam)
The engine starts automatically as
soon as the starting conditions are
met.
The ISG system is ON whenever the
engine is running.
✽ ✽NOTICE
When the engine automatically
starts by the ISG system, some
warning lights (ABS, ESC, ESC
OFF, EPS or Parking brake warn-
ing light) may turn on for a few sec-
onds.
This happens because of low battery
voltage. It does not mean the system
is malfunctioning.
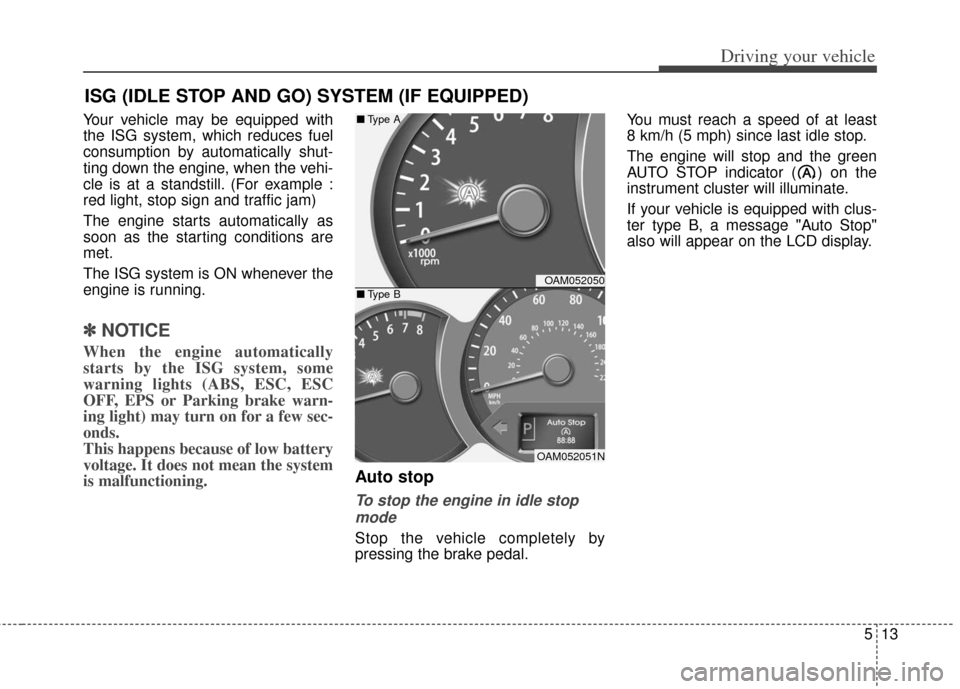
Auto stop
To stop the engine in idle stop
mode
Stop the vehicle completely by
pressing the brake pedal. You must reach a speed of at least
8 km/h (5 mph) since last idle stop.
The engine will stop and the green
AUTO STOP indicator ( ) on the
instrument cluster will illuminate.
If your vehicle is equipped with clus-
ter type B, a message "Auto Stop"
also will appear on the LCD display.
ISG (IDLE STOP AND GO) SYSTEM (IF EQUIPPED)
OAM052050
OAM052051N
■
Type A
■ Type B