ignition KIA Soul EV 2016 2.G Owner's Manual
[x] Cancel search | Manufacturer: KIA, Model Year: 2016, Model line: Soul EV, Model: KIA Soul EV 2016 2.GPages: 524, PDF Size: 25.82 MB
Page 49 of 524
Safety features of your vehicle
36
3
Noise and smoke
When inflated, the air bags make a
loud noise and leave smoke and
powder in the air inside the vehicle.
This is normal and is a result of the
ignition of the air bag inflator. After
the air bag inflates, you may feel sub-
stantial discomfort in breathing due
to the contact of your chest with both
the seat belt and the air bag, as well
as from breathing the smoke and
powder. Open your doors and/or
windows as soon as possible after
impact in order to reduce discom-
fort and prevent prolonged expo-
sure to the smoke and powder.
Though smoke and powder are non-
toxic, it may cause irritation to the
skin (eyes, nose and throat, etc). If
this is the case, wash and rinse with
cold water immediately and consult a
doctor if the symptom persists.WARNING- Hot compo-
nents
Do not touch the air bag storage
area's internal components
immediately after airbag infla-
tion. The air bag related parts in
the steering wheel, instrument
panel and the roof rails above
the front and rear doors are
very hot. Hot components can
result in burn injuries.WARNING- Airbag infla- tion
Sit as far back as possible from
the steering wheel while still
maintaining comfortable con-
trol of your vehicle. A distance
of at least 10" from your chest
to the steering wheel is recom-
mended. Failure to do so can
result in airbag inflation injuries
to the driver.
Page 70 of 524
357
Safety features of your vehicle
Adding equipment to or modi-
fying your air bag-equipped
vehicle
If you modify your vehicle by changing
your vehicle's frame, bumper system,
front end or side sheet metal or ride
height, this may affect the operation of
your vehicle's air bag system.
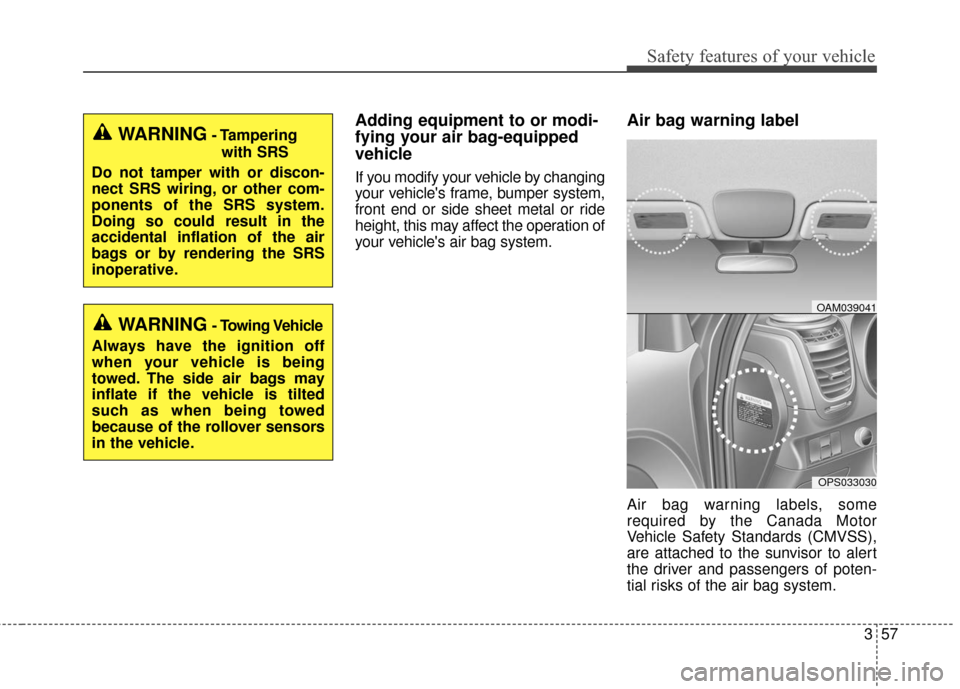
Air bag warning label
Air bag warning labels, some
required by the Canada Motor
Vehicle Safety Standards (CMVSS),
are attached to the sunvisor to alert
the driver and passengers of poten-
tial risks of the air bag system.
WARNING- Tamperingwith SRS
Do not tamper with or discon-
nect SRS wiring, or other com-
ponents of the SRS system.
Doing so could result in the
accidental inflation of the air
bags or by rendering the SRS
inoperative.
WARNING- Towing Vehicle
Always have the ignition off
when your vehicle is being
towed. The side air bags may
inflate if the vehicle is tilted
such as when being towed
because of the rollover sensors
in the vehicle.
OPS033030
OAM039041
Page 94 of 524
Features of your vehicle
24
4
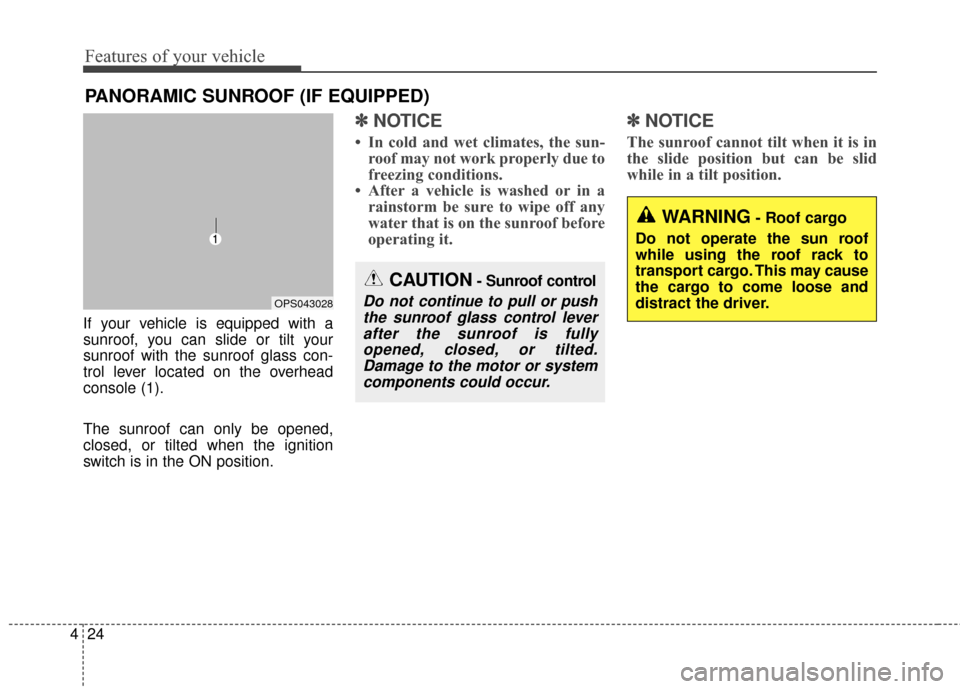
If your vehicle is equipped with a
sunroof, you can slide or tilt your
sunroof with the sunroof glass con-
trol lever located on the overhead
console (1).
The sunroof can only be opened,
closed, or tilted when the ignition
switch is in the ON position.
✽ ✽
NOTICE
• In cold and wet climates, the sun-
roof may not work properly due to
freezing conditions.
• After a vehicle is washed or in a rainstorm be sure to wipe off any
water that is on the sunroof before
operating it.
✽ ✽ NOTICE
The sunroof cannot tilt when it is in
the slide position but can be slid
while in a tilt position.
PANORAMIC SUNROOF (IF EQUIPPED)
CAUTION- Sunroof control
Do not continue to pull or push
the sunroof glass control leverafter the sunroof is fullyopened, closed, or tilted.Damage to the motor or systemcomponents could occur.OPS043028
WARNING- Roof cargo
Do not operate the sun roof
while using the roof rack to
transport cargo. This may cause
the cargo to come loose and
distract the driver.
Page 95 of 524
425
Features of your vehicle
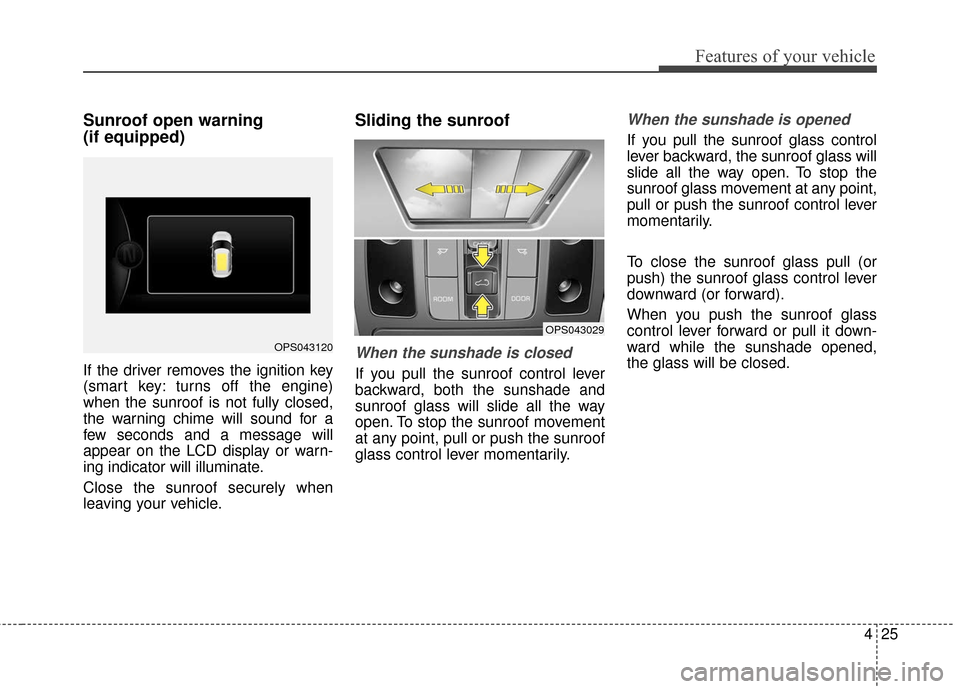
Sunroof open warning
(if equipped)
If the driver removes the ignition key
(smart key: turns off the engine)
when the sunroof is not fully closed,
the warning chime will sound for a
few seconds and a message will
appear on the LCD display or warn-
ing indicator will illuminate.
Close the sunroof securely when
leaving your vehicle.
Sliding the sunroof
When the sunshade is closed
If you pull the sunroof control lever
backward, both the sunshade and
sunroof glass will slide all the way
open. To stop the sunroof movement
at any point, pull or push the sunroof
glass control lever momentarily.
When the sunshade is opened
If you pull the sunroof glass control
lever backward, the sunroof glass will
slide all the way open. To stop the
sunroof glass movement at any point,
pull or push the sunroof control lever
momentarily.
To close the sunroof glass pull (or
push) the sunroof glass control lever
downward (or forward).
When you push the sunroof glass
control lever forward or pull it down-
ward while the sunshade opened,
the glass will be closed.
OPS043120
OPS043029
Page 98 of 524
Features of your vehicle
28
4
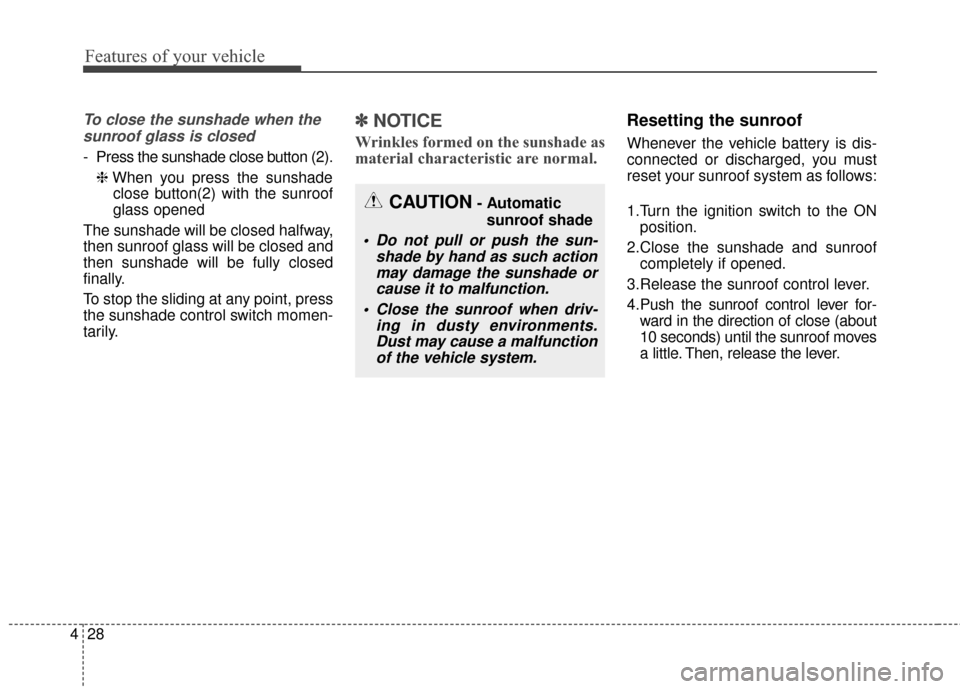
To close the sunshade when the
sunroof glass is closed
- Press the sunshade close button (2).
❈ When you press the sunshade
close button(2) with the sunroof
glass opened
The sunshade will be closed halfway,
then sunroof glass will be closed and
then sunshade will be fully closed
finally.
To stop the sliding at any point, press
the sunshade control switch momen-
tarily.
✽ ✽ NOTICE
Wrinkles formed on the sunshade as
material characteristic are normal.
Resetting the sunroof
Whenever the vehicle battery is dis-
connected or discharged, you must
reset your sunroof system as follows:
1.Turn the ignition switch to the ON
position.
2.Close the sunshade and sunroof completely if opened.
3.Release the sunroof control lever.
4.Push the sunroof control lever for- ward in the direction of close (about
10 seconds) until the sunroof moves
a little. Then, release the lever.
CAUTION- Automatic
sunroof shade
Do not pull or push the sun- shade by hand as such actionmay damage the sunshade orcause it to malfunction.
Close the sunroof when driv- ing in dusty environments.Dust may cause a malfunctionof the vehicle system.
Page 203 of 524
4133
Features of your vehicle
Adjust the volume to levels thatallow the driver to hear sounds from
outside of the vehicle. Driving in a
state where external sounds cannot
be heard may lead to accidents. Pay attention to the volume setting
when turning the device on. A sud-
den output of extreme volume
upon turning the device on could
lead to hearing impairment. (Adjust
the volume to a suitable levels
before turning off the device.)
Turn on the car ignition before using the audio system Do not
operate the audio system for long
periods of time with the ignition
turned off as such operations may
lead to battery discharge.
In case of product malfunction, please contact your place of pur-
chase or After Service center.
Placing the audio system within an electromagnetic environment may
result in noise interference.
CAUTION- LCD Monitor
Do not subject the device tosevere shock or impact. Directpressure onto the front side ofthe monitor may cause damageto the LCD or touch screen.
CAUTION
When cleaning the device, make sure to turn off theaudio system and use a dryand smooth cloth.
Never use tough materials, chemical cloths, or solvents(alcohol, benzene, thinners,etc.) as such materials maydamage the device panel orcause color/quality deteriora-tion.
Prevent caustic solutions such as perfume and cosmetic oilfrom contacting the dashboardbecause they may cause dam-age or discoloration.
WARNING- Distracted
Driring
Driving while distracted can
result in a loss of vehicle control
that may lead to an accident,
severe personal injury, and
death. The driver’s primary
responsibility is in the safe and
legal operation of a vehicle, and
use of any handheld devices,
other equipment, or vehicle sys-
tems which take the driver’s
eyes, attention and focus away
from the safe operation of a vehi-
cle or which are not permissible
by law should never be used dur-
ing operation of the vehicle.
Page 353 of 524
What to do in an emergency
26
ROAD WARNING
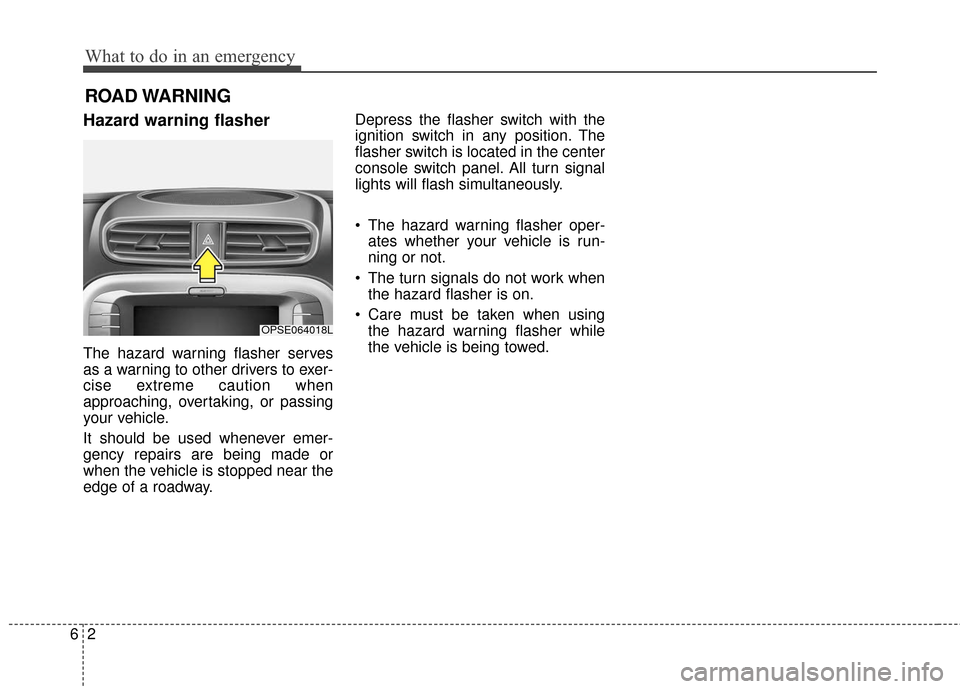
Hazard warning flasher
The hazard warning flasher serves
as a warning to other drivers to exer-
cise extreme caution when
approaching, overtaking, or passing
your vehicle.
It should be used whenever emer-
gency repairs are being made or
when the vehicle is stopped near the
edge of a roadway.Depress the flasher switch with the
ignition switch in any position. The
flasher switch is located in the center
console switch panel. All turn signal
lights will flash simultaneously.
• The hazard warning flasher oper-
ates whether your vehicle is run-
ning or not.
The turn signals do not work when the hazard flasher is on.
Care must be taken when using the hazard warning flasher while
the vehicle is being towed.
OPSE064018L
Page 356 of 524
65
What to do in an emergency
EMERGENCY STARTING
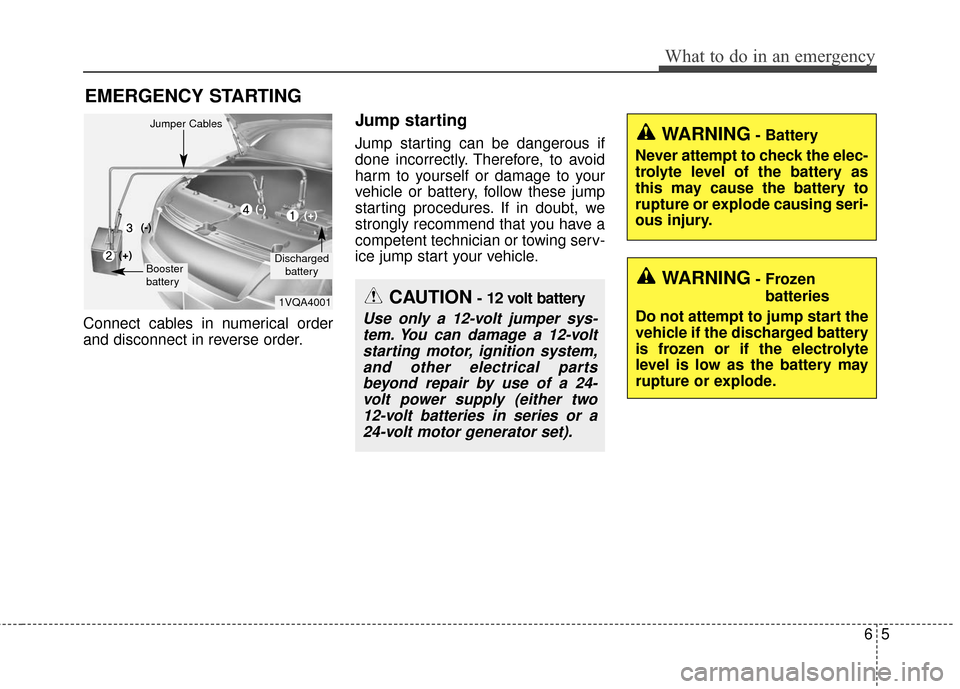
Connect cables in numerical order
and disconnect in reverse order.
Jump starting
Jump starting can be dangerous if
done incorrectly. Therefore, to avoid
harm to yourself or damage to your
vehicle or battery, follow these jump
starting procedures. If in doubt, we
strongly recommend that you have a
competent technician or towing serv-
ice jump start your vehicle.
CAUTION- 12 volt battery
Use only a 12-volt jumper sys-tem. You can damage a 12-voltstarting motor, ignition system,and other electrical partsbeyond repair by use of a 24-volt power supply (either two12-volt batteries in series or a24-volt motor generator set).
WARNING- Battery
Never attempt to check the elec-
trolyte level of the battery as
this may cause the battery to
rupture or explode causing seri-
ous injury.
1VQA4001
Discharged battery
Jumper Cables
Booster
battery
(-)
(+)
(+)(-)
WARNING- Frozenbatteries
Do not attempt to jump start the
vehicle if the discharged battery
is frozen or if the electrolyte
level is low as the battery may
rupture or explode.
Page 361 of 524
What to do in an emergency
10
6
Always check the TPMS malfunction
telltale after replacing one or more
tires or wheels on your vehicle to
ensure that the replacement or alter-
nate tires and wheels allow the TPMS
to continue to function properly.
✽ ✽
NOTICE
If the TPMS, Low Tire Pressure
indicator do not illuminate for 3 sec-
onds when the ignition switch is
turned to the ON position or vehicle
is running, or if they remain illumi-
nated after coming on for approxi-
mately 3 seconds, take your vehicle
to your nearest authorized Kia deal-
er and have the system checked.
Low tire pressure
telltale
When the tire pressure monitoring
system warning indicators are illumi-
nated, one or more of your tires is
significantly under-inflated.
If the telltale illuminates, immediately
reduce your speed, avoid hard cor-
nering and anticipate increased stop-
ping distances. You should stop and
check your tires as soon as possible.
Inflate the tires to the proper pres-
sure as indicated on the vehicle’s
placard or tire inflation pressure label
located on the driver’s side center pil-
lar outer panel. If you cannot reach a
service station or if the tire cannot
hold the newly added air, replace the
low pressure tire with the spare tire. Then the Low Tire Pressure telltale
may flash for approximately one
minute and then remain continuously
illuminated after restarting and about
10 minutes of continuous driving at
speed above 25 km/h (15.5 mph)
before you have the low pressure tire
repaired and replaced on the vehicle.
In winter or cold weather, the low tire
pressure telltale may be illuminated if
the tire pressure was adjusted to the
recommended tire inflation pressure
in warm weather. It does not mean
your TPMS is malfunctioning because
the decreased temperature leads to a
proportional lowering of tire pressure.
When you drive your vehicle from a
warm area to a cold area or from a
cold area to a warm area, or the out-
side temperature is greatly higher or
lower, you should check the tire infla-
tion pressure and adjust the tires to
the recommended tire inflation pres-
sure.
Page 369 of 524
What to do in an emergency
18
6
8. With the vehicle start/stop button
position on or ignition switch posi-
tion on, switch on the compressor
and let it run for approximately
5~7 minutes to fill the sealant up
to proper pressure. (refer to the
Tire and Wheels, chapter 8). The
inflation pressure of the tire after
filling is unimportant and will be
checked/corrected later.
Be careful not to overinflate the
tire and stay away from the tire
when filling it. 9. Switch off the compressor.
10. Detach the hoses from the
sealant bottle connector and
from the tire valve.
Return the Tire Mobility Kit to its stor-
age location in the vehicle.Distributing the sealant
11. Immediately drive approximately 7~10km (4~6miles or, about
10min) to evenly distribute the
sealant in the tire.
Do not exceed a speed of 80 km/h
(50 mph). If possible, do not fall
below a speed of 20 km/h (12 mph).
While driving, if you experience any
unusual vibration, ride disturbance or
noise, reduce your speed and drive
with caution until you can safely pull
off of the side of the road.
Call for road side service or towing.
When you use the Tire Mobility Kit,
the tire pressure sensors and wheel
may be stained by sealant.
Therefore, remove the tire pressure
sensors and wheel stained by
sealant and we recommend that
inspect at an authorized Kia dealer.
WARNING - Carbon monoxide
Do not leave your vehicle run-
ning in a poorly ventilated area
for extended periods of time.
Carbon monoxide poisoning
and suffocation can occur.
WARNING- Tire pressure
Do not attempt to drive your
vehicle if the tire pressure is
below 200 kPa (29 psi).
This could result in an accident
due to sudden tire failure.