KIA Spectra 2008 2.G Owner's Manual
Manufacturer: KIA, Model Year: 2008, Model line: Spectra, Model: KIA Spectra 2008 2.GPages: 298, PDF Size: 5.38 MB
Page 211 of 298
521
Driving tips
1
2
3
4
5
6
7
8
9
Following distance
Stay at least twice as far behind the
vehicle ahead as you would when
driving your vehicle without a trailer.
This can help you avoid situations
that require heavy braking and sud-
den turns.
Passing
You’ll need more passing distance
up ahead when you’re towing a trail-
er. And, because you’re a good deal
longer, you’ll need to go much farther
beyond the passed vehicle before
you can return to your lane.
Backing up
The trailer will go in the opposite
direction of the rear of your vehicle
when backing up. This is very difficult
for an inexperienced trailer driver to
get used to. To help you avoid mis-
takes, hold the bottom of the steering
wheel with one hand. Then, to move
the trailer to the left, just hold the
steering wheel firmly and move your
hand to the left. To move the trailer to
the right, move your hand to the
right. Always back up slowly and, if
possible, have someone guide you.
Making turns
When you’re turning with a trailer,
make wider turns than normal. Do
this so your trailer won’t strike soft
shoulders, curbs, road signs, trees,
or other objects. Avoid jerky or sud-
den maneuvers. Signal well in
advance.
Turn signals when towing a trailer
When you tow a trailer, your vehicle
has to have a different turn signal
flasher and extra wiring. The green
arrows on your instrument panel will
flash whenever you signal a turn or
lane change. Properly connected,
the trailer lights will also flash to alert
other drivers you’re about to turn,
change lanes, or stop.
When towing a trailer, the green
arrows on your instrument panel will
flash for turns even if the bulbs on
the trailer are burned out. Thus, you
may think drivers behind you are
seeing your signals when, in fact,
they are not. It’s important to check
reqularly to be sure the trailer bulbs
are still working. You must also check
the lights every time you disconnect
and then reconnect the wires.
Page 212 of 298
Driving tips
22 5
1
2
3
4
5
6
7
8
9
Do not connect a trailer lighting sys-
tem directly to your vehicle’s lighting
system. Use only an approved trailer
wiring harness.
Your Authorized Kia Dealer can
assist you in installing the wiring har-
ness.Driving on grades
Reduce speed and shift to a lower
gear before you start down a long or
steep downgrade. If you don’t shift
down, you might have to use your
brakes so much that they would get
hot and no longer operate efficiently.
On a long uphill grade, shift down
and reduce your speed to around 70
km/h (45 mph) to reduce the possi-
bility of engine and transaxle over-
heating.
Operating your vehicle in D (Drive)
when towing a trailer will minimize
heat buildup and extend the life of
your transaxle.
WARNING - Trailer wiring
harness
Failure to use an approved trail-
er wiring harness could result in
damage to the vehicle's electri-
cal system, there by disabling
the brake light system resulting
in an accident.
CAUTION
When towing a trailer on steep
grades especially (in excess of
6%) pay close attention to the
engine coolant temperature
gauge to ensure the engine
does not overheat. If the needle
of the coolant temperature
gauge moves across the dial
towards “H” (HOT), pull over and
stop as soon as it is safe to do
so, and allow the engine to idle
until it cools down. You may pro-
ceed once the engine has
cooled sufficiently.
Page 213 of 298

523
Driving tips
1
2
3
4
5
6
7
8
9
Parking on hills
Generally, you should not park your
vehicle, with a trailer attached, on a
hill. People can be seriously or fatal-
ly injured, and both your vehicle and
the trailer can be damaged if they
begin to move downhill.However, if you ever have to park
your trailer on a hill, here’s how to do
it:
1. Apply your brakes, but don’t shift
into gear.
2. Have someone place chocks
(blocks of wood or metal intended
for this purpose) under the down-
hill sides of the trailer wheels.
3. When the wheel chocks are in
place, release the brakes until the
chocks absorb the load.
4. Reapply the brakes. Apply your
parking brake, and then shift to R
(Reverse) for a manual transaxle
or P (Park) for an automatic
transaxle.
5. Release the brakes.
When you are ready to leave after
parking on a hill
1. With the manual transaxle in
Neutral or automatic transaxle in P
(Park), apply your brakes and hold
the brake pedal down while you:
• Start your engine;
• Shift into gear; and
• Release the parking brake.
2. Slowly remove your foot from the
brake pedal.
3. Drive slowly forward until the trail-
er is clear of the chocks.
4. Stop and have someone pick up
and store the chocks.
WARNING- Parking brake
It can be dangerous to get out of
your vehicle if the parking brake
is not firmly set or if the engine
is still running. In either case
the vehicle can move suddenly.
You or others could be serious-
ly or fatally injured.
WARNING- Parking on a
hill
Parking your vehicle on a hill
with a trailer attached is danger-
ous. It could cause serious
injury or death, should the trail-
er break lose, or should the trail-
er drag the vehicle downhill.
Page 214 of 298

Driving tips
24 5
1
2
3
4
5
6
7
8
9
Maintenance when trailer tow-
ing
Your vehicle will need service more
often when you regularly pull a trail-
er. Important items to pay particular
attention to include engine oil, auto-
matic transaxle fluid, axle lubricant
and cooling system fluid. Brake con-
dition is another important item to
frequently check. Each item is cov-
ered in this manual, and the Index
will help you find them quickly. If
you’re trailering, it’s a good idea to
review these sections before you
start your trip.
Don’t forget to also maintain your
trailer and hitch. Follow the mainte-
nance schedule that accompanied
your trailer and check it periodically.
Preferably, conduct the check at the
start of each day’s driving. Most
importantly, all hitch nuts and bolts
should be tight.
CAUTION
• Due to higher load during
trailer usage, overheating
might occur in hot days or
during uphill driving. If the
coolant gauge indicates over-
heating, switch off the A/C and
stop the vehicle in a safe area
to cool down the engine.
• When towing check transaxle
fluid more frequently.
• If your vehicle is not equipped
with the air conditioner, you
should install a condenser fan
for engine performance when
towing a trailer.
Page 215 of 298

525
Driving tips
1
2
3
4
5
6
7
8
9
LABEL INFORMATION
There are several important labels
and identification numbers located
on your vehicle. The label locations
are identified in the illustrations
shown.
Vehicle identification number (VIN)
To check the frame number under the passenger seat, lift the cover.
OLD068001
Frame number
Vehicle certification label (MVSS label)
1LD6001
VIN label
1LDN6003
VIN bar code
1LDN6002
Page 216 of 298
Driving tips
26 5
1
2
3
4
5
6
7
8
9
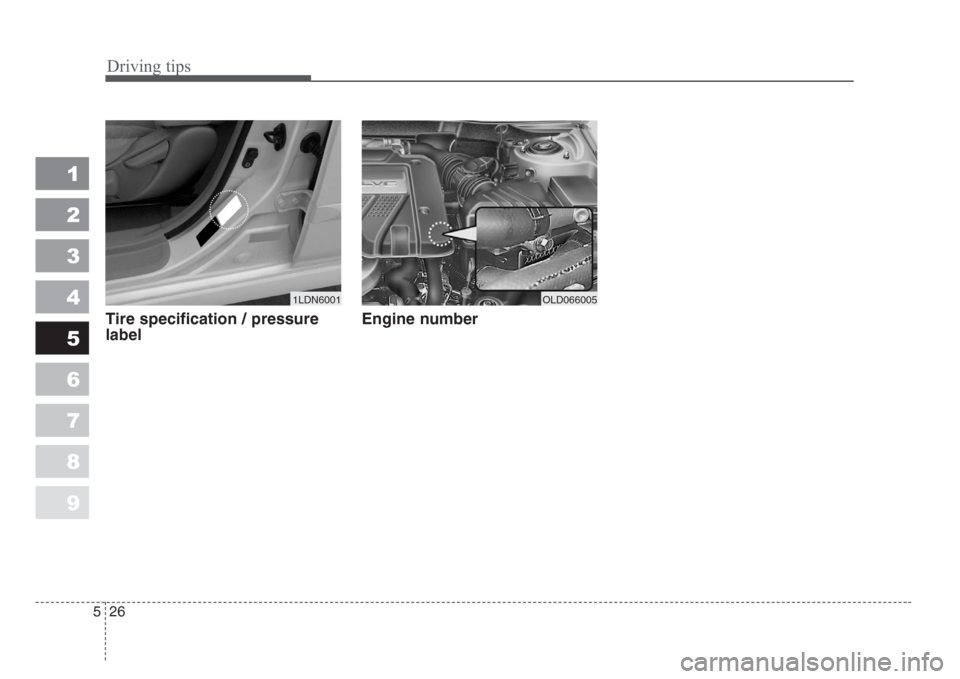
Tire specification / pressure
labelEngine number
1LDN6001OLD066005
Page 217 of 298
1
2
3
4
5
6
7
8
91
2
3
4
5
6
7
8
9Road warning / 6-2
Tires pressure monitoring system (TPMS) / 6-3
Overheating / 6-8
Emergency starting / 6-9
Electrical circuit protection / 6-12
Towing / 6-19
If you have a flat tire / 6-24
In case of an emergency
Page 218 of 298

In case of an emergency
2 6
ROAD WARNING
Hazard warning flasher
The hazard warning flasher serves
as a warning to other drivers to exer-
cise extreme caution when
approaching, overtaking, or passing
your vehicle. It should be used when-
ever emergency repairs are being
made or when the vehicle is stopped
near the edge of a roadway.
Depress the flasher switch with the
ignition switch in any position. The
flasher switch is located in the center
console switch panel. All turn signal
lights will flash simultaneously.• The hazard warning flasher oper-
ates whether your vehicle is run-
ning or not.
• The turn signals do not work when
the hazard flasher is on.
• Care must be taken when using
the hazard warning flasher while
the vehicle is being towed.
1
2
3
4
5
6
7
8
9
OLD026100
Page 219 of 298
63
In case of an emergency
TIRES PRESSURE MONITORING SYSTEM (TPMS) (IF EQUIPPED)
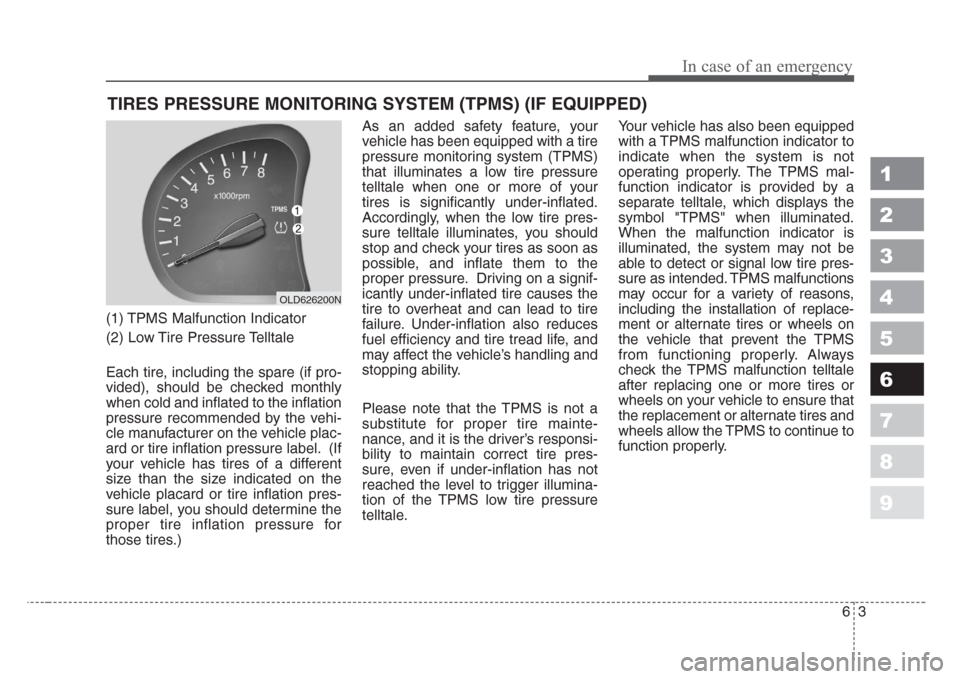
(1) TPMS Malfunction Indicator
(2) Low Tire Pressure Telltale
Each tire, including the spare (if pro-
vided), should be checked monthly
when cold and inflated to the inflation
pressure recommended by the vehi-
cle manufacturer on the vehicle plac-
ard or tire inflation pressure label. (If
your vehicle has tires of a different
size than the size indicated on the
vehicle placard or tire inflation pres-
sure label, you should determine the
proper tire inflation pressure for
those tires.)As an added safety feature, your
vehicle has been equipped with a tire
pressure monitoring system (TPMS)
that illuminates a low tire pressure
telltale when one or more of your
tires is significantly under-inflated.
Accordingly, when the low tire pres-
sure telltale illuminates, you should
stop and check your tires as soon as
possible, and inflate them to the
proper pressure. Driving on a signif-
icantly under-inflated tire causes the
tire to overheat and can lead to tire
failure. Under-inflation also reduces
fuel efficiency and tire tread life, and
may affect the vehicle’s handling and
stopping ability.
Please note that the TPMS is not a
substitute for proper tire mainte-
nance, and it is the driver’s responsi-
bility to maintain correct tire pres-
sure, even if under-inflation has not
reached the level to trigger illumina-
tion of the TPMS low tire pressure
telltale.Your vehicle has also been equipped
with a TPMS malfunction indicator to
indicate when the system is not
operating properly. The TPMS mal-
function indicator is provided by a
separate telltale, which displays the
symbol "TPMS" when illuminated.
When the malfunction indicator is
illuminated, the system may not be
able to detect or signal low tire pres-
sure as intended. TPMS malfunctions
may occur for a variety of reasons,
including the installation of replace-
ment or alternate tires or wheels on
the vehicle that prevent the TPMS
from functioning properly. Always
check the TPMS malfunction telltale
after replacing one or more tires or
wheels on your vehicle to ensure that
the replacement or alternate tires and
wheels allow the TPMS to continue to
function properly.
1
2
3
4
5
6
7
8
9
OLD626200N
Page 220 of 298
In case of an emergency
4 6
Low tire pressure
telltale
When the tire pressure monitoring
system warning telltale is illuminat-
ed, one or more of your tires is sig-
nificantly under-inflated. Immediately
reduce your speed, avoid hard cor-
nering and anticipate increased stop-
ping distances. You should stop and
check your tires as soon as possible.
Inflate the tires to the proper pres-
sure as indicated on the vehicle’s
placard or tire inflation pressure label
located on the driver’s side center pil-
lar outer panel. If you cannot reach a
service station or if the tire cannot
hold the newly added air, replace the
low pressure tire with the temporary
spare tire. Then the TPMS malfunc-
tion indicator may turn on and the
Low Tire Pressure telltale may turn
off after restarting and about 20 min-
utes of continuous driving before you
have the low-pressure tire repaired
and replaced on the vehicle.1
2
3
4
5
6
7
8
9
WARNING - Low pressure
damage
Significantly low tire pressure
makes the vehicle unstable and
can contribute to loss of vehicle
control and increased braking
distances.
Continued driving on low pres-
sure tires can cause the tires to
overheat and fail.CAUTION- Changing tem-
peratures
In winter or cold weather, the
low tire pressure telltale may be
illuminated if the tire pressure
was adjusted to the recom-
mended tire inflation pressure
in warm weather. It does not
mean your TPMS is malfunction-
ing because the decreased tem-
perature leads to a proportional
lowering of tire pressure.
When you drive your vehicle
from a warm area to a cold area
or from a cold area to a warm
area, or the outside temperature
is greatly higher or lower, you
should check the tire inflation
pressure and adjust the tires to
the recommended tire inflation
pressure.