warning KIA SPECTRA5 2007 Owners Manual
[x] Cancel search | Manufacturer: KIA, Model Year: 2007, Model line: SPECTRA5, Model: KIA SPECTRA5 2007Pages: 312, PDF Size: 3.42 MB
Page 278 of 312

731
Maintenance
1
2
3
4
5
6
7
8
910
TIRES AND WHEELS Tire care For proper maintenance, safety, and
maximum fuel economy, you must
always maintain recommended tire
inflation pressures and stay within
the load limits and weight distribution
recommended for your vehicle.Recommended cold tire infla-
tion pressures All tire pressures (including the
spare) should be checked every day
when the tires are cold. “Cold Tires”
means the vehicle has not been driv-
en for at least three hours or driven
less than one mile (1.6 km).
Recommended pressures must be
maintained for the best ride, top vehi-
cle handling, and minimum tire wear.All specifications (sizes and pres-
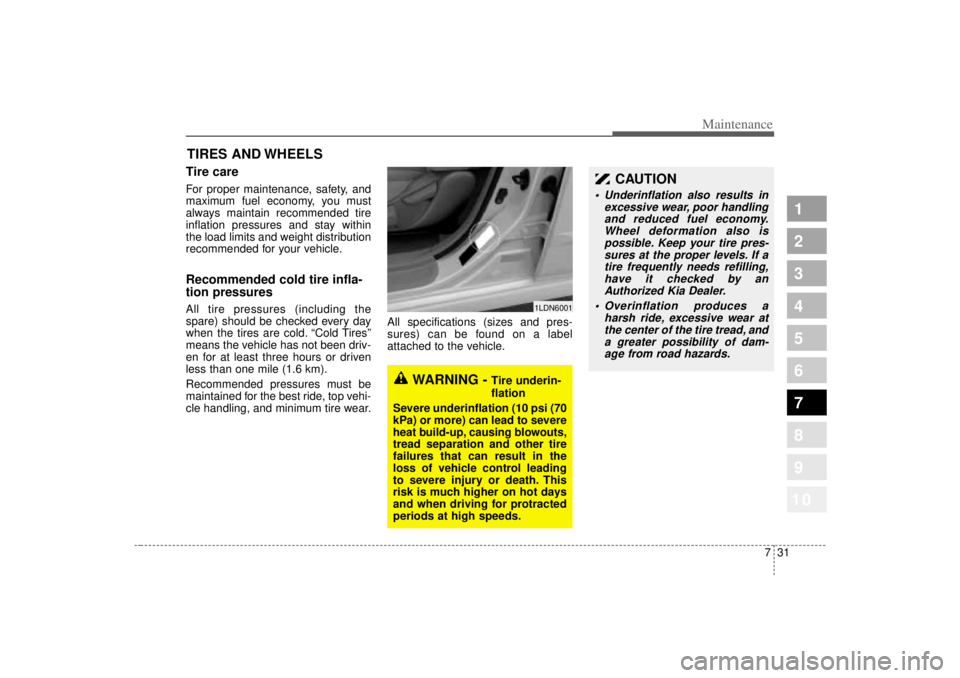
sures) can be found on a label
attached to the vehicle.
1LDN6001
WARNING -
Tire underin-
flation
Severe underinflation (10 psi (70
kPa) or more) can lead to severe
heat build-up, causing blowouts,
tread separation and other tire
failures that can result in the
loss of vehicle control leading
to severe injury or death. This
risk is much higher on hot days
and when driving for protracted
periods at high speeds.
CAUTION
Underinflation also results in excessive wear, poor handlingand reduced fuel economy.Wheel deformation also ispossible. Keep your tire pres-sures at the proper levels. If atire frequently needs refilling,have it checked by anAuthorized Kia Dealer.
Overinflation produces a harsh ride, excessive wear atthe center of the tire tread, anda greater possibility of dam-age from road hazards.
Page 279 of 312

Maintenance32
7
1
2
3
4
5
6
7
8
910
Checking tire inflation pres-
sureCheck your tires once a month or
more.
Also, check the tire pressure of the
spare tire.How to checkUse a good quality gage to check tire
pressure. You can not tell if your tires
are properly inflated simply by look-
ing at them. Radial tires may look
properly inflated even when they're
underinflated.
Check the tire's inflation pressure
when the tires are cold. - "Cold"
means your vehicle has been sitting
for at least three hours or driven no
more than 1 mile (1.6 km).
Remove the valve cap from the tire
valve stem. Press the tire gage firm-
ly onto the valve to get a pressure
measurement. If the cold tire inflation
pressure matches the recommended
pressure on the tire and loading
information label, no further adjust-
ment is necessary. If the pressure is
low, add air until you reach the rec-
ommended amount.
WARNING
- Tire Inflation
Overinflation or underinflation
can reduce tire life, adversely
affect vehicle handling, and lead
to sudden tire failure. This could
result in loss of vehicle control
and potential injury.
CAUTION -
Tire pressure
Always observe the following: Check tire pressure when the tires are cold. (After vehiclehas been parked for at leastthree hours or hasn't beendriven more than one mile (1.6km) since startup.)
Check the pressure of your spare tire each time you checkthe pressure of other tires.
Never overload your vehicle. Be careful not to overload avehicle luggage rack if yourvehicle is equipped with one.
Worn, old tires can cause acci- dents. If your tread is badlyworn, or if your tires havebeen damaged, replace them.
CAUTION
Warm tires normally exceed recommended cold tire pres-sures by 4 to 6 psi (28 to 41kPa). Do not release air fromwarm tires to adjust the pres-sure or the tires will be under-inflated.
Be sure to reinstall the tire inflation valve caps. Withoutthe valve cap, dirt or moisturecould get into the valve coreand cause air leakage. If avalve cap is missing, install anew one as soon as possible.
Page 280 of 312

733
Maintenance
1
2
3
4
5
6
7
8
910
If you overfill the tire, release air by
pushing on the metal stem in the cen-
ter of the tire valve. Recheck the tire
pressure with the tire gage. Be sure
to put the valve caps back on the
valve stems. They help prevent leaks
by keeping out dirt and moisture.Tire rotation To equalize tread wear, it is recom-
mended that the tires be rotated
every 7,500 miles (12,000 km) or
sooner if irregular wear develops.
During rotation, check the tires for
correct balance.
When rotating tires, check for uneven
wear and damage. Abnormal wear is
usually caused by incorrect tire pres-
sure, improper wheel alignment, out-
of-balance wheels, severe braking or
severe cornering. Look for bumps or
bulges in the tread or side of tire.
Replace the tire if you find either of
these conditions. Replace the tire if
fabric or cord is visible. After rotation,
be sure to bring the front and rear tire
pressures to specification and check
lug nut tightness.
Refer to Section 8, Specifications.
Disc brake pads should be inspectedfor wear whenever tires are rotated.Rotate radial tires that have an
asymmetric tread pattern only
from front to rear and not from
right to left.
CBGQ0707CBGQ0707A
Do not include compact spare tire in rotation.
Directional tires (if equipped)
WARNING
Do not use the temporary spare tire for tire rotation
Do not mix bias ply and radial ply tires under any circum-
stances. This may cause
unusual handling characteris-
tics that could result in death,
severe injury, or property
damage.
Page 281 of 312

Maintenance34
7
1
2
3
4
5
6
7
8
910
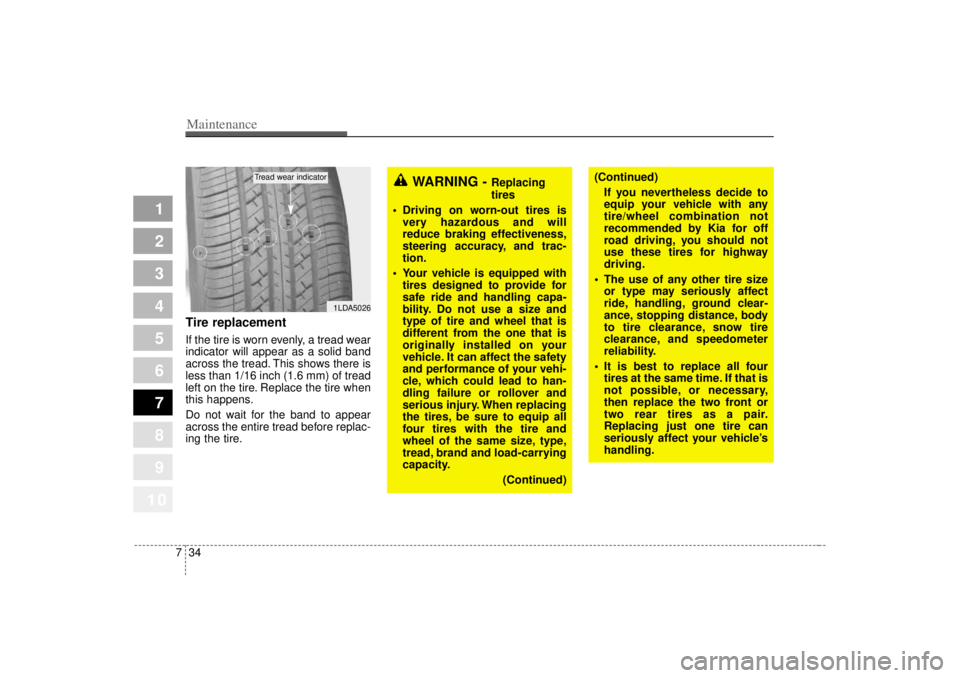
Tire replacementIf the tire is worn evenly, a tread wear
indicator will appear as a solid band
across the tread. This shows there is
less than 1/16 inch (1.6 mm) of tread
left on the tire. Replace the tire when
this happens.
Do not wait for the band to appear
across the entire tread before replac-
ing the tire.
1LDA5026
Tread wear indicator
WARNING -
Replacing
tires
Driving on worn-out tires is very hazardous and will
reduce braking effectiveness,
steering accuracy, and trac-
tion.
Your vehicle is equipped with tires designed to provide for
safe ride and handling capa-
bility. Do not use a size and
type of tire and wheel that is
different from the one that is
originally installed on your
vehicle. It can affect the safety
and performance of your vehi-
cle, which could lead to han-
dling failure or rollover and
serious injury. When replacing
the tires, be sure to equip all
four tires with the tire and
wheel of the same size, type,
tread, brand and load-carrying
capacity.
(Continued)
(Continued)If you nevertheless decide to
equip your vehicle with any
tire/wheel combination not
recommended by Kia for off
road driving, you should not
use these tires for highway
driving.
The use of any other tire size or type may seriously affect
ride, handling, ground clear-
ance, stopping distance, body
to tire clearance, snow tire
clearance, and speedometer
reliability.
It is best to replace all four tires at the same time. If that is
not possible, or necessary,
then replace the two front or
two rear tires as a pair.
Replacing just one tire can
seriously affect your vehicle’s
handling.
Page 282 of 312

735
Maintenance
1
2
3
4
5
6
7
8
910
Compact spare tire replace-
ment (if equipped)A compact spare tire has a shorter
tread life than a regular size tire.
Replace it when you can see the
tread wear indicator bars on the tire.
The replacement compact spare tire
should be the same size and design
tire as the one provided with your
new Kia and should be mounted on
the same compact spare tire wheel.
The compact spare tire is not
designed to be mounted on a regular
size wheel, and the compact spare
tire wheel is not designed for mount-
ing a regular size tire.
Wheel alignment and tire
balance The wheels on your vehicle were
aligned and balanced carefully at the
factory to give you the longest tire life
and best overall performance.
In most cases, you will not need to
have your wheels aligned again.
However, if you notice unusual tire
wear or your vehicle pulling one way
or the other, the alignment may need
to be reset.
If you notice your vehicle vibrating
when driving on a smooth road, your
wheels may need to be rebalanced.
Wheel replacement When replacing the metal wheels for
any reason, make sure the new
wheels are equivalent to the original
factory units in diameter, rim width
and offset.
WARNING
A wheel that is not the correct
size may adversely affect wheel
and bearing life, braking and
stopping abilities, handling char-
acteristics, ground clearance,
body-to-tire clearance, snow
chain clearance, speedometer
calibration, headlight aim and
bumper height.
CAUTION
Improper wheel weights candamage your vehicle's alu-minum wheels. Use onlyapproved wheel weights.
Page 285 of 312

Maintenance38
7
1
2
3
4
5
6
7
8
910
4. Tire ply composition and mate-
rialThe number of layers or plies of rub-
ber-coated fabric in the tire. Tire
manufacturers also must indicate the
materials in the tire, which include
steel, nylon, polyester, and others.
The letter "R" means radial ply con-
struction; the letter "D" means diago-
nal or bias ply construction; and the
letter "B" means belted-bias ply con-
struction.
5. Maximum permissible inflationpressureThis number is the greatest amount
of air pressure that should be put in
the tire. Do not exceed the maximum
permissible inflation pressure. Refer
to the Tire and Loading Information
label for recommended inflation
pressure.6. Maximum load ratingThis number indicates the maximum
load in kilograms and pounds that
can be carried by the tire. When
replacing the tires on the vehicle,
always use a tire that has the same
load rating as the factory installed
tire.7. Uniform tire quality grading The following information relates to
the tire grading system developed by
the National Highway Traffic Safety
Administration (NHTSA) for grading
tires by tread wear, traction and tem-
perature performance. Tread wear
The tread wear grade is a compara-
tive rating based on the wear rate of
the tire when tested under controlled
conditions on a specified govern-
ment test course. For example, a tire
graded 150 would wear one-and-a-
half times as well on the government
course as a tire graded 100.
The relative performance of tires
depends upon the actual conditions
of their use. However, performance
may differ from the norm because of
variations in driving habits, service
practices and differences in road
characteristics and climate.
These grades are molded on the
side-walls of passenger vehicle tires.
The tires available as standard or
optional equipment on your vehicles
may vary with respect to grade.
WARNING -
Tire age
A tire more than 6 years old may
sustain separation of cord lay-
ers inside the tire. Tire failure to
separation of cord, can cause
accidents resulting in severe
injuries or death.
Make sure to check the manu-
facturing date of the tire and
replace it within 6 years of that
date.
Page 286 of 312

739
Maintenance
1
2
3
4
5
6
7
8
910
Traction - AA, A, B & C
The traction grades, from highest to
lowest, are AA, A, B and C. The
grades represent the tires ability to
stop on wet pavement as measured
under controlled conditions on spec-
ified government test surfaces of
asphalt and concrete. A tire marked
C may have poor traction perform-
ance.
Temperature -A, B & C
The temperature grades are A (the
highest), B and C. The grades repre-
sent the tire’s resistance to the gen-
eration of heat and its ability to dissi-
pate heat when tested under con-
trolled conditions on a specified
indoor laboratory test wheel.
Sustained high temperature can
cause the material of the tires to
degenerate and reduce tires life, and
excessive temperature can lead to
sudden tires failure. Grade C corre-
sponds to a level of performance
which all passenger vehicle tires must
meet under the Federal Motor Vehicle
Safety Standard No. 109. Grades A
and B represent higher levels of per-
formance on the laboratory test wheel
than the minimum required by the law.
Tire terminology and defini-
tionsAir Pressure: The amount of air
inside the tire pressing outward on
the tire. Air pressure is expressed in
pounds per square inch (psi) or kilo-
pascal (kPa).
Accessory Weight: This means the
combined weight of optional acces-
sories. Some examples of optional
accessories are, automatic transmis-
sion, power seats, and air condition-
ing.
Aspect Ratio: The relationship of a
tire's height to its width.
Belt:A rubber coated layer of cords
that is located between the plies and
the tread. Cords may be made from
steel or other reinforcing materials.
Bead: The tire bead contains steel
wires wrapped by steel cords that
hold the tire onto the rim.
Bias Ply Tire: A pneumatic tire in
which the plies are laid at alternate
angles less than 90 degrees to the
centerline of the tread.
WARNING
- Tire
temperature
The temperature grade for this
tire is established for a tire that
is properly inflated and not
overloaded. Excessive speed,
underinflation, or excessive
loading, either separately or in
combination, can cause heat
build-up and possible sudden
tire failure. This can cause loss
of vehicle control and serious
injury or death.
Page 289 of 312

Maintenance42
7
1
2
3
4
5
6
7
8
910
Snow tiresIf you equip your car with snow tires,
they should be the same size and
have the same load capacity as the
original tires. Snow tires should be
installed on all four wheels; other-
wise, poor handling may result.
Snow tires should carry 4 psi (28
kPa) more air pressure than the
pressure recommended for the stan-
dard tires on the tire label on the dri-
ver's side of the center pillar, or up to
the maximum pressure shown on the
tire sidewall, whichever is less.
Do not drive faster than 75 mph (120
km/h) when your car is equipped with
snow tires.Tire chainsTire chains, if necessary, should be
installed on the drive wheels (front
wheel).
Be sure that the chains are installed
in accordance with the manufactur-
er's instructions.
To minimize tire and chain wear, do
not continue to use tire chains when
they are no longer needed.
WARNING
- Snow or ice
When driving on roads cov- ered with snow or ice, drive at
less than 20 mph (30 km/h).
Use the SAE “S” class or wire chains.
If you have nolse caused by chains contacting the body,
retighten the chain to avoid
contact with the vehicle body.
To prevent body damage, retighten the chains after driv-
ing 0.3~0.5 miles (0.5~0.8 km).
Do not use tire chains on vehi- cles equipped with aluminum
wheels. In unavoidable cir-
cumstance, use a wire type
chain.
Use wire chains less than 15mm to prevent damage to
the chain’s connection.
CAUTION
If you hear noise caused by chains contacting the body,retighten the chain to avoidcontact with the vehicle body.
To prevent body damage, retighten the chains after driv-ing 0.3 ~ 0.6 miles (0.5 ~ 1.0km).
Page 290 of 312

743
Maintenance
1
2
3
4
5
6
7
8
910
BULB REPLACEMENT Use only the bulbs of the specifiedwattage.
Headlight bulb replacement ✽ ✽ NOTICEAfter heavy, driving rain or washing,
headlight and taillight lenses could
appear frosty. This condition is
caused by the temperature difference
between the lamp inside and outside.
This is similar to the condensation on
your windows inside your vehicle
during the rain and doesn’t indicate
a problem with your vehicle. If the
water leaks into the lamp bulb cir-
cuitry, have the vehicle checked by
an Authorized Kia Dealer.
WARNING
- Working on
the lights
Prior to working on the light,
firmly apply the parking brake,
ensure that the ignition switch
is turned to the “LOCK” position
and turn off the lights to avoid
sudden movement of the vehi-
cle and burning your fingers or
receiving an electric shock.
➀ Headlight (High/Low)
➁ Position light
➂ Front turn signal light
➃ Front fog light (if equipped)
1LDN5032/1LDE5032
4 Door
5 Door
CAUTION
If you don’t have necessary
tools, the correct bulbs and theexpertise, consult anAuthorized Kia Dealer. In manycases, it is difficult to replacevehicle light bulbs becauseother parts of the vehicle mustbe removed before you can getto the bulb. This is especiallytrue if you have to remove thefront bumper to
get to the
bulb(s). Removing/installing
the
front bumper or bumper hard- ware can result in damage tothe vehicle.
Page 291 of 312

Maintenance44
7
1
2
3
4
5
6
7
8
910
1. Open the hood.
2. Remove the headlight bulb cover
by turning it counterclockwise.
3. Disconnect the headlight bulb socket-connector.
4. Unsnap the headlight bulb retain- ing wire by depressing the end
and pushing it upward.
5. Remove the bulb from the head- light assembly.
WARNING
- Halogen bulbs
Halogen bulbs contain pres-surized gas that will produce
flying pieces of glass if broken.
Always handle them carefully, and avoid scratches and abra-
sions. If the bulbs are lit, avoid
contact with liquids. Never
touch the glass with bare
hands. Residual oil may cause
the bulb to overheat and burst
when lit. A bulb should be
operated only when installed
in a headlight.
(Continued)
(Continued)
If a bulb becomes damaged orcracked, replace it immediate-
ly and carefully dispose of it.
Wear eye protection when changing a bulb. Allow the
bulb to cool down before han-
dling it.
1LDA5030
1LDA7048