buttons KIA Sportage 2008 JE_ / 2.G Owner's Manual
[x] Cancel search | Manufacturer: KIA, Model Year: 2008, Model line: Sportage, Model: KIA Sportage 2008 JE_ / 2.GPages: 350, PDF Size: 6.42 MB
Page 109 of 350
Knowing your vehicle
100 3
1
2
3
4
5
6
7
8
9
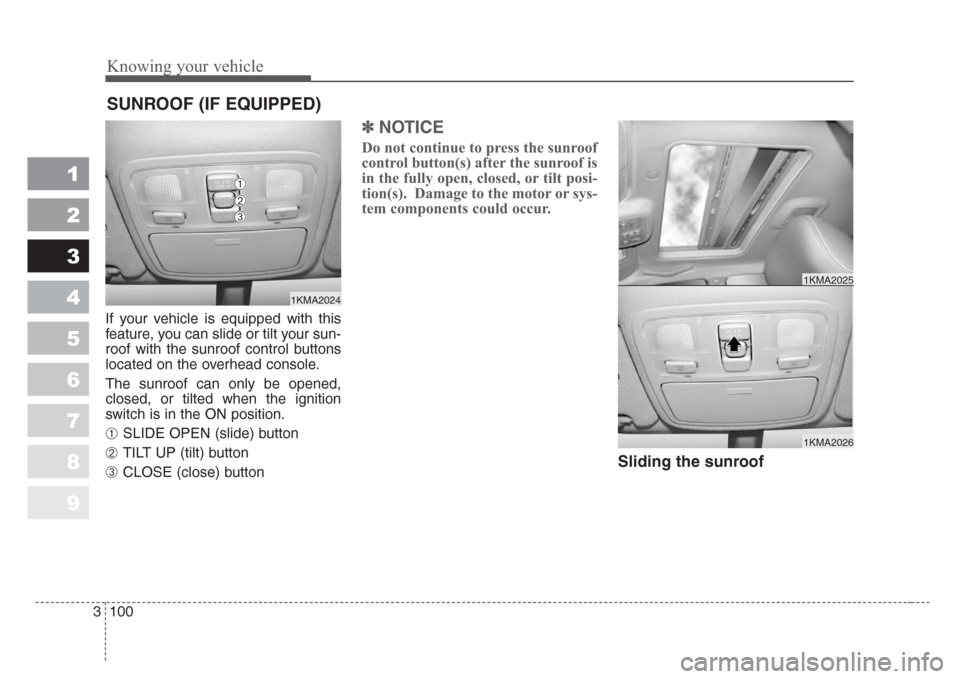
If your vehicle is equipped with this
feature, you can slide or tilt your sun-
roof with the sunroof control buttons
located on the overhead console.
The sunroof can only be opened,
closed, or tilted when the ignition
switch is in the ON position.
➀ SLIDE OPEN (slide) button
➁ TILT UP (tilt) button
➂ CLOSE (close) button
✽
NOTICE
Do not continue to press the sunroof
control button(s) after the sunroof is
in the fully open, closed, or tilt posi-
tion(s). Damage to the motor or sys-
tem components could occur.
Sliding the sunroof
SUNROOF (IF EQUIPPED)
1KMA2024
➀
➁
➂
1KMA2026
1KMA2025
Page 195 of 350
477
Driving your vehicle
1
2
3
4
5
6
7
8
9
Manual operation
The heating and cooling system can
be controlled manually as well by
pushing buttons other than the AUTO
button. In this case, the system
works sequentially according to the
order of buttons selected.
When pressing any button except
AUTO button while automatic opera-
tion, the functions of the buttons not
selected will be controlled automati-
cally.
Press the AUTO button in order to
convert to full automatic control of
the system.
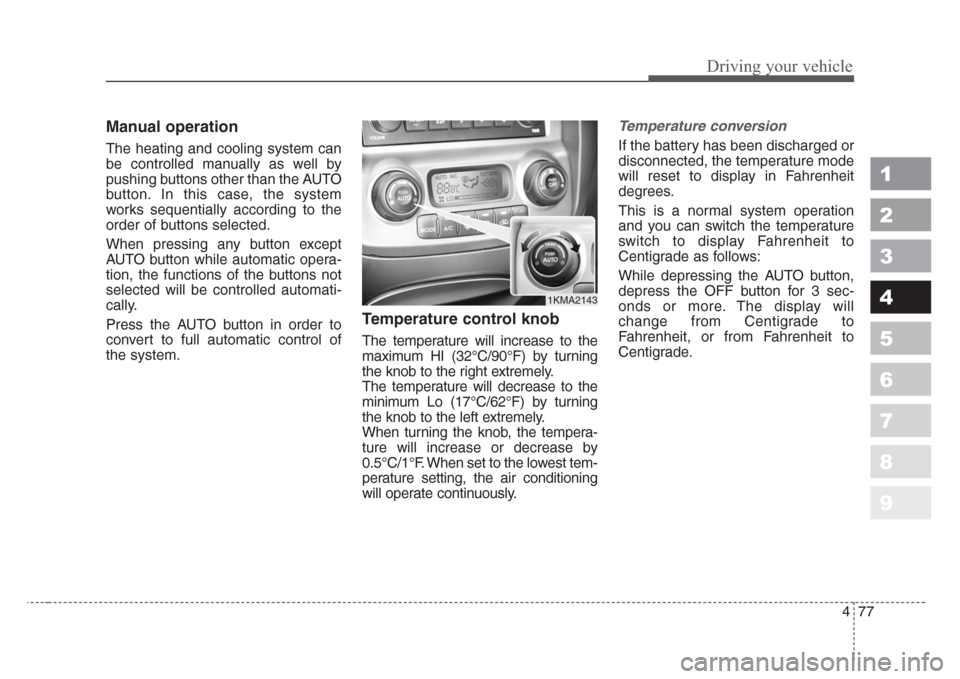
Temperature control knob
The temperature will increase to the
maximum HI (32°C/90°F) by turning
the knob to the right extremely.
The temperature will decrease to the
minimum Lo (17°C/62°F) by turning
the knob to the left extremely.
When turning the knob, the tempera-
ture will increase or decrease by
0.5°C/1°F. When set to the lowest tem-
perature setting, the air conditioning
will operate continuously.
Temperature conversion
If the battery has been discharged or
disconnected, the temperature mode
will reset to display in Fahrenheit
degrees.
This is a normal system operation
and you can switch the temperature
switch to display Fahrenheit to
Centigrade as follows:
While depressing the AUTO button,
depress the OFF button for 3 sec-
onds or more. The display will
change from Centigrade to
Fahrenheit, or from Fahrenheit to
Centigrade.
1KMA2143
Page 201 of 350
483
Driving your vehicle
1
2
3
4
5
6
7
8
9
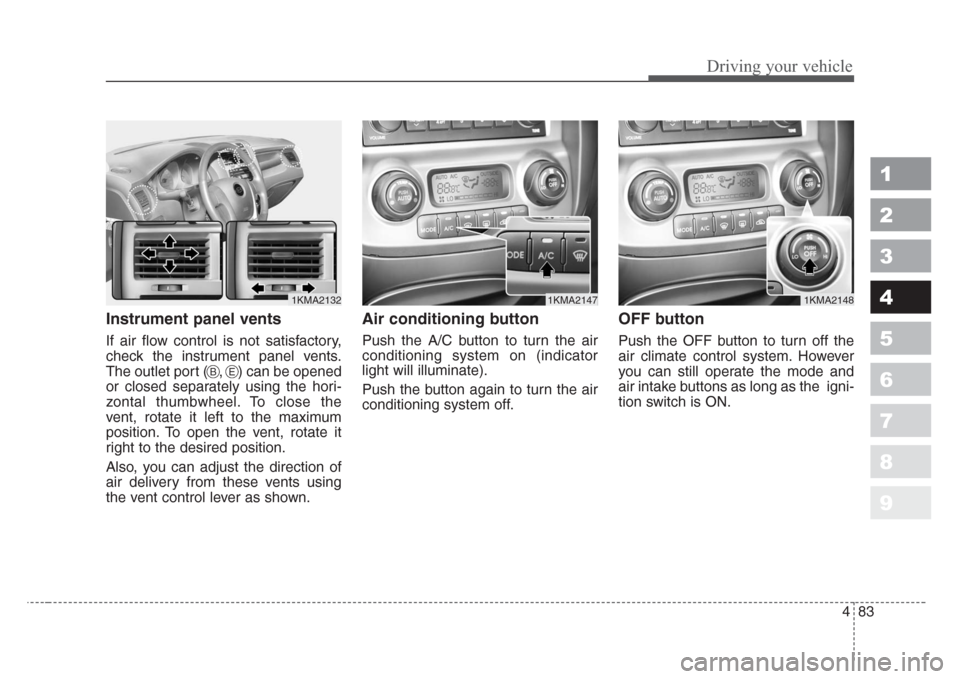
Instrument panel vents
If air flow control is not satisfactory,
check the instrument panel vents.
The outlet port ( , ) can be opened
or closed separately using the hori-
zontal thumbwheel. To close the
vent, rotate it left to the maximum
position. To open the vent, rotate it
right to the desired position.
Also, you can adjust the direction of
air delivery from these vents using
the vent control lever as shown.
Air conditioning button
Push the A/C button to turn the air
conditioning system on (indicator
light will illuminate).
Push the button again to turn the air
conditioning system off.
OFF button
Push the OFF button to turn off the
air climate control system. However
you can still operate the mode and
air intake buttons as long as the igni-
tion switch is ON.
1KMA21321KMA21471KMA2148
BE
Page 202 of 350
Driving your vehicle
84 4
1
2
3
4
5
6
7
8
9
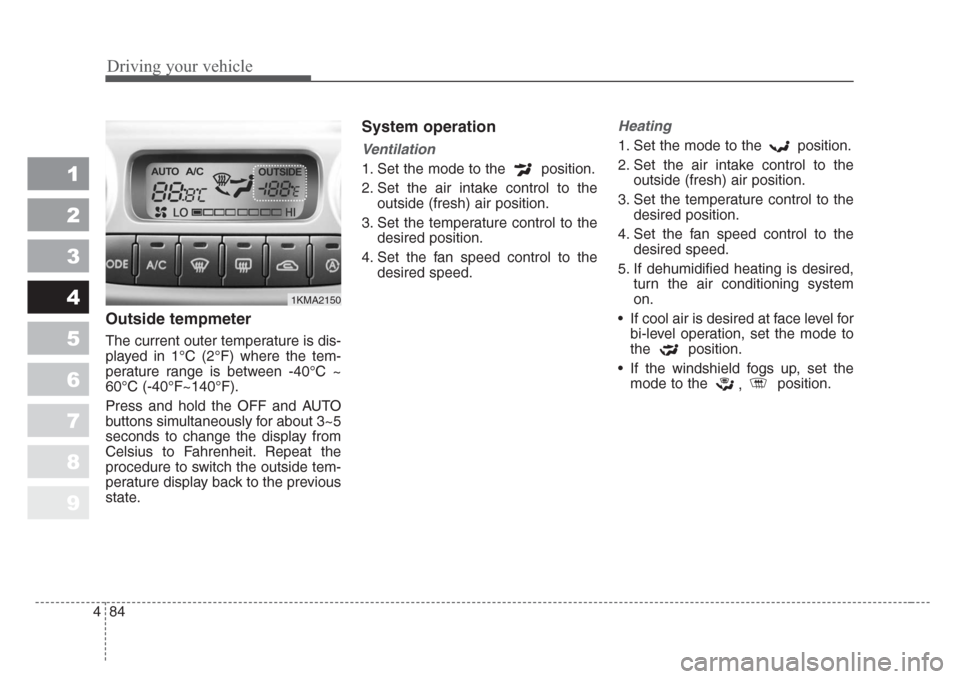
Outside tempmeter
The current outer temperature is dis-
played in 1°C (2°F) where the tem-
perature range is between -40°C ~
60°C (-40°F~140°F).
Press and hold the OFF and AUTO
buttons simultaneously for about 3~5
seconds to change the display from
Celsius to Fahrenheit. Repeat the
procedure to switch the outside tem-
perature display back to the previous
state.
System operation
Ventilation
1. Set the mode to the position.
2. Set the air intake control to the
outside (fresh) air position.
3. Set the temperature control to the
desired position.
4. Set the fan speed control to the
desired speed.
Heating
1. Set the mode to the position.
2. Set the air intake control to the
outside (fresh) air position.
3. Set the temperature control to the
desired position.
4. Set the fan speed control to the
desired speed.
5. If dehumidified heating is desired,
turn the air conditioning system
on.
• If cool air is desired at face level for
bi-level operation, set the mode to
the position.
• If the windshield fogs up, set the
mode to the
,position.
1KMA2150
Page 255 of 350
545
Driving tips
1
2
3
4
5
6
7
8
9
HOMELINK® WIRELESS CONTROL SYSTEM (IF EQUIPPED)
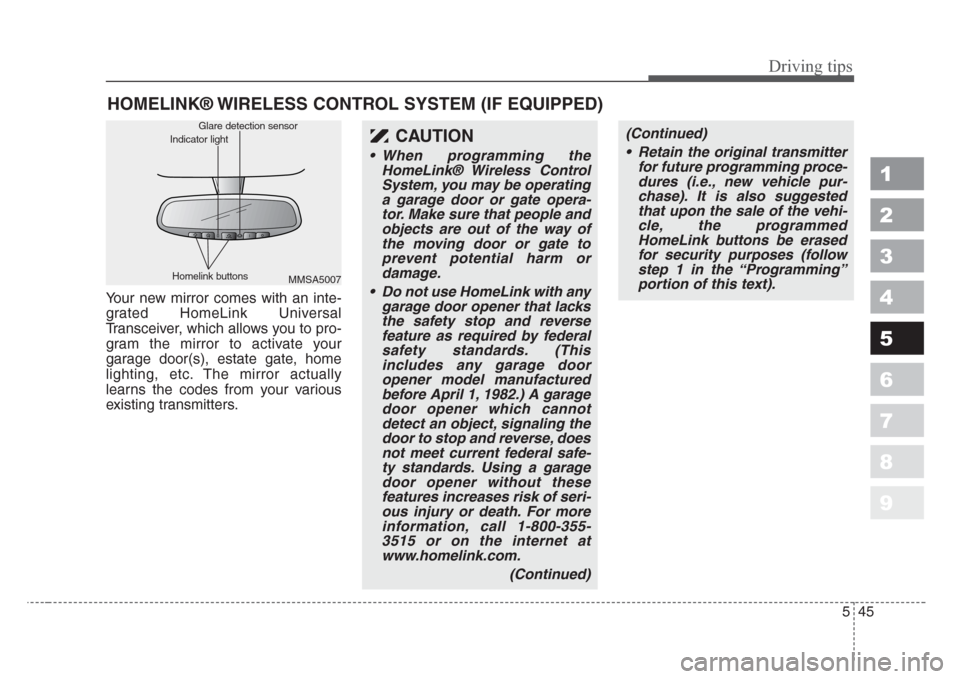
Your new mirror comes with an inte-
grated HomeLink Universal
Transceiver, which allows you to pro-
gram the mirror to activate your
garage door(s), estate gate, home
lighting, etc. The mirror actually
learns the codes from your various
existing transmitters.
CAUTION
• When programming the
HomeLink® Wireless Control
System, you may be operating
a garage door or gate opera-
tor.Make sure that people and
objects are out of the way of
the moving door or gate to
prevent potential harm or
damage.
• Do not use HomeLink with any
garage door opener that lacks
the safety stop and reverse
feature as required by federal
safety standards.(This
includes any garage door
opener model manufactured
before April 1, 1982.) A garage
door opener which cannot
detect an object,signaling the
door to stop and reverse, does
not meet current federal safe-
ty standards.Using a garage
door opener without the
se
features increases risk of seri-
ous injury or death.For more
information, call 1-800-355-
3515 or on the internet at
www.homelink.com.
(Continued)
(Continued)
• Retain the original transmitter
for future programming proce-
dures (i.e., new vehicle pur-
chase).It is also suggested
that upon the sale of the vehi-
cle, the programmed
HomeLink buttons be erased
for security purposes (follow
step 1 in the “Programming”
portion of this text).
MMSA5007 Homelink buttonsGlare detection sensor
Indicator light
Page 256 of 350
Driving tips
46 5
1
2
3
4
5
6
7
8
9
Programming
Your vehicle may require the ignition
switch to be turned to the ACC posi-
tion for programming and/or opera-
tion of HomeLink. It is also recom-
mended that a new battery be
replaced in the hand-held transmitter
of the device being programmed to
HomeLink for quicker training and
accurate transmission of the radio-
frequency.
Follow these steps to train your
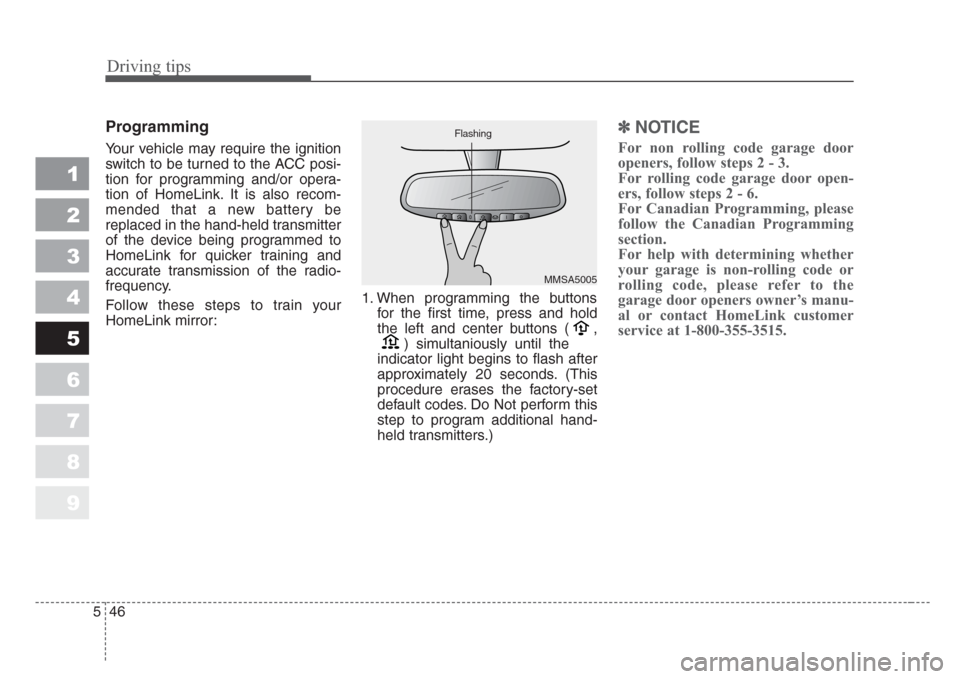
HomeLink mirror:1. When programming the buttons
for the first time, press and hold
the left and center buttons ( ,
) simultaniously until the
indicator light begins to flash after
approximately 20 seconds. (This
procedure erases the factory-set
default codes. Do Not perform this
step to program additional hand-
held transmitters.)
✽
NOTICE
For non rolling code garage door
openers, follow steps 2 - 3.
For rolling code garage door open-
ers, follow steps 2 - 6.
For Canadian Programming, please
follow the Canadian Programming
section.
For help with determining whether
your garage is non-rolling code or
rolling code, please refer to the
garage door openers owner’s manu-
al or contact HomeLink customer
service at 1-800-355-3515.
MMSA5005 Flashing
Page 257 of 350
547
Driving tips
1
2
3
4
5
6
7
8
9
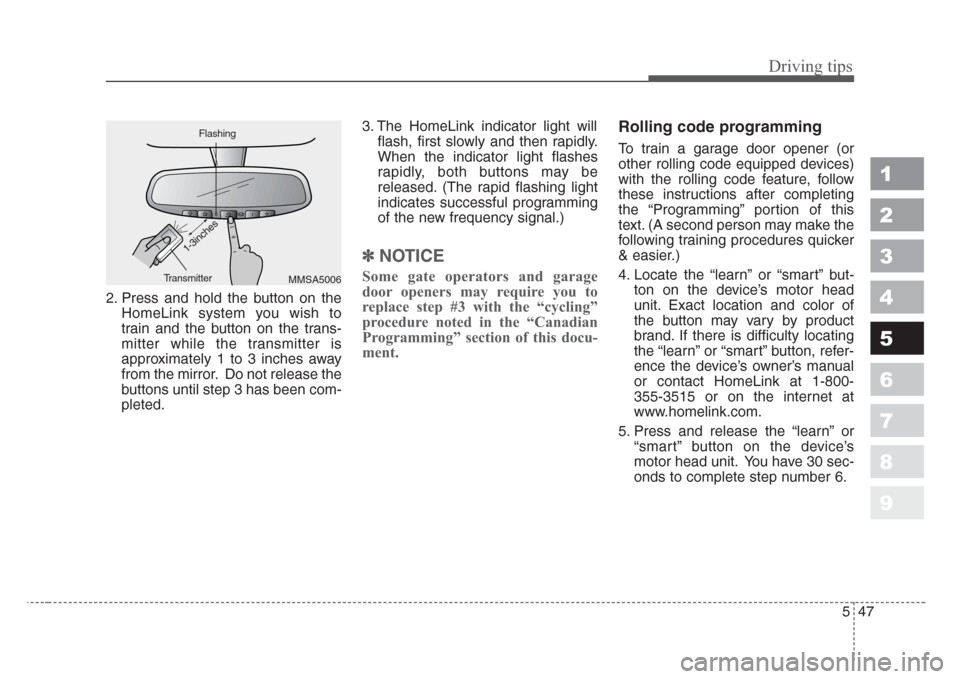
2. Press and hold the button on the
HomeLink system you wish to
train and the button on the trans-
mitter while the transmitter is
approximately 1 to 3 inches away
from the mirror. Do not release the
buttons until step 3 has been com-
pleted.3. The HomeLink indicator light will
flash, first slowly and then rapidly.
When the indicator light flashes
rapidly, both buttons may be
released. (The rapid flashing light
indicates successful programming
of the new frequency signal.)
✽
NOTICE
Some gate operators and garage
door openers may require you to
replace step #3 with the “cycling”
procedure noted in the “Canadian
Programming” section of this docu-
ment.
Rolling code programming
To train a garage door opener (or
other rolling code equipped devices)
with the rolling code feature, follow
these instructions after completing
the “Programming” portion of this
text. (A second person may make the
following training procedures quicker
& easier.)
4. Locate the “learn” or “smart” but-
ton on the device’s motor head
unit. Exact location and color of
the button may vary by product
brand. If there is difficulty locating
the “learn” or “smart” button, refer-
ence the device’s owner’s manual
or contact HomeLink at 1-800-
355-3515 or on the internet at
www.homelink.com.
5. Press and release the “learn” or
“smart” button on the device’s
motor head unit. You have 30 sec-
onds to complete step number 6.
MMSA5006 FlashingTransmitter
1-3inches
Page 258 of 350
Driving tips
48 5
1
2
3
4
5
6
7
8
9
6. Return to the vehicle and firmly
press and release the pro-
grammed HomeLink button up to
three times. The rolling code
equipped device should now rec-
ognize the HomeLink signal and
activate when the HomeLink but-
ton is pressed. The remaining two
buttons may now be programmed
if this has not previously been
done. Refer to the “Programming”
portion of this text.Operating HomeLink
To operate, simply press the pro-
grammed HomeLink button.
Activation will now occur for the
trained product (garage door, securi-
ty system, entry door lock, estate
gate, or home or office lighting). For
convenience, the hand-held trans-
mitter of the device may also be used
at any time. The HomeLink Wireless
Controls System (once programmed)
or the original hand-held transmitter
may be used to activate the device
(e.g. garage door, entry door lock,
etc.). In the event that there are still
programming difficulties, contact
HomeLink at 1-800-355-3515 or on
the internet at www.homelink.com.
Erasing programmed
HomeLink buttons
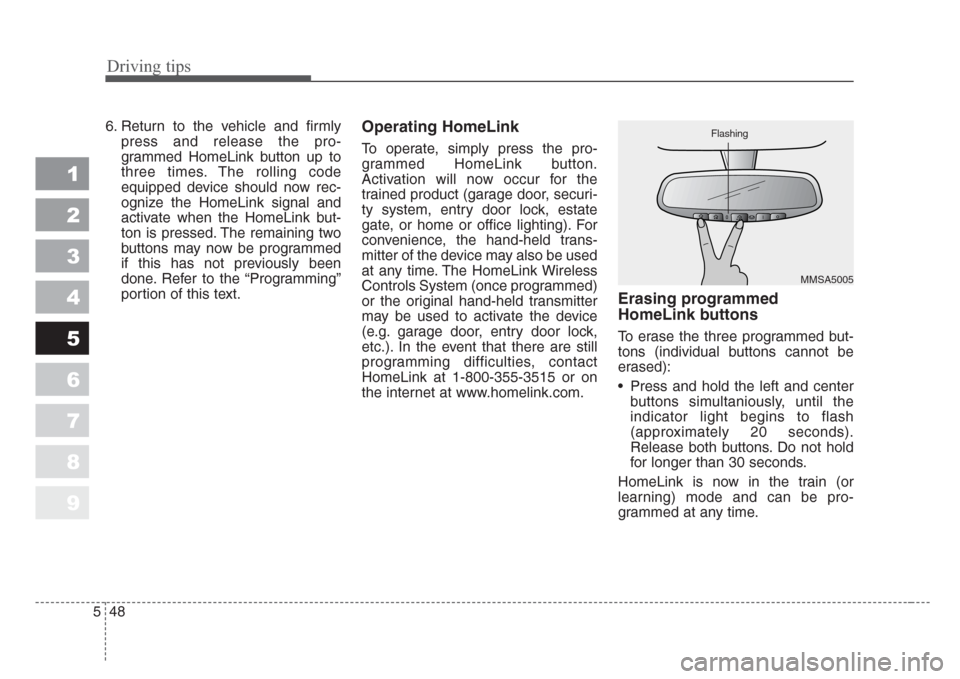
To erase the three programmed but-
tons (individual buttons cannot be
erased):
• Press and hold the left and center
buttons simultaniously, until the
indicator light begins to flash
(approximately 20 seconds).
Release both buttons. Do not hold
for longer than 30 seconds.
HomeLink is now in the train (or
learning) mode and can be pro-
grammed at any time.
MMSA5005 Flashing
Page 259 of 350
549
Driving tips
1
2
3
4
5
6
7
8
9
Reprogramming a single
HomeLink button
To program a device to HomeLink
using a HomeLink button previously
trained, follow these steps:
1. Press and hold the desired
HomeLink button. Do NOT release
until step 4 has been completed.
2. When the indicator light begins to
flash slowly (after 20 seconds),
position the hand-held transmitter
1 to 3 inches away from the
HomeLink surface.
3. Press and hold the hand-held
transmitter button (or press and
“cycle” - as described in
“Canadian Programming” above).
4. The HomeLink indicator light will
flash, first slowly and then rapidly.
When the indicator light begins to
flash rapidly, release both buttons.
The previous device has now been
erased and the new device can be
activated by pushing the HomeLink
button that has just been pro-
grammed. This procedure will not
affect any other programmed
HomeLink buttons.
Gate operator programming &
canadian programming
During programming, your hand-held
transmitter may automatically stop
transmitting. Continue to press and
hold the HomeLink button (note
steps 2 through 4 in the
“Programming” portion of this text)
while you press and re-press
(“cycle”) your handheld transmitter
every two seconds until the frequen-
cy signal has been learned. The indi-
cator light will flash slowly and then
rapidly after several seconds upon
successful training.
✽
NOTICE
If programming a garage door open-
er or gate, it is advised to unplug the
device during the “cycling” process
to prevent possible motor burn-up.
Accessories
If you would like additional informa-
tion on the HomeLink Wireless
Control System, HomeLink compati-
ble products, or to purchase other
accessories such as the HomeLink®
Lighting Package, please contact
HomeLink at 1-800-355-3515 or on
the internet at www.homelink.com.