battery KIA Sportage 2013 SL / 3.G User Guide
[x] Cancel search | Manufacturer: KIA, Model Year: 2013, Model line: Sportage, Model: KIA Sportage 2013 SL / 3.GPages: 387, PDF Size: 8.44 MB
Page 138 of 387
Features of your vehicle
48
4
D150204BHM-EE
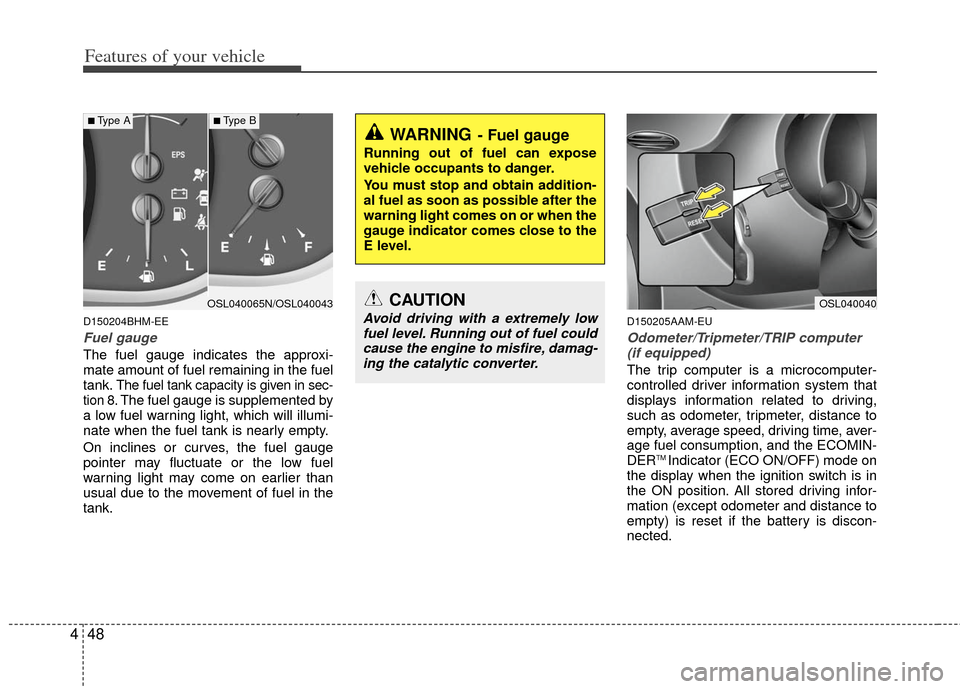
Fuel gauge
The fuel gauge indicates the approxi-
mate amount of fuel remaining in the fuel
tank.
The fuel tank capacity is given in sec-
tion 8.The fuel gauge is supplemented by
a low fuel warning light, which will illumi-
nate when the fuel tank is nearly empty.
On inclines or curves, the fuel gauge
pointer may fluctuate or the low fuel
warning light may come on earlier than
usual due to the movement of fuel in the
tank.
D150205AAM-EU
Odometer/Tripmeter/TRIP computer (if equipped)
The trip computer is a microcomputer-
controlled driver information system that
displays information related to driving,
such as odometer, tripmeter, distance to
empty, average speed, driving time, aver-
age fuel consumption, and the ECOMIN-
DER
TM Indicator (ECO ON/OFF) mode on
the display when the ignition switch is in
the ON position. All stored driving infor-
mation (except odometer and distance to
empty) is reset if the battery is discon-
nected.
WARNING- Fuel gauge
Running out of fuel can expose
vehicle occupants to danger.
You must stop and obtain addition-
al fuel as soon as possible after the
warning light comes on or when the
gauge indicator comes close to the
E level.
CAUTION
Avoid driving with a extremely low fuel level. Running out of fuel couldcause the engine to misfire, damag-ing the catalytic converter.
OSL040040OSL040065N/OSL040043
■Type A■Type B
Page 141 of 387
451
Features of your vehicle
✽
✽NOTICE
• If the vehicle is not on level ground or
the battery power has been interrupt-
ed, the “Distance to empty” function
may not operate correctly.
The trip computer may not register
additional fuel if less than 6 liters (1.6
gallons) of fuel are added to the vehi-
cle.
• The fuel consumption and distance to empty values may vary significantly
based on driving conditions, driving
habits, and condition of the vehicle.
• The distance to empty value is an esti- mate of the available driving distance.
This value may differ from the actual
driving distance available.
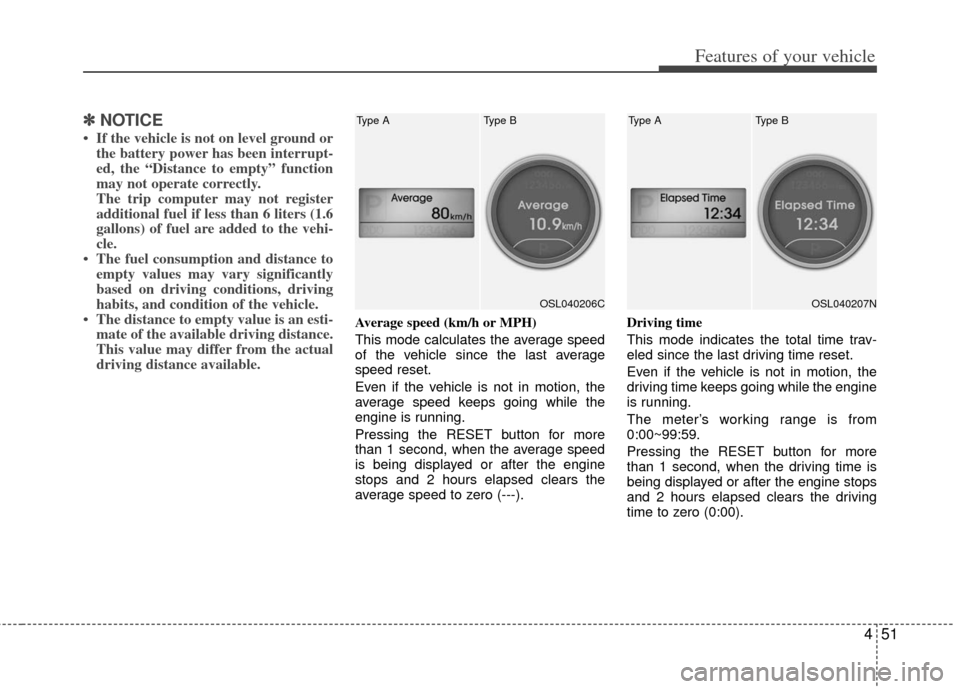
Average speed (km/h or MPH)
This mode calculates the average speed
of the vehicle since the last average
speed reset.
Even if the vehicle is not in motion, the
average speed keeps going while the
engine is running.
Pressing the RESET button for more
than 1 second, when the average speed
is being displayed or after the engine
stops and 2 hours elapsed clears the
average speed to zero (---). Driving time
This mode indicates the total time trav-
eled since the last driving time reset.
Even if the vehicle is not in motion, the
driving time keeps going while the engine
is running.
The meter’s working range is from
0:00~99:59.
Pressing the RESET button for more
than 1 second, when the driving time is
being displayed or after the engine stops
and 2 hours elapsed clears the driving
time to zero (0:00).
OSL040206C
Type B
Type AOSL040207N
Type B
Type A
Page 148 of 387
Features of your vehicle
58
4
Immobilizer indicator
(if equipped)
With smart key system
If any of the following occurs in a vehicle
equipped with the smart key, the immobi-
lizer indicator illuminates, blinks or goes
off.
When the smart key is in the vehicle, if the ENGINE START/STOP button is in
the ACC or ON position, the indicator
will illuminate for approximately 30
seconds to indicate that you are able to
start the engine. However, when the
smart key is not in the vehicle, if the
ENGINE START/STOP button is
pressed, the indicator will blink for a
few seconds to indicate that you are
not be able to start the engine.
If the indicator illuminates only for 2 seconds and goes out when the
ENGINE START/STOP button is
turned to ON position with the smart
key in the vehicle, have the system
checked by an authorized Kia dealer.
When the battery is weak, if the ENGINE START/STOP button is
pressed, the indicator will blink and you
are not able to start the engine.
However, you are able to start the
engine by inserting the smart key in
the smart key holder. Also, if the smart
key system related parts have a prob-
lem, the indicator will blink.
D150320AHM-EU-U1
Malfunction Indicator Light
(MIL) (check engine light)
This indicator light is part of the Engine
Control System which monitors various
emission control system components. If
this light illuminates while driving, it indi-
cates that a potential malfunction has
been detected somewhere in the emis-
sion control system.
This light will also illuminate when the
ignition switch is turned to the ON posi-
tion, and will go out in a few seconds
after the engine is started. If it illuminates
while driving, or does not illuminate when
the ignition switch is turned to the ON
position, take your vehicle to the nearest
authorized Kia dealer and have the sys-
tem checked.
Generally, your vehicle will continue to be
drivable, but have the system checked by
an authorized Kia dealer promptly.
CAUTION
If the Emission Control SystemMalfunction Indicator Light illumi-nates, potential catalytic converterdamage is possible. This could result in loss of engine power. Havethe Engine Control System inspect- ed as soon as possible by anauthorized Kia dealer.
CAUTION
Prolonged driving with the Emission Control System MalfunctionIndicator Light illuminated may cause damage to the emission con-trol systems which could effect dri-vability and/or fuel economy.
Page 151 of 387
461
Features of your vehicle
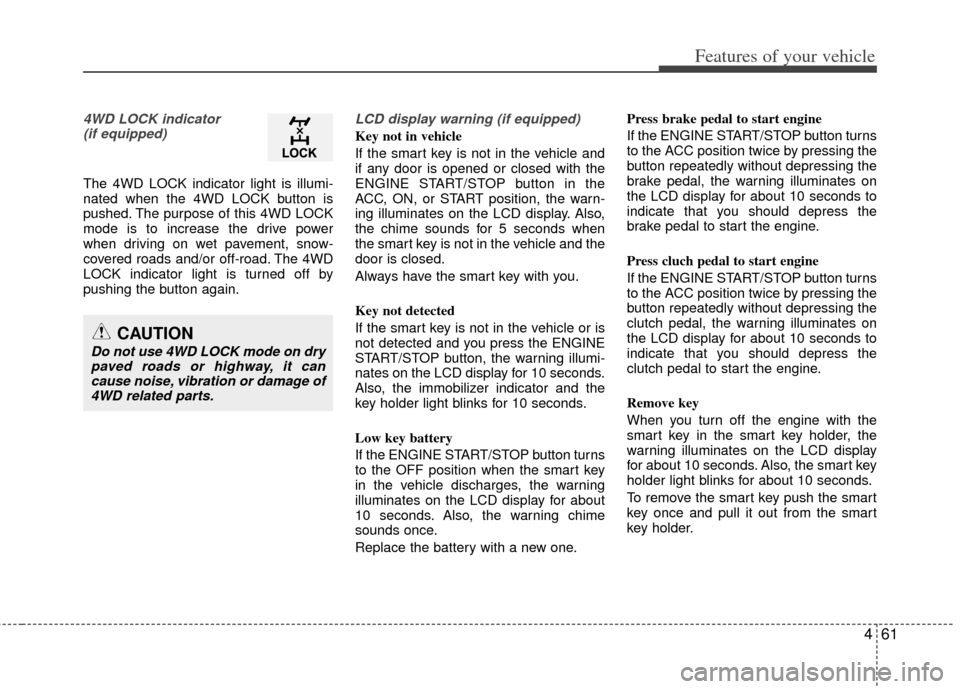
4WD LOCK indicator (if equipped)
The 4WD LOCK indicator light is illumi-
nated when the 4WD LOCK button is
pushed. The purpose of this 4WD LOCK
mode is to increase the drive power
when driving on wet pavement, snow-
covered roads and/or off-road. The 4WD
LOCK indicator light is turned off by
pushing the button again.
LCD display warning (if equipped)
Key not in vehicle
If the smart key is not in the vehicle and
if any door is opened or closed with the
ENGINE START/STOP button in the
ACC, ON, or START position, the warn-
ing illuminates on the LCD display. Also,
the chime sounds for 5 seconds when
the smart key is not in the vehicle and the
door is closed.
Always have the smart key with you.
Key not detected
If the smart key is not in the vehicle or is
not detected and you press the ENGINE
START/STOP button, the warning illumi-
nates on the LCD display for 10 seconds.
Also, the immobilizer indicator and the
key holder light blinks for 10 seconds.
Low key battery
If the ENGINE START/STOP button turns
to the OFF position when the smart key
in the vehicle discharges, the warning
illuminates on the LCD display for about
10 seconds. Also, the warning chime
sounds once.
Replace the battery with a new one. Press brake pedal to start engine
If the ENGINE START/STOP button turns
to the ACC position twice by pressing the
button repeatedly without depressing the
brake pedal, the warning illuminates on
the LCD display for about 10 seconds to
indicate that you should depress the
brake pedal to start the engine.
Press cluch pedal to start engine
If the ENGINE START/STOP button turns
to the ACC position twice by pressing the
button repeatedly without depressing the
clutch pedal, the warning illuminates on
the LCD display for about 10 seconds to
indicate that you should depress the
clutch pedal to start the engine.
Remove key
When you turn off the engine with the
smart key in the smart key holder, the
warning illuminates on the LCD display
for about 10 seconds. Also, the smart key
holder light blinks for about 10 seconds.
To remove the smart key push the smart
key once and pull it out from the smart
key holder.
CAUTION
Do not use 4WD LOCK mode on dry
paved roads or highway, it cancause noise, vibration or damage of4WD related parts.
Page 157 of 387
467
Features of your vehicle
D190100APB
Battery saver function
The purpose of this feature is to pre-vent the battery from being discharged
if the lights are left in the ON position.
The system automatically shuts off the
parking lights 30 seconds after the
ignition key is removed and the driver’s
door is opened and closed.
With this feature, the parking lights will turn off automatically if the driver parks
on the side of the road at night and
opens the driver’s side door.
If necessary, to keep the parking lights
on when the ignition key is removed,
perform the following:
1) Open the driver-side door.
2) Turn the parking lights OFF and ON again using the light switch on the
steering column.
Headlight escort function
(if equipped)
The headlights (and/or taillights) remain
on for approximately 20 minutes after the
ignition key is removed or turned to the
ACC or LOCK position. However, if the
driver’s door (and tailgate) is opened and
closed, the headlights are turned off after
30 seconds.
The headlights can be turned off by
pressing the lock button on the transmit-
ter (or smart key) twice or turning off the
light switch from the headlight or Auto
light position.
Headlight welcome function
(if equipped)
When the headlight switch is in the ON or
AUTO position and all doors (and tail-
gate) are closed and locked, if you press
the door unlock button on the transmitter
(or smart key), the headlights will come
on for about 15 seconds.
If the headlight switch is in the AUTO
position, the function can only operate at
night.
At this time, if you press the door lock
button or unlock button (once or twice) on
the transmitter (or smart key), the head-
lights will turn off immediately.
LIGHTING
CAUTION
If the driver gets out of the vehiclethrough other doors (except dri-ver's door), the battery saver func-tion does not operate and the head- light escort function does not turnoff automatically. Therefore, It caus-es the battery to be discharged. Inthis case, make sure to turn off thelamp before getting out of the vehi-cle.
Page 159 of 387
469
Features of your vehicle
Auto light position (if equipped)
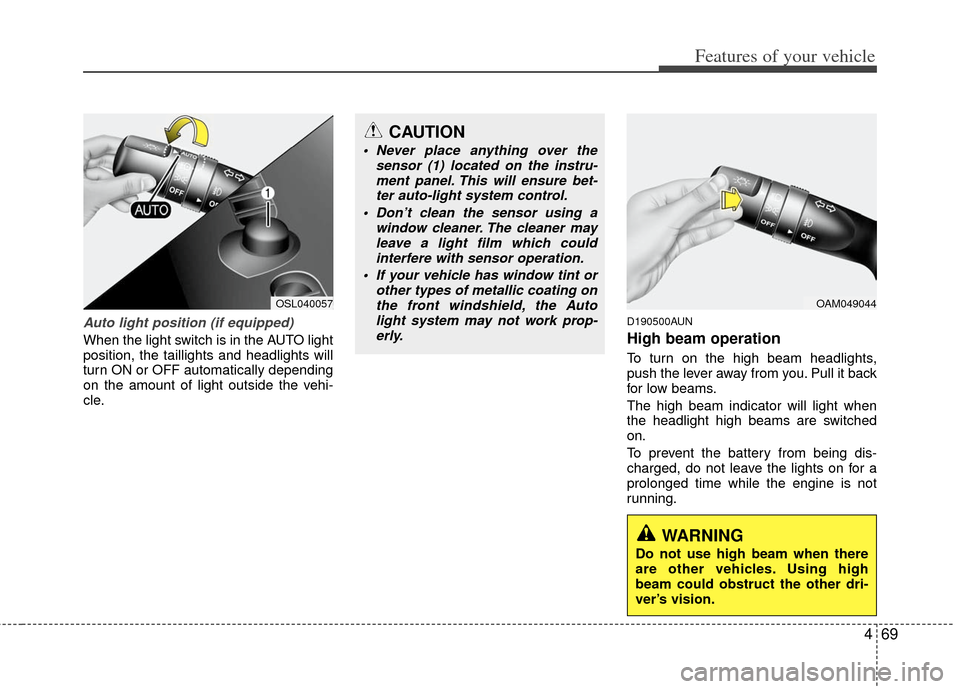
When the light switch is in the AUTO light
position, the taillights and headlights will
turn ON or OFF automatically depending
on the amount of light outside the vehi-
cle.
D190500AUN
High beam operation
To turn on the high beam headlights,
push the lever away from you. Pull it back
for low beams.
The high beam indicator will light when
the headlight high beams are switched
on.
To prevent the battery from being dis-
charged, do not leave the lights on for a
prolonged time while the engine is not
running.
CAUTION
Never place anything over thesensor (1) located on the instru-ment panel. This will ensure bet-ter auto-light system control.
Don’t clean the sensor using a window cleaner. The cleaner mayleave a light film which could interfere with sensor operation.
If your vehicle has window tint or other types of metallic coating onthe front windshield, the Autolight system may not work prop-erly.
OAM049044OSL040057
WARNING
Do not use high beam when there
are other vehicles. Using high
beam could obstruct the other dri-
ver’s vision.
Page 166 of 387
Features of your vehicle
76
4
D210000AEN
D210200AAM-EU
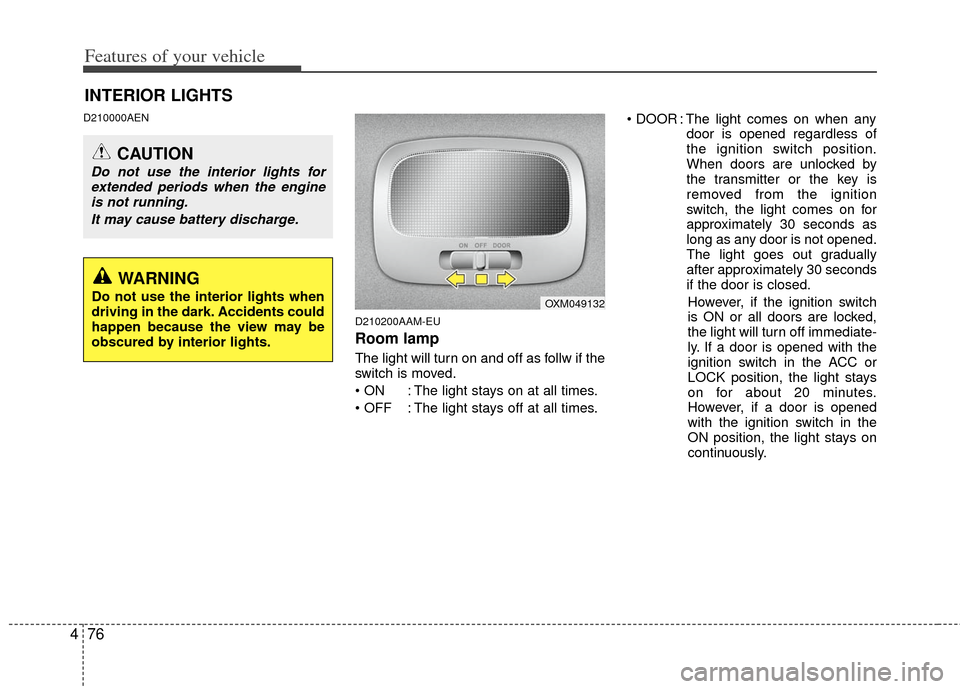
Room lamp
The light will turn on and off as follw if the
switch is moved.
: The light stays on at all times.
: The light stays off at all times. : The light comes on when any
door is opened regardless of
the ignition switch position.
When doors are unlocked by
the transmitter or the key is
removed from the ignition
switch, the light comes on for
approximately 30 seconds as
long as any door is not opened.
The light goes out gradually
after approximately 30 seconds
if the door is closed.
However, if the ignition switch
is ON or all doors are locked,
the light will turn off immediate-
ly. If a door is opened with the
ignition switch in the ACC or
LOCK position, the light stays
on for about 20 minutes.
However, if a door is opened
with the ignition switch in the
ON position, the light stays on
continuously.
INTERIOR LIGHTS
CAUTION
Do not use the interior lights for extended periods when the engineis not running.
It may cause battery discharge.
OXM049132
WARNING
Do not use the interior lights when
driving in the dark. Accidents could
happen because the view may be
obscured by interior lights.
Page 182 of 387
Features of your vehicle
92
4
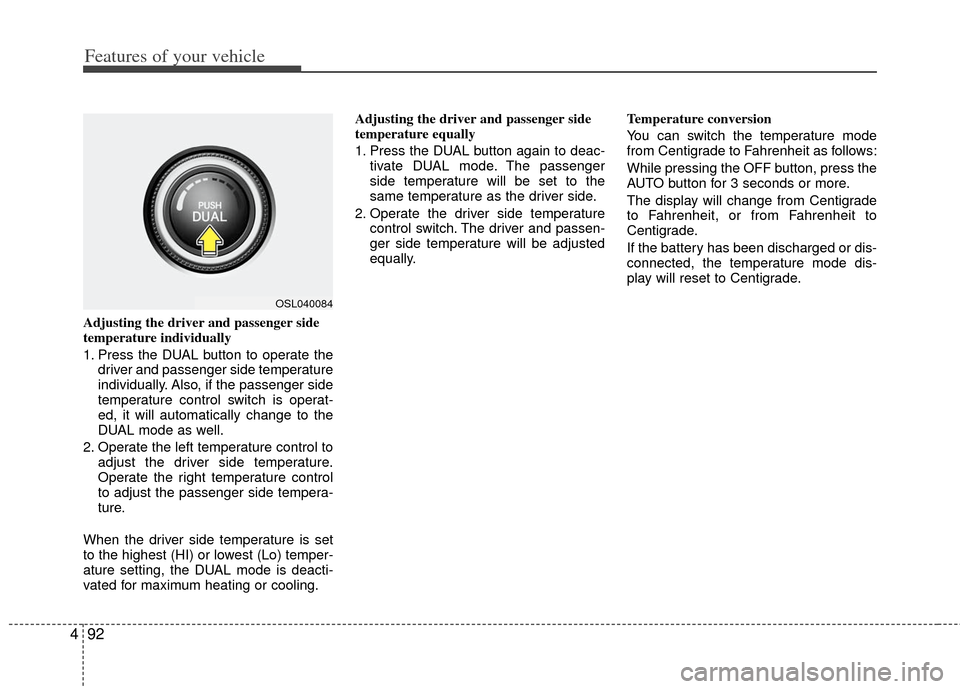
Adjusting the driver and passenger side
temperature individually
1. Press the DUAL button to operate the
driver and passenger side temperature
individually. Also, if the passenger side
temperature control switch is operat-
ed, it will automatically change to the
DUAL mode as well.
2. Operate the left temperature control to adjust the driver side temperature.
Operate the right temperature control
to adjust the passenger side tempera-
ture.
When the driver side temperature is set
to the highest (HI) or lowest (Lo) temper-
ature setting, the DUAL mode is deacti-
vated for maximum heating or cooling. Adjusting the driver and passenger side
temperature equally
1. Press the DUAL button again to deac-
tivate DUAL mode. The passenger
side temperature will be set to the
same temperature as the driver side.
2. Operate the driver side temperature control switch. The driver and passen-
ger side temperature will be adjusted
equally. Temperature conversion
You can switch the temperature mode
from Centigrade to Fahrenheit as follows:
While pressing the OFF button, press the
AUTO button for 3 seconds or more.
The display will change from Centigrade
to Fahrenheit, or from Fahrenheit to
Centigrade.
If the battery has been discharged or dis-
connected, the temperature mode dis-
play will reset to Centigrade.
OSL040084
Page 187 of 387
497
Features of your vehicle
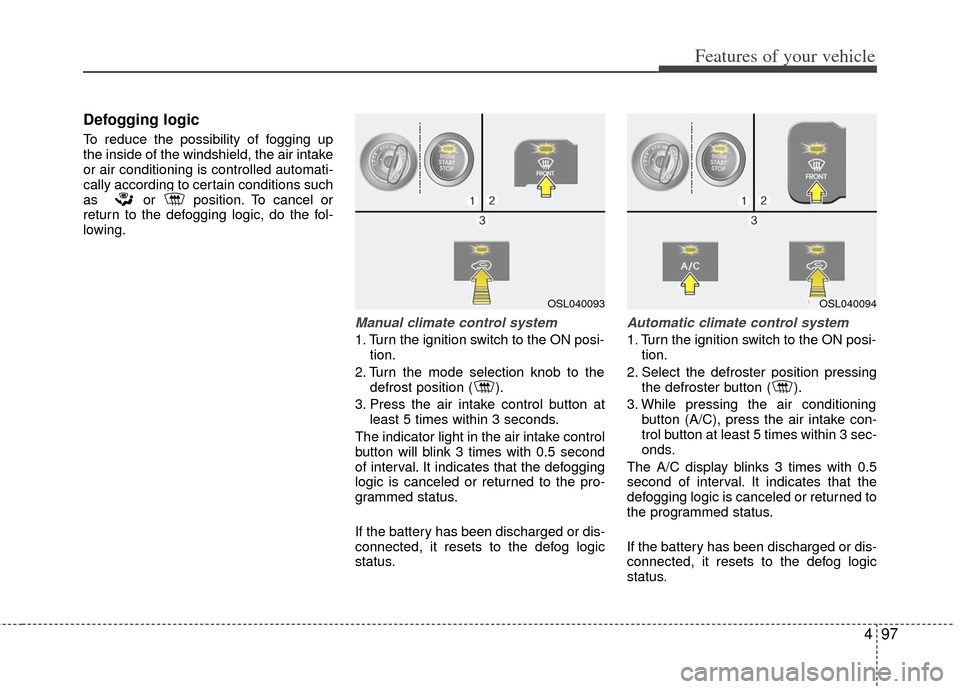
Defogging logic
To reduce the possibility of fogging up
the inside of the windshield, the air intake
or air conditioning is controlled automati-
cally according to certain conditions such
as or position. To cancel or
return to the defogging logic, do the fol-
lowing.
Manual climate control system
1. Turn the ignition switch to the ON posi-tion.
2. Turn the mode selection knob to the defrost position ( ).
3. Press the air intake control button at least 5 times within 3 seconds.
The indicator light in the air intake control
button will blink 3 times with 0.5 second
of interval. It indicates that the defogging
logic is canceled or returned to the pro-
grammed status.
If the battery has been discharged or dis-
connected, it resets to the defog logic
status.
Automatic climate control system
1. Turn the ignition switch to the ON posi- tion.
2. Select the defroster position pressing the defroster button ( ).
3. While pressing the air conditioning button (A/C), press the air intake con-
trol button at least 5 times within 3 sec-
onds.
The A/C display blinks 3 times with 0.5
second of interval. It indicates that the
defogging logic is canceled or returned to
the programmed status.
If the battery has been discharged or dis-
connected, it resets to the defog logic
status.
OSL040093OSL040094
Page 192 of 387
Features of your vehicle
102
4
D280500AEN
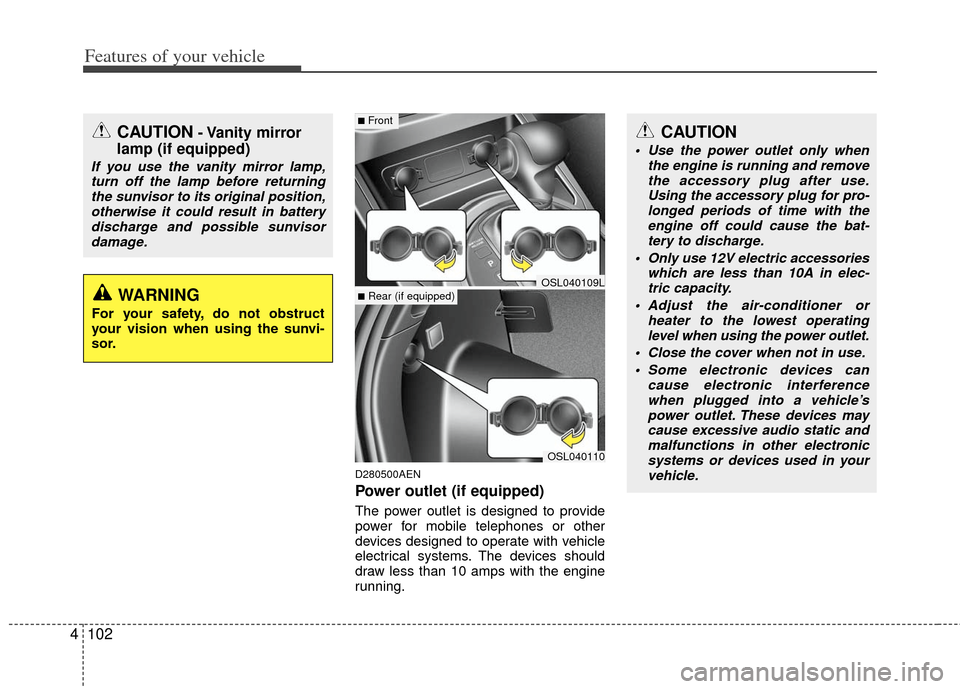
Power outlet (if equipped)
The power outlet is designed to provide
power for mobile telephones or other
devices designed to operate with vehicle
electrical systems. The devices should
draw less than 10 amps with the engine
running.
CAUTION- Vanity mirror
lamp (if equipped)
If you use the vanity mirror lamp,
turn off the lamp before returningthe sunvisor to its original position,otherwise it could result in batterydischarge and possible sunvisor damage.
OSL040110
■Front
■Rear (if equipped)OSL040109L
CAUTION
Use the power outlet only when the engine is running and removethe accessory plug after use. Using the accessory plug for pro-longed periods of time with theengine off could cause the bat- tery to discharge.
Only use 12V electric accessories which are less than 10A in elec-tric capacity.
Adjust the air-conditioner or heater to the lowest operatinglevel when using the power outlet.
Close the cover when not in use. Some electronic devices can cause electronic interferencewhen plugged into a vehicle’s power outlet. These devices maycause excessive audio static and malfunctions in other electronicsystems or devices used in yourvehicle.
WARNING
For your safety, do not obstruct
your vision when using the sunvi-
sor.