battery KIA Sportage 2013 SL / 3.G Owner's Guide
[x] Cancel search | Manufacturer: KIA, Model Year: 2013, Model line: Sportage, Model: KIA Sportage 2013 SL / 3.GPages: 387, PDF Size: 8.44 MB
Page 303 of 387
What to do in an emergency
46
EMERGENCY STARTING
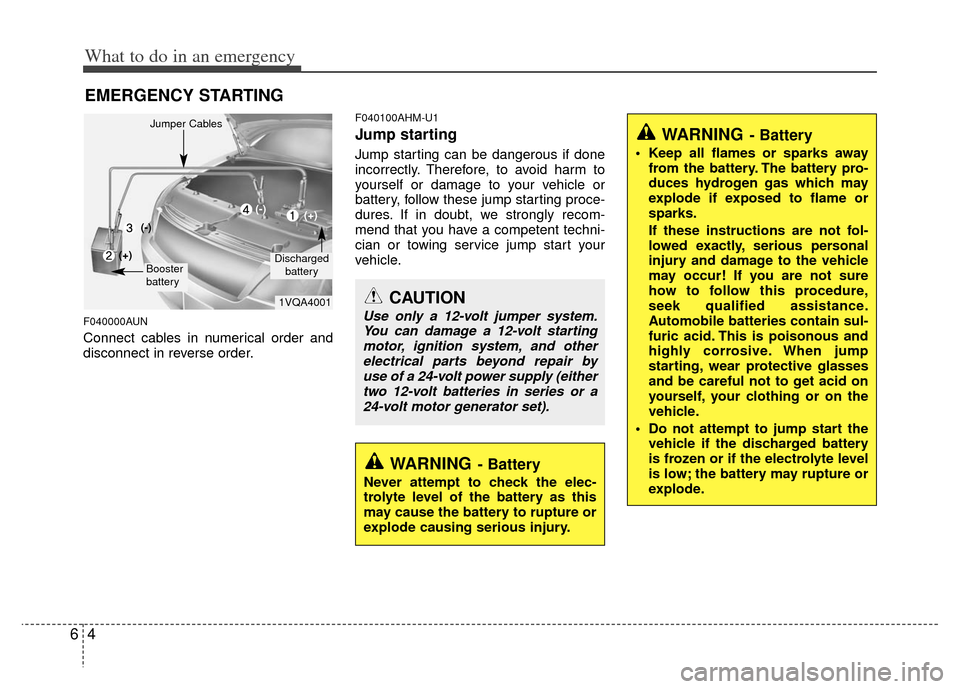
F040000AUN
Connect cables in numerical order and
disconnect in reverse order.
F040100AHM-U1
Jump starting
Jump starting can be dangerous if done
incorrectly. Therefore, to avoid harm to
yourself or damage to your vehicle or
battery, follow these jump starting proce-
dures. If in doubt, we strongly recom-
mend that you have a competent techni-
cian or towing service jump start your
vehicle.
CAUTION
Use only a 12-volt jumper system.You can damage a 12-volt startingmotor, ignition system, and otherelectrical parts beyond repair by use of a 24-volt power supply (eithertwo 12-volt batteries in series or a24-volt motor generator set).
WARNING- Battery
• Keep all flames or sparks away from the battery. The battery pro-
duces hydrogen gas which may
explode if exposed to flame or
sparks.
If these instructions are not fol-
lowed exactly, serious personal
injury and damage to the vehicle
may occur! If you are not sure
how to follow this procedure,
seek qualified assistance.
Automobile batteries contain sul-
furic acid. This is poisonous and
highly corrosive. When jump
starting, wear protective glasses
and be careful not to get acid on
yourself, your clothing or on the
vehicle.
Do not attempt to jump start the vehicle if the discharged battery
is frozen or if the electrolyte level
is low; the battery may rupture or
explode.
WARNING- Battery
Never attempt to check the elec-
trolyte level of the battery as this
may cause the battery to rupture or
explode causing serious injury.
1VQA4001
Discharged
battery
Jumper Cables
Booster
battery
(-)
(+)
(+)(-)
Page 304 of 387
65
What to do in an emergency
F040101ASA
Jump starting procedure
1. Make sure the booster battery is 12-volt and that its negative terminal is
grounded.
2. If the booster battery is in another vehicle, do not allow the vehicles to
come in contact.
3. Turn off all unnecessary electrical loads.
4. Connect the jumper cables in the exact sequence shown in the illustration.
First connect one end of a jumper
cable to the positive terminal of the
discharged battery (1), then connect
the other end to the positive terminal
of the booster battery (2).
Proceed to connect one end of the
other jumper cable to the negative ter-
minal of the booster battery (3), then
the other end to a solid, stationary,
metallic point (for example, the engine
lifting bracket) away from the battery
(4). Do not connect it to or near any
part that moves when the engine is
cranked. Do not allow the jumper cables to con-
tact anything except the correct battery
terminals or the correct ground. Do not
lean over the battery when making
connections.
5. Start the engine of the vehicle with the booster battery and let it run at 2,000
rpm, then start the engine of the vehi-
cle with the discharged battery.
If the cause of your battery discharging isnot apparent, you should have your vehi-cle checked by an authorized Kia dealer.
F040200AAM-EU
Push-starting
Vehicles equipped with automatic
transaxle and manual transaxle vehicles
equipped with clutch lock system cannot
be push-started.
Follow the directions in this section for
jump-starting.
CAUTION- Battery cables
Do not connect the jumper cablefrom the negative terminal of thebooster battery to the negative ter- minal of the discharged battery.This can cause the discharged bat-tery to overheat and crack, releas-ing battery acid.
WARNING
Never tow a vehicle to start it
because the sudden surge forward
when the engine starts could cause
a collision with the tow vehicle.
Page 319 of 387
7
Engine compartment / 7-2
Maintenance services / 7-3
Owner maintenance / 7-4
Maintenance schedule / 7-6
Explanation of scheduled maintenance items / 7-10
Engine oil / 7-16
Engine coolant / 7-18
Brake/clutch fluid / 7-21
Washer fluid / 7-22
Parking brake / 7-22
Air cleaner / 7-23
Climate control air filter / 7-24
Wiper blades / 7-25
Battery / 7-28
Tires and wheels / 7-31
Fuses / 7-45
Appearance care / 7-53
Emission control system / 7-59
Maintenance
Page 320 of 387
Maintenance
27
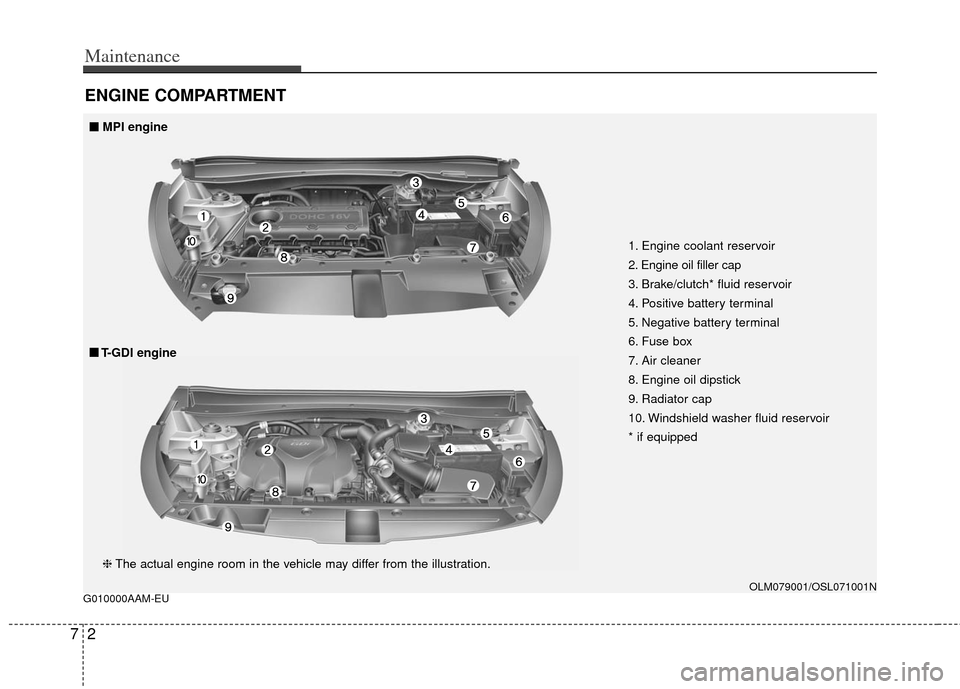
ENGINE COMPARTMENT
G010000AAM-EU
1. Engine coolant reservoir
2. Engine oil filler cap
3. Brake/clutch* fluid reservoir
4. Positive battery terminal
5. Negative battery terminal
6. Fuse box
7. Air cleaner
8. Engine oil dipstick
9. Radiator cap
10. Windshield washer fluid reservoir
* if equipped
OLM079001/OSL071001N
❈The actual engine room in the vehicle may differ from the illustration.
■
■
MPI engine
■
■ T-GDI engine
Page 323 of 387
75
Maintenance
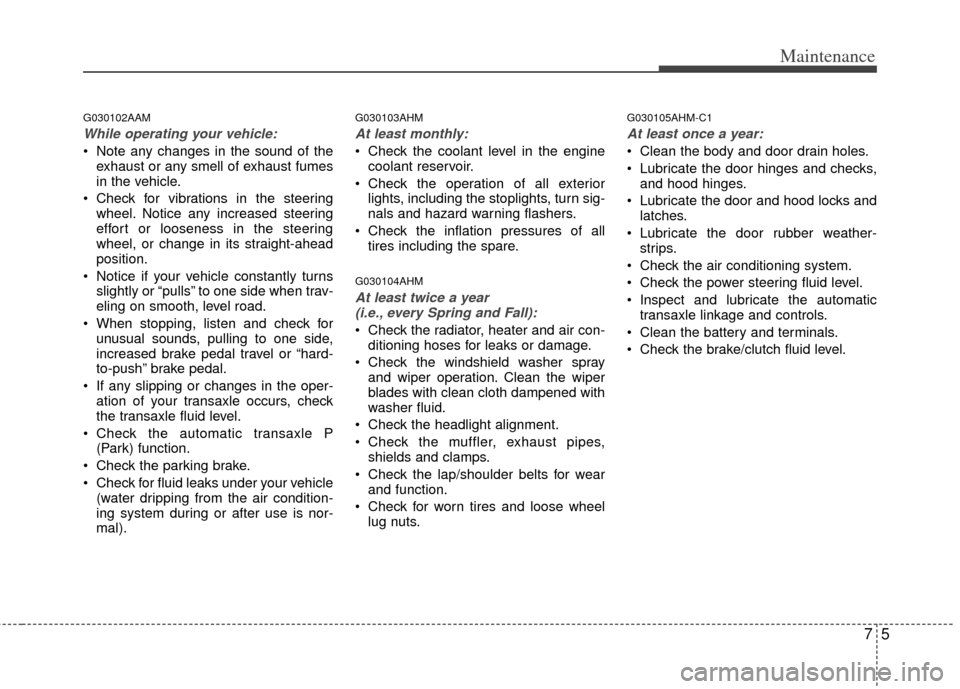
G030102AAM
While operating your vehicle:
Note any changes in the sound of theexhaust or any smell of exhaust fumes
in the vehicle.
Check for vibrations in the steering wheel. Notice any increased steering
effort or looseness in the steering
wheel, or change in its straight-ahead
position.
Notice if your vehicle constantly turns slightly or “pulls” to one side when trav-
eling on smooth, level road.
When stopping, listen and check for unusual sounds, pulling to one side,
increased brake pedal travel or “hard-
to-push” brake pedal.
If any slipping or changes in the oper- ation of your transaxle occurs, check
the transaxle fluid level.
Check the automatic transaxle P (Park) function.
Check the parking brake.
Check for fluid leaks under your vehicle (water dripping from the air condition-
ing system during or after use is nor-
mal).
G030103AHM
At least monthly:
Check the coolant level in the enginecoolant reservoir.
Check the operation of all exterior lights, including the stoplights, turn sig-
nals and hazard warning flashers.
Check the inflation pressures of all tires including the spare.
G030104AHM
At least twice a year (i.e., every Spring and Fall):
Check the radiator, heater and air con- ditioning hoses for leaks or damage.
Check the windshield washer spray and wiper operation. Clean the wiper
blades with clean cloth dampened with
washer fluid.
Check the headlight alignment.
Check the muffler, exhaust pipes, shields and clamps.
Check the lap/shoulder belts for wear and function.
Check for worn tires and loose wheel lug nuts.
G030105AHM-C1
At least once a year:
Clean the body and door drain holes.
Lubricate the door hinges and checks,and hood hinges.
Lubricate the door and hood locks and latches.
Lubricate the door rubber weather- strips.
Check the air conditioning system.
Check the power steering fluid level.
Inspect and lubricate the automatic transaxle linkage and controls.
Clean the battery and terminals.
Check the brake/clutch fluid level.
Page 327 of 387
79
Maintenance
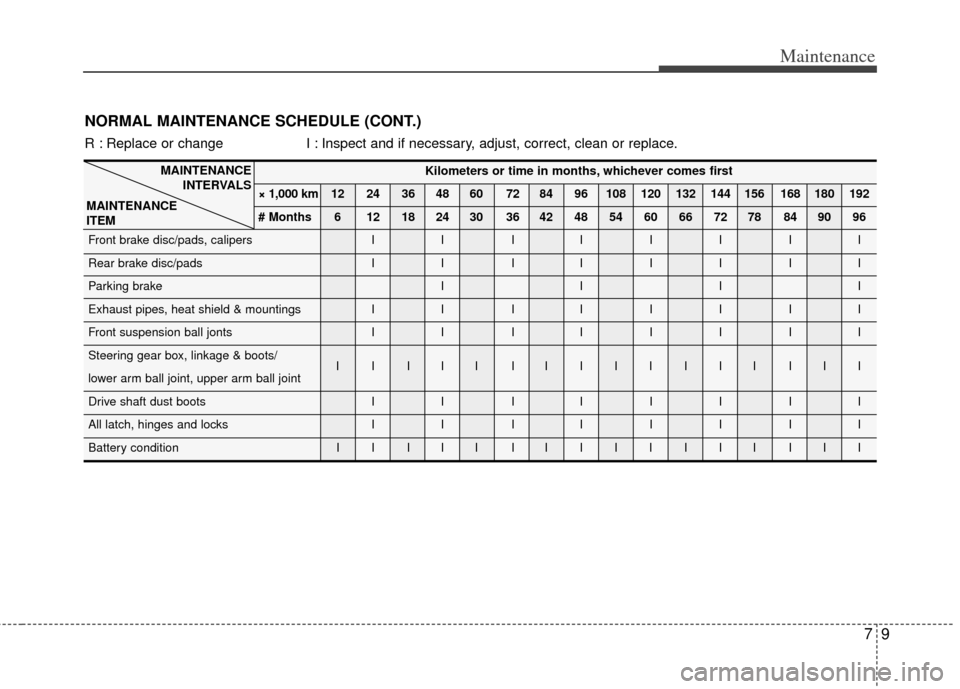
Kilometers or time in months, whichever comes first
× 1,000 km 12 24 36 48 60 72 84 96 108 120 132 144 156 168 180 192
# Months 6 12 18 24 30 36 42 48 54 60 66 72 78 84 90 96
Front brake disc/pads, calipers I I I IIIII
Rear brake disc/pads I I I IIIII
Parking brake I I I I
Exhaust pipes, heat shield & mountings I I I IIIII
Front suspension ball jonts I I I IIIII
Steering gear box, linkage & boots/ IIIII IIIIIIII III
lower arm ball joint, upper arm ball joint
Drive shaft dust boots I I I IIIII
All latch, hinges and locks I I I IIIII
Battery condition I I I I I I IIIIIII III
MAINTENANCE
INTERVALS
MAINTENANCE
ITEM
NORMAL MAINTENANCE SCHEDULE (CONT.)
R : Replace or change I : Inspect and if necessary, adjust, correct, clean or replace.
Page 336 of 387
Maintenance
18
7
ENGINE COOLANT
G070000AHM
The high-pressure cooling system has a
reservoir filled with year round antifreeze
coolant. The reservoir is filled at the fac-
tory.
Check the antifreeze protection and
coolant level at least once a year, at the
beginning of the winter season, and
before traveling to a colder climate.
G070100AHM
Checking the coolant level
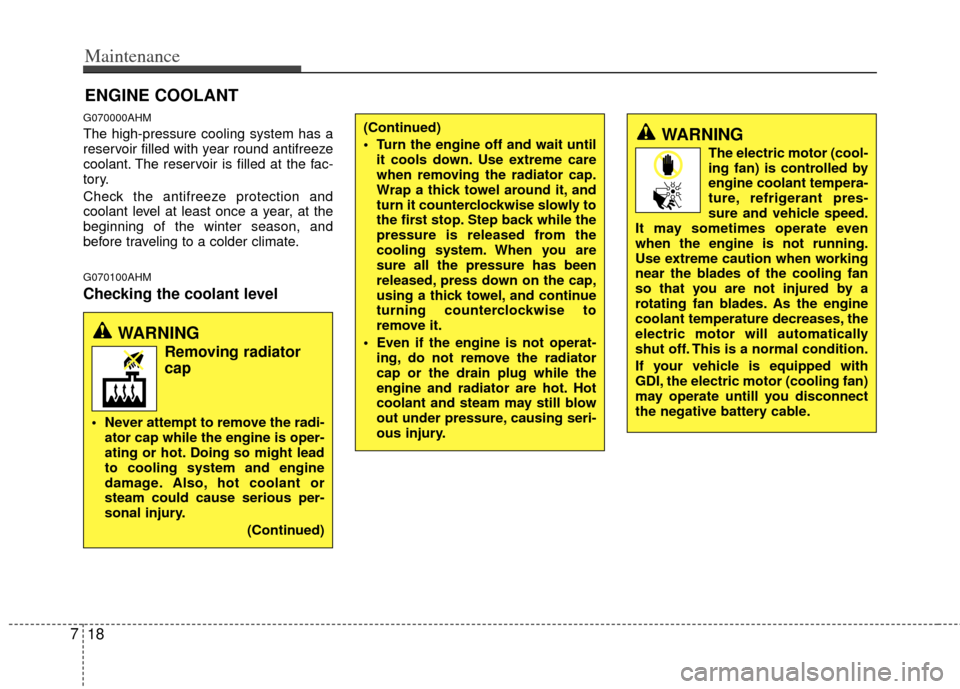
WARNING
Removing radiator
cap
Never attempt to remove the radi-
ator cap while the engine is oper-
ating or hot. Doing so might lead
to cooling system and engine
damage. Also, hot coolant or
steam could cause serious per-
sonal injury.
(Continued)
(Continued)
Turn the engine off and wait untilit cools down. Use extreme care
when removing the radiator cap.
Wrap a thick towel around it, and
turn it counterclockwise slowly to
the first stop. Step back while the
pressure is released from the
cooling system. When you are
sure all the pressure has been
released, press down on the cap,
using a thick towel, and continue
turning counterclockwise to
remove it.
Even if the engine is not operat- ing, do not remove the radiator
cap or the drain plug while the
engine and radiator are hot. Hot
coolant and steam may still blow
out under pressure, causing seri-
ous injury.WARNING
The electric motor (cool-
ing fan) is controlled by
engine coolant tempera-
ture, refrigerant pres-
sure and vehicle speed.
It may sometimes operate even
when the engine is not running.
Use extreme caution when working
near the blades of the cooling fan
so that you are not injured by a
rotating fan blades. As the engine
coolant temperature decreases, the
electric motor will automatically
shut off. This is a normal condition.
If your vehicle is equipped with
GDI, the electric motor (cooling fan)
may operate untill you disconnect
the negative battery cable.
Page 346 of 387
Maintenance
28
7
BATTERY
G190100AAM
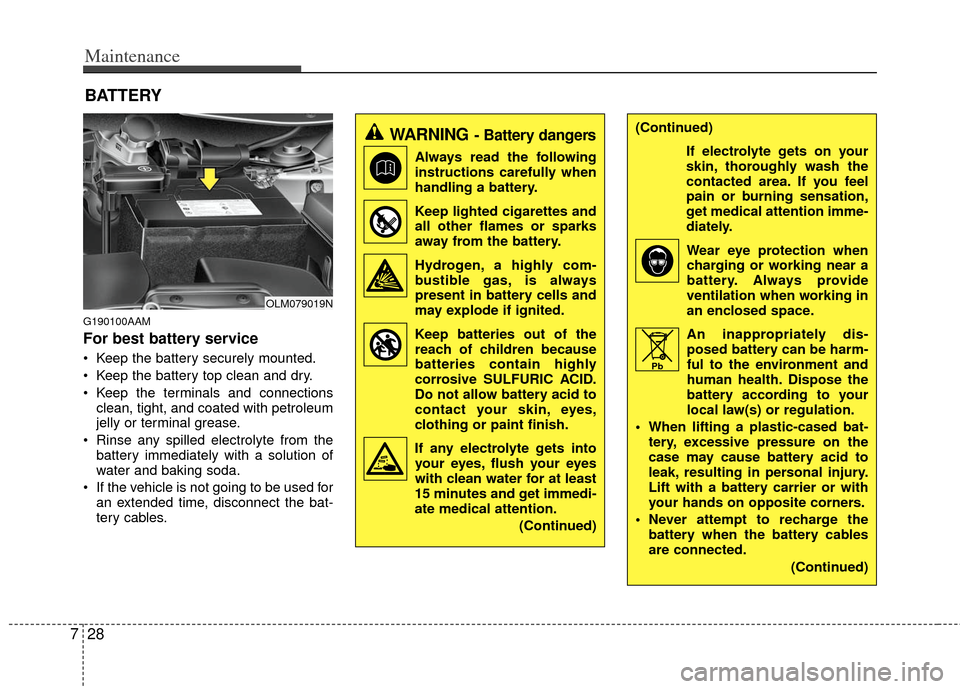
For best battery service
Keep the battery securely mounted.
Keep the battery top clean and dry.
Keep the terminals and connections
clean, tight, and coated with petroleum
jelly or terminal grease.
Rinse any spilled electrolyte from the battery immediately with a solution of
water and baking soda.
If the vehicle is not going to be used for an extended time, disconnect the bat-
tery cables.
WARNING- Battery dangers
Always read the following
instructions carefully when
handling a battery.
Keep lighted cigarettes and all other flames or sparks
away from the battery.
Hydrogen, a highly com- bustible gas, is always
present in battery cells and
may explode if ignited.
Keep batteries out of the reach of children because
batteries contain highly
corrosive SULFURIC ACID.
Do not allow battery acid to
contact your skin, eyes,
clothing or paint finish.
If any electrolyte gets into your eyes, flush your eyes
with clean water for at least
15 minutes and get immedi-
ate medical attention.
(Continued)
(Continued)
If electrolyte gets on your
skin, thoroughly wash the
contacted area. If you feel
pain or burning sensation,
get medical attention imme-
diately.Wear eye protection whencharging or working near a
battery. Always provide
ventilation when working in
an enclosed space.
An inappropriately dis- posed battery can be harm-
ful to the environment and
human health. Dispose the
battery according to your
local law(s) or regulation.
When lifting a plastic-cased bat- tery, excessive pressure on the
case may cause battery acid to
leak, resulting in personal injury.
Lift with a battery carrier or with
your hands on opposite corners.
Never attempt to recharge the battery when the battery cables
are connected.
(Continued)
Pb
OLM079019N
Page 347 of 387
729
Maintenance
G190200AUN
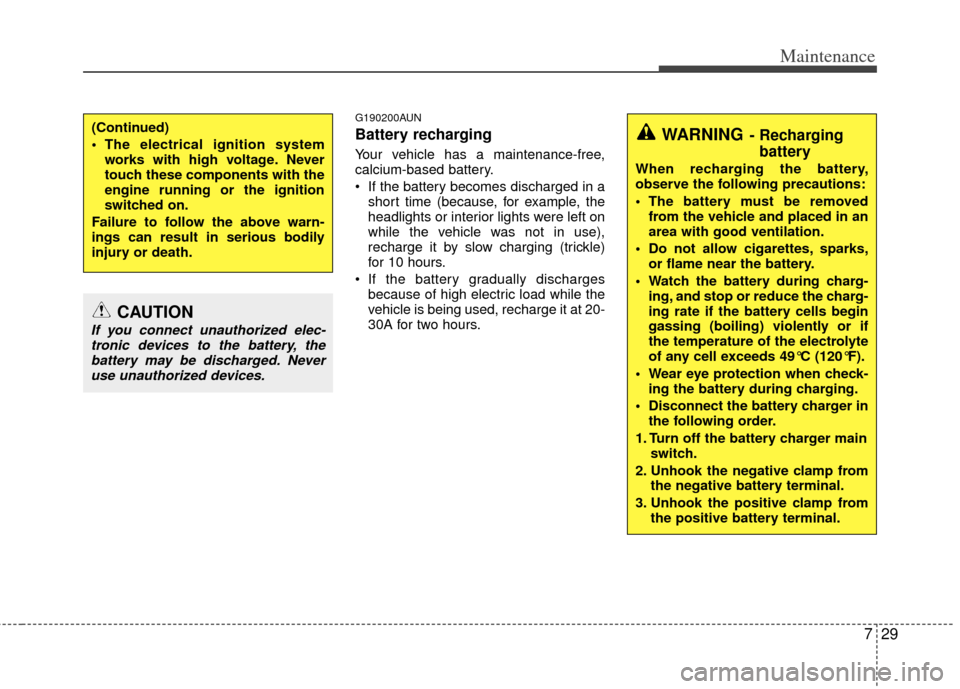
Battery recharging
Your vehicle has a maintenance-free,
calcium-based battery.
If the battery becomes discharged in ashort time (because, for example, the
headlights or interior lights were left on
while the vehicle was not in use),
recharge it by slow charging (trickle)
for 10 hours.
If the battery gradually discharges because of high electric load while the
vehicle is being used, recharge it at 20-
30A for two hours.
(Continued)
The electrical ignition systemworks with high voltage. Never
touch these components with the
engine running or the ignition
switched on.
Failure to follow the above warn-
ings can result in serious bodily
injury or death.WARNING- Recharging battery
When recharging the battery,
observe the following precautions:
The battery must be removed
from the vehicle and placed in an
area with good ventilation.
Do not allow cigarettes, sparks, or flame near the battery.
Watch the battery during charg- ing, and stop or reduce the charg-
ing rate if the battery cells begin
gassing (boiling) violently or if
the temperature of the electrolyte
of any cell exceeds 49°C (120°F).
Wear eye protection when check- ing the battery during charging.
Disconnect the battery charger in the following order.
1. Turn off the battery charger main switch.
2. Unhook the negative clamp from the negative battery terminal.
3. Unhook the positive clamp from the positive battery terminal.
CAUTION
If you connect unauthorized elec-tronic devices to the battery, thebattery may be discharged. Never use unauthorized devices.
Page 348 of 387
Maintenance
30
7
G190300AAM
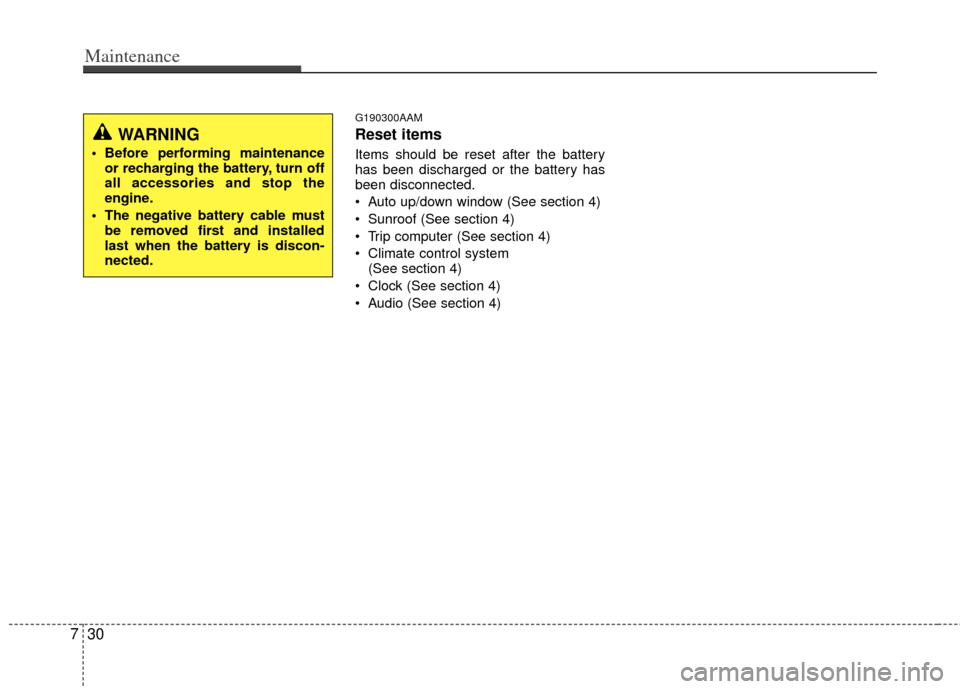
Reset items
Items should be reset after the battery
has been discharged or the battery has
been disconnected.
Auto up/down window (See section 4)
Sunroof (See section 4)
Trip computer (See section 4)
Climate control system
(See section 4)
Clock (See section 4)
Audio (See section 4)
WARNING
Before performing maintenance or recharging the battery, turn off
all accessories and stop the
engine.
The negative battery cable must be removed first and installed
last when the battery is discon-
nected.