lock KIA Sportage 2016 QL / 4.G User Guide
[x] Cancel search | Manufacturer: KIA, Model Year: 2016, Model line: Sportage, Model: KIA Sportage 2016 QL / 4.GPages: 501, PDF Size: 18.95 MB
Page 43 of 501
327
Safety features of your vehicle
C020106AUN
Seat belts - Front passenger andrear seat 3-point system withcombination locking retractor
To fasten your seat belt:
Combination retractor type seat belts
are installed in the rear seat positions
to help accommodate the installation
of child restraint systems. Although a
combination retractor is also installed
in the front passenger seat position, it
is strongly recommended that chil-
dren always be seated in the rear
seat. NEVER place any infant
restraint system in the front seat of
the vehicle.
This type of seat belt combines the
features of both an emergency lock-
ing retractor seat belt and an auto-
matic locking retractor seat belt. To
fasten your seat belt, pull it out of the
retractor and insert the metal tab into
the buckle. There will be an audible
"click" when the tab locks into the
buckle. When not securing a child
restraint, the seat belt operates in the
same way as the driver's seat belt
(Emergency Locking Retractor Type). It automatically adjusts to the proper
length only after the lap belt portion
of the seat belt is adjusted manually
so that it fits snugly around your hips.
When the seat belt is fully extended
from the retractor to allow the instal-
lation of a child restraint system, the
seat belt operation changes to allow
the belt to retract, but not to extend
(Automatic Locking Retractor Type).
Refer to “Using a child restraint sys-
tem” in this section.
✽ ✽
NOTICE
Although the combination retractor
provides the same level of protection
for seated passengers in either emer-
gency or automatic locking modes,
have the seated passengers use the
emergency locking feature for
improved convenience. The auto-
matic locking function is intended to
facilitate child restraint installation.
To convert from the automatic lock-
ing feature to the emergency locking
operation mode, allow the unbuck-
led seat belt to fully retract.
Do NOT fold down the left portion of
the rear seat back when the rear
center seat belt is buckled. ALWAYS
UNBUCKLE the rear center seat belt
before folding down the left portion of
the rear seat back. If the rear center
seat belt is buckled when the left por-
tion of the rear seat back is folded
down, distortion and damage to the
top portion of the seat back and seat
belt garnish may result, causing the
seat back to lock into the folded
down position.
Page 44 of 501
Safety features of your vehicle
28
3
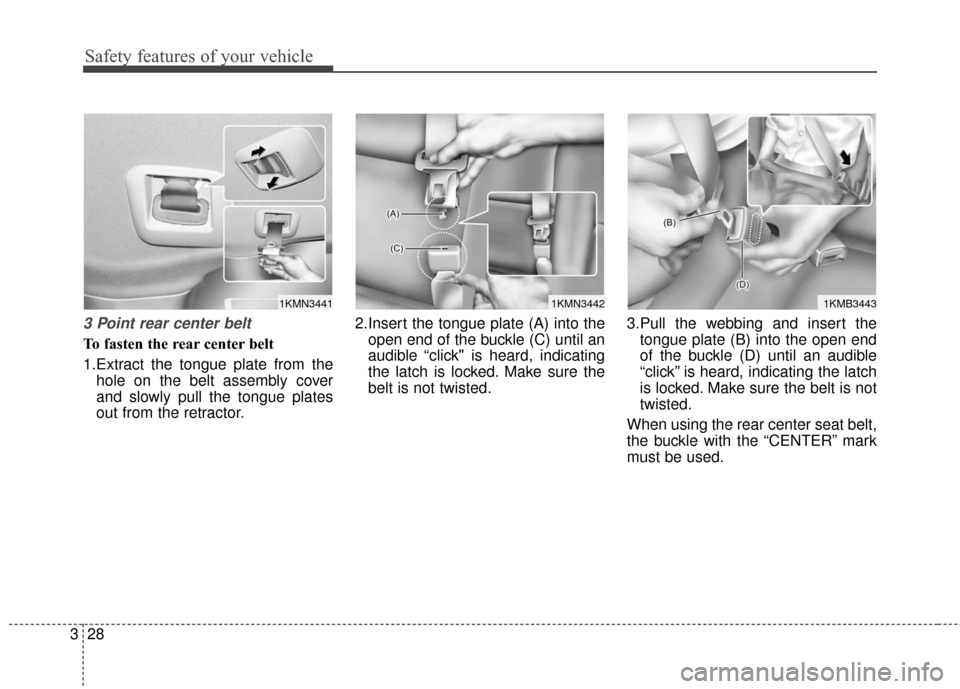
3 Point rear center belt
To fasten the rear center belt
1.Extract the tongue plate from the
hole on the belt assembly cover
and slowly pull the tongue plates
out from the retractor. 2.Insert the tongue plate (A) into the
open end of the buckle (C) until an
audible “click" is heard, indicating
the latch is locked. Make sure the
belt is not twisted. 3.Pull the webbing and insert the
tongue plate (B) into the open end
of the buckle (D) until an audible
“click” is heard, indicating the latch
is locked. Make sure the belt is not
twisted.
When using the rear center seat belt,
the buckle with the “CENTER” mark
must be used.
1KMN34411KMN34421KMB3443
Page 45 of 501
329
Safety features of your vehicle
There will be an audible “click” when
the tab locks in the buckle. The seat
belt automatically adjusts to the
proper length only after the lap belt is
adjusted manually so that it fits snug-
ly around your hips, if you lean for-
ward in a slow, easy motion, the belt
will extend and let you move around.
If there is a sudden stop or impact,
the belt will lock into position. It will
also lock if you try to lean forward too
quickly.
When using the rear seat center belt,
you must lock all tongue plates and
buckles.
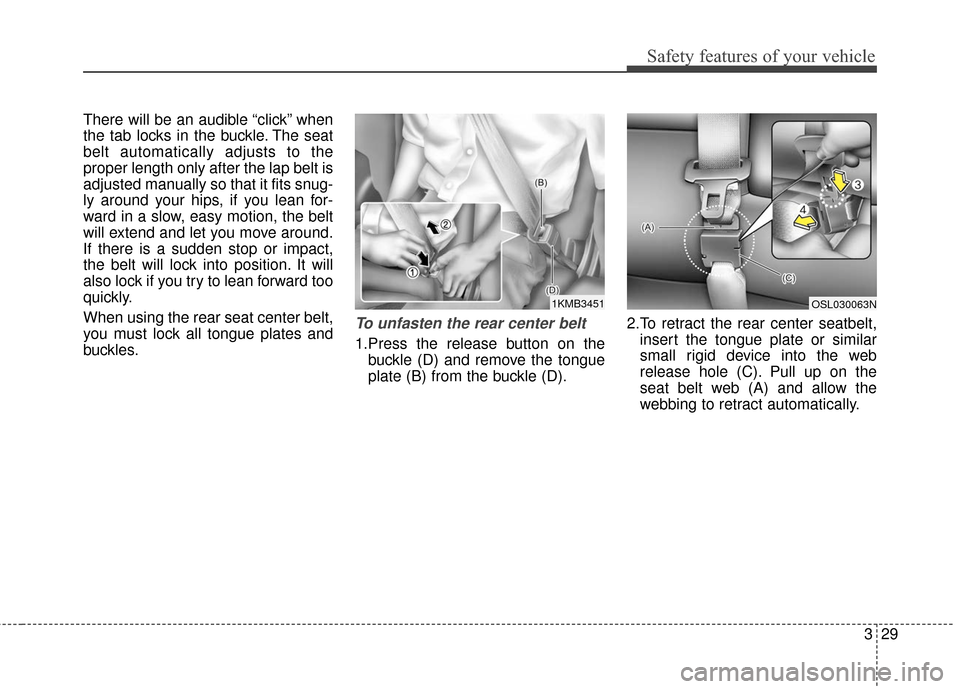
To unfasten the rear center belt
1.Press the release button on thebuckle (D) and remove the tongue
plate (B) from the buckle (D). 2.To retract the rear center seatbelt,
insert the tongue plate or similar
small rigid device into the web
release hole (C). Pull up on the
seat belt web (A) and allow the
webbing to retract automatically.
1KMB3451OSL030063N
Page 47 of 501
331
Safety features of your vehicle
C020200BHM-EU
Pre-tensioner seat belt
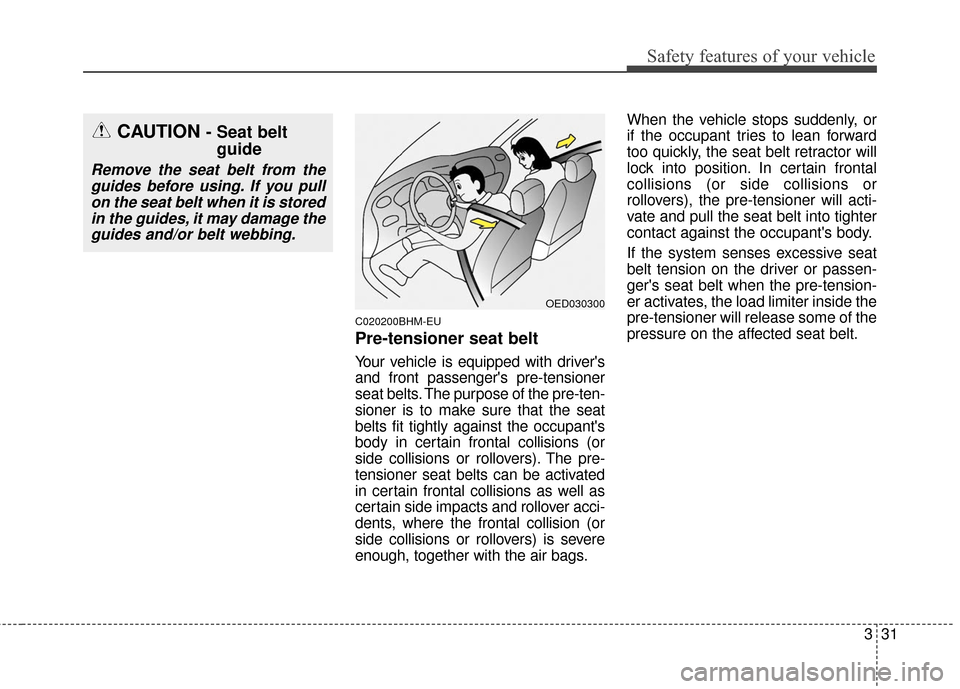
Your vehicle is equipped with driver's
and front passenger's pre-tensioner
seat belts. The purpose of the pre-ten-
sioner is to make sure that the seat
belts fit tightly against the occupant's
body in certain frontal collisions (or
side collisions or rollovers). The pre-
tensioner seat belts can be activated
in certain frontal collisions as well as
certain side impacts and rollover acci-
dents, where the frontal collision (or
side collisions or rollovers) is severe
enough, together with the air bags.When the vehicle stops suddenly, or
if the occupant tries to lean forward
too quickly, the seat belt retractor will
lock into position. In certain frontal
collisions (or side collisions or
rollovers), the pre-tensioner will acti-
vate and pull the seat belt into tighter
contact against the occupant's body.
If the system senses excessive seat
belt tension on the driver or passen-
ger's seat belt when the pre-tension-
er activates, the load limiter inside the
pre-tensioner will release some of the
pressure on the affected seat belt.
OED030300
CAUTION - Seat belt
guide
Remove the seat belt from the
guides before using. If you pullon the seat belt when it is storedin the guides, it may damage theguides and/or belt webbing.
Page 55 of 501
339
Safety features of your vehicle
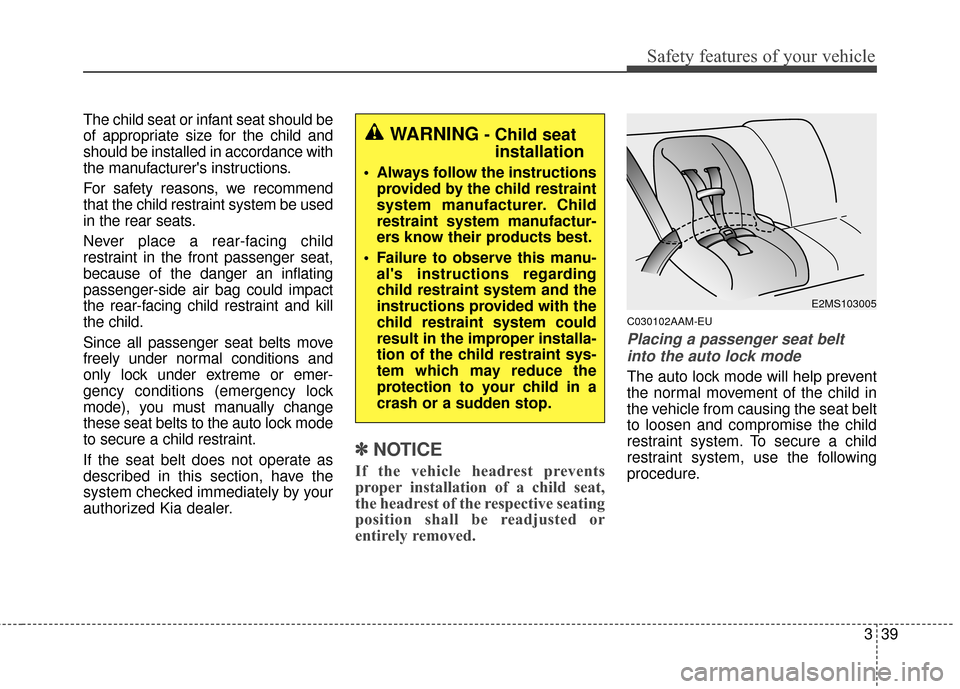
The child seat or infant seat should be
of appropriate size for the child and
should be installed in accordance with
the manufacturer's instructions.
For safety reasons, we recommend
that the child restraint system be used
in the rear seats.
Never place a rear-facing child
restraint in the front passenger seat,
because of the danger an inflating
passenger-side air bag could impact
the rear-facing child restraint and kill
the child.
Since all passenger seat belts move
freely under normal conditions and
only lock under extreme or emer-
gency conditions (emergency lock
mode), you must manually change
these seat belts to the auto lock mode
to secure a child restraint.
If the seat belt does not operate as
described in this section, have the
system checked immediately by your
authorized Kia dealer.
✽ ✽NOTICE
If the vehicle headrest prevents
proper installation of a child seat,
the headrest of the respective seating
position shall be readjusted or
entirely removed.
C030102AAM-EU
Placing a passenger seat belt
into the auto lock mode
The auto lock mode will help prevent
the normal movement of the child in
the vehicle from causing the seat belt
to loosen and compromise the child
restraint system. To secure a child
restraint system, use the following
procedure.
WARNING- Child seat installation
Always follow the instructions
provided by the child restraint
system manufacturer. Child
restraint system manufactur-
ers know their products best.
Failure to observe this manu- al's instructions regarding
child restraint system and the
instructions provided with the
child restraint system could
result in the improper installa-
tion of the child restraint sys-
tem which may reduce the
protection to your child in a
crash or a sudden stop.
E2MS103005
Page 56 of 501
Safety features of your vehicle
40
3
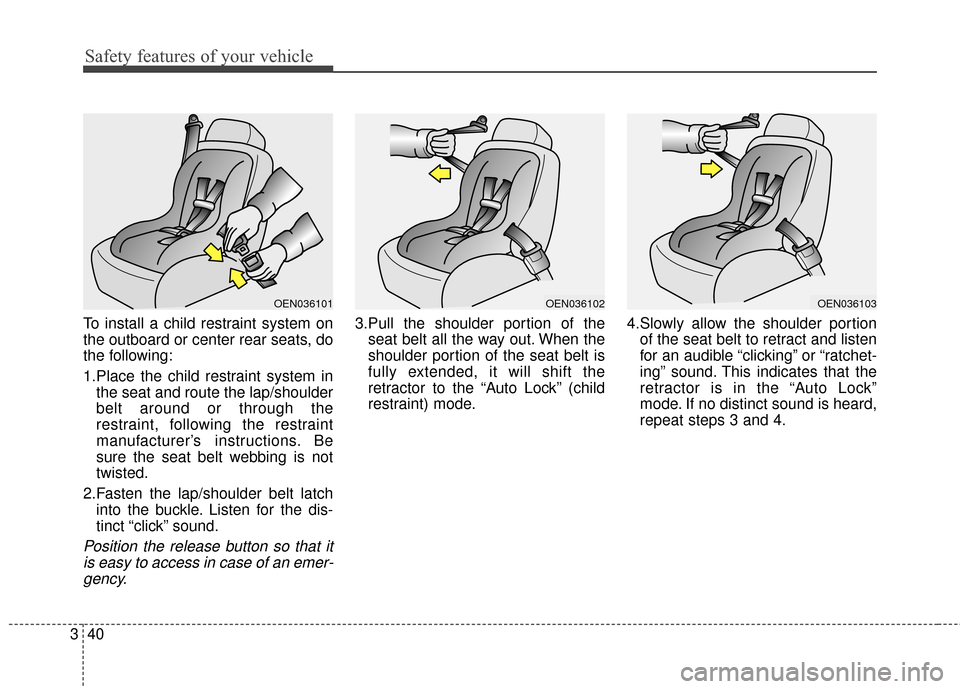
To install a child restraint system on
the outboard or center rear seats, do
the following:
1.Place the child restraint system in
the seat and route the lap/shoulder
belt around or through the
restraint, following the restraint
manufacturer’s instructions. Be
sure the seat belt webbing is not
twisted.
2.Fasten the lap/shoulder belt latch into the buckle. Listen for the dis-
tinct “click” sound.
Position the release button so that itis easy to access in case of an emer-gency.
3.Pull the shoulder portion of the seat belt all the way out. When the
shoulder portion of the seat belt is
fully extended, it will shift the
retractor to the “Auto Lock” (child
restraint) mode. 4.Slowly allow the shoulder portion
of the seat belt to retract and listen
for an audible “clicking” or “ratchet-
ing” sound. This indicates that the
retractor is in the “Auto Lock”
mode. If no distinct sound is heard,
repeat steps 3 and 4.
OEN036101OEN036102OEN036103
Page 57 of 501
341
Safety features of your vehicle
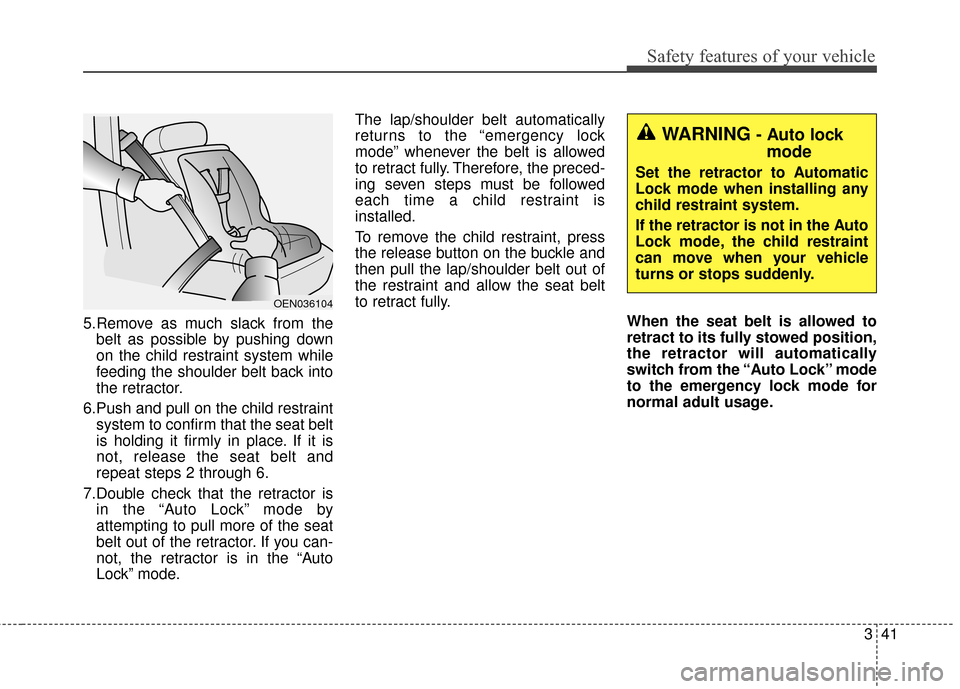
5.Remove as much slack from thebelt as possible by pushing down
on the child restraint system while
feeding the shoulder belt back into
the retractor.
6.Push and pull on the child restraint system to confirm that the seat belt
is holding it firmly in place. If it is
not, release the seat belt and
repeat steps 2 through 6.
7.Double check that the retractor is in the “Auto Lock” mode by
attempting to pull more of the seat
belt out of the retractor. If you can-
not, the retractor is in the “Auto
Lock” mode. The lap/shoulder belt automatically
returns to the “emergency lock
mode” whenever the belt is allowed
to retract fully. Therefore, the preced-
ing seven steps must be followed
each time a child restraint is
installed.
To remove the child restraint, press
the release button on the buckle and
then pull the lap/shoulder belt out of
the restraint and allow the seat belt
to retract fully.
When the seat belt is allowed to
retract to its fully stowed position,
the retractor will automatically
switch from the “Auto Lock” mode
to the emergency lock mode for
normal adult usage.
OEN036104
WARNING- Auto lockmode
Set the retractor to Automatic
Lock mode when installing any
child restraint system.
If the retractor is not in the Auto
Lock mode, the child restraint
can move when your vehicle
turns or stops suddenly.
Page 69 of 501
353
Safety features of your vehicle
If an air bag deploys, there may be aloud noise followed by a fine dust
released in the vehicle. These condi-
tions are normal and are non-toxic -
the air bags are packed in this fine
powder. The dust generated during
air bag deployment may cause skin
or eye irritation as well as aggravate
asthma for some persons. Always
wash all exposed skin areas thor-
oughly with lukewarm water and a
mild soap after an accident in which
the air bags were deployed.
The SRS can function only when the ignition switch is in the ON position.
If the SRS air bag warning light " "
does not illuminate, or continuously
remains on after illuminating for
about 6 seconds or blinks when the
ignition switch is turned to the ON
position, or after the engine is start-
ed, comes on while driving, the SRS
is not working properly. If this occurs,
have your vehicle immediately
inspected by an authorized Kia deal-
er.✽ ✽ NOTICE
Before you replace a fuse or discon-
nect a battery terminal, turn the igni-
tion switch to the LOCK position and
remove the ignition switch. Never
remove or replace the air bag related
fuse(s) when the ignition switch is in
the ON position. Failure to heed this
warning will cause the SRS air bag
warning light to illuminate.
C040300AAM
Occupant Detection System
(ODS)
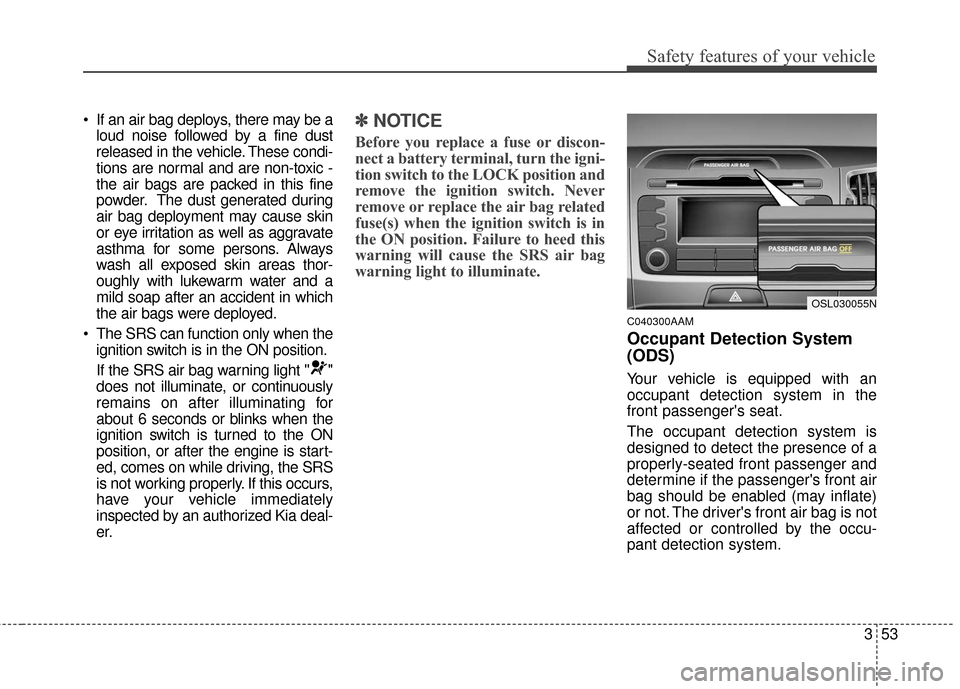
Your vehicle is equipped with an
occupant detection system in the
front passenger's seat.
The occupant detection system is
designed to detect the presence of a
properly-seated front passenger and
determine if the passenger's front air
bag should be enabled (may inflate)
or not. The driver's front air bag is not
affected or controlled by the occu-
pant detection system.
OSL030055N
Page 73 of 501
357
Safety features of your vehicle
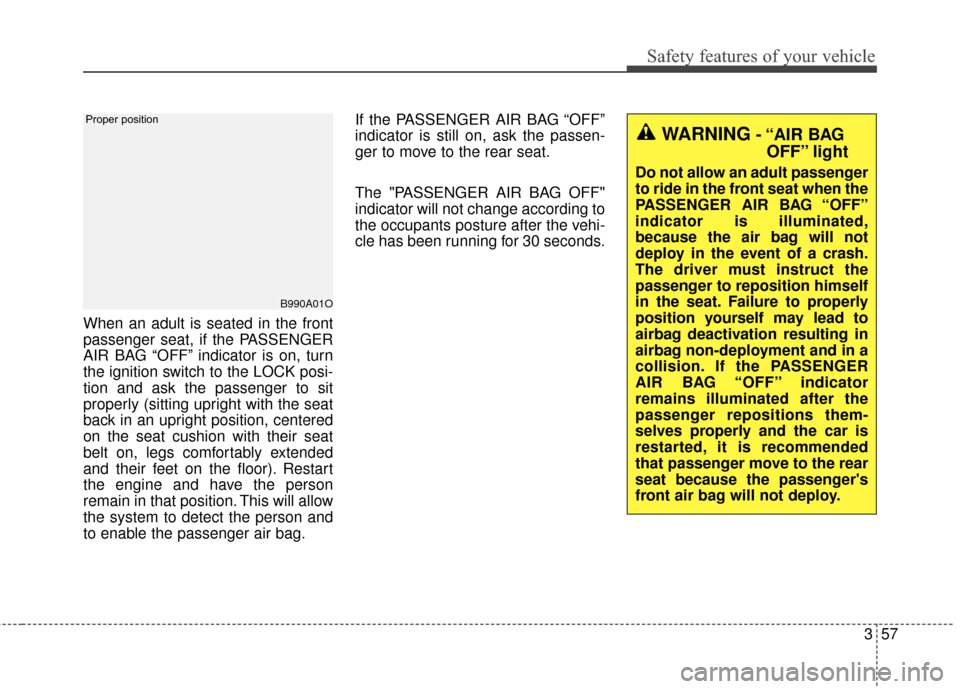
When an adult is seated in the front
passenger seat, if the PASSENGER
AIR BAG “OFF” indicator is on, turn
the ignition switch to the LOCK posi-
tion and ask the passenger to sit
properly (sitting upright with the seat
back in an upright position, centered
on the seat cushion with their seat
belt on, legs comfortably extended
and their feet on the floor). Restart
the engine and have the person
remain in that position. This will allow
the system to detect the person and
to enable the passenger air bag.If the PASSENGER AIR BAG “OFF”
indicator is still on, ask the passen-
ger to move to the rear seat.
The "PASSENGER AIR BAG OFF"
indicator will not change according to
the occupants posture after the vehi-
cle has been running for 30 seconds.
B990A01O
Proper position
WARNING- “AIR BAG
OFF” light
Do not allow an adult passenger
to ride in the front seat when the
PASSENGER AIR BAG “OFF”
indicator is illuminated,
because the air bag will not
deploy in the event of a crash.
The driver must instruct the
passenger to reposition himself
in the seat. Failure to properly
position yourself may lead to
airbag deactivation resulting in
airbag non-deployment and in a
collision. If the PASSENGER
AIR BAG “OFF” indicator
remains illuminated after the
passenger repositions them-
selves properly and the car is
restarted, it is recommended
that passenger move to the rear
seat because the passenger's
front air bag will not deploy.
Page 88 of 501

Features of your vehicle
Keys . . . . . . . . . . . . . . . . . . . . . . . . . . . . . . . . . . . . \
. . 4-3
• Record your key number . . . . . . . . . . . . . . . . . . . . . . . 4-3
. . . . . . . . . . . . . . . . . . . . . . . . . . . . . . . . 4-3
Remote keyless entry . . . . . . . . . . . . . . . . . . . . . . . . 4-7
. . . . . . . . . . . 4-7
. . . . . . . . . . . . . . . . . . . . . . . . 4-8
. . . . . . . . . . . . . . . . . . . . . . . . . . . 4-9
Smart key . . . . . . . . . . . . . . . . . . . . . . . . . . . . . . . . 4-11
. . . . . . . . . . . . . . . . . . . . . . . . . . 4-12
. . . . . . . . . . . . . . . . . . . . . . . . 4-13
. . . . . . . . . . . . . . . . . . . . . . . . . . 4-15
Theft-alarm system . . . . . . . . . . . . . . . . . . . . . . . . 4-17
Door locks . . . . . . . . . . . . . . . . . . . . . . . . . . . . . . . . 4-19
. . . . . . . . . . . . . . . . . . . . . . . . . . . 4-19
. . . . . . . . . . . . . . . . . . . . . . . . . . . . . 4-20
. . . . . . . . . . . . . . . . 4-22
. . . . . . . . . . . . . . . . . 4-22
Tailgate . . . . . . . . . . . . . . . . . . . . . . . . . . . . . . . . . . 4-24\
Windows . . . . . . . . . . . . . . . . . . . . . . . . . . . . . . . . . 4-27
Hood. . . . . . . . . . . . . . . . . . . . . . . . . . . . . . . . . . . . \
. 4-32
Fuel filler lid . . . . . . . . . . . . . . . . . . . . . . . . . . . . . . 4-34
Panoramic sunroof . . . . . . . . . . . . . . . . . . . . . . . . . 4-37Steering wheel . . . . . . . . . . . . . . . . . . . . . . . . . . . . . 4-41
. . . . . . . . . . . . . . . . 4-41
. . . . . . . . . . . . . . . . . . . . 4-42
. . . . . . . . . . . . . . . . . . . . . . . . . 4-43
. . . . . . . . . . . . . . . . . . . . . . . . . . . . . . . . . . . . \
. . . 4-44
. . . . . . . . . . . . . . . . . . . . . . . . . . . . . . . . . . . 4-\
45
Mirrors . . . . . . . . . . . . . . . . . . . . . . . . . . . . . . . . . . 4-47\
. . . . . . . . . . . . . . . . . . . . . . . . 4-47
. . . . . . . . . . . . . . . . . . . . . . . 4-54
Instrument cluster . . . . . . . . . . . . . . . . . . . . . . . . . . . . . 4-57
. . . . . . . . . . . . . . . . . . 4-58
. . . . . . . . . . . . . . . . . . . . . . . . . . . . . . . . . . . . \
. 4-58
. . . . . . . . . . . . . . . . . . . . . . . 4-65
Back up warning system . . . . . . . . . . . . . . . . . . . . 4-79
. . . . . . . . 4-79
system . . . . . . . . . . . . . . . . . . . . . . . . . . . . . . . . . . . . \
. 4-80
. . . . . . . . . . . . 4-81
. . . . . . . . . . . . . . . . . . . . . . . . . . . . . . . . 4-82
Rear camera display . . . . . . . . . . . . . . . . . . . . . . . 4-83
Hazard warning flasher . . . . . . . . . . . . . . . . . . . . . 4-84
4