parking brake KIA Sportage 2016 QL / 4.G Owner's Manual
[x] Cancel search | Manufacturer: KIA, Model Year: 2016, Model line: Sportage, Model: KIA Sportage 2016 QL / 4.GPages: 501, PDF Size: 18.95 MB
Page 15 of 501
25
Your vehicle at a glance
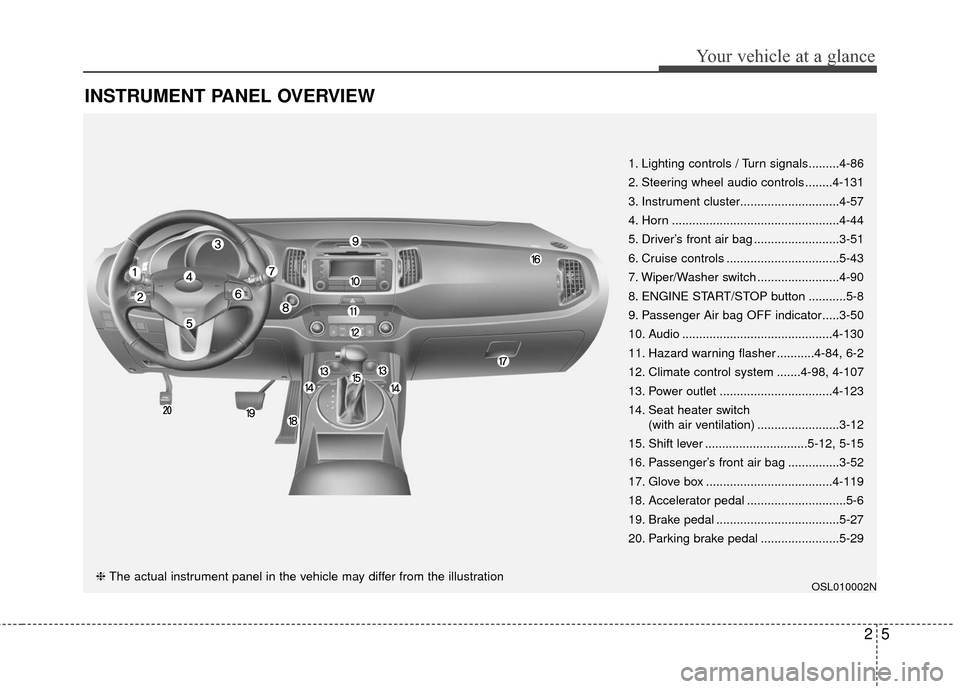
INSTRUMENT PANEL OVERVIEW
OSL010002N
1. Lighting controls / Turn signals.........4-86
2. Steering wheel audio controls ........4-131
3. Instrument cluster.............................4-57
4. Horn .................................................4-44
5. Driver’s front air bag .........................3-51
6. Cruise controls .................................5-43
7. Wiper/Washer switch ........................4-90
8. ENGINE START/STOP button ...........5-8
9. Passenger Air bag OFF indicator.....3-50
10. Audio ............................................4-130
11. Hazard warning flasher ...........4-84, 6-2
12. Climate control system .......4-98, 4-107
13. Power outlet .................................4-123
14. Seat heater switch(with air ventilation) ........................3-12
15. Shift lever ..............................5-12, 5-15
16. Passenger’s front air bag ...............3-52
17. Glove box .....................................4-119
18. Accelerator pedal .............................5-6
19. Brake pedal ....................................5-27
20. Parking brake pedal .......................5-29
❈ The actual instrument panel in the vehicle may differ from the illustration
Page 34 of 501
Safety features of your vehicle
18
3
Make sure the engine is off, the auto-
matic transaxle is in P (Park) or the
manual transaxle is in 1st, and the
parking brake is securely applied
whenever loading or unloading
cargo. Failure to take these steps
may allow the vehicle to move if the
shift lever is inadvertently moved to
another position.
C010303AHM
Headrest
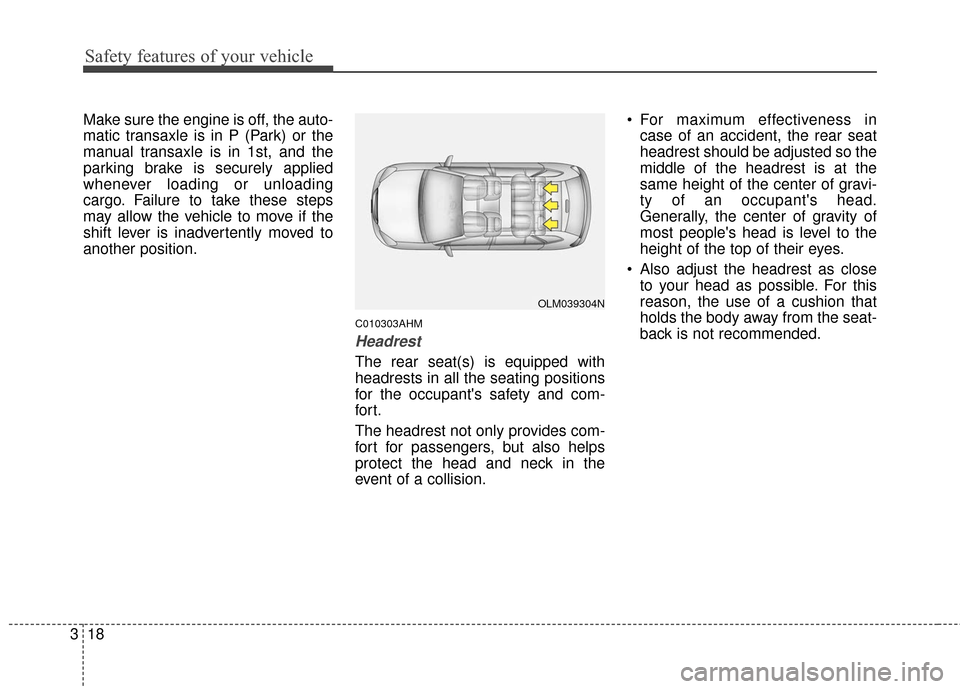
The rear seat(s) is equipped with
headrests in all the seating positions
for the occupant's safety and com-
for t.
The headrest not only provides com-
fort for passengers, but also helps
protect the head and neck in the
event of a collision. For maximum effectiveness in
case of an accident, the rear seat
headrest should be adjusted so the
middle of the headrest is at the
same height of the center of gravi-
ty of an occupant's head.
Generally, the center of gravity of
most people's head is level to the
height of the top of their eyes.
Also adjust the headrest as close to your head as possible. For this
reason, the use of a cushion that
holds the body away from the seat-
back is not recommended.
OLM039304N
Page 106 of 501
419
Features of your vehicle
D050100AAM-EU
Operating door locks from
outside the vehicle
Turn the key clockwise to unlockand counterclockwise to lock.
If you lock the driver’s door with a key, all vehicle doors will lock auto-
matically.
From the driver’s door, turn the key to the right once to unlock the door
and once more within 4 seconds to
unlock all doors. Doors can also be locked and
unlocked with the transmitter.
Once the doors are unlocked, they may be opened by pulling the door
handle.
When closing the door, push the door by hand. Make sure the doors
are closed securely.
✽ ✽ NOTICE
• In cold and wet climates, door lock
and door mechanisms may not
work properly due to freezing con-
ditions.
• If the door is locked/unlocked multiple times in rapid succession
with either the vehicle key or door
lock switch, the system may stop
operating temporarily in order to
protect the circuit and prevent
damage to system components.
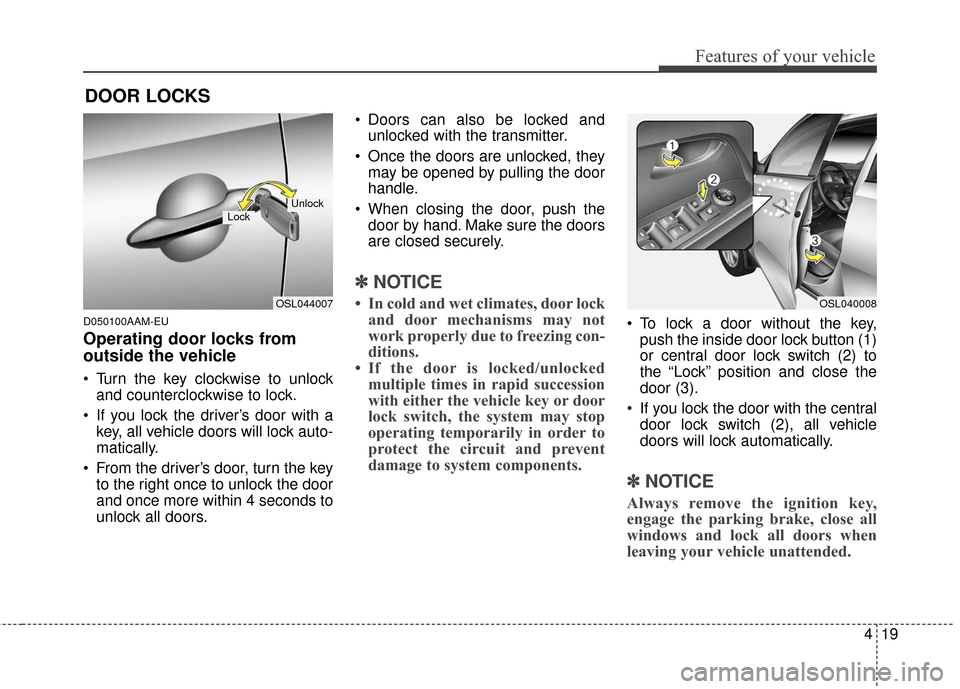
To lock a door without the key,
push the inside door lock button (1)
or central door lock switch (2) to
the “Lock” position and close the
door (3).
If you lock the door with the central door lock switch (2), all vehicle
doors will lock automatically.
✽ ✽ NOTICE
Always remove the ignition key,
engage the parking brake, close all
windows and lock all doors when
leaving your vehicle unattended.
DOOR LOCKS
OSL044007
LockUnlock
OSL040008
Page 119 of 501
Features of your vehicle
32
4
D090100AUN-U1
Opening the hood
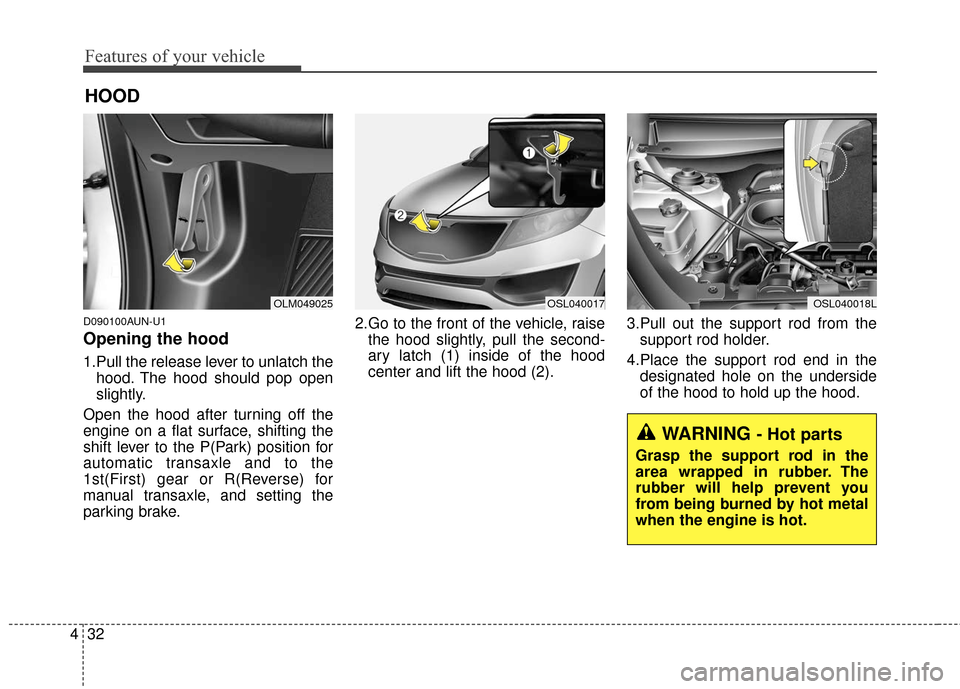
1.Pull the release lever to unlatch the
hood. The hood should pop open
slightly.
Open the hood after turning off the
engine on a flat surface, shifting the
shift lever to the P(Park) position for
automatic transaxle and to the
1st(First) gear or R(Reverse) for
manual transaxle, and setting the
parking brake. 2.Go to the front of the vehicle, raise
the hood slightly, pull the second-
ary latch (1) inside of the hood
center and lift the hood (2). 3.Pull out the support rod from the
support rod holder.
4.Place the support rod end in the designated hole on the underside
of the hood to hold up the hood.
HOOD
WARNING - Hot parts
Grasp the support rod in the
area wrapped in rubber. The
rubber will help prevent you
from being burned by hot metal
when the engine is hot.
OLM049025OSL040017OSL040018L
Page 156 of 501
469
Features of your vehicle
D150308AHM-EE
Parking brake & brakefluid warning light
Parking brake warning
This light is illuminated when the
parking brake is applied with the igni-
tion switch in the START or ON posi-
tion. The warning light should go off
after a few seconds when the park-
ing brake is released.
Low brake fluid level warning
If the warning light remains on, it may
indicate that the brake fluid level in
the reservoir is low.
If the warning light remains on:
1.Drive carefully to the nearest safe location and stop your vehicle.
2.With the engine stopped, check the brake fluid level immediately and
add fluid as required. Then check
all brake components for fluid
leaks. 3.Do not drive the vehicle if leaks are
found, the warning light remains on
or the brakes do not operate prop-
erly. Have the vehicle towed to any
authorized Kia dealer for a brake
system inspection and necessary
repairs.
Your vehicle is equipped with dual-
diagonal braking systems. This
means you still have braking on two
wheels even if one of the dual sys-
tems should fail. With only one of the
dual systems working, more than
normal pedal travel and greater
pedal pressure are required to stop
the vehicle. Also, the vehicle will not
stop in as short a distance with only
a portion of the brake system work-
ing. If the brakes fail while you are
driving, shift to a lower gear for addi-
tional engine braking and stop the
vehicle as soon as it is safe to do so.
To check bulb operation, check
whether the parking brake and brake
fluid warning light illuminates when
the ignition switch is in the ON posi-
tion.
CAUTION- Engine dam- age
If the engine is not stopped
immediately after the engine oilpressure warning light is illumi-nated and stays on while theengine is running, seriousengine damage may result.
Page 157 of 501
Features of your vehicle
70
4
D150312AAM
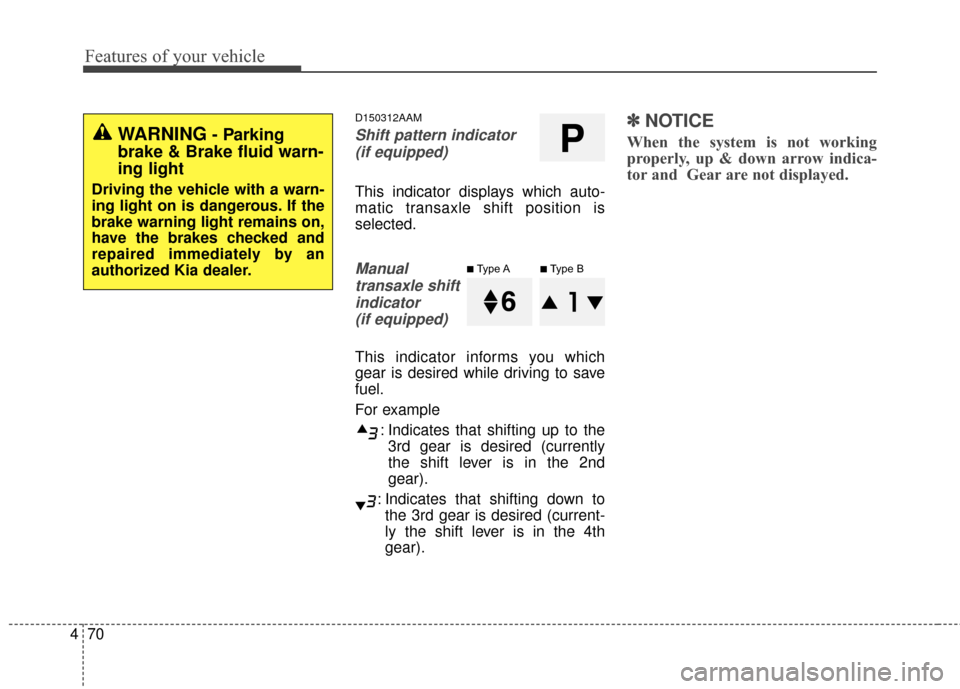
Shift pattern indicator
(if equipped)
This indicator displays which auto-
matic transaxle shift position is
selected.
Manualtransaxle shiftindicator (if equipped)
This indicator informs you which
gear is desired while driving to save
fuel.
For example
: Indicates that shifting up to the3rd gear is desired (currently
the shift lever is in the 2nd
gear).
: Indicates that shifting down to the 3rd gear is desired (current-
ly the shift lever is in the 4th
gear).
✽ ✽ NOTICE
When the system is not working
properly, up & down arrow indica-
tor and Gear are not displayed.WARNING- Parking
brake & Brake fluid warn-
ing light
Driving the vehicle with a warn-
ing light on is dangerous. If the
brake warning light remains on,
have the brakes checked and
repaired immediately by an
authorized Kia dealer.
P
■Type A■Type B
Page 167 of 501
Features of your vehicle
80
4
This system will activate when the
indicator on the rear parking assist
OFF button is not illuminated. If
you desire to deactivate the Back
up warning system, press the rear
parking assist OFF button. (The
indicator on the button will illumi-
nate.) To turn the system on, press
the button again. (The indicator on
the button will go off.)
The sensing distance while the Back up warning system is in oper-
ation is approximately 120 cm (47
in.).
When more than two objects are sensed at the same time, the clos-
est one will be recognized first.Types of warning sound
When an object is 120 cm to 81 cm(47 in. to 32 in.) from the rear
bumper: Buzzer beeps intermit-
tently.
When an object is 80 cm to 41 cm (31 in. to 16 in.) from the rear
bumper: Buzzer beeps more fre-
quently.
When an object is within 40 cm (15 in.) of the rear bumper:
Buzzer sounds continuously.
Non-operational conditions of
Back up warning system
The Back up warning system may
not operate properly when:
1.Moisture is frozen to the sensor. (Itwill operate normally when the
moisture has been cleared.)
2.The sensor is covered with foreign matter, such as snow or water, or
the sensor cover is blocked. (It will
operate normally when the materi-
al is removed or the sensor is no
longer blocked.)
3.Driving on uneven road surfaces (unpaved roads, gravel, bumps,
gradient).
4.Objects generating excessive noise (vehicle horns, loud motorcy-
cle engines, or truck air brakes) are
within range of the sensor.
5.Heavy rain or water spray exists.
6.Wireless transmitters or mobile phones are within range of the
sensor.
7.The sensor is covered with snow.
8.Trailer towing
Page 176 of 501
489
Features of your vehicle
To signal a lane change, move the
turn signal lever slightly and hold it in
position (B). The lever will return to
the OFF position when released.
If an indicator stays on and does not
flash or if it flashes abnormally, one
of the turn signal bulbs may be
burned out and will require replace-
ment.
One-touch lane change function (if equipped)
To activate an one-touch lane
change function, move the turn sig-
nal lever slightly for less than 1.5
second and then release it. The lane
change signals will blink 3 times.
✽ ✽ NOTICE
If an indicator flash is abnormally
quick or slow, a bulb may be burned
out or have a poor electrical connec-
tion in the circuit.
D190700AAM-EU
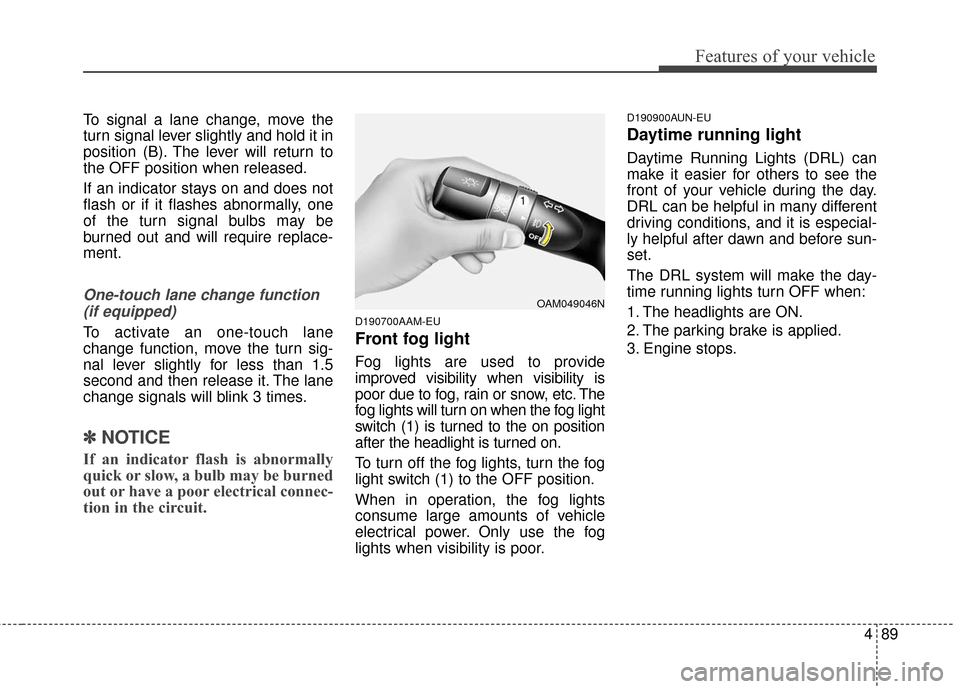
Front fog light
Fog lights are used to provide
improved visibility when visibility is
poor due to fog, rain or snow, etc. The
fog lights will turn on when the fog light
switch (1) is turned to the on position
after the headlight is turned on.
To turn off the fog lights, turn the fog
light switch (1) to the OFF position.
When in operation, the fog lights
consume large amounts of vehicle
electrical power. Only use the fog
lights when visibility is poor.
D190900AUN-EU
Daytime running light
Daytime Running Lights (DRL) can
make it easier for others to see the
front of your vehicle during the day.
DRL can be helpful in many different
driving conditions, and it is especial-
ly helpful after dawn and before sun-
set.
The DRL system will make the day-
time running lights turn OFF when:
1. The headlights are ON.
2. The parking brake is applied.
3. Engine stops.
OAM049046N
Page 328 of 501
53
Driving your vehicle
E020100AUN
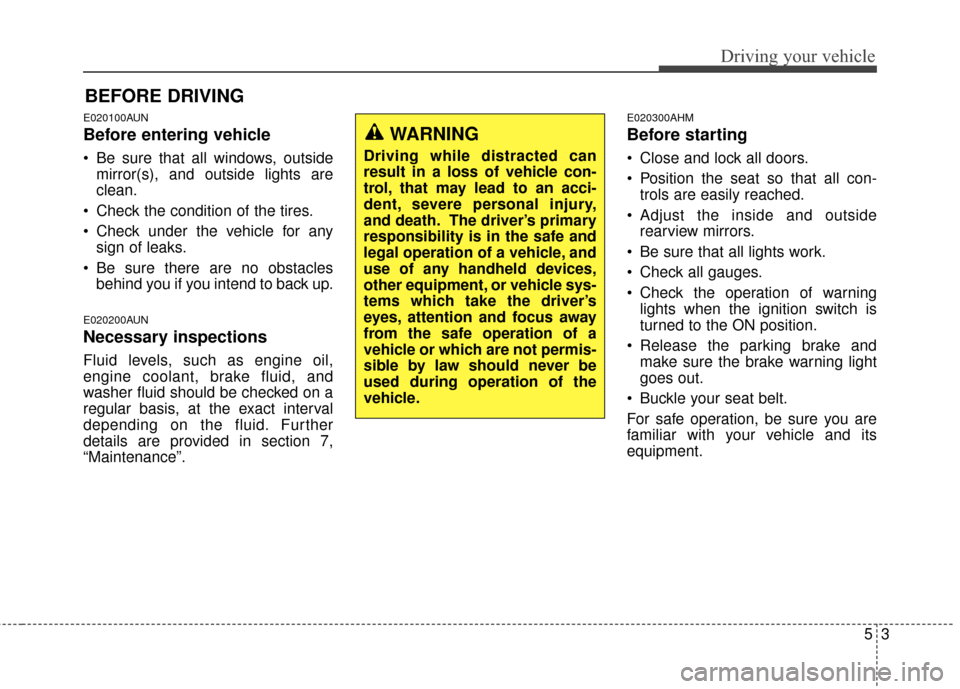
Before entering vehicle
• Be sure that all windows, outsidemirror(s), and outside lights are
clean.
Check the condition of the tires.
Check under the vehicle for any sign of leaks.
Be sure there are no obstacles behind you if you intend to back up.
E020200AUN
Necessary inspections
Fluid levels, such as engine oil,
engine coolant, brake fluid, and
washer fluid should be checked on a
regular basis, at the exact interval
depending on the fluid. Further
details are provided in section 7,
“Maintenance”.
E020300AHM
Before starting
Close and lock all doors.
Position the seat so that all con-trols are easily reached.
Adjust the inside and outside rearview mirrors.
Be sure that all lights work.
Check all gauges.
Check the operation of warning lights when the ignition switch is
turned to the ON position.
Release the parking brake and make sure the brake warning light
goes out.
Buckle your seat belt.
For safe operation, be sure you are
familiar with your vehicle and its
equipment.
BEFORE DRIVING
WARNING
Driving while distracted can
result in a loss of vehicle con-
trol, that may lead to an acci-
dent, severe personal injury,
and death. The driver’s primary
responsibility is in the safe and
legal operation of a vehicle, and
use of any handheld devices,
other equipment, or vehicle sys-
tems which take the driver’s
eyes, attention and focus away
from the safe operation of a
vehicle or which are not permis-
sible by law should never be
used during operation of the
vehicle.
Page 331 of 501
Driving your vehicle
65
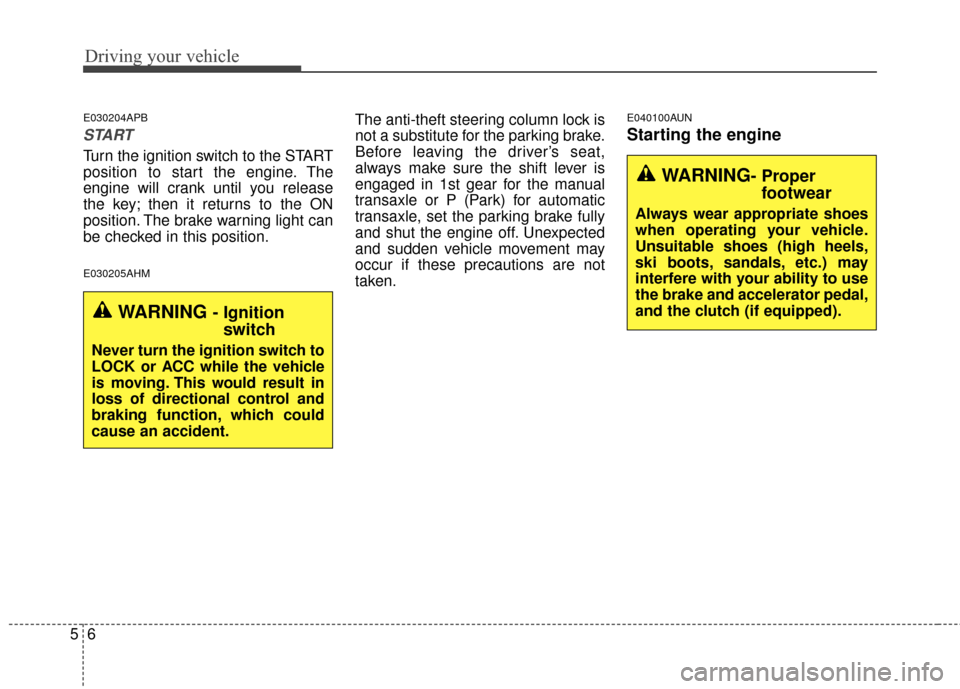
E030204APB
START
Turn the ignition switch to the START
position to start the engine. The
engine will crank until you release
the key; then it returns to the ON
position. The brake warning light can
be checked in this position.
E030205AHM
The anti-theft steering column lock is
not a substitute for the parking brake.
Before leaving the driver’s seat,
always make sure the shift lever is
engaged in 1st gear for the manual
transaxle or P (Park) for automatic
transaxle, set the parking brake fully
and shut the engine off. Unexpected
and sudden vehicle movement may
occur if these precautions are not
taken.E040100AUN
Starting the engine
WARNING - Ignitionswitch
Never turn the ignition switch to
LOCK or ACC while the vehicle
is moving. This would result in
loss of directional control and
braking function, which could
cause an accident.
WARNING- Proper footwear
Always wear appropriate shoes
when operating your vehicle.
Unsuitable shoes (high heels,
ski boots, sandals, etc.) may
interfere with your ability to use
the brake and accelerator pedal,
and the clutch (if equipped).