display KIA Sportage 2017 QL / 4.G Owner's Manual
[x] Cancel search | Manufacturer: KIA, Model Year: 2017, Model line: Sportage, Model: KIA Sportage 2017 QL / 4.GPages: 595, PDF Size: 16.22 MB
Page 87 of 595
Steering wheel . . . . . . . . . . . . . . . . . . . . . . . . . . . . . 4-54
• Electronic power steering (EPS) . . . . . . . . . . . . . . . . 4-54
• Tilt and telescopic steering . . . . . . . . . . . . . . . . . . . . 4-55
• Heated steering wheel . . . . . . . . . . . . . . . . . . . . . . . . . 4-56
• Horn . . . . . . . . . . . . . . . . . . . . . . . . . . . . . . . . . . . . \
. . . 4-57
Mirrors . . . . . . . . . . . . . . . . . . . . . . . . . . . . . . . . . . 4-58\
• Inside rearview mirror . . . . . . . . . . . . . . . . . . . . . . . . 4-58
• Outside rearview mirror . . . . . . . . . . . . . . . . . . . . . . 4-65
Instrument cluster . . . . . . . . . . . . . . . . . . . . . . . . . 4-69
• Instrument Cluster Control . . . . . . . . . . . . . . . . . . . . 4-70
• LCD Display Control . . . . . . . . . . . . . . . . . . . . . . . . . 4-70
• Gauges . . . . . . . . . . . . . . . . . . . . . . . . . . . . . . . . . . . . \
. 4-71
• Transaxle Shift Indicator . . . . . . . . . . . . . . . . . . . . . . 4-74
LCD Display . . . . . . . . . . . . . . . . . . . . . . . . . . . . . . 4-75
• LCD Modes . . . . . . . . . . . . . . . . . . . . . . . . . . . . . . . . . 4-75
• Service Mode . . . . . . . . . . . . . . . . . . . . . . . . . . . . . . . . 4-76
• User Settings Mode . . . . . . . . . . . . . . . . . . . . . . . . . . . 4-78
Trip modes (Trip computer) . . . . . . . . . . . . . . . . . 4-84
• Trip Modes . . . . . . . . . . . . . . . . . . . . . . . . . . . . . . . . . . 4-84\
• Fuel Economy . . . . . . . . . . . . . . . . . . . . . . . . . . . . . . . 4-84
• Trip A/B . . . . . . . . . . . . . . . . . . . . . . . . . . . . . . . . . . . . \
4-86
• Digital speedometer . . . . . . . . . . . . . . . . . . . . . . . . . . . 4-87
• One time driving information mode . . . . . . . . . . . . . 4-87
• Turn By Turn Mode . . . . . . . . . . . . . . . . . . . . . . . . . . 4-88• LDWS Mode . . . . . . . . . . . . . . . . . . . . . . . . . . . . . . . . 4-88
• A/V Mode . . . . . . . . . . . . . . . . . . . . . . . . . . . . . . . . . . . 4-\
88
• Warning Messages . . . . . . . . . . . . . . . . . . . . . . . . . . . . 4-89
Warning and indicator lights . . . . . . . . . . . . . . . . 4-97
• Warning lights . . . . . . . . . . . . . . . . . . . . . . . . . . . . . . . 4-97
• Indicator Lights . . . . . . . . . . . . . . . . . . . . . . . . . . . . . 4-104
Rear parking assist system . . . . . . . . . . . . . . . . . 4-109
• Operation of the rear parking assist system . . . . . . 4-109
• Non-operational conditions of
rear parking assist system . . . . . . . . . . . . . . . . . . . 4-110
• Rear parking assist system precautions . . . . . . . . . 4-111
• Self-diagnosis . . . . . . . . . . . . . . . . . . . . . . . . . . . . . . . 4-112
Parking assist system . . . . . . . . . . . . . . . . . . . . . . 4-113
• Operation of the parking assist system . . . . . . . . . . 4-113
• Non-operational conditions of parking assist system. . 4-115
• Self-diagnosis . . . . . . . . . . . . . . . . . . . . . . . . . . . . . . . 4-117
Rearview camera . . . . . . . . . . . . . . . . . . . . . . . . . 4-118
Lighting . . . . . . . . . . . . . . . . . . . . . . . . . . . . . . . . . 4-119
• Battery saver function . . . . . . . . . . . . . . . . . . . . . . . . 4-119
• Daytime running light . . . . . . . . . . . . . . . . . . . . . . . . 4-119
• Lighting control . . . . . . . . . . . . . . . . . . . . . . . . . . . . . 4-119
• High beam operation. . . . . . . . . . . . . . . . . . . . . . . . . 4-121
• High Beam Assist . . . . . . . . . . . . . . . . . . . . . . . . . . . . 4-122
4
Page 119 of 595
Features of your vehicle
34
4
How to use the Smart Power
Liftgate
The liftgate can be opened with no-
touch activation satisfying all the
conditions below.
After 15 seconds when all doors are closed and locked
Positioned in the detecting area for more than 3 seconds.
✽ ✽ NOTICE
• The Smart Power Liftgate does
not operate when:
- The smart key is detected within15 seconds after the doors are
closed and locked, and is contin-
uously detected.
- The smart key is detected within 15 seconds after the doors are
closed and locked, and within 1.5
m (60 inches) from the front door
handles. (for vehicles equipped
with Welcome Light)
- A door is not locked or closed.
- The smart key is in the vehicle.
1. Setting
To activate the Smart Power Liftgate,
go to User Settings Mode and select
Smart Power Liftgate on the LCD
display.
For more information, refer to the
"LCD Display" section in this
chapter.
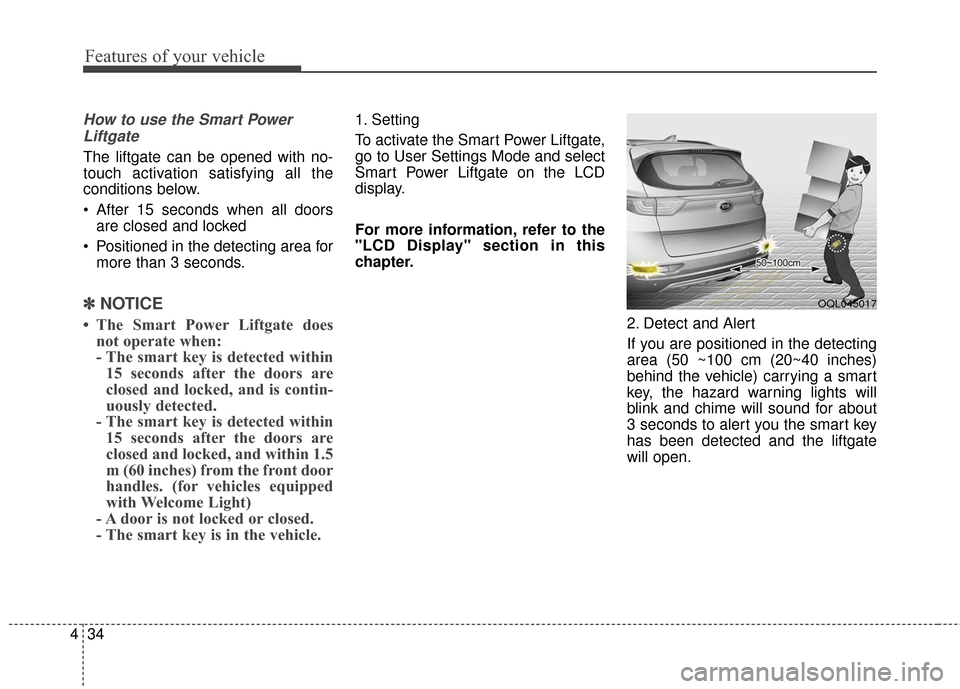
2. Detect and Alert
If you are positioned in the detecting
area (50 ~100 cm (20~40 inches)
behind the vehicle) carrying a smart
key, the hazard warning lights will
blink and chime will sound for about
3 seconds to alert you the smart key
has been detected and the liftgate
will open.
OQL045017
Page 134 of 595
449
Features of your vehicle
Sunroof open warning
(if equipped)
If the driver removes the ignition key
(smart key: turns off the engine)
when the sunroof is not fully closed,
the warning chime will sound for a
few seconds and a message will
appear on the LCD display or the
warning indicator will illuminate.
Close the sunroof securely when
leaving your vehicle.
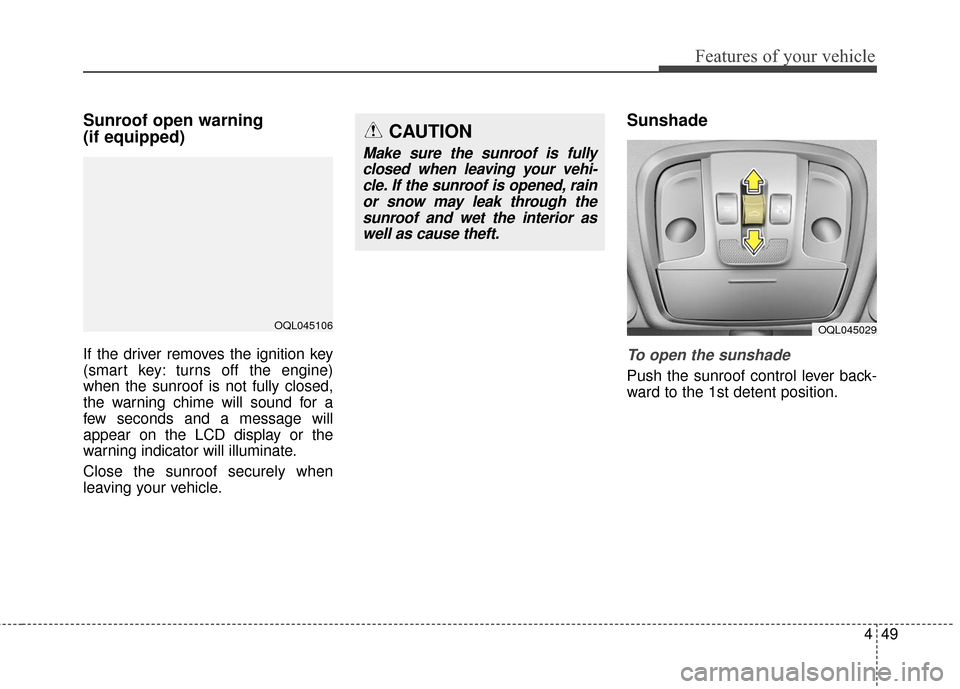
Sunshade
To open the sunshade
Push the sunroof control lever back-
ward to the 1st detent position.
CAUTION
Make sure the sunroof is fullyclosed when leaving your vehi-cle. If the sunroof is opened, rainor snow may leak through thesunroof and wet the interior aswell as cause theft.
OQL045106OQL045029
Page 154 of 595
469
Features of your vehicle
INSTRUMENT CLUSTER
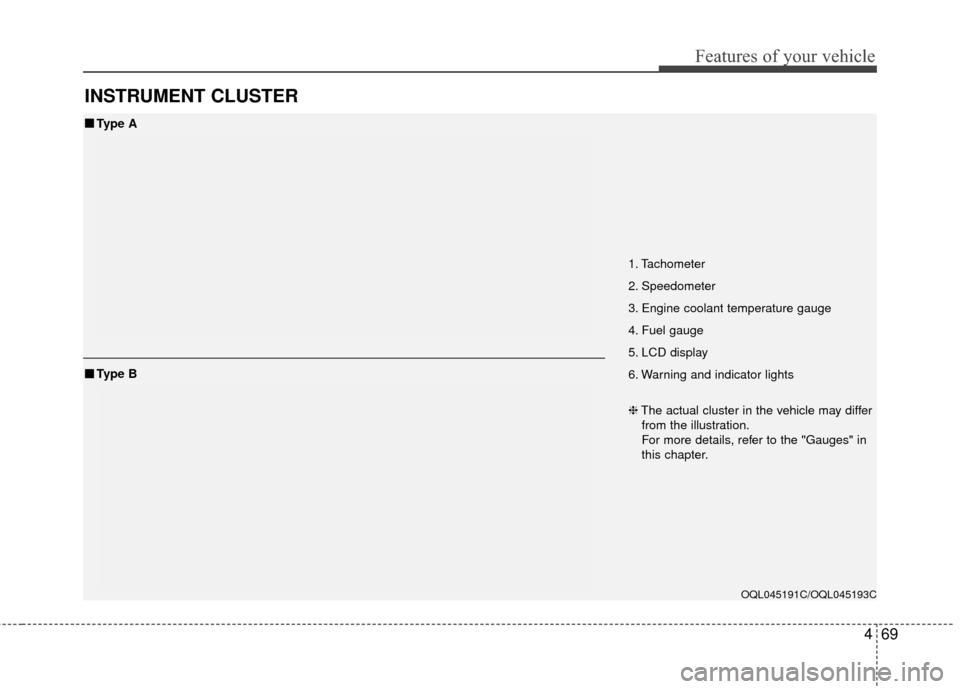
1. Tachometer
2. Speedometer
3. Engine coolant temperature gauge
4. Fuel gauge
5. LCD display
6. Warning and indicator lights
OQL045191C/OQL045193C
■ ■Type A
❈The actual cluster in the vehicle may differ
from the illustration.
For more details, refer to the "Gauges" in
this chapter.
■ ■ Type B
Page 155 of 595
Features of your vehicle
70
4
Instrument Cluster Control
Adjusting Instrument Cluster
Illumination
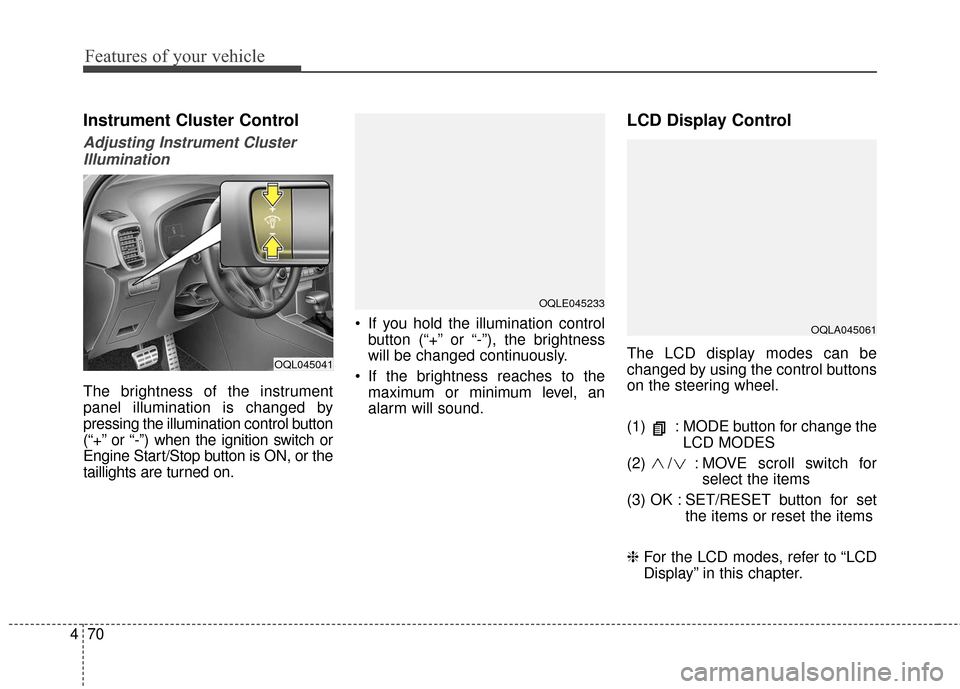
The brightness of the instrument
panel illumination is changed by
pressing the illumination control button
(“+” or “-”) when the ignition switch or
Engine Start/Stop button is ON, or the
taillights are turned on. If you hold the illumination control
button (“+” or “-”), the brightness
will be changed continuously.
If the brightness reaches to the maximum or minimum level, an
alarm will sound.
LCD Display Control
The LCD display modes can be
changed by using the control buttons
on the steering wheel.
(1) : MODE button for change the LCD MODES
(2) / : MOVE scroll switch for select the items
(3) OK : SET/RESET button for set the items or reset the items
❈ For the LCD modes, refer to “LCD
Display” in this chapter.OQL045041
OQLA045061
OQLE045233
Page 157 of 595
Features of your vehicle
72
4
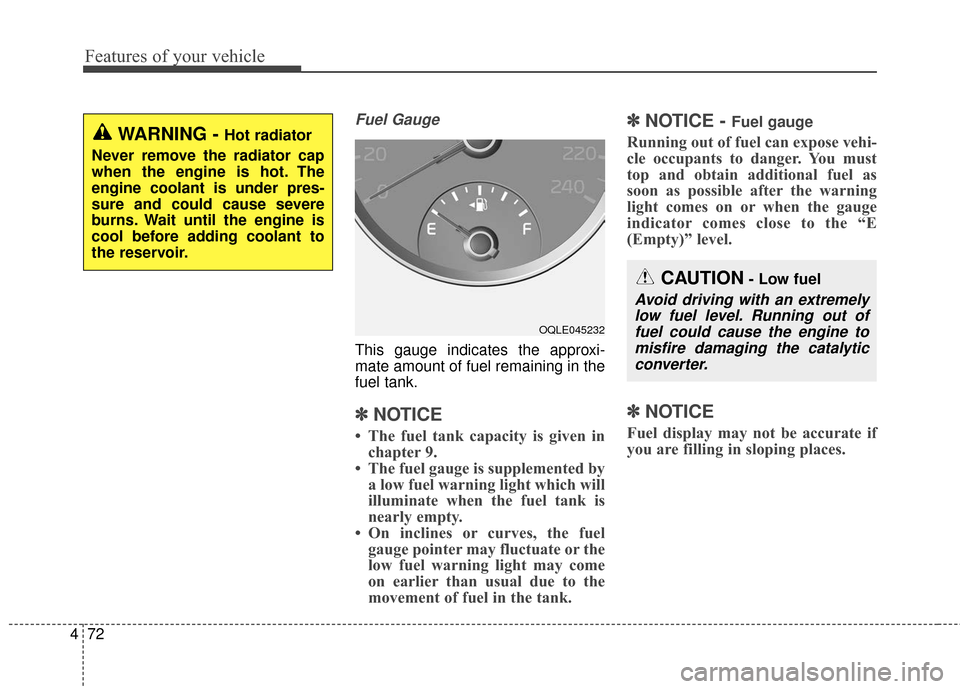
Fuel Gauge
This gauge indicates the approxi-
mate amount of fuel remaining in the
fuel tank.
✽ ✽
NOTICE
• The fuel tank capacity is given in
chapter 9.
• The fuel gauge is supplemented by a low fuel warning light which will
illuminate when the fuel tank is
nearly empty.
• On inclines or curves, the fuel gauge pointer may fluctuate or the
low fuel warning light may come
on earlier than usual due to the
movement of fuel in the tank.
✽ ✽ NOTICE - Fuel gauge
Running out of fuel can expose vehi-
cle occupants to danger. You must
top and obtain additional fuel as
soon as possible after the warning
light comes on or when the gauge
indicator comes close to the “E
(Empty)” level.
✽ ✽NOTICE
Fuel display may not be accurate if
you are filling in sloping places.
WARNING - Hot radiator
Never remove the radiator cap
when the engine is hot. The
engine coolant is under pres-
sure and could cause severe
burns. Wait until the engine is
cool before adding coolant to
the reservoir.
OQLE045232
CAUTION- Low fuel
Avoid driving with an extremely low fuel level. Running out offuel could cause the engine tomisfire damaging the catalyticconverter.
Page 158 of 595
473
Features of your vehicle
Odometer
The odometer Indicates the total dis-
tance that the vehicle has been driv-
en and should be used to determine
when periodic maintenance should
be performed.
- Odometer range : 0 ~ 1,599,999 kmor 999,999 miles.
Outside Temperature Gauge
This gauge indicates the current out-
side air temperatures by 1°C (1°F).
- Temperature range : -40°C ~ 85°C (-40°F ~ 185°F)
The outside temperature on the dis-
play may not change immediately
like a general thermometer to pre-
vent the driver from being distracted. To change the temperature unit (from
°F to °C or from °C to °F) :
The temperature unit can be
changed by using the "User
Settings" mode of the LCD display.
❈
For more details, refer to “LCD
Display” in this chapter.
OQL045108OQL045109
Page 159 of 595
Features of your vehicle
74
4
Transaxle Shift Indicator
Automatic Transaxle Shift Indicator
This indicator displays which auto-
matic transaxle shift lever is selected.
Reverse : R
Neutral : N
Sports Mode : 1, 2, 3, 4, 5, 6
OJF045138
Page 160 of 595
475
Features of your vehicle
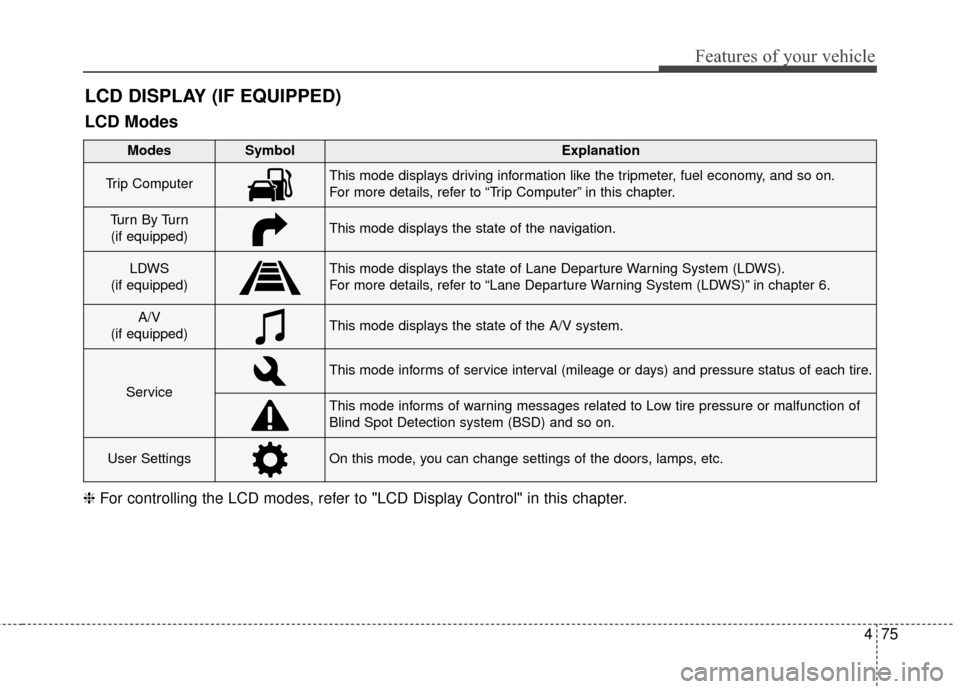
LCD DISPLAY (IF EQUIPPED)
❈For controlling the LCD modes, refer to "LCD Display Control" in this chapter.
LCD Modes
Modes SymbolExplanation
Trip ComputerThis mode displays driving information like the tripmeter, fuel economy, and so on.
For more details, refer to “Trip Computer” in this chapter.
Tu r n B y Tu r n
(if equipped)This mode displays the state of the navigation.
LDWS
(if equipped)This mode displays the state of Lane Departure Warning System (LDWS).
For more details, refer to “Lane Departure Warning System (LDWS)” in chapter 6.
A/V
(if equipped)This mode displays the state of the A/V system.
Service
This mode informs of service interval (mileage or days) and pressure status of each tire.
This mode informs of warning messages related to Low tire pressure or malfunction of
Blind Spot Detection system (BSD) and so on.
User SettingsOn this mode, you can change settings of the doors, lamps, etc.
Page 161 of 595
Features of your vehicle
76
4
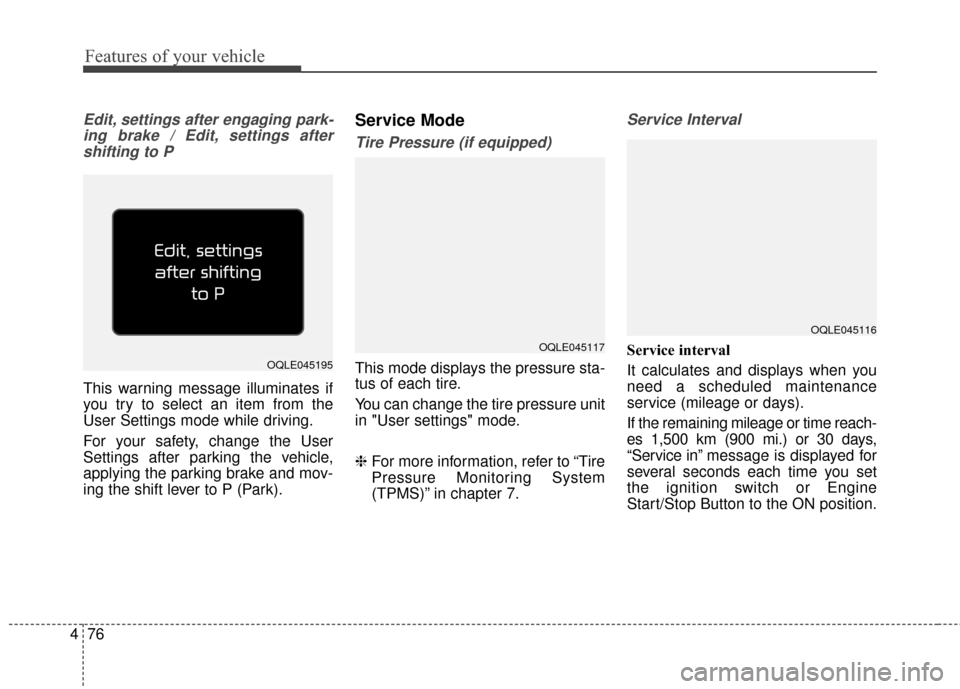
Edit, settings after engaging park-
ing brake / Edit, settings aftershifting to P
This warning message illuminates if
you try to select an item from the
User Settings mode while driving.
For your safety, change the User
Settings after parking the vehicle,
applying the parking brake and mov-
ing the shift lever to P (Park).
Service Mode
Tire Pressure (if equipped)
This mode displays the pressure sta-
tus of each tire.
You can change the tire pressure unit
in "User settings" mode.
❈ For more information, refer to “Tire
Pressure Monitoring System
(TPMS)” in chapter 7.
Service Interval
Service interval
It calculates and displays when you
need a scheduled maintenance
service (mileage or days).
If the remaining mileage or time reach-
es 1,500 km (900 mi.) or 30 days,
“Service in” message is displayed for
several seconds each time you set
the ignition switch or Engine
Start/Stop Button to the ON position.
OQLE045116
OQLE045195
OQLE045117