KIA SPORTAGE 2019 Owners Manual
Manufacturer: KIA, Model Year: 2019, Model line: SPORTAGE, Model: KIA SPORTAGE 2019Pages: 607, PDF Size: 16.97 MB
Page 141 of 607
Features of your vehicle
54
4
Electronic power steering
(EPS)
The power steering uses a motor to
assist you in steering the vehicle. If
the engine is off or if the power steer-
ing system becomes inoperative, the
vehicle may still be steered, but it will
require increased steering effort.
Electronic power steering is con-
trolled by a power steering control
unit which senses the steering wheel
torque and vehicle speed to com-
mand the motor.
The steering becomes heavier as the
vehicle’s speed increases and
becomes lighter as the vehicle’s
speed decreases for optimum steer-
ing control.
Should you notice any change in the
effort required to steer during normal
vehicle operation, have the power
steering checked by an authorized
Kia dealer. If the Electronic Power Steering
System does not operate normally,
the warning light will illuminate on
the instrument cluster. The steering
wheel may require increased
steering effort. Take your vehicle to
an authorized Kia dealer and have
the vehicle checked as soon as
possible.
When you operate the steering wheel in low temperature, the steer-
ing effort may be high or abnormal
noise may occur. If temperature
rises, the noise will likely disappear.
This is a normal condition.
When the vehicle is stationary, and the steering wheel is turned all the
way to the left or right continuous-
ly, the steering wheel becomes
harder to turn. The power assist is
limited to protect the motor from
overheating.
As time passes, the steering wheel
will return to its normal condition.
✽ ✽ NOTICE
The following symptoms may occur
during normal vehicle operation:
• The EPS warning light does not
illuminate.
• The steering gets heavy immedi- ately after turning the ignition
switch on. This happens as the sys-
tem performs the EPS system
diagnostics. When the diagnostics
are completed, the steering wheel
will return to its normal condition.
• A click noise may be heard from the EPS relay after the ignition
switch is turned to the ON or
LOCK (OFF) position.
• A motor noise may be heard when the vehicle is at a stop or at a low
driving speed.
• If the Electronic Power Steering System does not operate normally,
the warning light will illuminate on
the instrument cluster. The steer-
ing wheel may become difficult to
control or operate abnormally.
Take your vehicle to an authorized
Kia dealer and have the vehicle
checked as soon as possible. (Continued)
STEERING WHEEL
Page 142 of 607
455
Features of your vehicle
(Continued)
• When the charging system warninglight comes on due to the low volt-
age (When the alternator or bat-
tery) does not operate normally or
malfunctions), the steering wheel
may require increased steering
effort.Tilt and telescopic steering
Tilt and telescopic steering allows
you to adjust the steering wheel
before you drive. You can also raise it
to give your legs more room when
you exit and enter the vehicle.
The steering wheel should be posi-
tioned so that it is comfortable for
you to drive, while permitting you to
see the instrument panel warning
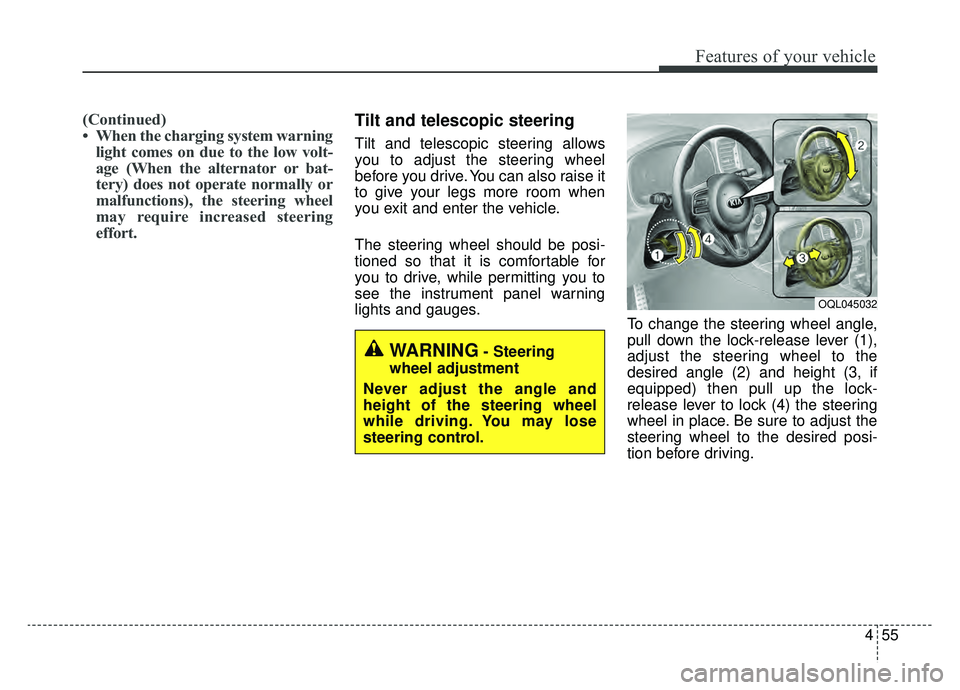
lights and gauges. To change the steering wheel angle,
pull down the lock-release lever (1),
adjust the steering wheel to the
desired angle (2) and height (3, if
equipped) then pull up the lock-
release lever to lock (4) the steering
wheel in place. Be sure to adjust the
steering wheel to the desired posi-
tion before driving.
WARNING- Steering
wheel adjustment
Never adjust the angle and
height of the steering wheel
while driving. You may lose
steering control.
OQL045032
Page 143 of 607
Features of your vehicle
56
4
✽ ✽
NOTICE
After adjustment, sometimes the
lock release lever may not lock the
steering wheel. It is not a malfunc-
tion. This occurs when two gears are
not engaged correctly. In this case,
adjust the steering wheel again and
then lock the steering wheel.
Heated steering wheel
(if equipped)
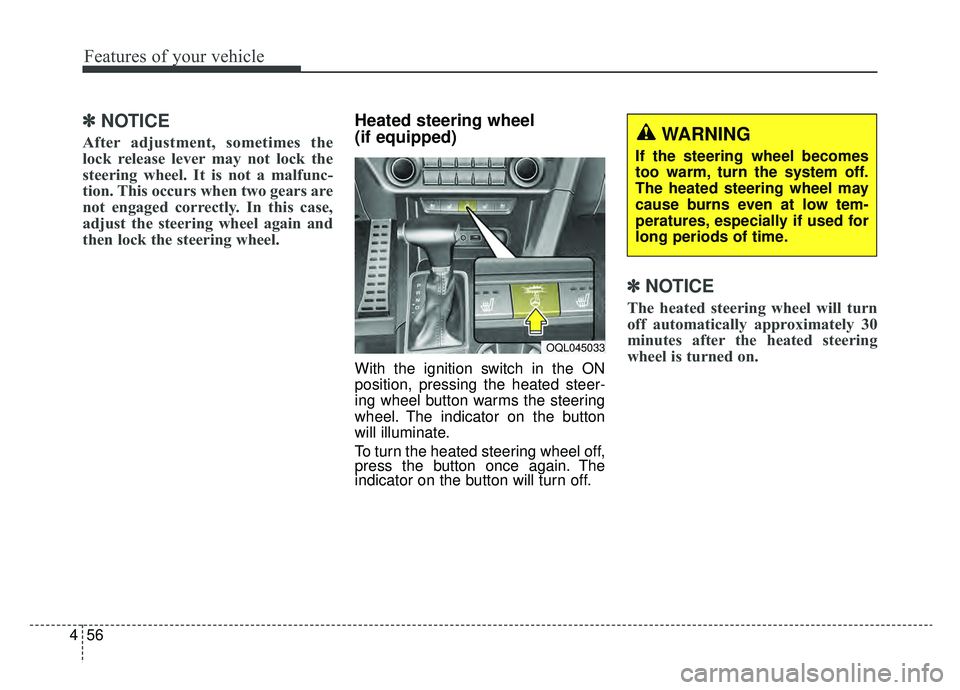
With the ignition switch in the ON
position, pressing the heated steer-
ing wheel button warms the steering
wheel. The indicator on the button
will illuminate.
To turn the heated steering wheel off,
press the button once again. The
indicator on the button will turn off.
✽ ✽NOTICE
The heated steering wheel will turn
off automatically approximately 30
minutes after the heated steering
wheel is turned on.
WARNING
If the steering wheel becomes
too warm, turn the system off.
The heated steering wheel may
cause burns even at low tem-
peratures, especially if used for
long periods of time.
OQL045033
Page 144 of 607
457
Features of your vehicle
Horn
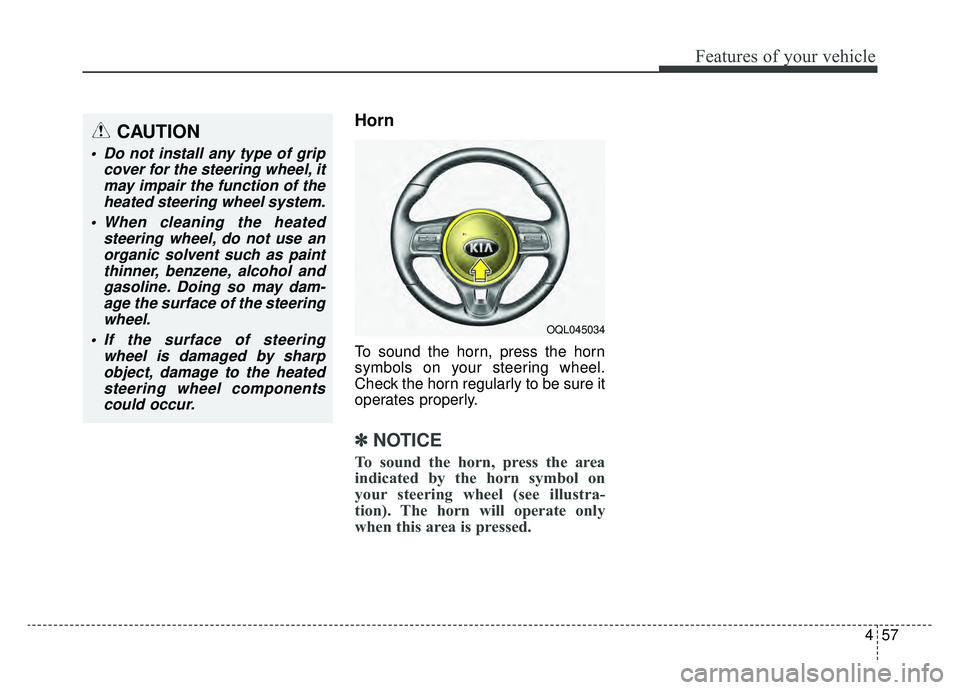
To sound the horn, press the horn
symbols on your steering wheel.
Check the horn regularly to be sure it
operates properly.
✽ ✽NOTICE
To sound the horn, press the area
indicated by the horn symbol on
your steering wheel (see illustra-
tion). The horn will operate only
when this area is pressed.
CAUTION
Do not install any type of grip
cover for the steering wheel, itmay impair the function of theheated steering wheel system.
When cleaning the heated steering wheel, do not use anorganic solvent such as paintthinner, benzene, alcohol andgasoline. Doing so may dam-age the surface of the steeringwheel.
If the surface of steering wheel is damaged by sharpobject, damage to the heatedsteering wheel componentscould occur.
OQL045034
Page 145 of 607
Features of your vehicle
58
4
MIRRORS
Inside rearview mirror
Adjust the rearview mirror so that the
center view through the rear window
is seen. Make this adjustment before
you start driving.
Do not place objects in the rear seat
or cargo area which would interfere
with your vision through the rear win-
dow.
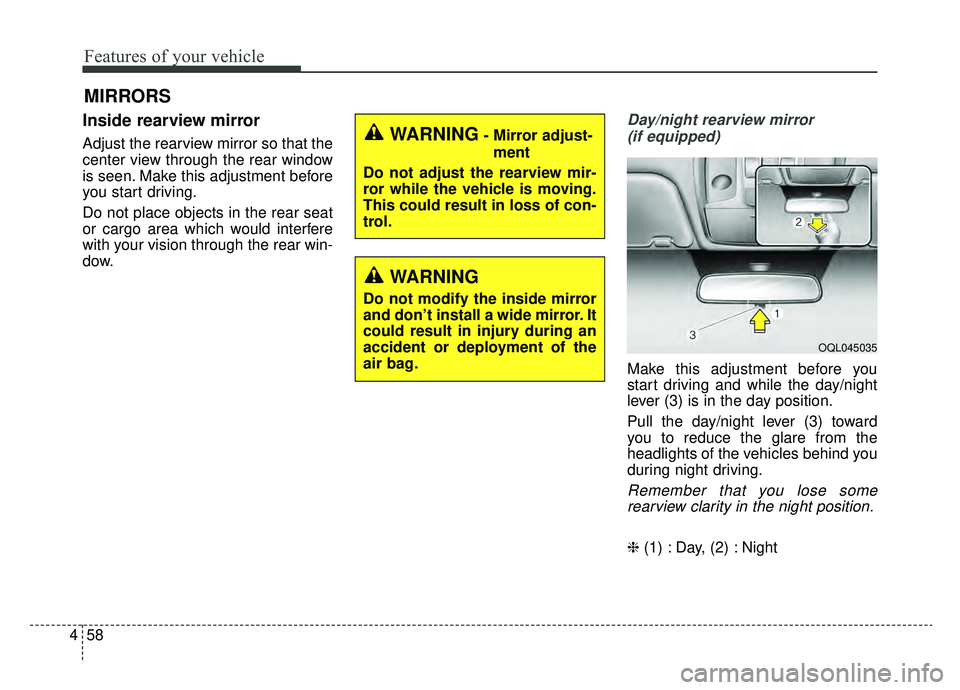
Day/night rearview mirror
(if equipped)
Make this adjustment before you
start driving and while the day/night
lever (3) is in the day position.
Pull the day/night lever (3) toward
you to reduce the glare from the
headlights of the vehicles behind you
during night driving.
Remember that you lose somerearview clarity in the night position.
❈ (1) : Day, (2) : Night
WARNING- Mirror adjust-
ment
Do not adjust the rearview mir-
ror while the vehicle is moving.
This could result in loss of con-
trol.
WARNING
Do not modify the inside mirror
and don’t install a wide mirror. It
could result in injury during an
accident or deployment of the
air bag.
OQL045035
Page 146 of 607
459
Features of your vehicle
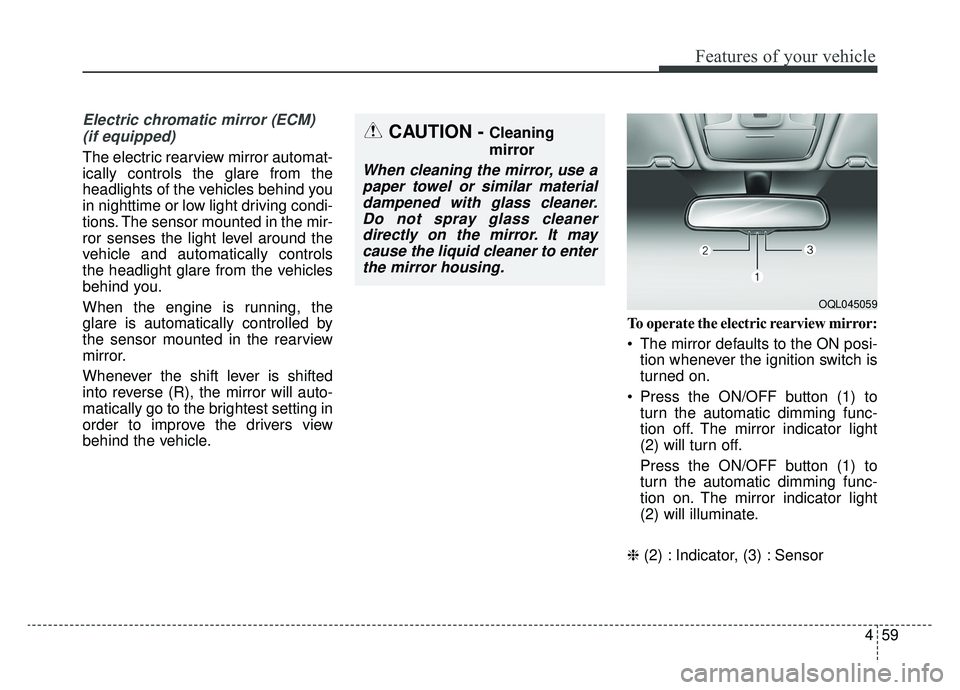
Electric chromatic mirror (ECM) (if equipped)
The electric rearview mirror automat-
ically controls the glare from the
headlights of the vehicles behind you
in nighttime or low light driving condi-
tions. The sensor mounted in the mir-
ror senses the light level around the
vehicle and automatically controls
the headlight glare from the vehicles
behind you.
When the engine is running, the
glare is automatically controlled by
the sensor mounted in the rearview
mirror.
Whenever the shift lever is shifted
into reverse (R), the mirror will auto-
matically go to the brightest setting in
order to improve the drivers view
behind the vehicle. To operate the electric rearview mirror:
The mirror defaults to the ON posi-
tion whenever the ignition switch is
turned on.
Press the ON/OFF button (1) to turn the automatic dimming func-
tion off. The mirror indicator light
(2) will turn off.
Press the ON/OFF button (1) to
turn the automatic dimming func-
tion on. The mirror indicator light
(2) will illuminate.
❈ (2) : Indicator, (3) : Sensor
CAUTION - Cleaning
mirror
When cleaning the mirror, use a
paper towel or similar materialdampened with glass cleaner.Do not spray glass cleanerdirectly on the mirror. It maycause the liquid cleaner to enterthe mirror housing.
OQL045059
Page 147 of 607
Features of your vehicle
60
4
Electrochromic mirror with
HomeLink system (if equipped)
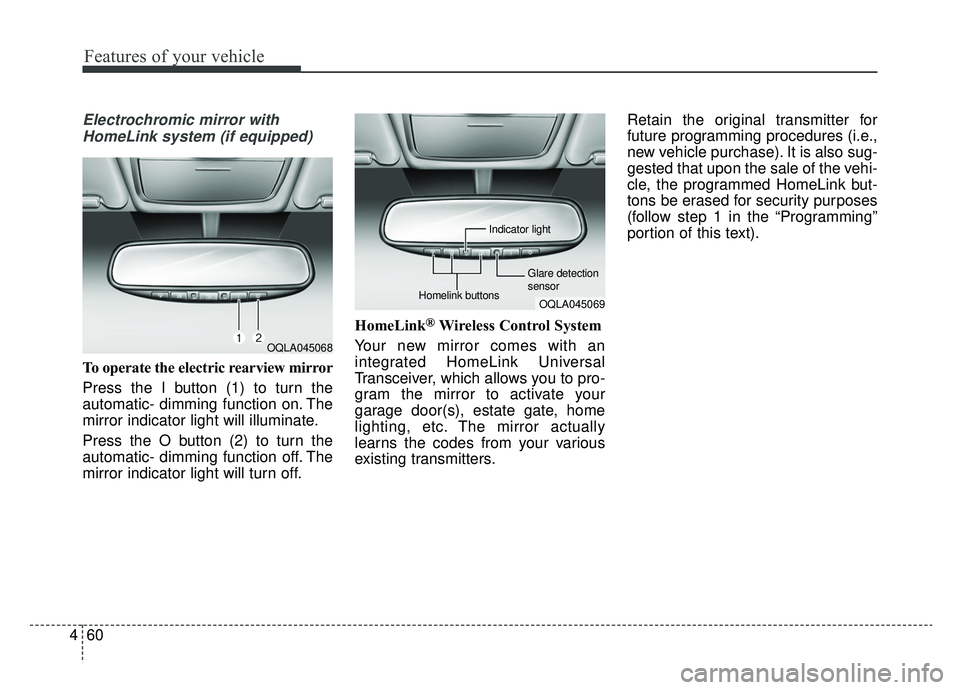
To operate the electric rearview mirror
Press the I button (1) to turn the
automatic- dimming function on. The
mirror indicator light will illuminate.
Press the O button (2) to turn the
automatic- dimming function off. The
mirror indicator light will turn off. HomeLink
®Wireless Control System
Your new mirror comes with an
integrated HomeLink Universal
Transceiver, which allows you to pro-
gram the mirror to activate your
garage door(s), estate gate, home
lighting, etc. The mirror actually
learns the codes from your various
existing transmitters. Retain the original transmitter for
future programming procedures (i.e.,
new vehicle purchase). It is also sug-
gested that upon the sale of the vehi-
cle, the programmed HomeLink but-
tons be erased for security purposes
(follow step 1 in the “Programming”
portion of this text).
OQLA045068
OQLA045069
Glare detection
sensor
Indicator light
Homelink buttons
Page 148 of 607
461
Features of your vehicle
Programming
Your vehicle may require the ignition
switch to be turned to the ACC posi-
tion for programming and/or opera-
tion of HomeLink. It is also recom-
mended that a new battery be
replaced in the hand-held transmitter
of the device being programmed to
HomeLink for quicker training and
accurate transmission of the radio-
frequency.
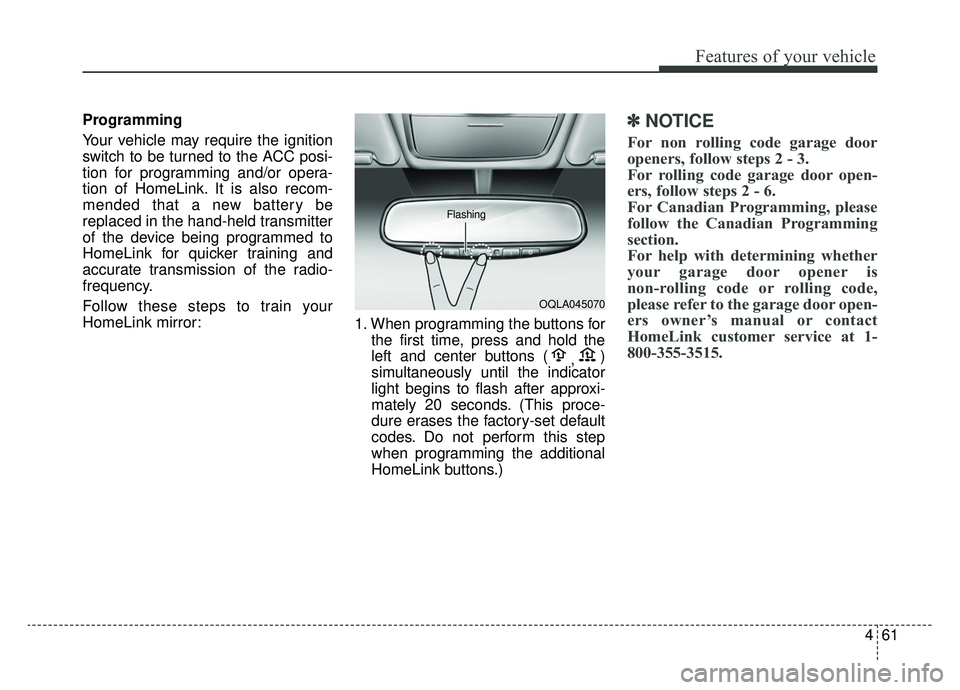
Follow these steps to train your
HomeLink mirror:1. When programming the buttons for
the first time, press and hold the
left and center buttons ( ,)
simultaneously until the indicator
light begins to flash after approxi-
mately 20 seconds. (This proce-
dure erases the factory-set default
codes. Do not perform this step
when programming the additional
HomeLink buttons.)✽ ✽ NOTICE
For non rolling code garage door
openers, follow steps 2 - 3.
For rolling code garage door open-
ers, follow steps 2 - 6.
For Canadian Programming, please
follow the Canadian Programming
section.
For help with determining whether
your garage door opener is
non-rolling code or rolling code,
please refer to the garage door open-
ers owner’s manual or contact
HomeLink customer service at 1-
800-355-3515.
OQLA045070
Flashing
Page 149 of 607
Features of your vehicle
62
4
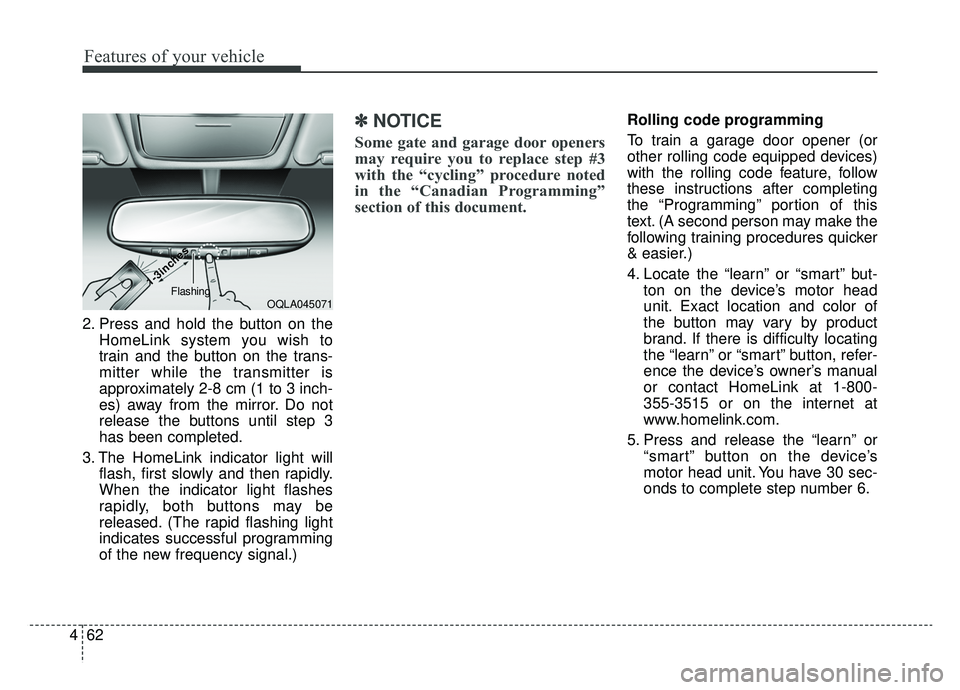
2. Press and hold the button on the
HomeLink system you wish to
train and the button on the trans-
mitter while the transmitter is
approximately 2-8 cm (1 to 3 inch-
es) away from the mirror. Do not
release the buttons until step 3
has been completed.
3. The HomeLink indicator light will flash, first slowly and then rapidly.
When the indicator light flashes
rapidly, both buttons may be
released. (The rapid flashing light
indicates successful programming
of the new frequency signal.)
✽ ✽NOTICE
Some gate and garage door openers
may require you to replace step #3
with the “cycling” procedure noted
in the “Canadian Programming”
section of this document.
Rolling code programming
To train a garage door opener (or
other rolling code equipped devices)
with the rolling code feature, follow
these instructions after completing
the “Programming” portion of this
text. (A second person may make the
following training procedures quicker
& easier.)
4. Locate the “learn” or “smart” but-
ton on the device’s motor head
unit. Exact location and color of
the button may vary by product
brand. If there is difficulty locating
the “learn” or “smart” button, refer-
ence the device’s owner’s manual
or contact HomeLink at 1-800-
355-3515 or on the internet at
www.homelink.com.
5. Press and release the “learn” or “smart” button on the device’s
motor head unit. You have 30 sec-
onds to complete step number 6.
OQLA045071
1-3inc
1-3inc
hes
hesFlashing
Page 150 of 607
463
Features of your vehicle
6. Return to the vehicle and firmlypress and release the pro-
grammed HomeLink button up to
three times. The rolling code
equipped device should now rec-
ognize the HomeLink signal and
activate when the HomeLink but-
ton is pressed. The remaining two
buttons may now be programmed
if this has not previously been
done. Refer to the “Programming”
portion of this text. Operating HomeLink
To operate, simply press the
programmed HomeLink button.
Activation will now occur for the
trained product (garage door, securi-
ty system, entry door lock, estate
gate, or home or office lighting). For
convenience, the hand-held trans-
mitter of the device may also be used
at any time. The HomeLink Wireless
Controls System (once programmed)
or the original hand-held transmitter
may be used to activate the device
(e.g. garage door, entry door lock,
etc.). In the event that there are still
programming difficulties, contact
HomeLink at 1-800-355-3515 or on
the internet at www.homelink.com. Erasing programmed HomeLink
buttons
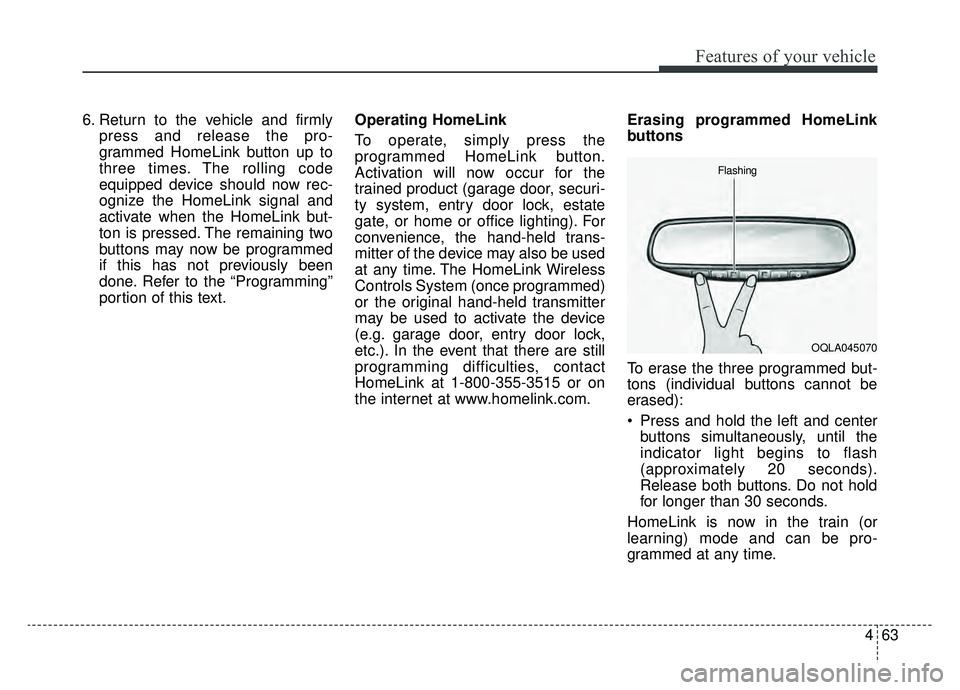
To erase the three programmed but-
tons (individual buttons cannot be
erased):
Press and hold the left and center
buttons simultaneously, until the
indicator light begins to flash
(approximately 20 seconds).
Release both buttons. Do not hold
for longer than 30 seconds.
HomeLink is now in the train (or
learning) mode and can be pro-
grammed at any time.
OQLA045070
Flashing