KIA STONIC 2018 Owners Manual
Manufacturer: KIA, Model Year: 2018, Model line: STONIC, Model: KIA STONIC 2018Pages: 523, PDF Size: 24.99 MB
Page 311 of 523
Making turns
When you’re turning with a trailer,
make wider turns than normal. Do this so your trailer won’t strike soft should‐
ers, curbs, road signs, trees, or other
objects. Avoid jerky or sudden maneu‐ vers. Signal well in advance.
Turn signals when towing a trailer
When you tow a trailer, your vehicle
has to have a different turn signal flasher and extra wiring. The green ar‐
rows on your instrument panel will
flash whenever you signal a turn or lane change. Properly connected, the
trailer lights will also flash to alert oth‐
er drivers you’re about to turn, change lanes, or stop.
When towing a trailer, the green ar‐
rows on your instrument panel will
flash for turns even if the bulbs on the trailer are burned out. Thus, you may
think drivers behind you are seeing
your signals when, in fact, they are not. It’s important to check occasionally to
be sure the trailer bulbs are still work‐
ing. You must also check the lights ev‐ ery time you disconnect and then re‐
connect the wires.
Do not connect a trailer lighting system
directly to your vehicle’s lighting sys‐ tem. Use only an approved trailer wir‐
ing harness. Have yourself assisted by a professio‐
nal workshop in installing the wiring harness.
Kia recommends to visit an authorized
Kia dealer/service partner.
WARNING
Failure to use an approved trailerwiring harness could result in dam‐age to the vehicle electrical systemand/or personal injury.
Driving on grades
Reduce the speed and shift to a lower
gear before you start down a long or steep downgrade. If you don’t shift
down, you might have to use your
brakes so much that they would get hot and no longer operate efficiently.
On a long uphill grade, shift down and
reduce your speed to around 70 km/h
(45 mph) to reduce the possibility of engine and transaxle overheating.
If your trailer weighs more than the
maximum trailer weight without trailer
brakes and you have an automatic transaxle, you should drive in D (Drive)
when towing a trailer. Operating your vehicle in D (Drive)
when towing a trailer will minimize heat build up and extend the life of
your transaxle.
CAUTION
•When towing a trailer on steepgrades (in excess of 6%) pay closeattention to the engine coolanttemperature gauge to ensure theengine does not overheat. If theneedle of the coolant temperaturegauge moves across the dial to‐wards L
Page 312 of 523
Parking on hills
Generally, if you have a trailer attached
to your vehicle, you should not park your vehicle on a hill. People can be se‐
riously or fatally injured, and both your
vehicle and the trailer can be damaged if unexpectedly roll down hill.
WARNING
nParking on a hill
Parking your vehicle on a hill with atrailer attached could cause seriousinjury or death, should the trailerbreak loose.
However, if you ever have to park your
trailer on a hill, here's how to do it: 1. Pull the vehicle into the parking space. Turn the steering wheel in
the direction of the curb (right if
headed down hill, left if headed up
hill).
2. If the vehicle has a manual trans‐ axle, place the car in neutral. If the
vehicle has an automatic transaxle,
place the car in P (Park).
3. Set the parking brake and shut off the vehicle. 4. Place chocks under the trailer
wheels on the down hill side of the
wheels.
5. Start the vehicle, hold the brakes, shift to neutral, release the parking
brake and slowly release the brakes
until the trailer chocks absorb the
load.
6. Reapply the brakes, reapply the parking brake and shift the vehicleto R (Reverse) for manual transaxle
or P (Park) for automatic transaxle.
7. Shut off the vehicle and release the vehicle brakes but leave the parking
brake set.WARNING
nParking brake
It can be dangerous to get out ofyour vehicle if the parking brake isnot firmly set.If you have left the engine running,the vehicle can move suddenly. Youor others could be seriously or fatal‐ly injured.
When you are ready to leave after
parking on a hill
1. With the manual transaxle in Neu‐ tral or automatic transaxle in P
(Park), apply your brakes and hold
the brake pedal down while you: • Start your engine;
• Shift into gear; and
• Release the parking brake.
2. Slowly remove your foot from the brake pedal.
3. Drive slowly until the trailer is clear of the chocks.
4. Stop and have someone pick up and store the chocks.
Driving your vehicle
6-90
Page 313 of 523
Maintenance when trailer
towing
Your vehicle will need service more of‐
ten when you regularly pull a trailer.
Important items to pay particular at‐ tention to include engine oil, automatic
transaxle fluid, axle lubricant and cool‐
ing system fluid. Brake condition is an‐ other important item to frequently
check. Each item is covered in this man‐
ual, and the Index will help you find them quickly. If you’re trailering, it’s a
good idea to review these sections be‐
fore you start your trip.
Don’t forget to also maintain your trail‐ er and hitch. Follow the maintenance
schedule that accompanied your trailer
and check it periodically. Preferably, conduct the check at the start of each
day’s driving. Most importantly, all
hitch nuts and bolts should be tight.
CAUTION
•Due to higher load during trailerusage, overheating might occur inhot days or during uphill driving. Ifthe coolant gauge indicates over‐heating, switch off the A/C andstop the vehicle in a safe area tocool down the engine.
•When towing, check the transaxlefluid more frequently.
•If your vehicle is not equipped withan air conditioner, you should in‐stall a condenser fan to improveengine performance when towinga trailer.
If you do decide to pull a trailer
Here are some important points if you
decide to pull a trailer:
• Consider using a sway control. You can ask a hitch dealer about swaycontrol. • Do not do any towing with your car
during its first 2,000 km (1,200 miles)
in order to allow the engine to prop‐
erly break in. Failure to heed this cau‐
tion may result in serious engine or transaxle damage.
• When towing a trailer, Kia recom‐ mends that you consult an author‐
ized Kia dealer/service partner on ad‐
ditional requirements such as a tow‐
ing kit, etc.
• Always drive your vehicle at a moder‐ ate speed (less than 100 km/h
(60 mph)).
• On a long uphill grade, do not exceed 70 km/h (45 mph) or the posted tow‐
ing speed limit, whichever is lower.
• The chart contains important consid‐ erations that have to do with weight:
For Europe
Item1.0L T-GDI1.2L MPI1.4L MPI1.6L Diesel
6M/T5M/T6M/T6M/T
Maximum trailerweight Without brake System 450 (992) 450 (992) 450 (992) 450 (992)
6-91
6
Driving your vehicle
Page 314 of 523
Item1.0L T-GDI1.2L MPI1.4L MPI1.6L Diesel
6M/T5M/T6M/T6M/T
kg (Ibs.) With brake System 1,110 (2,447) 910 (2,006) 1,000 (2,204) 1,110
(2,447)
Maximum permissible static vertical
load on the coupling device 75 (165)
kg (Ibs.)
Recommended distance from rear
wheel center to coupling point 805 (32)
mm (inch)
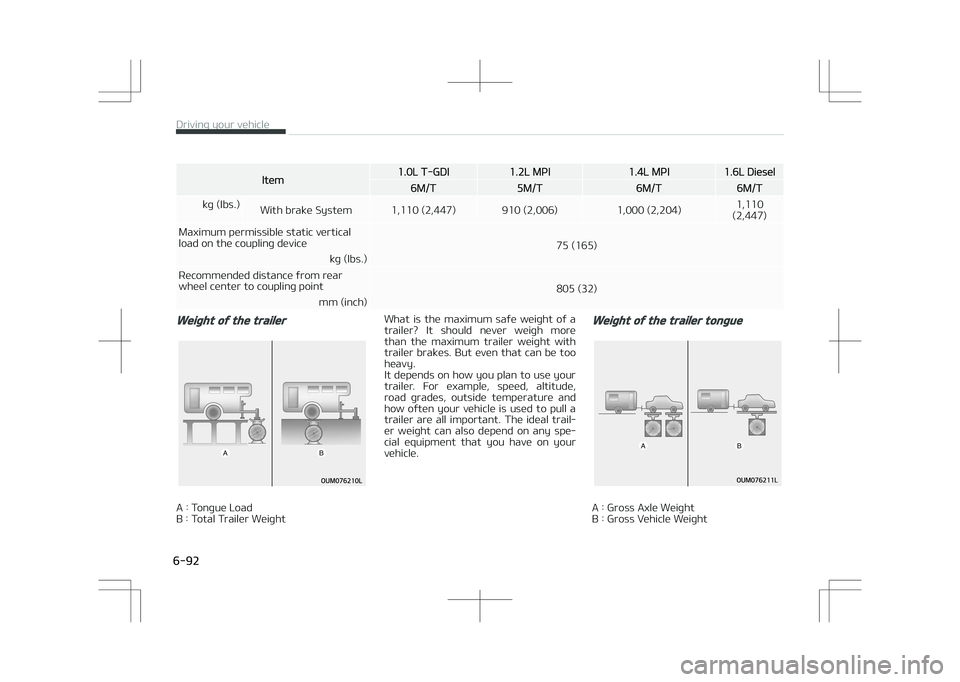
Weight of the trailer
A : Tongue Load
B : Total Trailer Weight What is the maximum safe weight of a
trailer? It should never weigh more than the maximum trailer weight with
trailer brakes. But even that can be too
heavy.
It depends on how you plan to use your trailer. For example, speed, altitude,
road grades, outside temperature and
how often your vehicle is used to pull a trailer are all important. The ideal trail‐
er weight can also depend on any spe‐
cial equipment that you have on your vehicle.
Weight of the trailer tongue
A : Gross Axle Weight
B : Gross Vehicle Weight
Driving your vehicle
6-92
Page 315 of 523
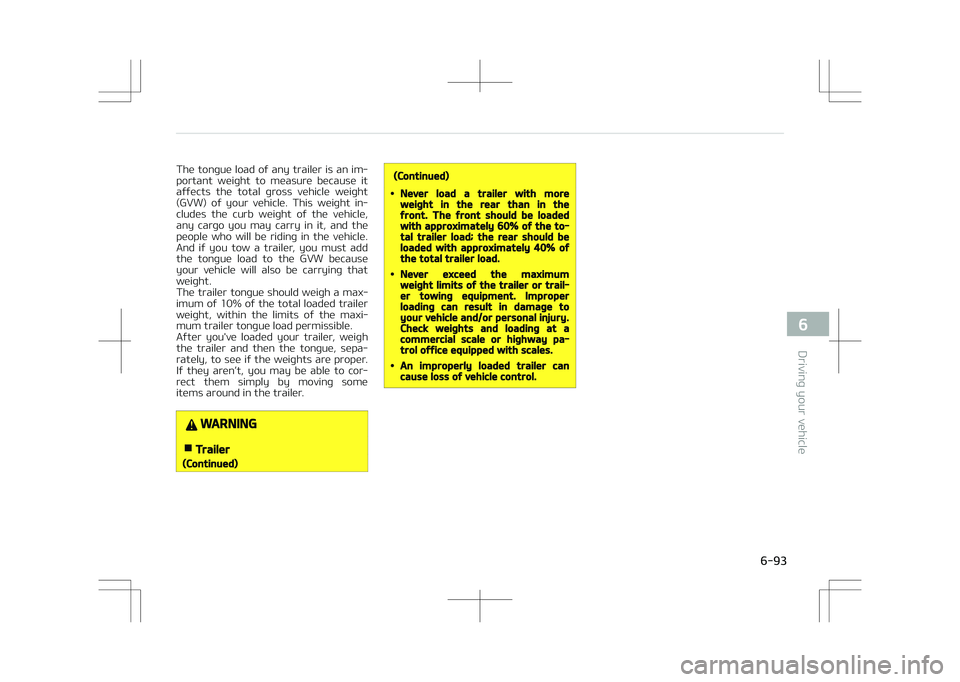
The tongue load of any trailer is an im‐
portant weight to measure because it affects the total gross vehicle weight
(GVW) of your vehicle. This weight in‐
cludes the curb weight of the vehicle, any cargo you may carry in it, and the
people who will be riding in the vehicle.
And if you tow a trailer, you must add the tongue load to the GVW because
your vehicle will also be carrying that
weight.
The trailer tongue should weigh a max‐ imum of 10% of the total loaded trailer
weight, within the limits of the maxi‐
mum trailer tongue load permissible.
After you've loaded your trailer, weigh the trailer and then the tongue, sepa‐
rately, to see if the weights are proper.
If they aren’t, you may be able to cor‐ rect them simply by moving some
items around in the trailer.
WARNING
nTrailer
(Continued)
(Continued)
•Never load a trailer with moreweight in the rear than in thefront. The front should be loadedwith approximately 60% of the to‐tal trailer load; the rear should beloaded with approximately 40% ofthe total trailer load.
•Never exceed the maximumweight limits of the trailer or trail‐er towing equipment. Improperloading can result in damage toyour vehicle and/or personal injury.Check weights and loading at acommercial scale or highway pa‐trol office equipped with scales.
•An improperly loaded trailer cancause loss of vehicle control.
6-93
6
Driving your vehicle
Page 316 of 523
VEHICLE WEIGHT
This section will guide you in the proper
loading of your vehicle, to keep your loaded vehicle weight within its design
rating capability. Properly loading your
vehicle will provide maximum return of the vehicle design performance. Before
loading your vehicle, familiarize your‐
self with the following terms for deter‐ mining your vehicle's weight ratings,
from the vehicle's specifications and
the certification label:
Base curb weight
This is the weight of the vehicle includ‐
ing a full tank of fuel and all standard equipment. It does not include passen‐
gers, cargo, or optional equipment.
Vehicle curb weight
This is the weight of your new vehicle
when you picked it up from your dealer plus any aftermarket equipment.
Cargo weight
This figure includes all weight added to
the Base Curb Weight, including cargo and optional equipment.
GAW (Gross axle weight)
This is the total weight placed on each
axle (front and rear) - including vehicle curb weight and all payload.
GAWR (Gross axle weight rating)
This is the maximum allowable weight
that can be carried by a single axle
(front or rear). These numbers are shown on the certification label.
The total load on each axle must never
exceed its GAWR.
GVW (Gross vehicle weight)
This is the Base Curb Weight plus actual
Cargo Weight plus passengers.
GVWR (Gross vehicle weight
rating)
This is the maximum allowable weight
of the fully loaded vehicle (including all options, equipment, passengers and
cargo). The GVWR is shown on the cer‐
tification label located on the driver’s (or front passenger’s) door sill.
Overloading
WARNING
nVehicle weight
The gross axle weight rating (GAWR)and the gross vehicle weight rating
(Continued)
(Continued)
(GVWR) for your vehicle are on thecertification label attached to thedriver's (or front passenger’s) door.Exceeding these ratings can causean accident or vehicle damage. Youcan calculate the weight of your loadby weighing the items (and people)before putting them in the vehicle.Be careful not to overload your vehi‐cle.
Driving your vehicle
6-94
Page 317 of 523
Road warning............................................................................. 7-02Hazard warning flasher........................................................7-02
In case of an emergency while driving.................................. 7-03 If the engine stalls at a crossroad or crossing................. 7-03
If you have a flat tire while driving.................................... 7-03
If the engine stalls while driving......................................... 7-03
If the engine will not start....................................................... 7-04 If the engine doesn't turn over or turns over slowly...... 7-04
If the engine turns over normally but does not start.... 7-04
Emergency starting.................................................................. 7-05 Jump starting.........................................................................7-05
Push-starting........................................................................ 7-06
If the engine overheats............................................................ 7-07
Tire pressure monitoring system (TPMS) ........................... 7-08 System Overview.................................................................. 7-08
TPMS Setting......................................................................... 7-08
Indication of Low Tire Pressure.......................................... 7-09
Tire Pressure Monitoring System malfunction................7-10
Reference : Indicator Light Status..................................... 7-11
If You Have A Flat Tire (With Spare Tire).............................. 7-12 Jack and tools........................................................................ 7-12
Removing and storing the spare tire................................. 7-12
Changing tires........................................................................ 7-13
Jack label.................................................................................7-18
EC Declaration of Conformity for Jack.............................. 7-19
If you have a flat tire (with tire mobility kit)........................7-20 Introduction............................................................................7-21
Components of the Tire Mobility Kit (TMK)......................7-22
Using the Tire Mobility Kit................................................... 7-23
Distributing the sealant....................................................... 7-24 Checking the tire inflation pressure...................................7-24
Notes on the safe use of the Tire Mobility Kit................ 7-25
Technical data........................................................................ 7-25
Towing......................................................................................... 7-26 Towing service....................................................................... 7-26
Removable towing hook ..................................................... 7-27
Emergency towing................................................................ 7-27
Emergency commodity ........................................................... 7-30 Fire extinguisher................................................................... 7-30
First aid kit............................................................................. 7-30
Triangle reflector.................................................................. 7-30
Tire pressure gauge .............................................................7-30
What to do in an emergency
7
Page 318 of 523
ROAD WARNING
Hazard warning flasher
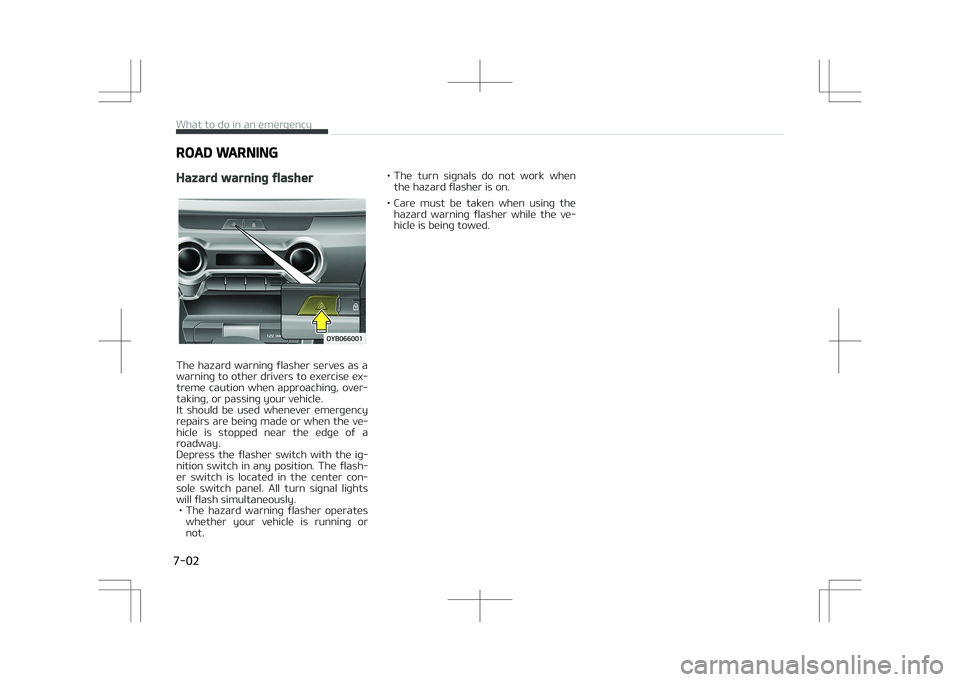
The hazard warning flasher serves as a
warning to other drivers to exercise ex‐ treme caution when approaching, over‐
taking, or passing your vehicle.
It should be used whenever emergency
repairs are being made or when the ve‐ hicle is stopped near the edge of a
roadway.
Depress the flasher switch with the ig‐
nition switch in any position. The flash‐ er switch is located in the center con‐
sole switch panel. All turn signal lights
will flash simultaneously. • The hazard warning flasher operates whether your vehicle is running ornot. • The turn signals do not work when
the hazard flasher is on.
• Care must be taken when using the hazard warning flasher while the ve‐
hicle is being towed.
What to do in an emergency
7-02
Page 319 of 523
IN CASE OF AN EMERGENCY WHILE DRIVING
If the engine stalls at a
crossroad or crossing
• If the engine stalls at a crossroad orcrossing, set the shift lever in the N
(Neutral) position and then push the vehicle to a safe place.
• If your vehicle has a manual transaxle not equipped with a ignition lock
switch, the vehicle can move forward
by shifting to the 2 (second) or 3
(third) gear and then turning the starter without depressing the clutch
pedal.
If you have a flat tire while
driving
If a tire goes flat while you are driving: 1. Take your foot off the accelerator pedal and let the vehicle slow down
while driving straight ahead. Do not
apply the brakes immediately or
attempt to pull off the road as this
may cause a loss of control. When
the vehicle has slowed down to
such a speed that it is safe to do so, brake carefully and pull off the
road. Drive off the road as far as
possible and park on a firm level
ground. If you are on a divided
highway, do not park in the median
area between the two traffic lanes. 2. When the vehicle is stopped, turn
on your emergency hazard flash‐
ers, set the parking brake and put
the transaxle in P (automatic
transaxle) or reverse (manual transaxle).
3. Have all passengers get out of the vehicle. Be sure they all get out on
the side of the vehicle that is away
from traffic.
4. When changing a flat tire, follow the instruction provided L
Page 320 of 523
IF THE ENGINE WILL NOT START
If the engine doesn't turn over
or turns over slowly
1. If your vehicle has an automatictransaxle, be sure the shift lever is
in N (Neutral) or P (Park) and the
emergency brake is set.
2. Check the battery connections to be sure they are clean and tight.
3. Turn on the interior light. If the light dims or goes out when you
operate the starter, the battery is
discharged.
4. Check the starter connections to be sure they are securely tightened.
5. Do not push or pull the vehicle to start it. See instructions for L